Part 4 - Using Loops
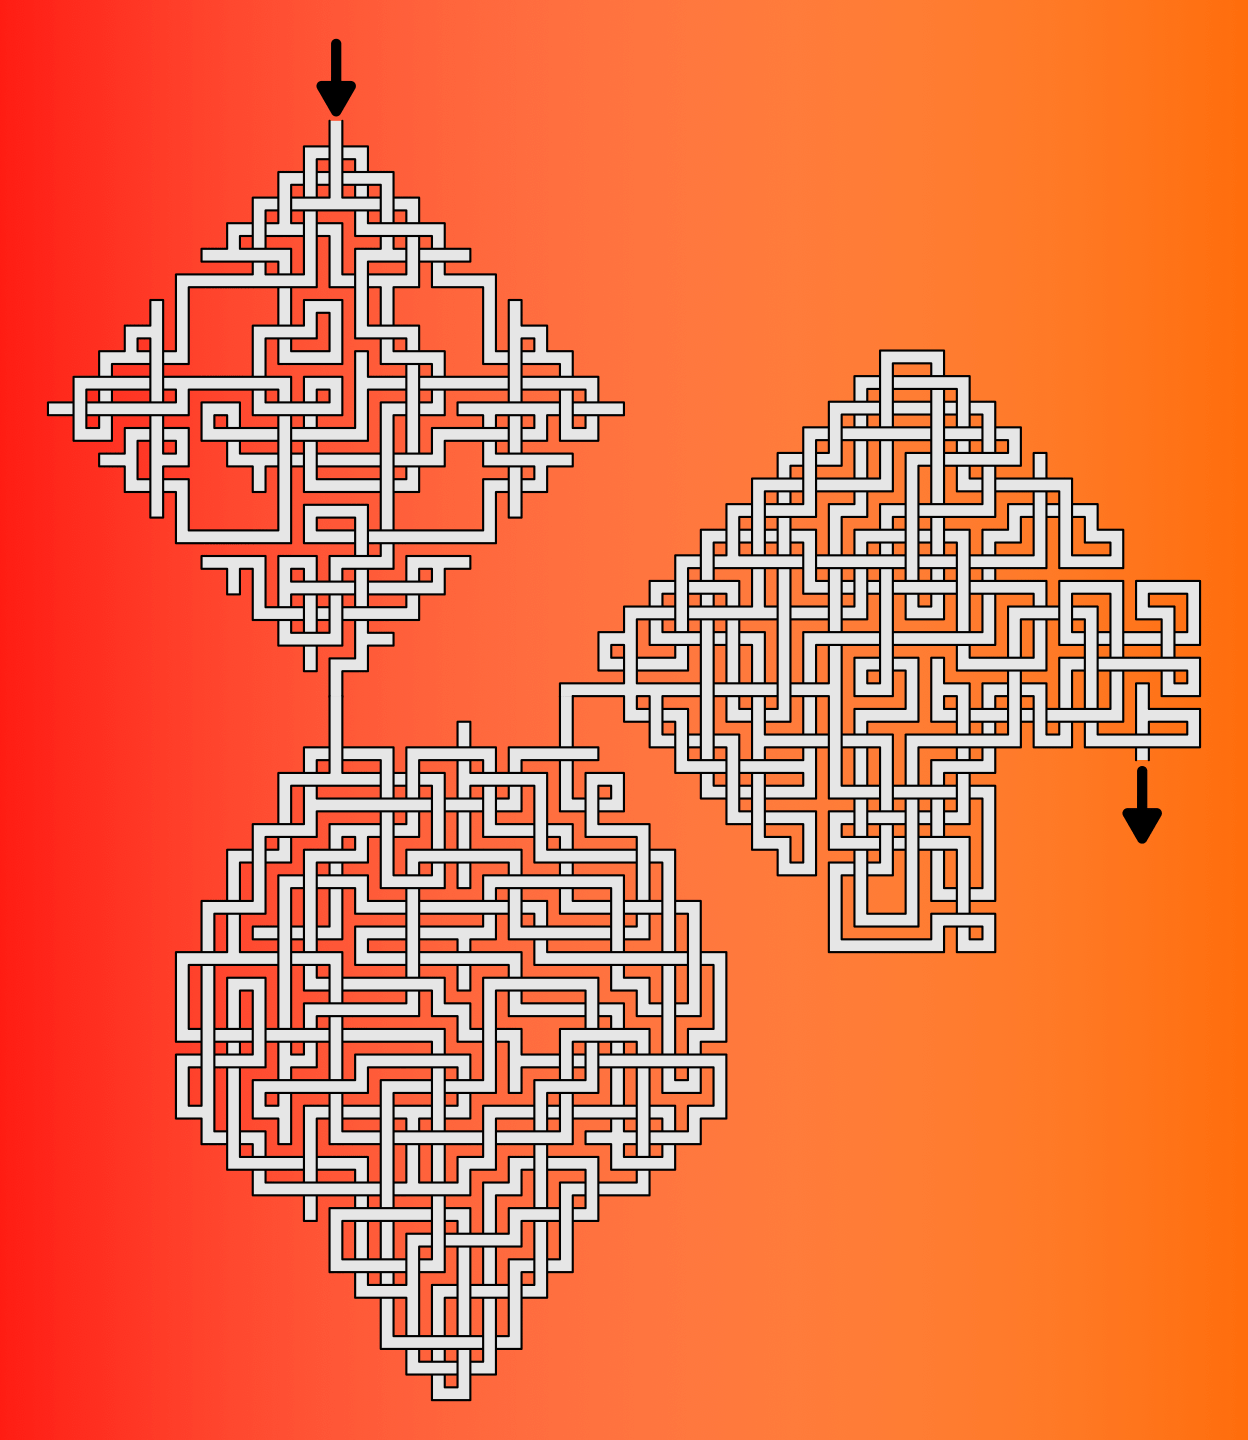
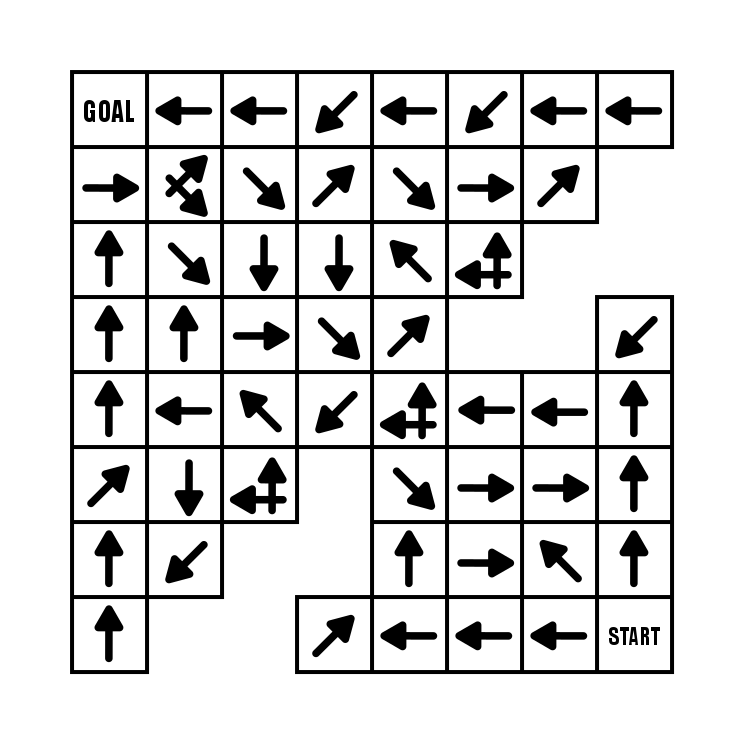
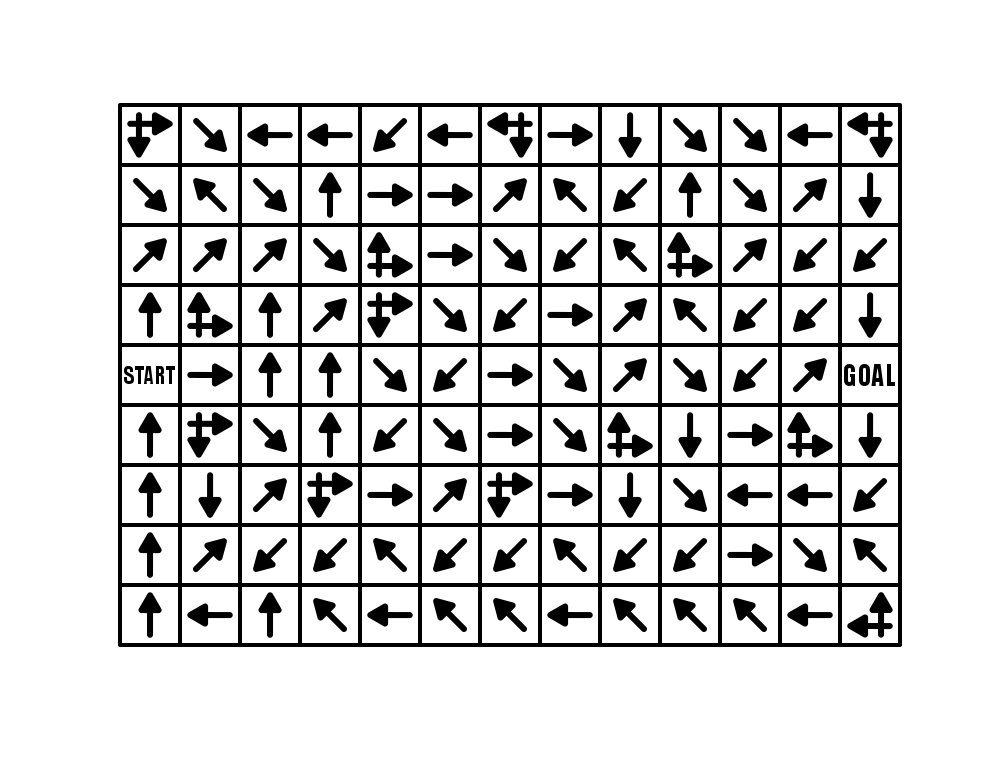
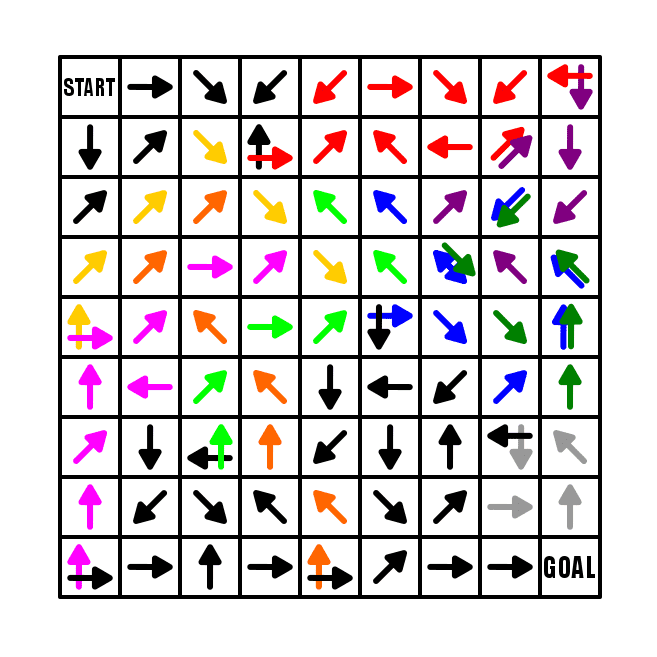
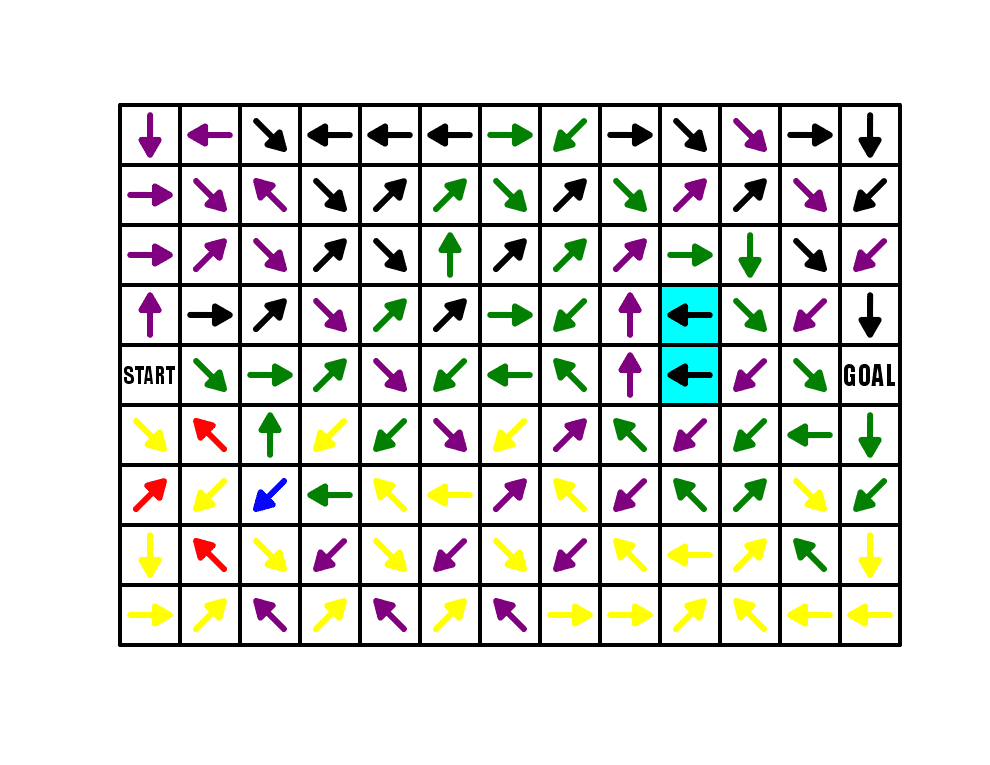
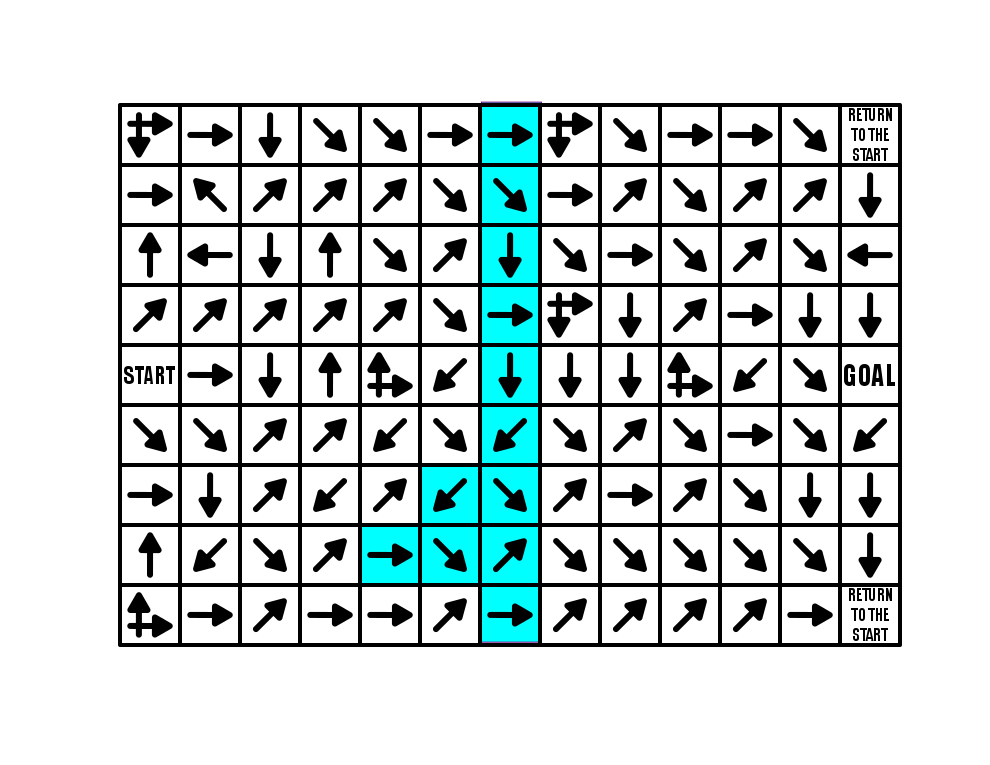
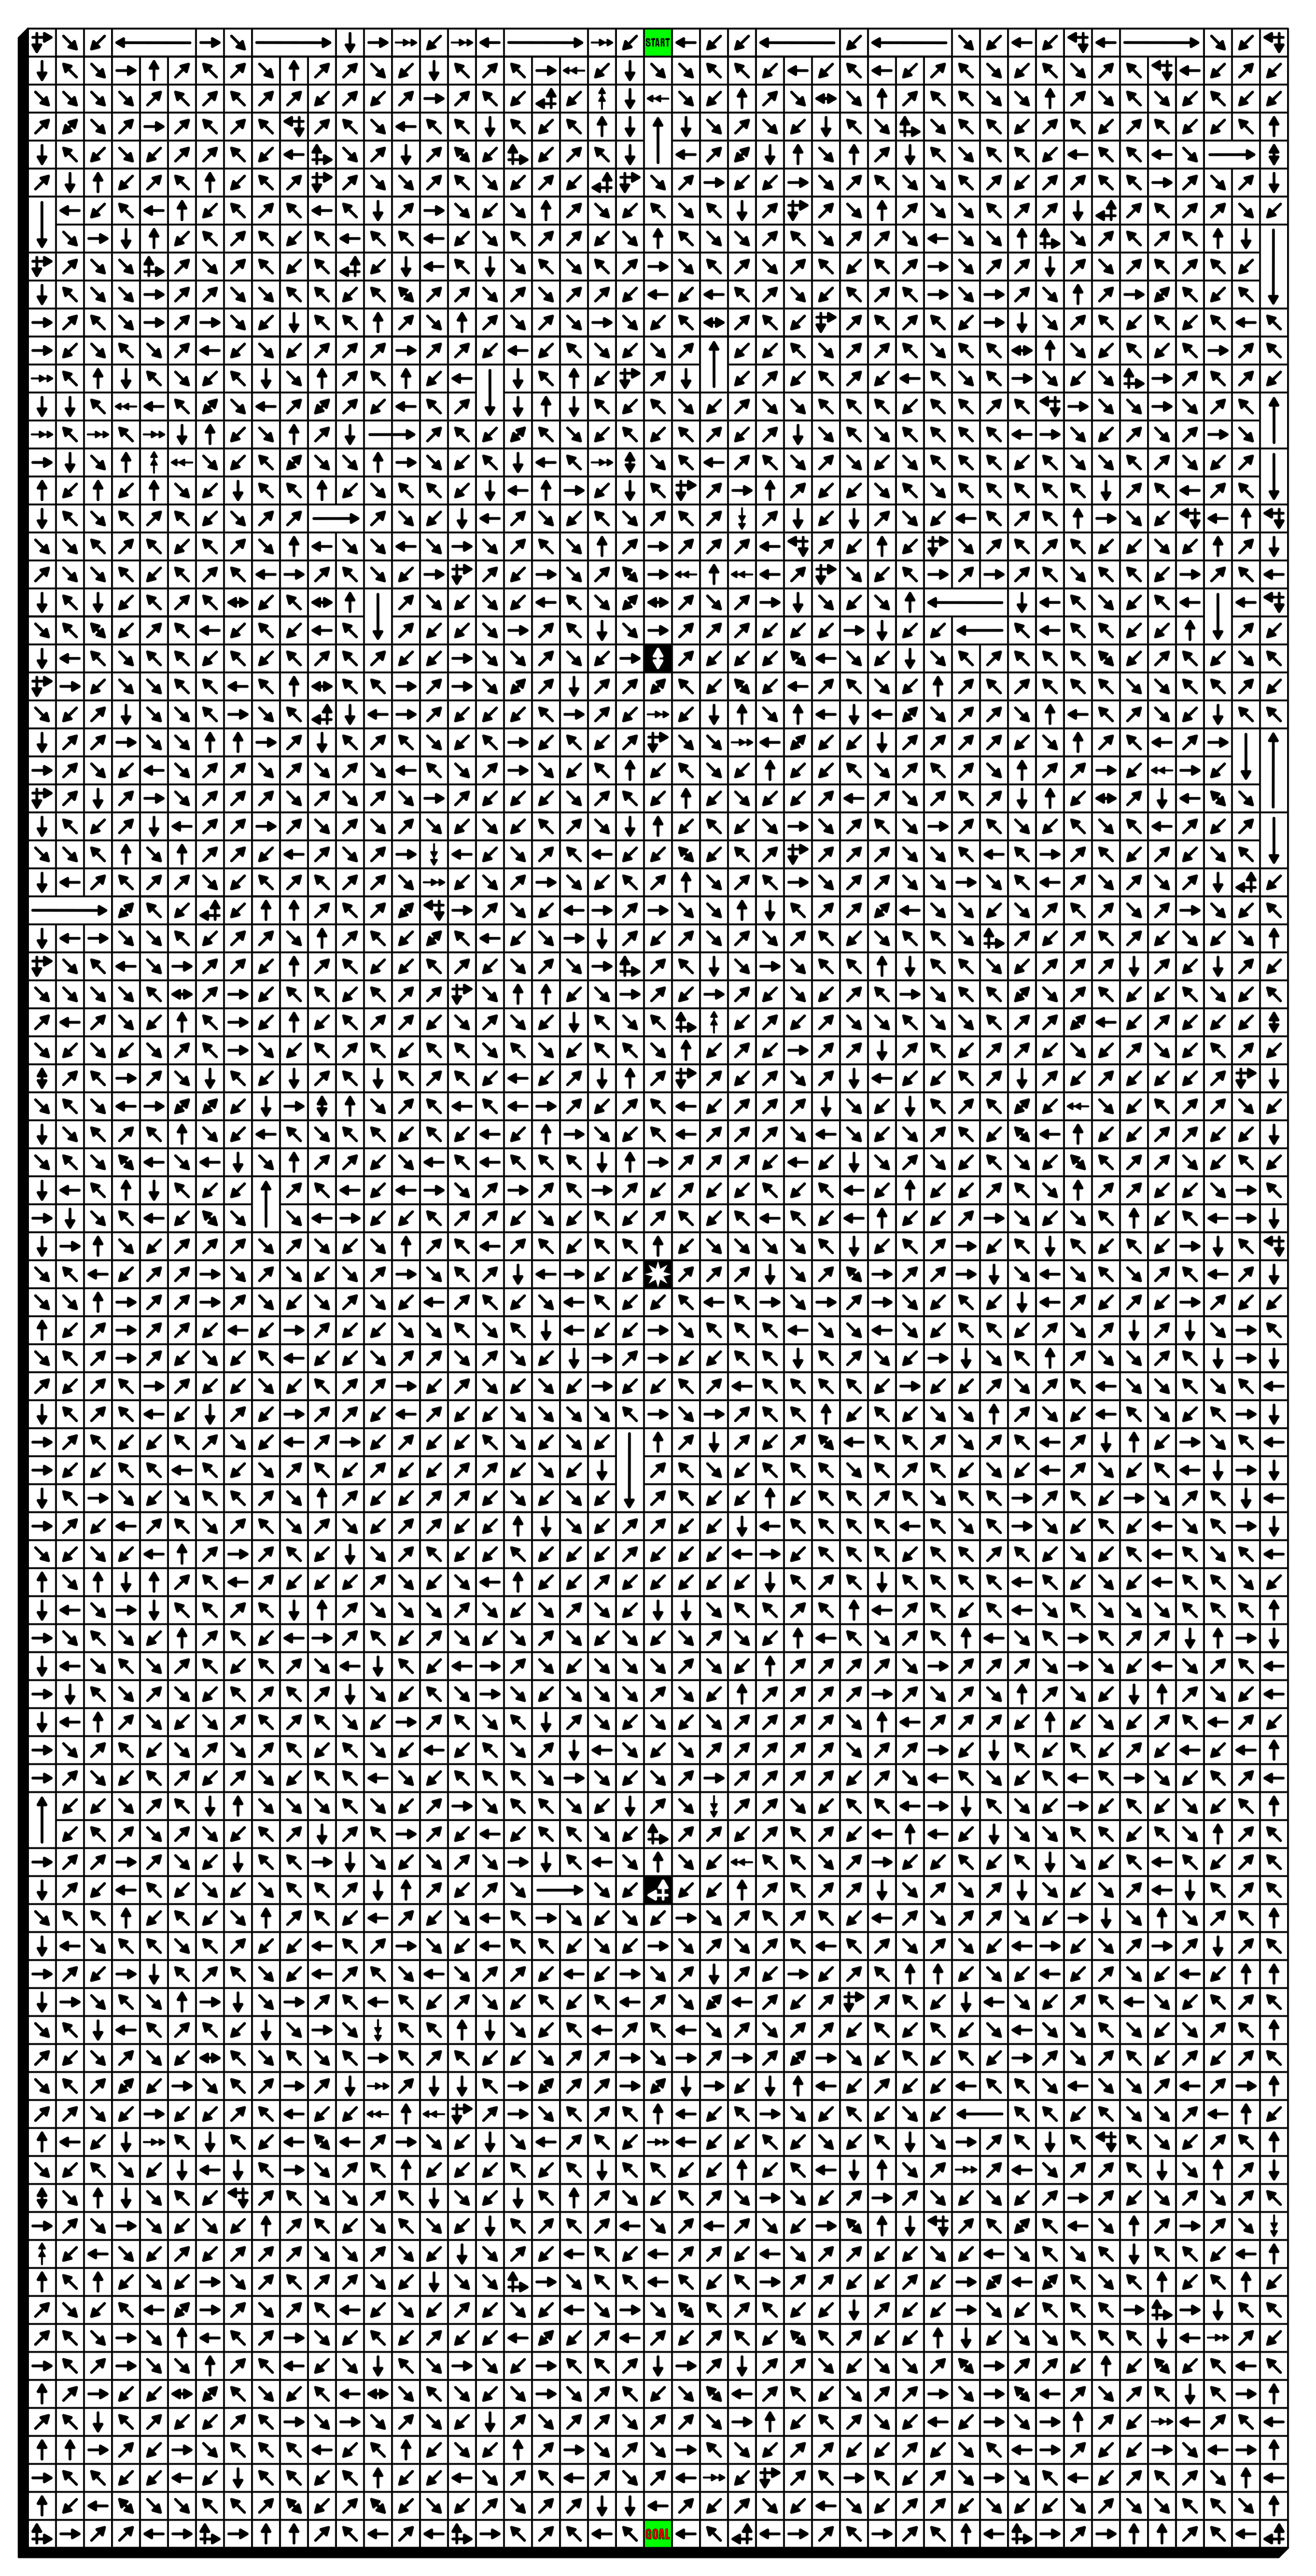
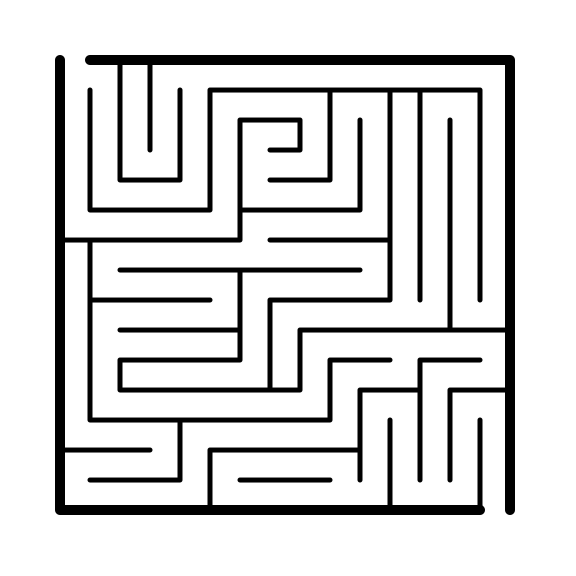
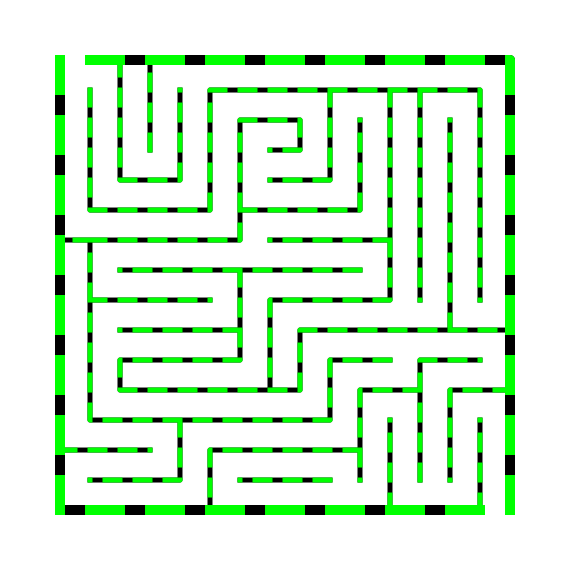
For this example I will use a 9x9 box Arrow Maze, and fill it with a lot of intersections (and make those into loops). We already discussed in Part 3 how the more intersections that are used, the more difficult the maze becomes. This example has 9 intersections. Scroll down a bit, and take some time and try to solve it.
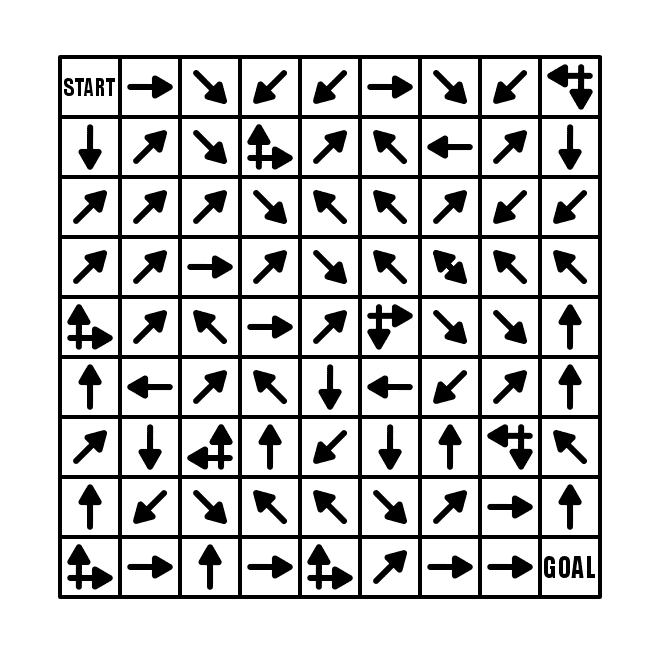
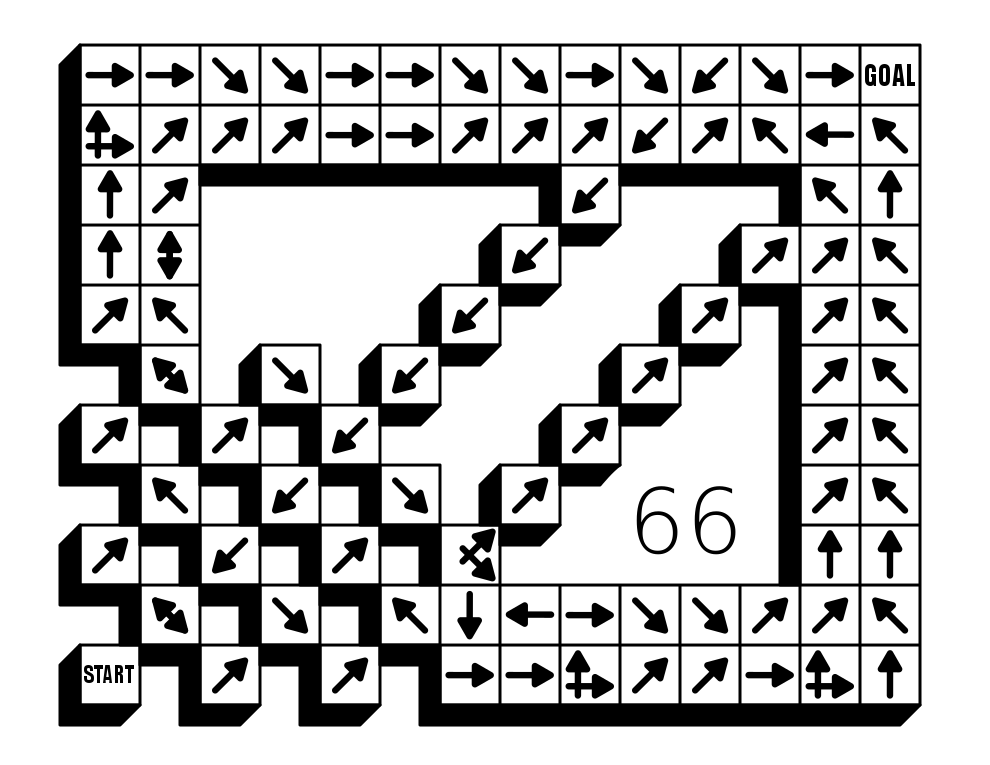
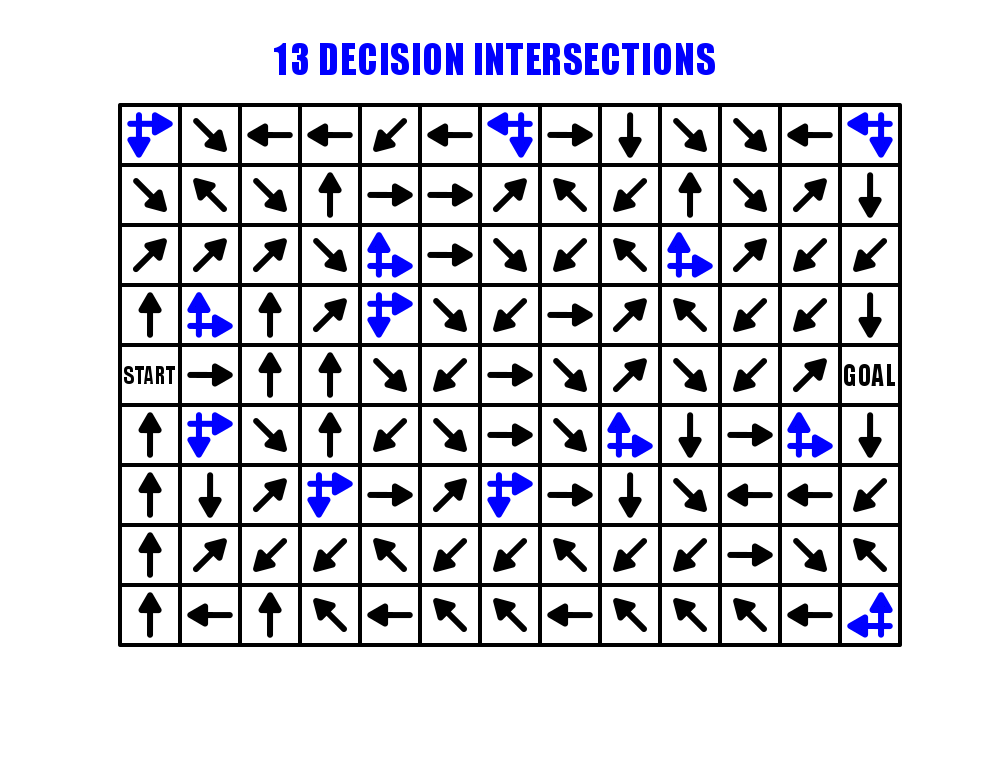
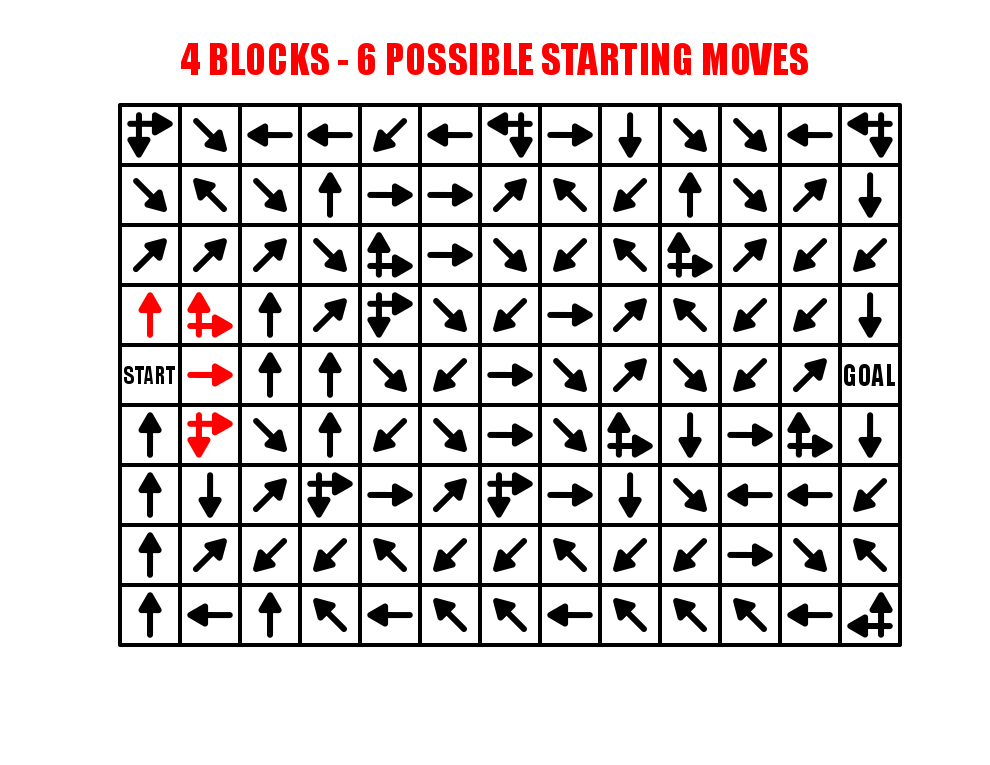
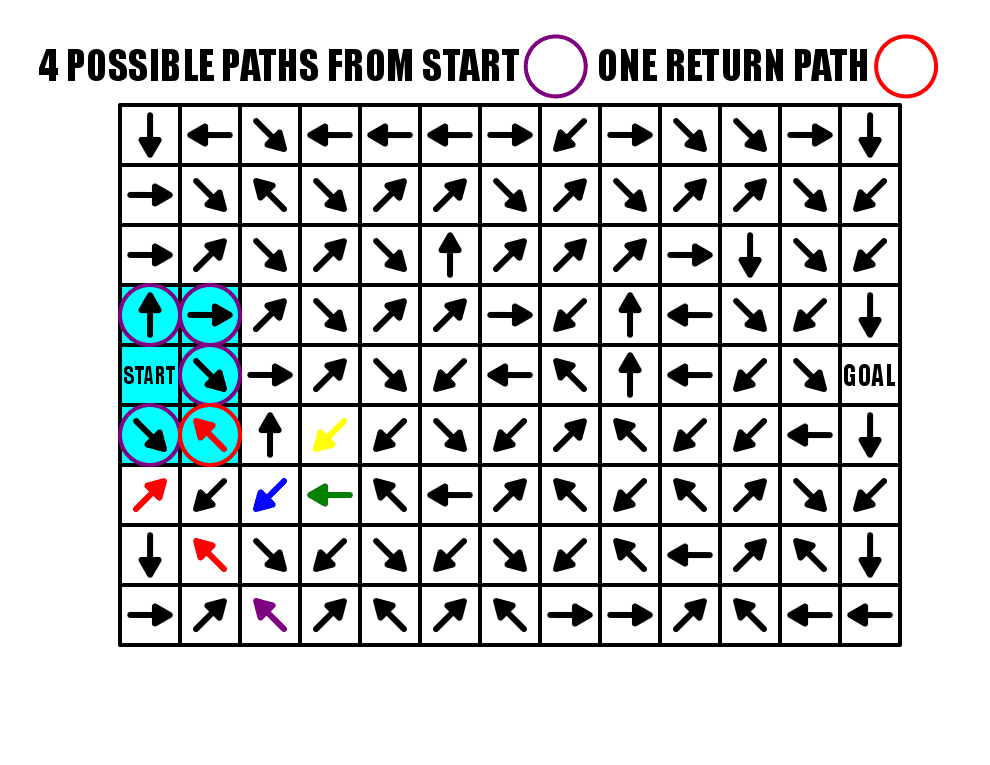
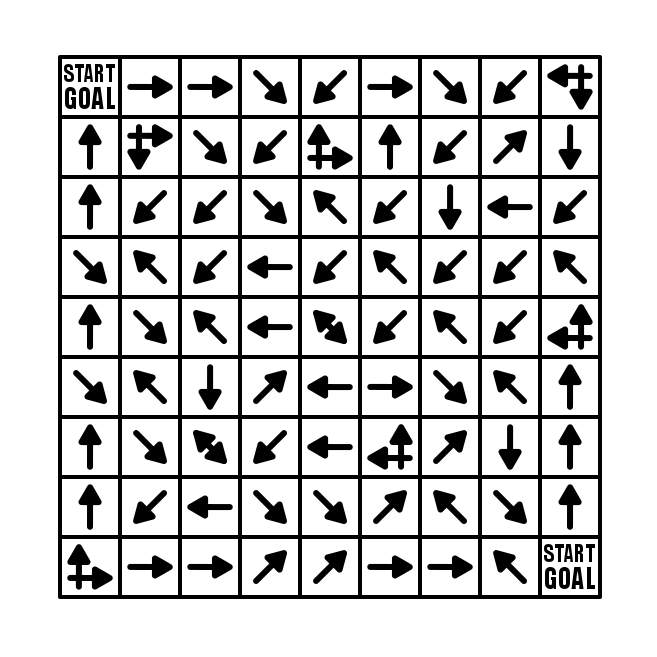
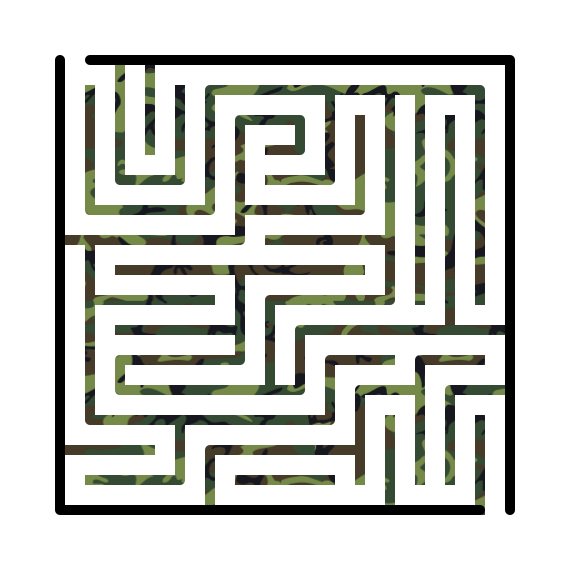
What did you think ? Did you notice the loops in the maze ? I assume yes. I took some time to highlight the loops throughout the maze. First notice that I have a constructed START (we will speak about this in a future post). No matter which of the 3 blocks you move to from the START they all lead to the first intersection.
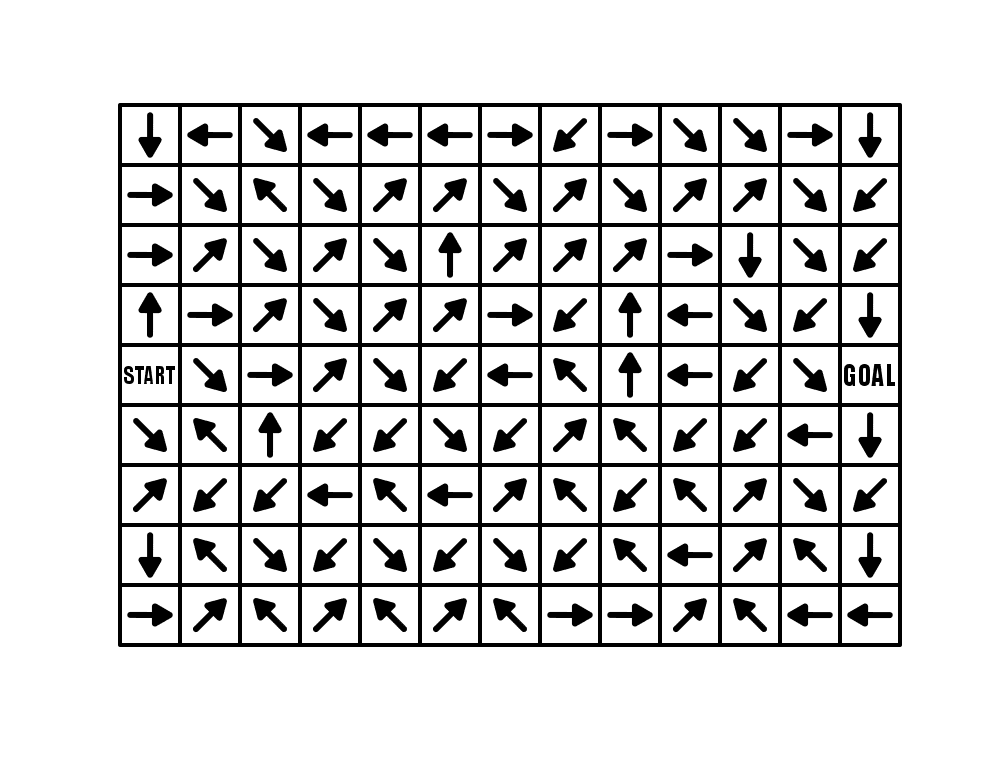
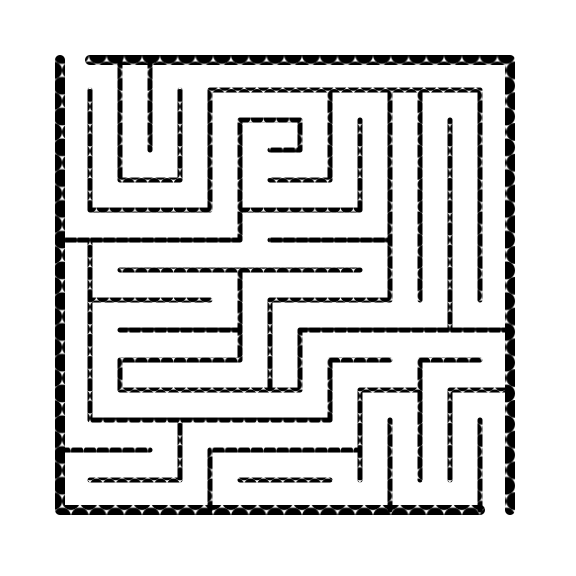
I added the same maze with the loops colored and shown in the gallery. You can flip between the 2 to reveal the loops.
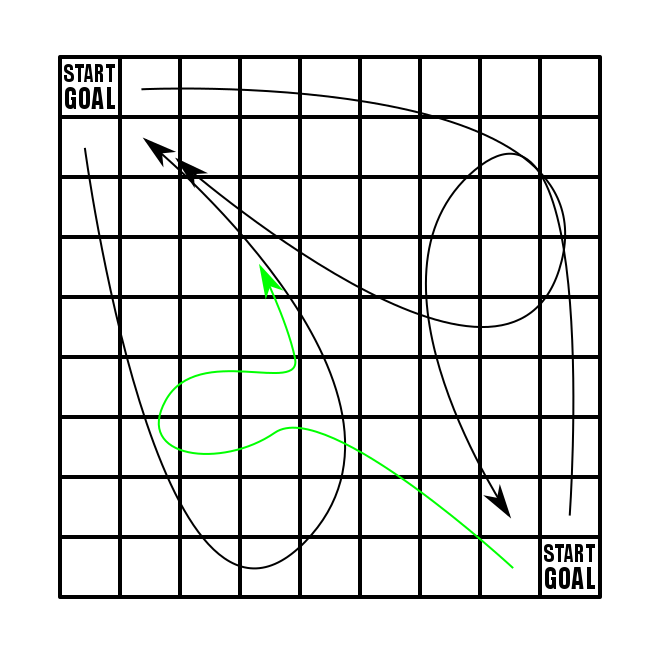
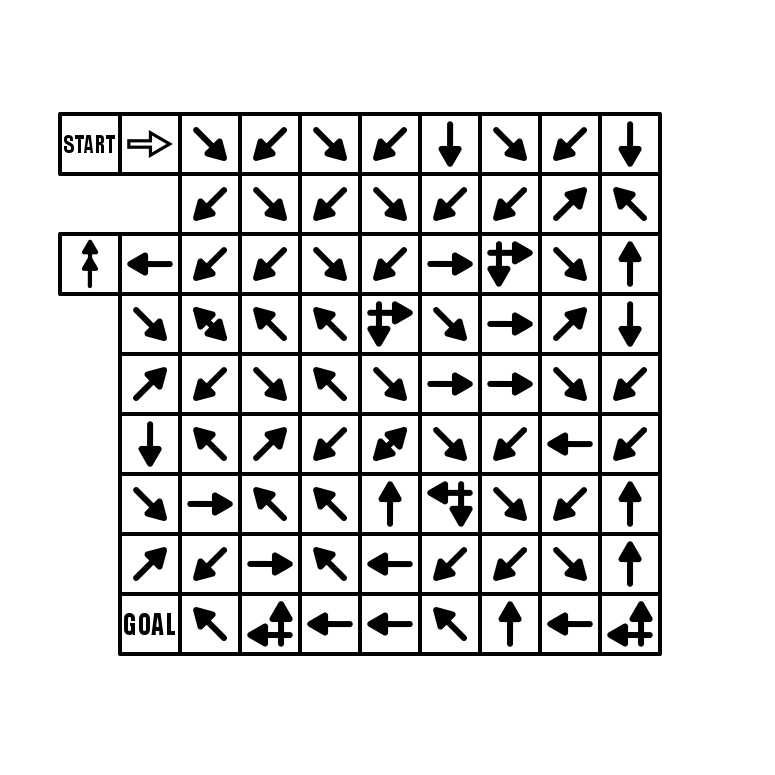
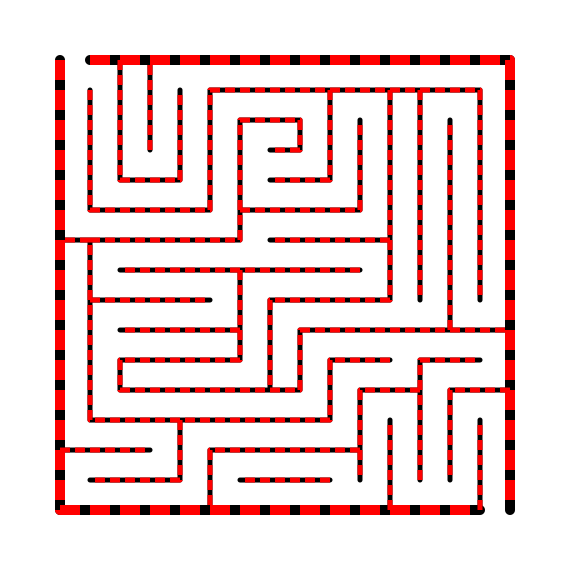
Now let’s follow the loops. RED is first. If you take the red path it leads back to where you are OR leads you to the next loop PURPLE which then leads you back to the RED loop either way !
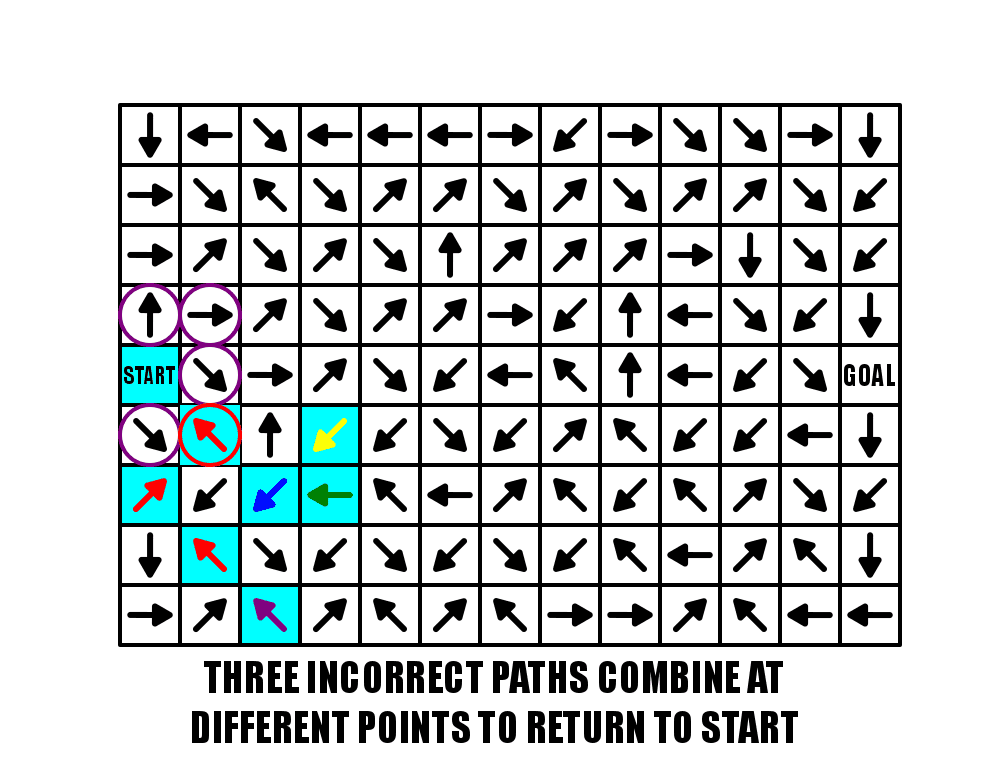
The next pathway is the BLUE loop, which takes you to another intersection ( the blue double arrow) which takes you back into the RED / PURPLE loop or into the GREEN loop that circles back to the BLUE intersection -> to the RED PURPLE… UGH, unless you correctly chose the down black direction.
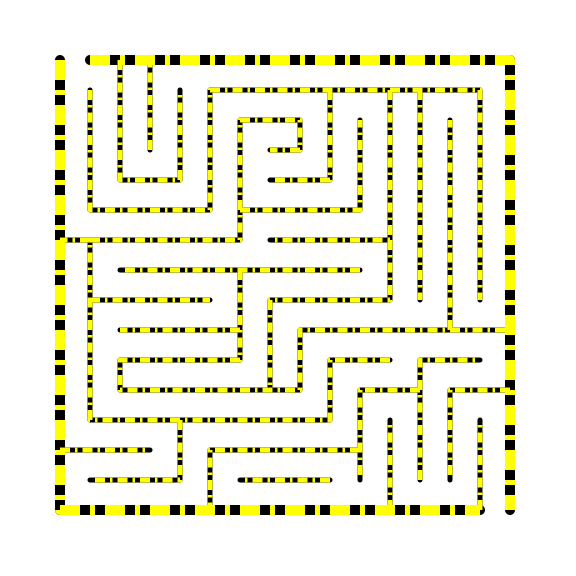
This goes to the BRIGHT GREEN loop that leads back to the first intersection if you take it.
Next is PINK which leads to either BRIGHT GREEN or YELLOW that loops you back to BLUE.
If you take the correct pathway from PINK you have only one loop remaining, the simple GREY that loops onto itself.