How to Make Multiple Conditional Maze Types

In a series of posts I will show you how to make a maze in a wide variety of design constructions. Today I combine 5 different maze types that are all related. I will walk through how-to’s for each version, with examples and definitions. Each of these mazes use conditions (rules) to determine how a solver can move through the maze. Each example will use the state of Ohio as a template for easy comparison.

This is a long blog post so you can skip ahead with jump links to the section you want using this outline:

THE MAZE DEFINITIONS

QUICK VISUAL COMPARISON GALLERY OF THE 5 MAZE TYPES

NUMBER MAZES

HOW TO MAKE A NUMBER MAZE

ADDITIONAL NUMBER MAZE EXAMPLES

LETTER MAZES

HOW TO MAKE A LETTER MAZE

ADDITIONAL LETTER MAZE EXAMPLE & SOLVING TIP

PUZZLE MAZES

HOW TO MAKE A PUZZLE MAZE

ADDITIONAL PUZZLE MAZE EXAMPLES

FREE DOWNLOADABLE PUZZLE MAZE BOOK

MAKING OF A PUZZLE MAZE VIDEO

COLOR GRID MAZES

HOW TO MAKE A COLOR GRID MAZE

ADDITIONAL COLOR GRID MAZE EXAMPLES

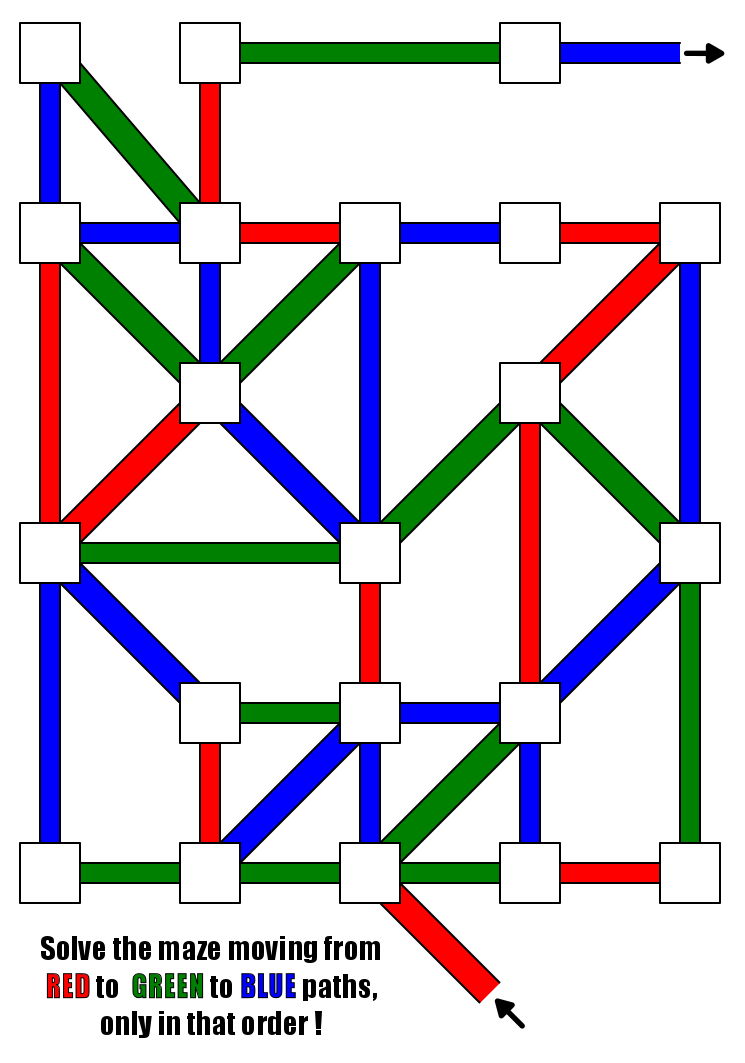
CONDITIONAL PATH MAZES

HOW TO MAKE A CONDITIONAL PATH MAZE

ADDITIONAL CONDITIONAL PATH MAZE EXAMPLES

MAZE MAKING TEMPLATES

CONCLUSION

THE MAZE DEFINITIONS:

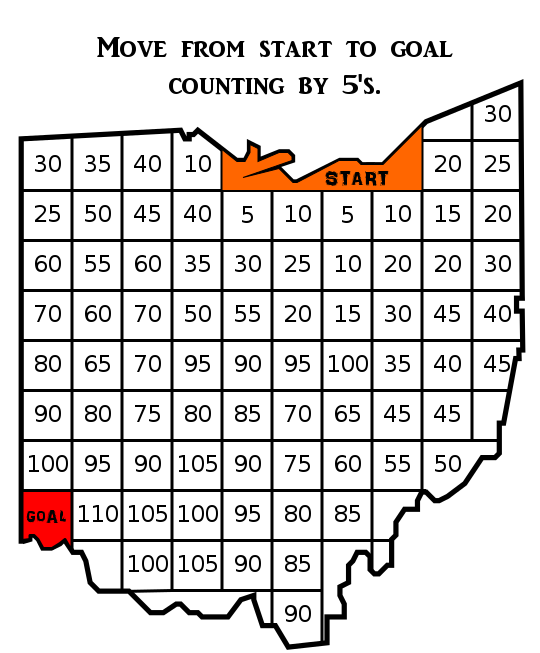
Number Maze - A maze where moving from the Start to the Goal is done by following a series of numbers in a specific sequence. Examples are counting by 5’s, or by numbers that are divisible by 7.

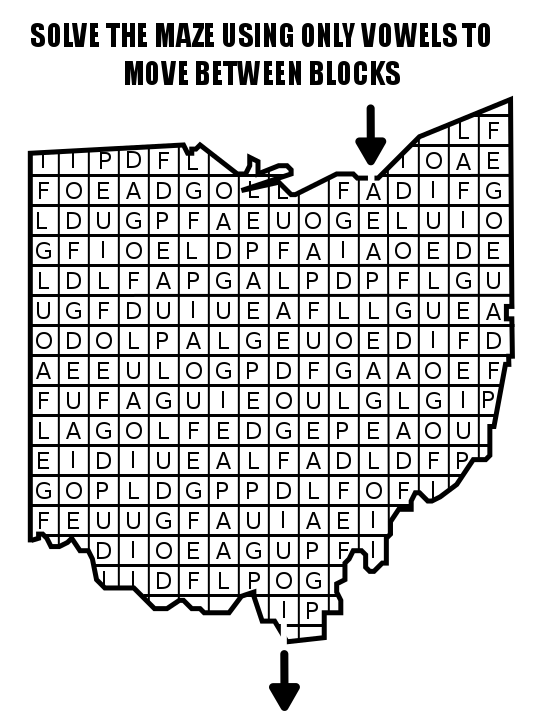
Letter Maze - A type of conditional maze where the pathways are formed by letters that need to be chosen in a correct sequence, or of a particular type to form a path to solve the maze.

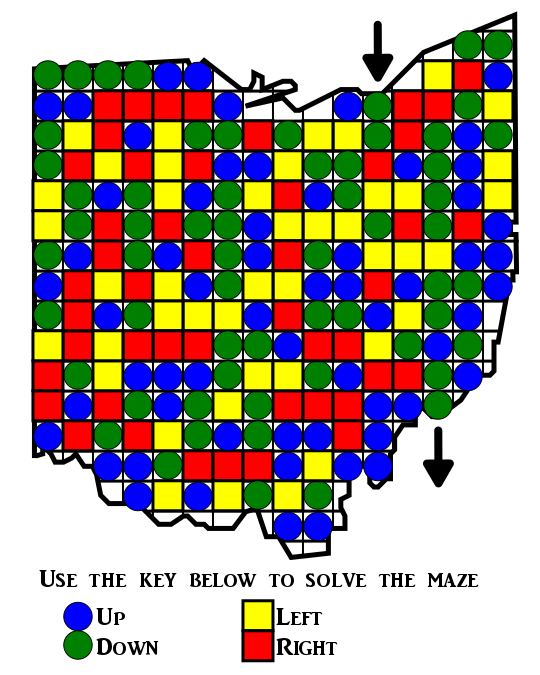
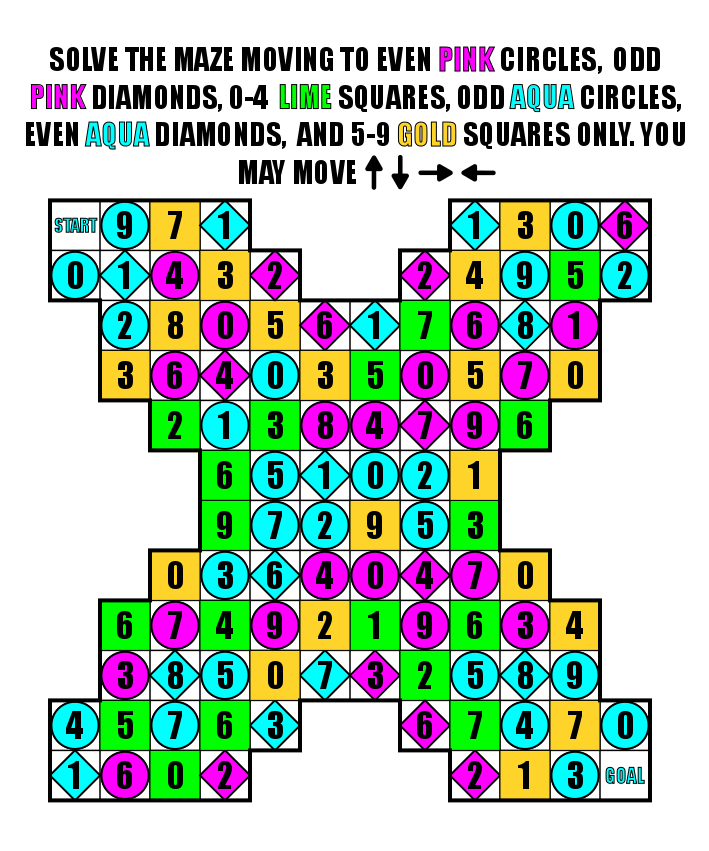
Puzzle Maze - A type of conditional maze that is solved by following a key that explains conditions to solve the puzzle. In a Simple puzzle maze there are no choices for the solver to make, only conditions of movement that must be followed to correctly solve the maze. In a Complex puzzle maze there is a puzzle to solve to create possible pathways for solving.

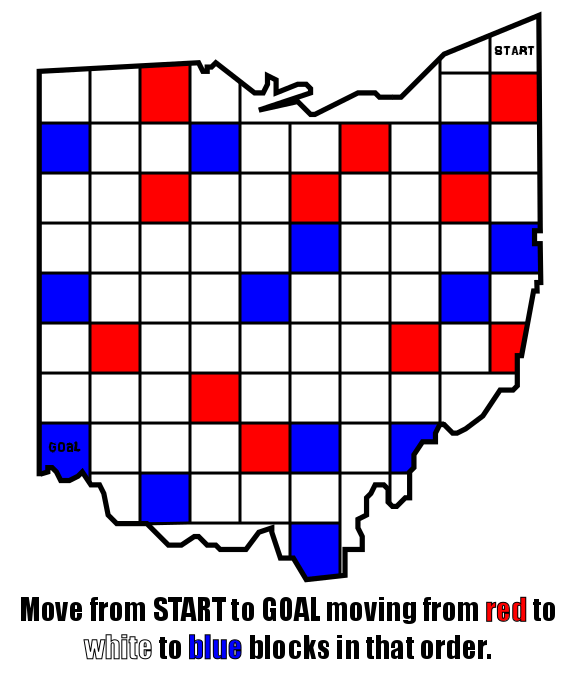
Color Grid Maze - A type of conditional maze where movement between blocks is limited to a specific sequence of colors.

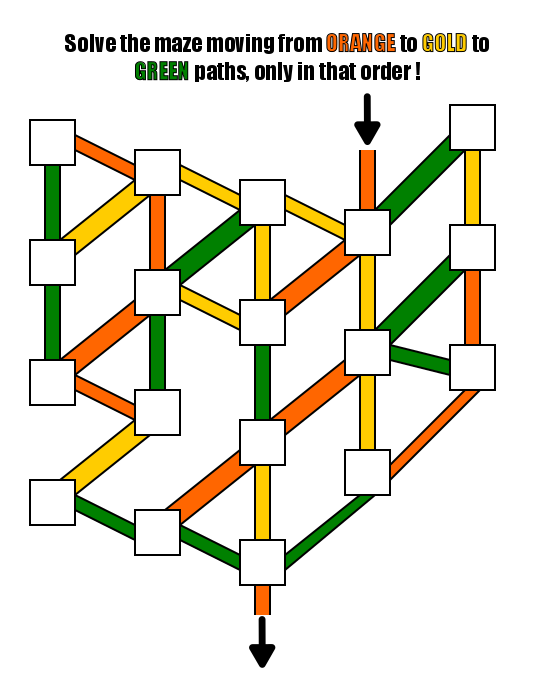
Conditional Path Maze - (sometimes called a Colored Path Maze) A maze where the paths that can be taken are subject to the conditions of the maze maker. Typically this involves a sequence of colored pathways that can only be taken in a specific order.

QUICK VISUAL COMPARISON GALLERY OF THE 5 MAZE TYPES

Notice that each needs directions in order to understand how to solve it. Click on an image to see a larger version of it.
HOW TO MAKE A NUMBER MAZE

Step 1 - Draw the Outline

The outline of the maze makes the outer wall of the maze. It can be anything from a simple shape like a square, to a complex picture. The outline should be thicker than the internal lines to give the maze definition. In the example below I chose the state of Ohio. A more traditional maze uses a square or rectangle outline.

Ohio state map outline

Step 2 - Draw a Grid

Draw a grid to fill the outline of the maze.

Ohio outline with a grid

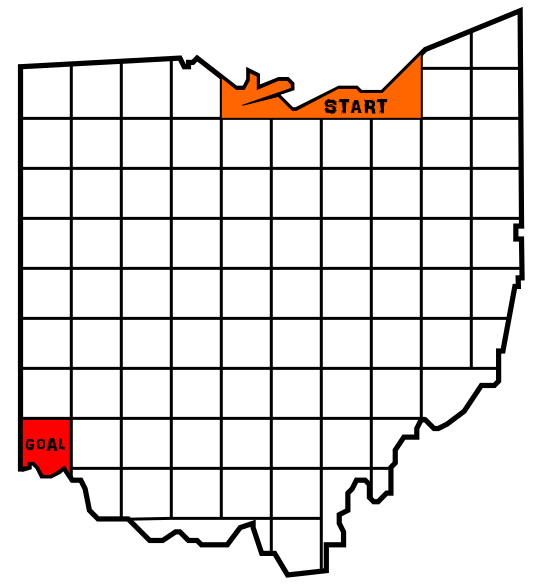
Step 3 - Choose the Start and Goal

I chose the large block in the north and a grid block in the far corner. As with any gridded maze the start and goal can be either internal or external to the outline. In my example I used internal.
Step 4 - Create the Solution

Make the solution to the maze based on the number system you have chosen, filling grids to create a path from the start to the goal of the maze.

Step 5 - Create False Pathways

Fill in any remaining blocks with incorrect answers, or short possible pathways that lead to dead ends. While a normal pathway is drawn to a dead end, a number maze uses possible numbers to create dead pathways. For a good example look at the 5 directly under the START. You may move left, right, or down to the 10 block. Two of these will become false moves.

Step 6 - Add Directions

Can be done at any time in the process, but must be done. Add directions to explain to the solver how they can move through the maze. In my example you can count by 5’s to move from start to goal.
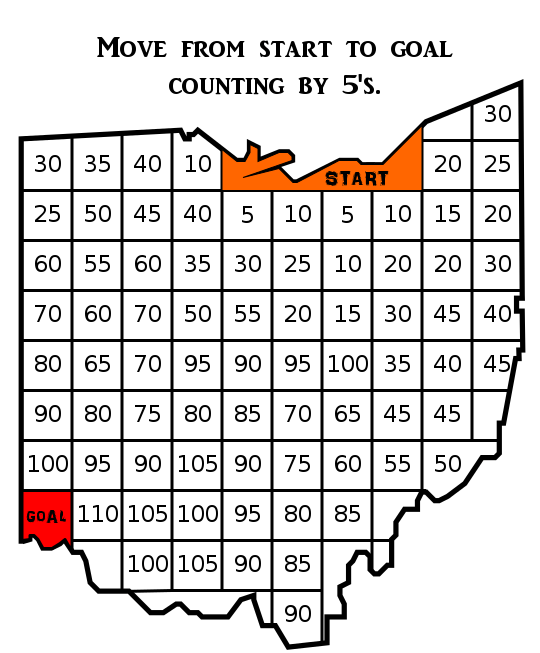
Number maze count by fives in the shape of Ohio

Step 7 - Create a Final Solution

Highlight the correct path in the final version of the maze to create the final maze solution (shown here in gold).

ADDITIONAL NUMBER MAZE EXAMPLES

Here is another example of a Number maze (here called a counting maze) made for children. The structure is a more normal rectangle shape for a number maze and the start and goal are items, in this case a worm going to an apple.
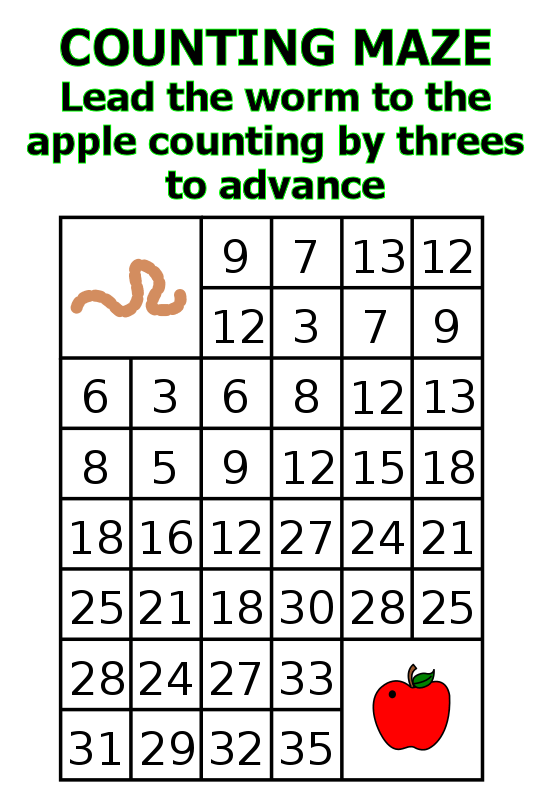
Count by 3's Maze for Kids

The next example uses a slight variation on the number maze - using larger number to move forward in the maze.

Number Maze example

Size and complexity can make a number maze complex. Use only Prime numbers (google search…). Here is larger maze using division.
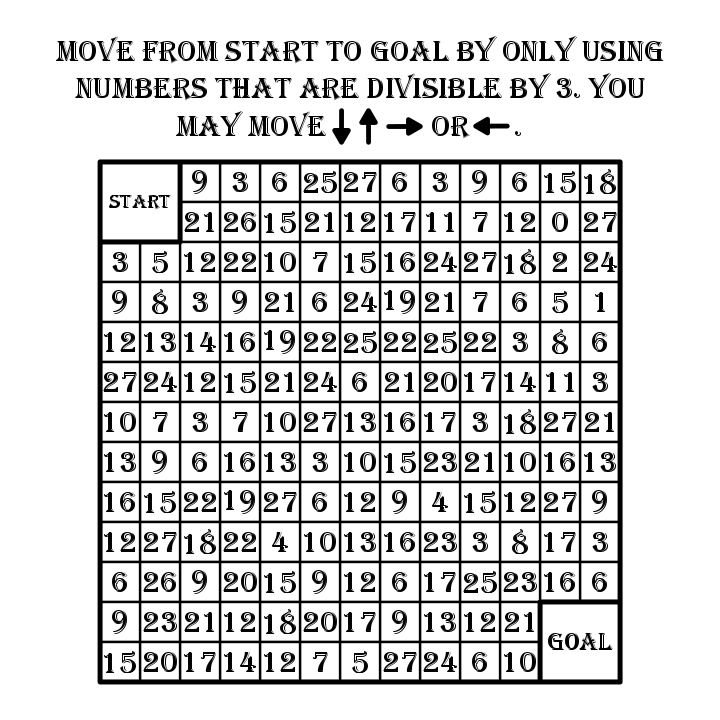
Number Maze - numbers divisible by 3

HOW TO MAKE A LETTER MAZE

  • Step 1 - Draw the Outline

The outline of the maze makes the outer wall of the maze. It can be anything from a simple shape like a square, to a complex picture. The outline should be thicker than the internal lines to give the maze definition. In the example below I chose the state of Ohio. A typical letter maze is square or rectangular in shape.

  • Step 1.5 - Choose the Start / Goal (optional now)

For the below example I chose the start of Cleveland and decided to choose the goal after completing the solution. As with any gridded maze the start and goal can be either internal or external to the outline. In my example I used external.

  • Step 2 - Draw a Grid

Draw a grid to fill the outline of the maze. Many of these mazes will be grid shaped squares and rectangles.
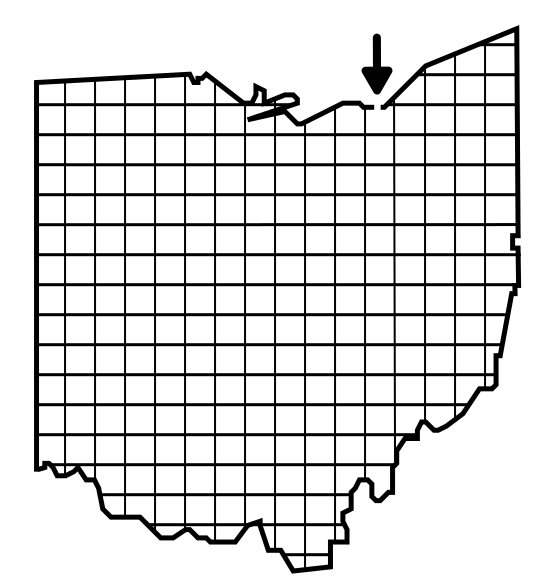
HOW TO MAKE A LETTER MAZE - STEP 1/2
  • Step 3 - Create the Maze Solution

Make the solution to the maze based on the letter system you have chosen, filling grids to create a path from the start to the goal of the maze. In my example below I will be using vowels to move the maze solver from grid to grid.
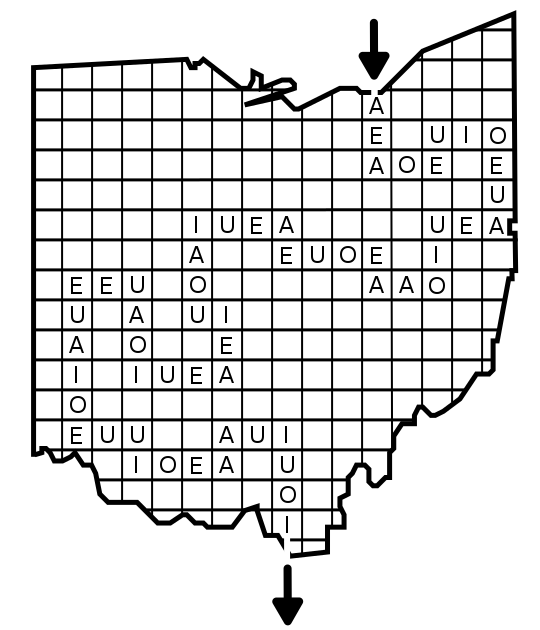
HOW TO MAKE A LETTER MAZE - STEP 3
  • Step 4 - Create False Paths

Create false paths by filling grids with possible branches off the main solution that lead to dead ends. Notice I used the same letters as the correct pathway.
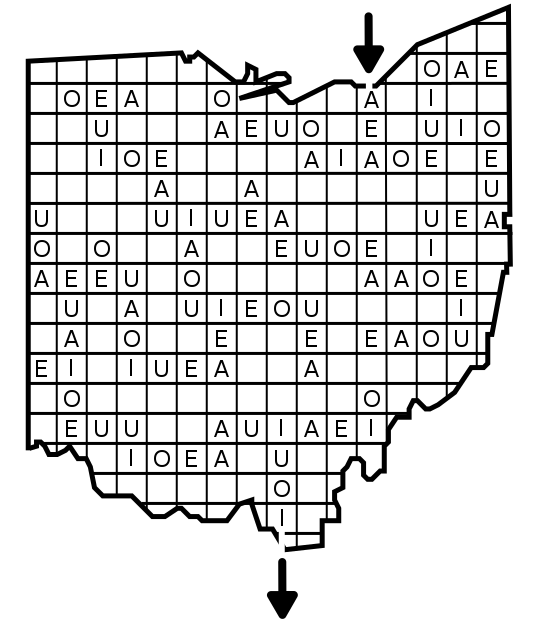
HOW TO MAKE A LETTER MAZE - STEP 4
  • Step 5 - Complete the Maze

Fill in any remaining blocks with incorrect or unusable letters, in my example below consonants.

  • Step 6 - Check for Unwelcome Words

Any time you make a letter maze you should return back to it after completion to check for curse words. No need for me to make a list…
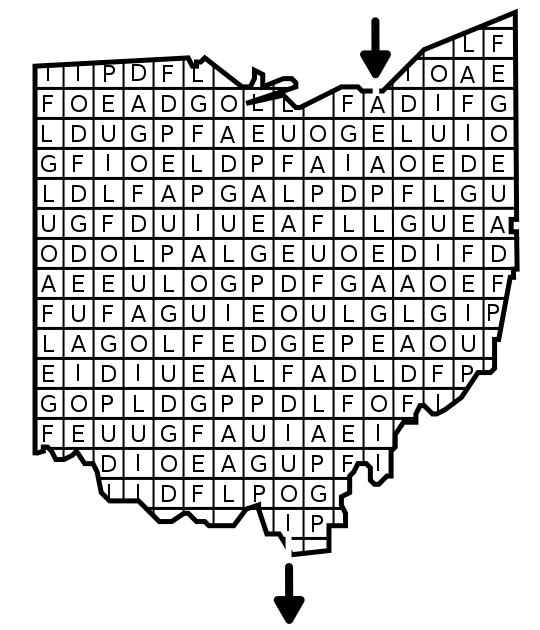
HOW TO MAKE A LETTER MAZE - STEP 5/6
  • Step 7 - Add Directions

Can be done at any time in the process, but must be done. At directions to explain to the solver how they can move through the maze. In my example you can use vowels to move between blocks.
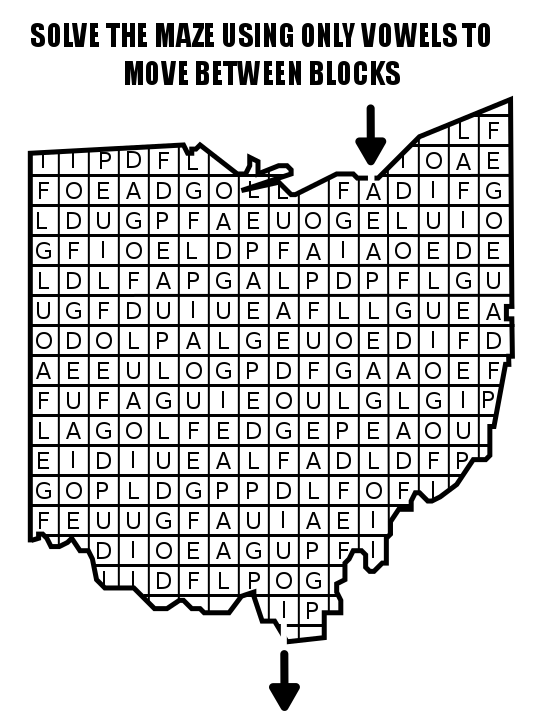
HOW TO MAKE A LETTER MAZE - STEP 7
  • Step 8 - Create a Final Solution

Highlight the correct path in the final version of the maze to create the final maze solution (shown here in gold).
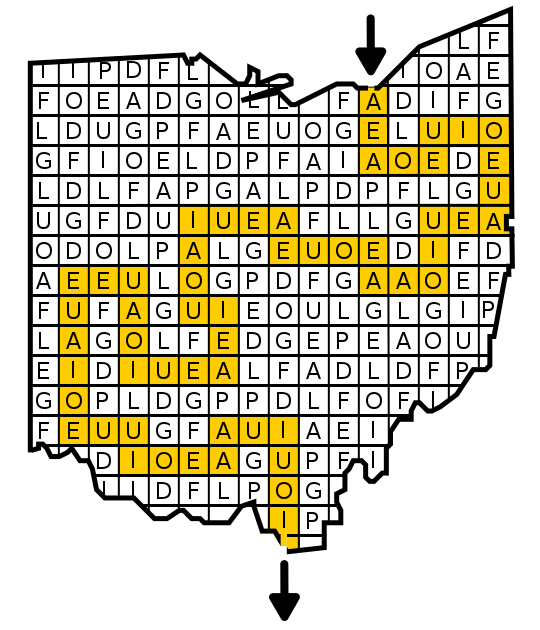
HOW TO MAKE A LETTER MAZE - STEP 8 the solution

ADDITIONAL LETTER MAZE EXAMPLE & SOLVING TIP

Letter Maze Solving Tip

One way to solve a large Letter Maze is to eliminate the false answers by filling them in with black marker (or by covering with an X). This will leave only the good grids that could create a pathway leaving the solution apparent (most likely).

Letter Maze example

HOW TO MAKE A PUZZLE MAZE

Steps 1, 2 and 2.5 all the same as above, so we start with step essentially below.

Step 1 - Draw the Outline

Step 2 - Draw a Grid

Step 2.5 - Choose the Start and Goal (optional now)

Step 3 - Add the Key the Puzzle

Decide the key that will move the solver through the maze. In my example I did this with 4 simple movements in 4 directions, but you may use any number of symbols and movements. Unlike many mazes that are made you need to make the rules first for this one, and “explain what needs explaning”.
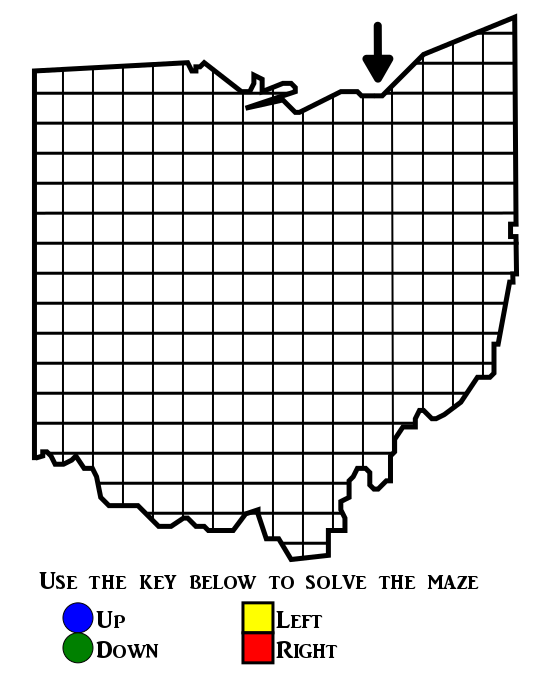
HOW TO MAKE A PUZZLE MAZE step 3

Step 4 - Create the Solution

Make the solution to the maze based on the key and symbol system you have chosen. For my simple puzzle maze there are not actually any decisions to make on the pathways, you need only follow the key to solve the puzzle maze.
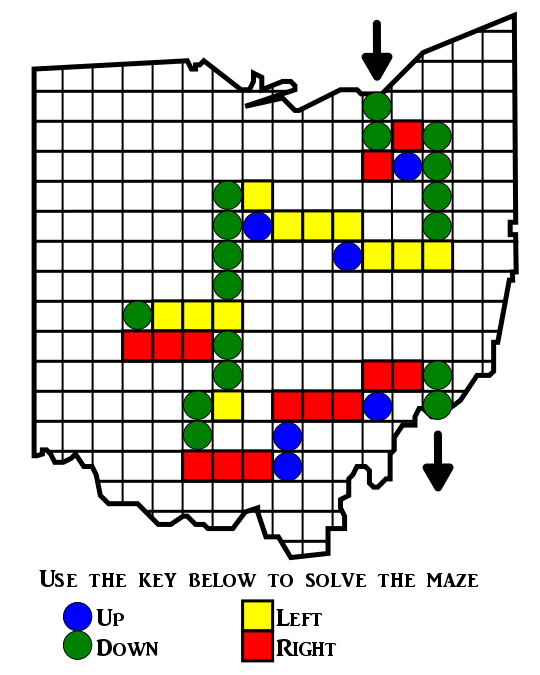
HOW TO MAKE A PUZZLE MAZE step 4

Step 5 - Create False Pathways

Fill in any remaining blocks with incorrect options. These are grid blocks that the solver should never reach if they follow the key correctly.
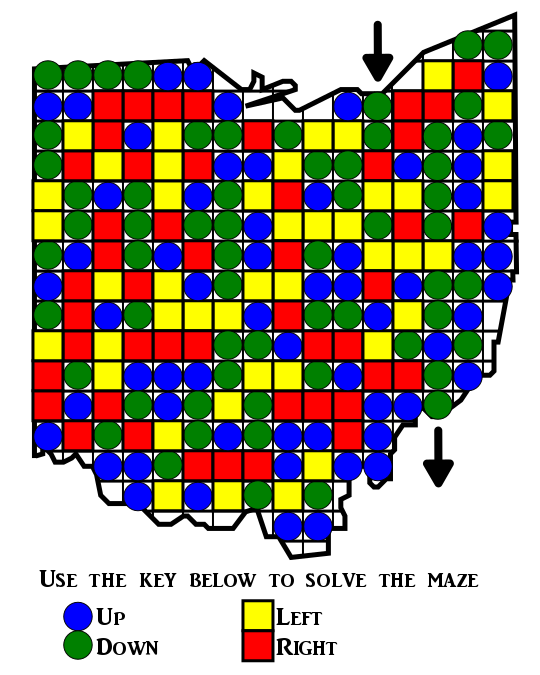
HOW TO MAKE A PUZZLE MAZE step 5

Step 6 - Create a Final Solution

Highlight the correct path in the final version of the maze to create the final maze solution (shown here in aqua).
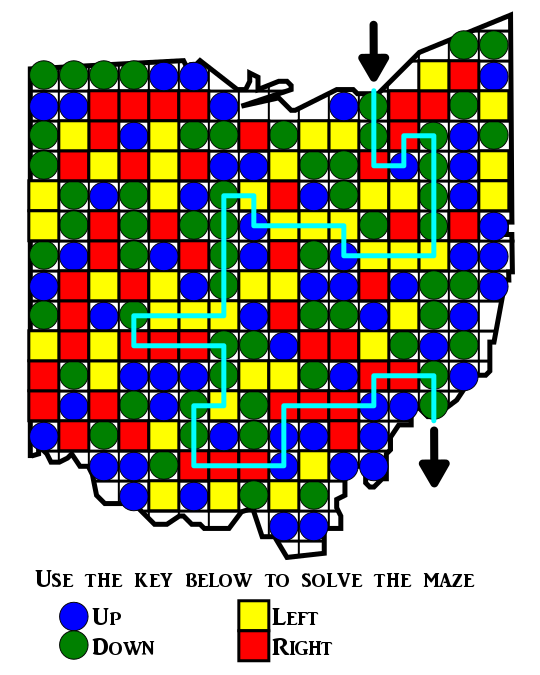
HOW TO MAKE A PUZZLE MAZE step 6 the solution

ADDITIONAL PUZZLE MAZE EXAMPLES

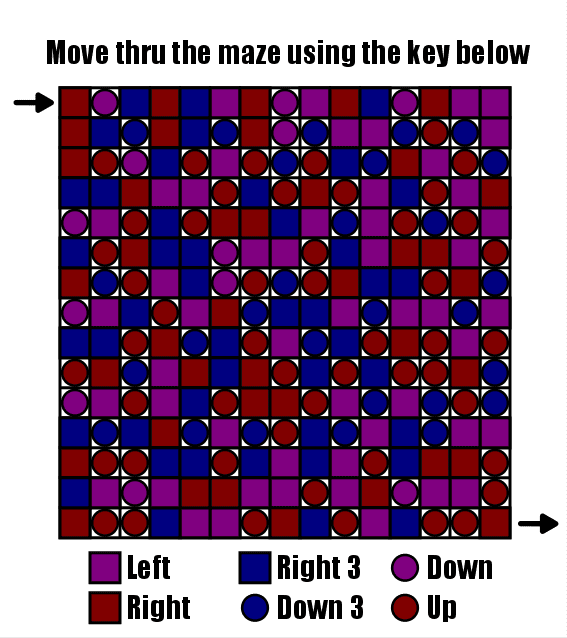
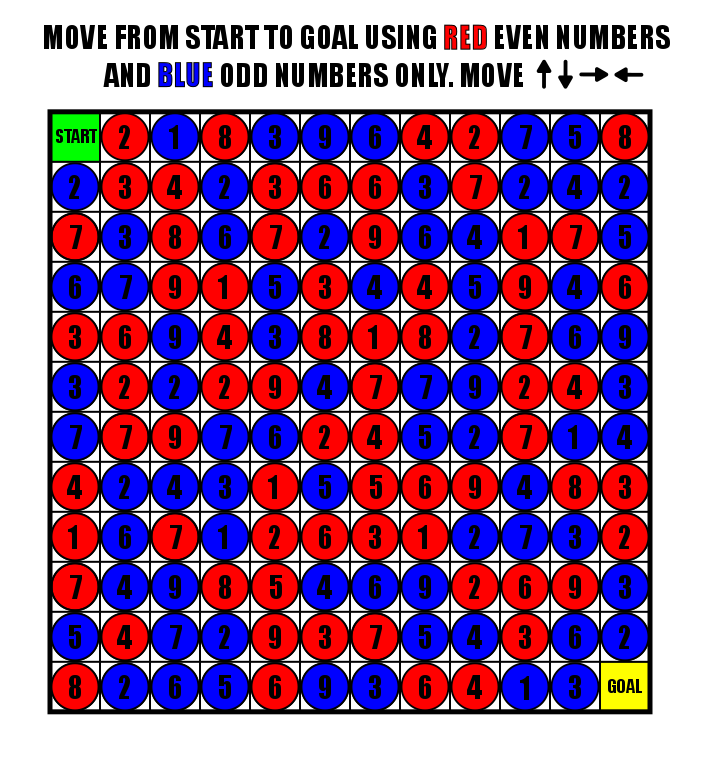
Numbers, colors and shapes are all available to you to play with as shown in the 3 examples below. Click to open a window with a large version. The nice thing about these maze is they can be solved without a writing utensil and on a screen.
FREE DOWNLOADABLE PUZZLE MAZE BOOK

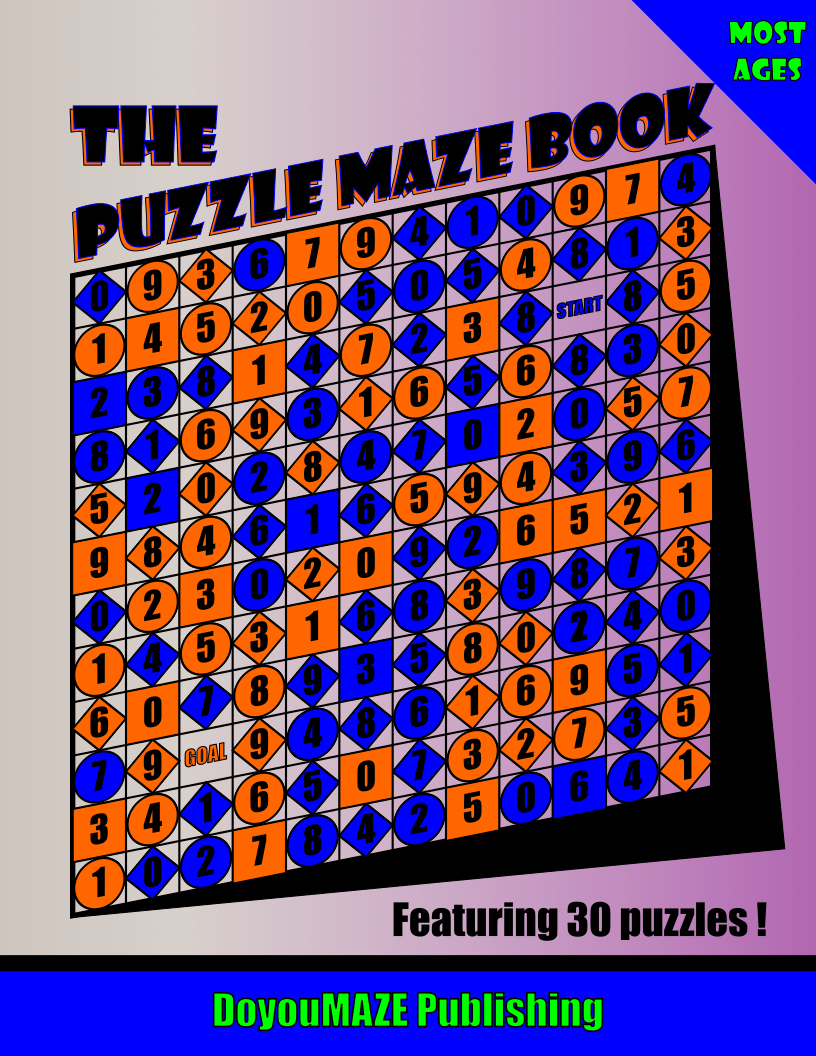
Of all the free books I have available this is one of my favorites. I like the cover and the colors of the mazes make the book look great.
THE PUZZLE MAZE BOOK

THE PUZZLE MAZE BOOK

30 puzzle mazes. Move from start to goal following the conditions in the instructions. (Please note : this book must be printed in color to solve the mazes, however all mazes can be solved on screen also !)

File Size: 845 KB

MAKING OF A PUZZLE MAZE VIDEO

Shows me making a puzzle maze. Notice I used numbers off to the side for quicker construction with copy and paste !

HOW TO MAKE A COLOR GRID MAZE

Our first 3 steps (steps 1, 2 and 2,5) are similar to above so we speed through them.

Step 1 - Draw the Outline

Step 2 - Draw a Grid

Step 2.5 - Choose the Start and Goal (optional now)

Step 3 - Add Directions to the Maze

Explain the conditional rules that will dictate the movement of the maze solver through the maze and add these directions. In my example I chose to move from block to block using red, white, and blue. I allow movement in any direction so I do not need to explain any limits since there are none (vs some mazes that only allow N,S,E,W movements and no diagonals).

HOW TO MAKE A COLOR GRID MAZE step 3

Step 4 - Create the Solution

Make the solution to the maze based on the color condition you have chosen.

HOW TO MAKE A COLOR GRID MAZE step 4

Step 5 - Create False Pathways (colored blocks)

Fill in any remaining blocks with incorrect options. Each block that you make a particular color needs to be considered - can this be used by the solver ? A completed color grid maze will always have one dominant color (in my example white) that helps create non-solutions to the maze more easily.

HOW TO MAKE A COLOR GRID MAZE step 5

Step 6 - Create a Final Solution

Highlight the correct path in the final version of the maze to create the final maze solution (shown here in lime, with possible branches in pink). There will always be a third color that is dominant in the color grid (here white) that allows multiple different moves for what is essentially the same solution.

HOW TO MAKE A COLOR GRID MAZE step 6

ADDITIONAL COLOR GRID MAZE EXAMPLES

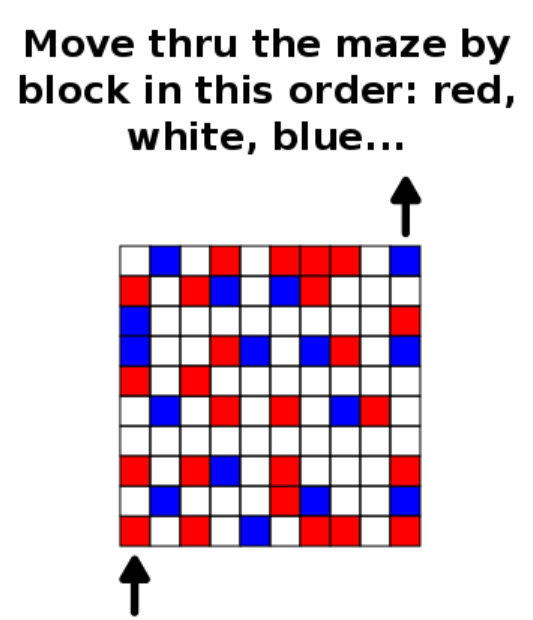
From my examples, I prefer using internal start and goals vs/ external arrows. Black, grey and white versions are most common for use in black and white books.
HOW TO MAKE A CONDITIONAL PATH MAZE

Step 1 - Draw the Decision Stations

A conditional path maze does not NEED an outline, in fact most will not have an outline….but it does need decision stations. For my example, to be consistent I used an outline of Ohio and created decision stations in that general shape. I deleted the Ohio outline in the next step. Space the decision stations far enough apart a pathway can be drawn between them.

Step 1.5 - Choose the Start / Goal (goal is optional)

For the below example I chose the start of Cleveland. I prefer to choose the goal later as I construct the maze based on how difficult I want it to be to solve. I want to also note that I used an arrow and an initial pathway to start the maze. I could have also used a block with the word “START”. This would mean that the initial move is not set, but will most likely have multiple options (further explained in step 2).

Step 2 - Draw Pathways between the Stations

Draw pathways between the decision stations. I do not connect every station to every nearby station. Leave a few open. As you build the solution and false pathways you can adjust these as needed. I find it’s better to have less pathways to start than more. Following up on the discussion above, had I opted for “START” in the first block used the solver would have 3 options to move in (pre colors added of course, but had I chosen that START I would have made at least 2 of them possible first moves).
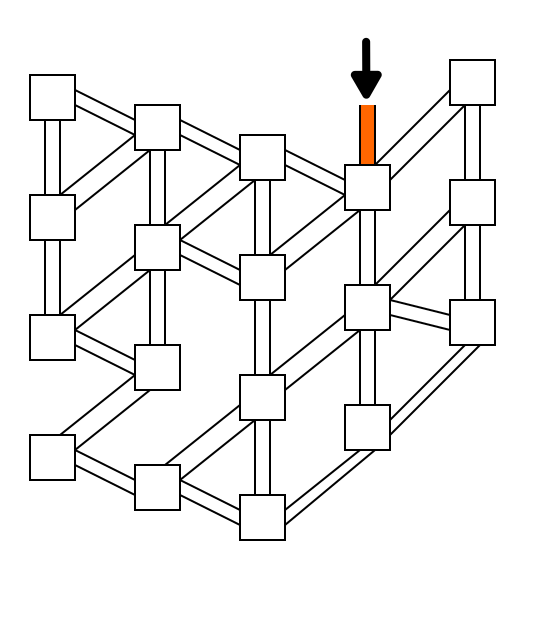
HOW TO MAKE A CONDITIONAL PATH MAZE STEP 2

Step 3 - Create a Solution

Starting from the entrance color pathways to create a solution. Because this is a Conditional Path maze you will need to decide what those conditions are. In my below example it is to solve the maze by moving from orange to gold to green pathways. Don’t worry, we will add the instructions in a later step. To make the maze more fun and difficult I suggest you loop the solution thru a block more than once. In row 2 the second block from the top is visited twice.

HOW TO MAKE A CONDITIONAL PATH MAZE STEP 3

Step 4 - Create False Pathways

Continue to color pathways, giving the solver additional options to move from one station to another. Add and delete pathways as needed. I well designed maze will create confusing loops that take the solver down false paths. In the example below I also added a final pathway to the goal. Similar to the discussion above on START, I could have used a GOAL block instead of the exit pathway and arrow.

HOW TO MAKE A CONDITIONAL PATH MAZE STEP 4

Step 5 - Complete the Maze

Add directions to the maze to complete it, telling the solver the conditions for solving.

SIDEBAR: Compare the Conditional Path maze to it’s sibling, the Color Grid maze. Each uses conditional movement to move from start to goal, but the structure is grid based vs. path based. A color grid maze also has much more open movement with a grid away from a wall being able to use 8 directions when it is landed on.
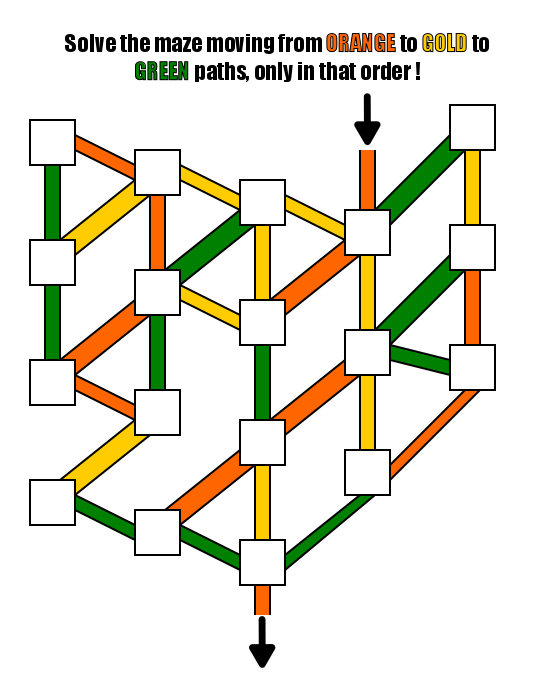
HOW TO MAKE A CONDITIONAL PATH MAZE STEP 5

Step 6 - Make the Maze Solution

Highlight the correct path in the final version of the maze to create the final maze solution (shown here as a purple dashed line). If your pathways have multiple possible solutions, mark the best (shortest) solution. I also like to set this maze type to the side for a week and try to solve it later to see how complex it is.
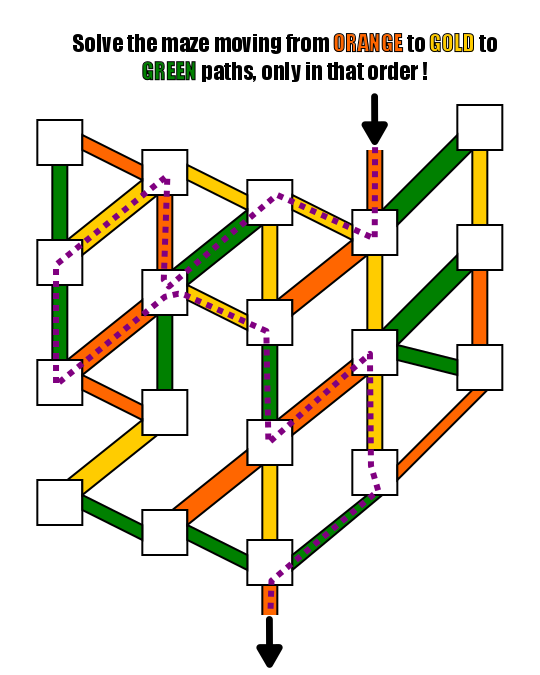
HOW TO MAKE A CONDITIONAL PATH MAZE STEP 6 SOLUTION

ADDITIONAL CONDITIONAL PATH MAZE EXAMPLES

We have a black and white version for kids, and a larger version for adults. Click to see them in larger windows and solve !
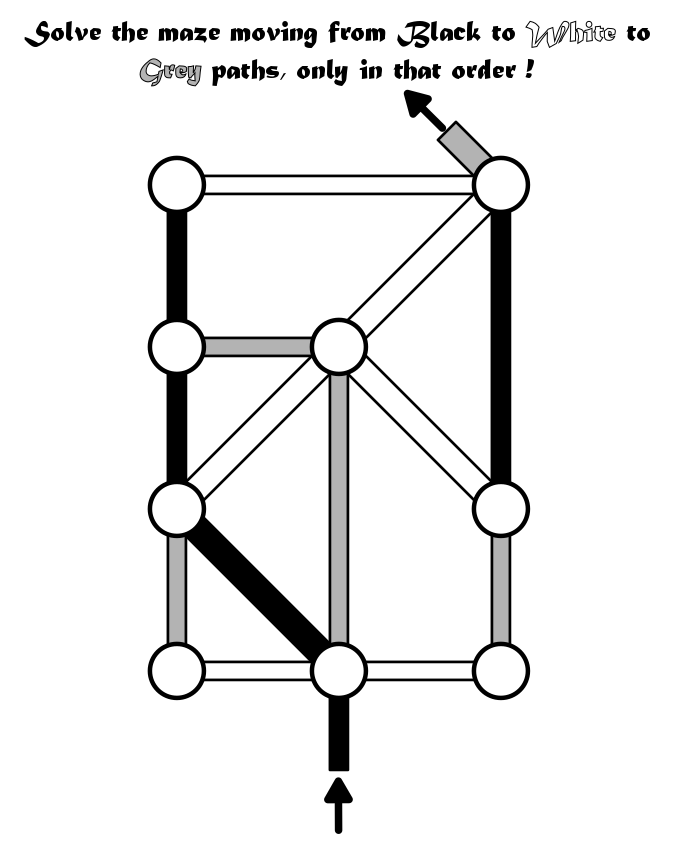
MAZE MAKING TEMPLATES

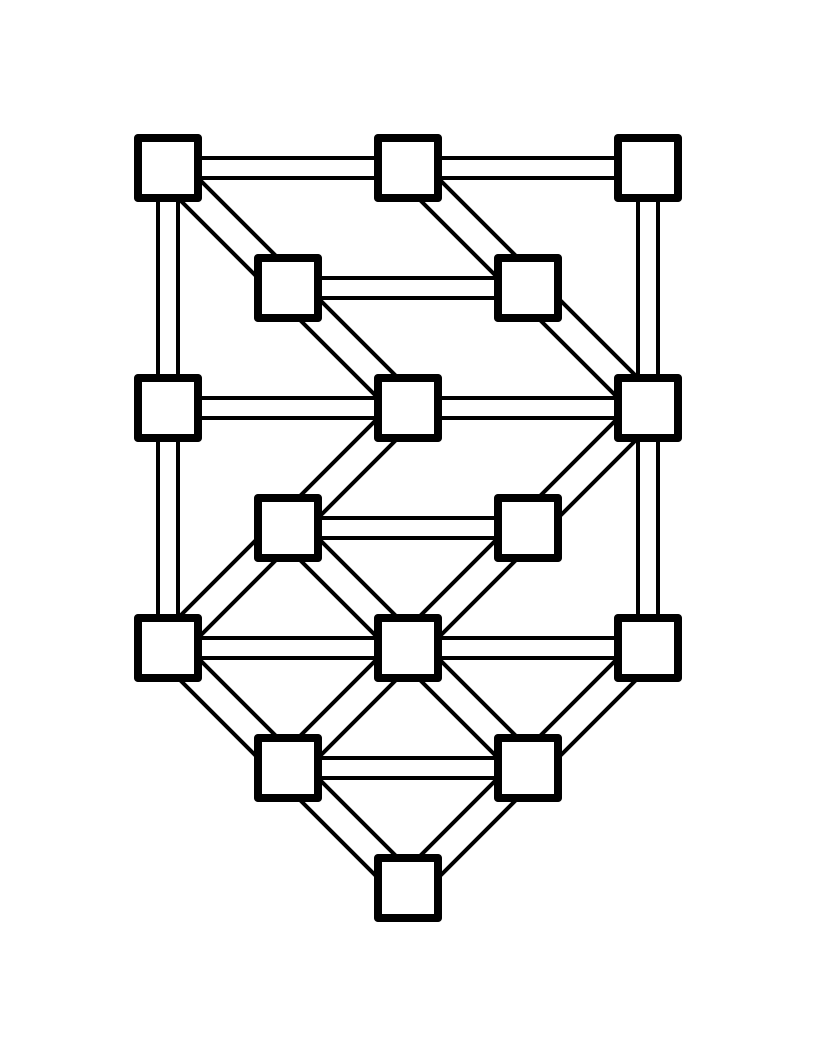
This simple grid template could be used for 4 of the above maze types. Download below.

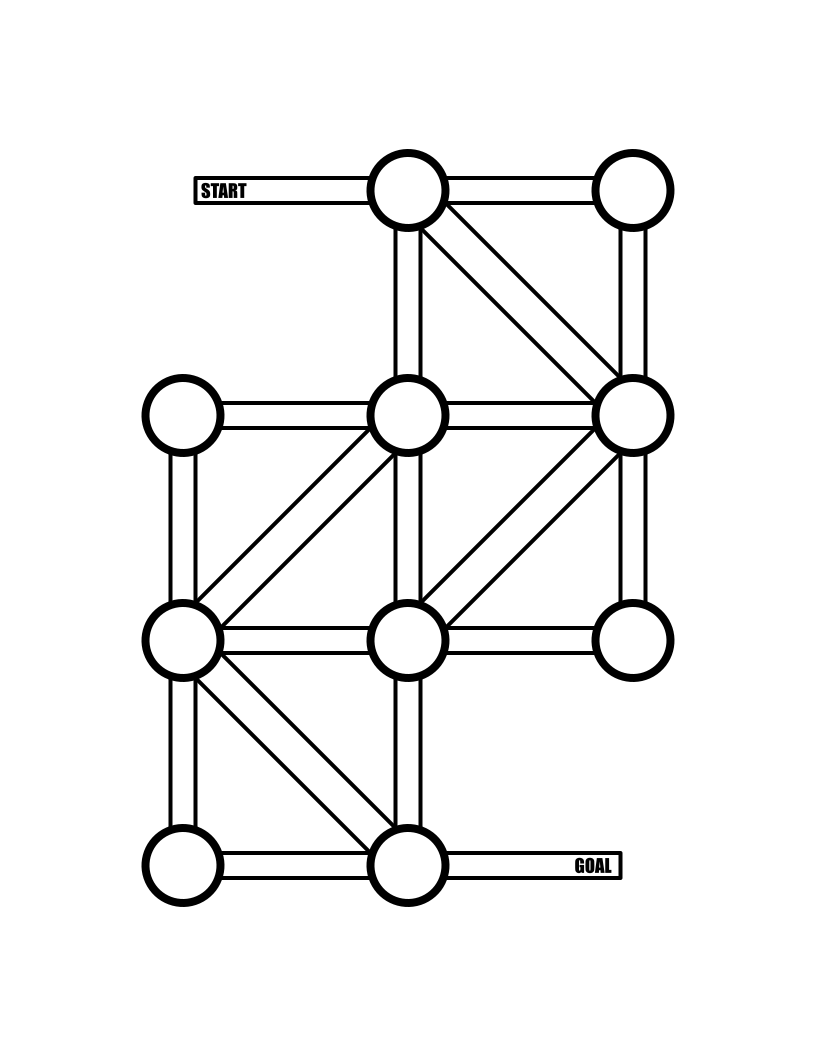
And these 2 templates can be used to make a conditional path maze by adding directions and some colors !
CONCLUSION

While each of these maze constructions uses conditions to solve them, you will rarely find them in bulked themed books focusing on a single type. These mazes are best used for a change of pace when making a book of mixed mazes, puzzles and activities. Each can be made in different difficulty levels from very easy to hard by creating the right rules !
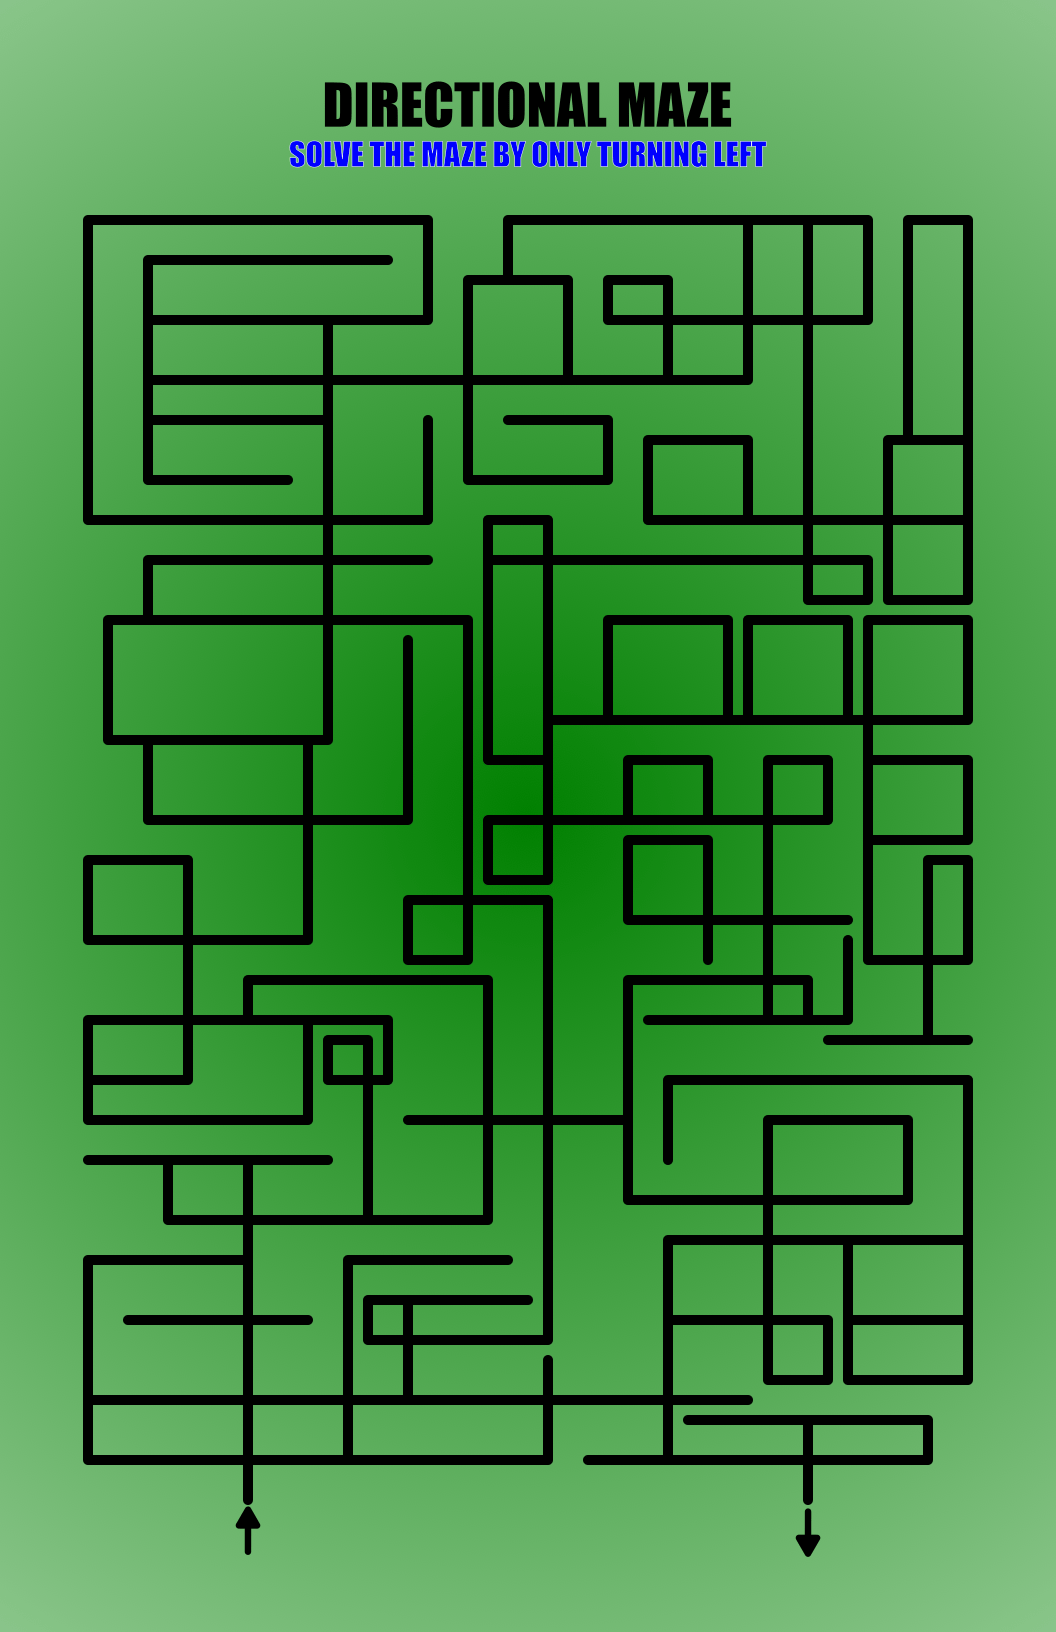
Weekly Hard Maze #35

Each Saturday I post a new hard maze with all of them sitting in the Hard Maze Archive. I will try to post a variety of maze types to keep things interesting.

Weekly Hard Maze #35 - Directional Maze

Solution will be in the archive. Download is below.

Weekly Hard Maze #35 - Directional Maze

If you solved that maze quickly and want to try some of my archival hard mazes, these posts should do the trick:

How to Make a Draw and Cut Maze

In a series of posts I will show you how to make a maze in a wide variety of design constructions. The 25th type of maze construction is the Draw and Cut maze. Let’s define what I mean, then get into the example. Every how-to will use a simple square so you can compare the differences between each maze construction type. I will also show a consolidated secondary how-to using an irregular shape (the state of Ohio).

Here is an outline for this blog post with jump links if you want to skip ahead to a section:

DRAW AND CUT MAZE DEFINTION

THE 5 RULES OF MAZE DESIGN

HOW TO MAKE A DRAW AND CUT MAZE

HOW TO MAKE A DRAW AND CUT MAZE - abbreviated writing & using a different shape

ADDITIONAL EXAMPLES OF DRAW AND CUT MAZES

DRAW AND CUT MAZE DEFINTION:

Draw and Cut Maze - A maze created by drawing an object, then using the object’s drawing as walls, making “cuts” thru them to create pathways. Often, from a distance these can appear to be drawings and not mazes because the construction is based on a completed drawing (pre-cuts).

THE 5 RULES OF MAZE DESIGN:

These 5 rules apply to any maze you make so we start with them !

1. Always keep an open pathway for the solution

While drawing a maze you will need to juggle multiple open pathways each of which could become the solution. One of them will become the solution. Keep track of it. This is especially important if you are designing pathways in both directions (from the start and from the goal).

2. Clearly mark the start and goal, or the objective of the maze

A maze should have a start and a goal that you can assess just by glancing at it. There are many ways to start and end a maze I review in this blog post: Options for Starting and Ending a Maze

3. Ensure the difficulty matches the intended audience

Most people want to solve a puzzle/maze that is just slightly below or slightly above their skill level. Many things help determine the difficulty of a maze. Size, number of branches, the length of dead ends, the number of choices, the complexity of the rules (if the maze has them).

4. Ensure your maze has a solution

When your maze is complete, solve it to determine the difficulty level and to ensure it is a real, solvable maze. Depending on the complexity of the maze you may want to do this right away or wait so you can properly assess the difficulty.

5. Explain anything that needs explaining

Some mazes have rules or conditions. Explain them with directions. If it isn't obvious, make it so.

HOW TO MAKE A DRAW AND CUT MAZE

I should mention that this is a digital maze how-to only (unless you use a pencil with a very good eraser), while most of my how-to’s can be applied to non-digital creations.

Step 1 - Draw the Outline

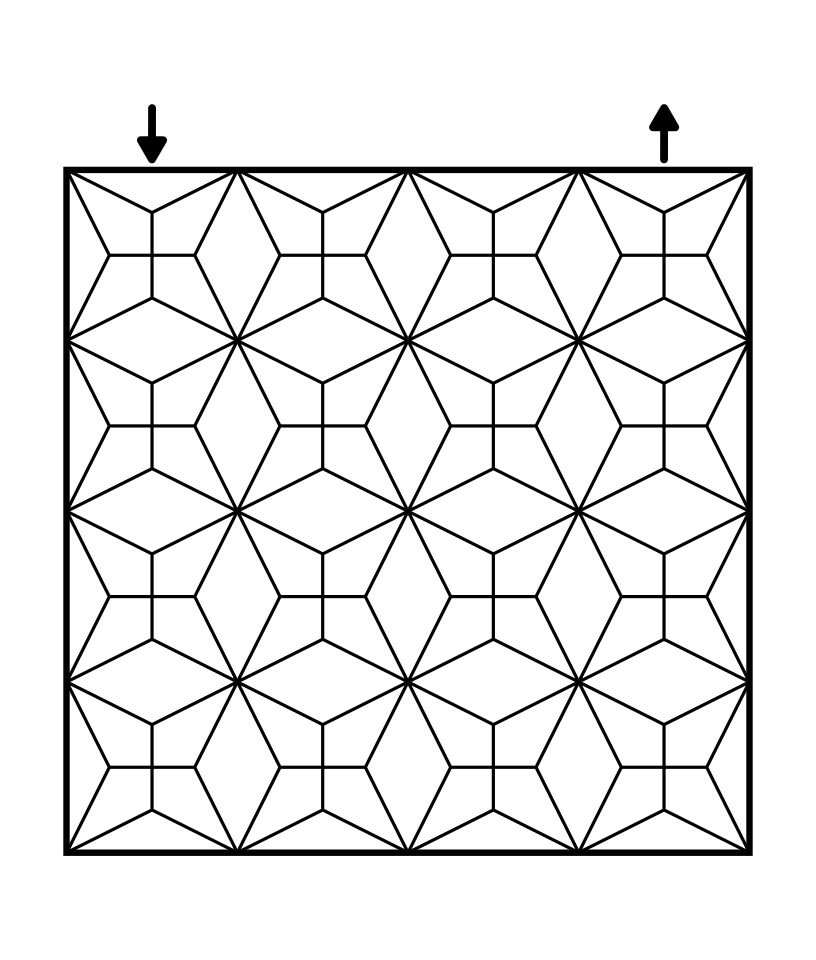
I went with a simple box and added arrows for the start and goal which I can move later.

Step 1.5 - Choose the Start and Goal

How to Make a Draw and Cut Maze Step 1

Step 2 - Draw the Picture

This type of maze starts with a complete picture, so draw that picture. The ideal use of a Draw and Cut maze is for complex drawings that many would consider maze art. It also works well for geometric box mazes like my example.

PRO TIP: When creating a cut thru maze digitally it is best to use one consistent background color. In the example below, white. Cutting between a variety of background colors means making many ‘half cuts’ in those same colors to create the maze. That is obviously not ideal and takes significantly more time. If you think the colors are important, I suggest you consider a different maze type.

How to Make a Draw and Cut Maze Step 2

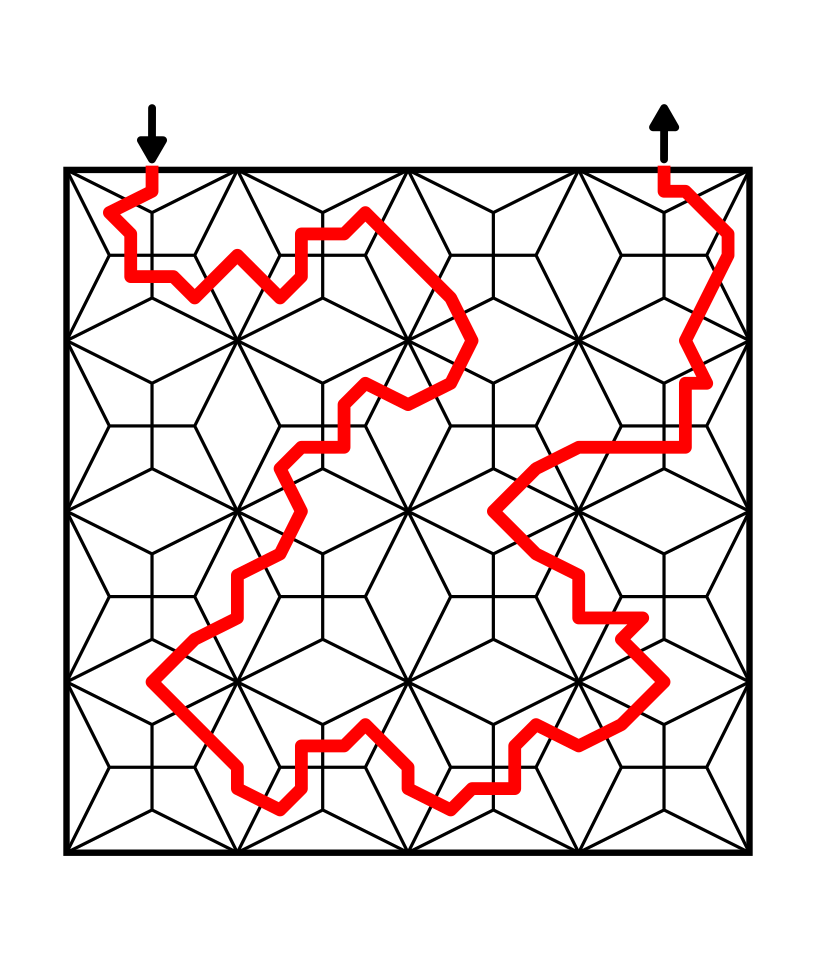
Step 3 - Draw the Maze Solution

Draw the solution to the maze by cutting through the drawing you made. In example below it is shown as the red line. Make sure it is thick enough to be easily visible later for the solver to find and move through.

How to Make a Draw and Cut Maze Step 3

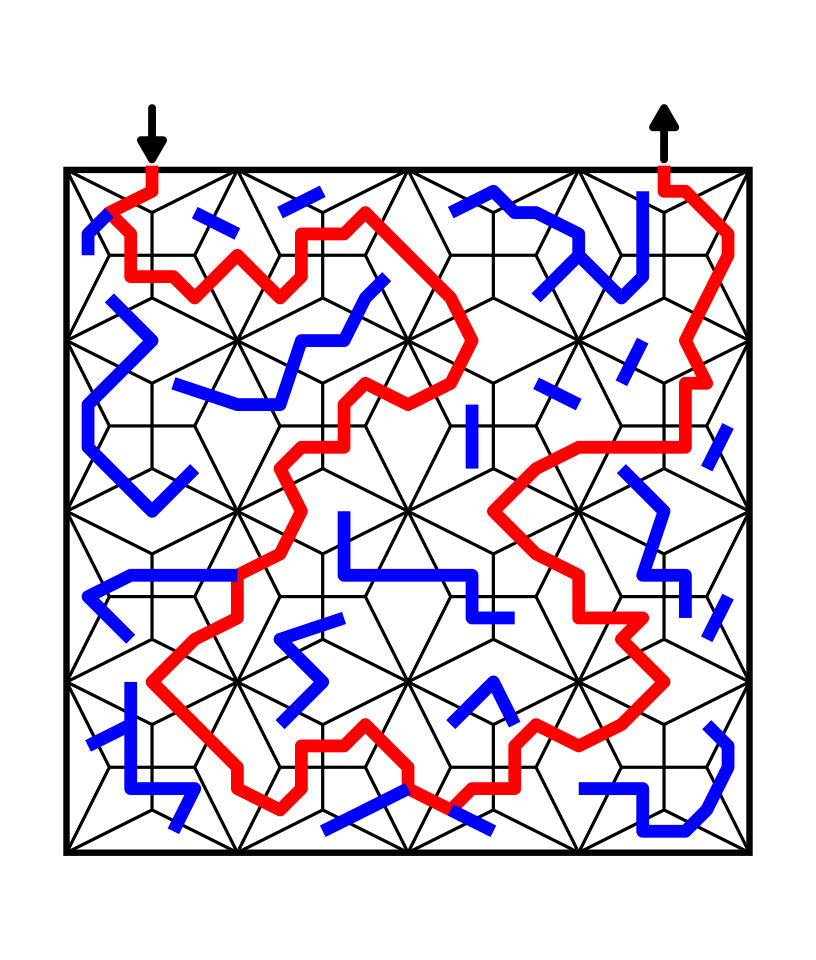
Step 4 - Draw the Dead Ends

Make branches off the solution path to create dead end paths. The longer the paths, the more difficult the maze. In the example below the false paths are blue.

How to Make a Draw and Cut Maze Step 4

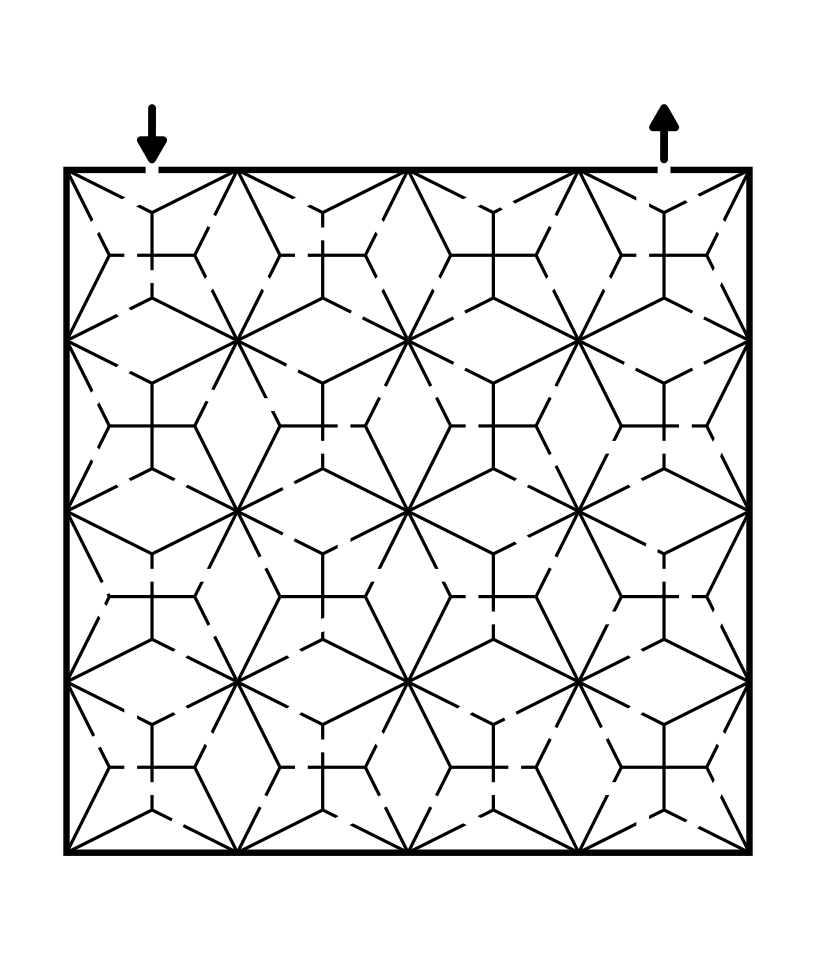
Step 5 - Convert all Pathways to White

Completing the maze means converting all paths you made to white. The width looks good and the solution does not appear obvious from glancing at the maze.

How to Make a Draw and Cut Maze Step 5

Step 6 (Optional) - Make the Maze Solution

Highlight the correct path in the final version of the maze to create the final Maze solution.

How to Make a Draw and Cut Maze Step 6

HOW TO MAKE A DRAW AND CUT MAZE - abbreviated writing & using a different shape

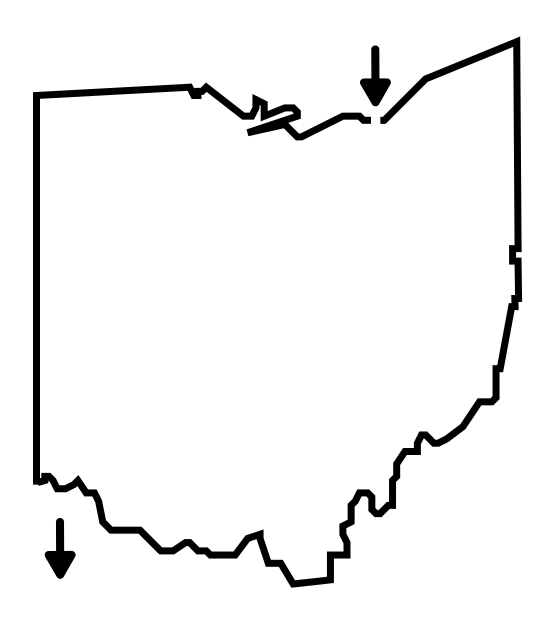
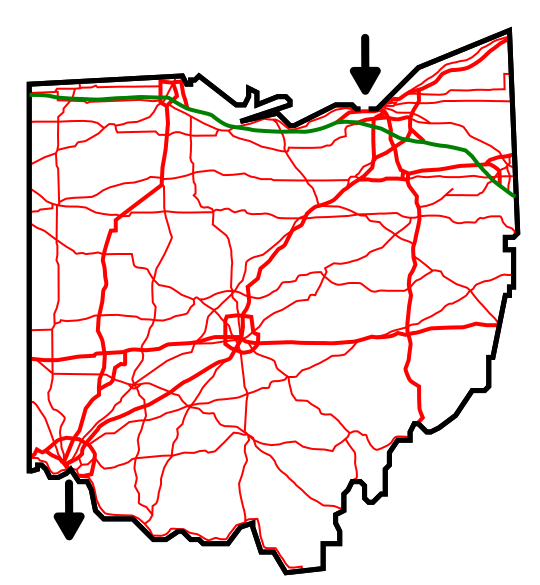
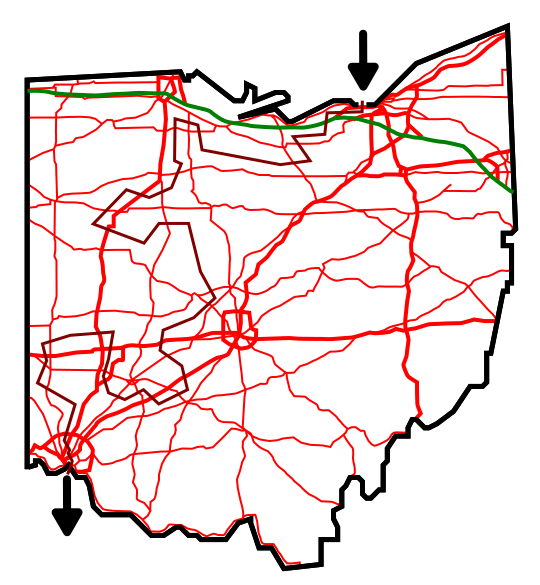
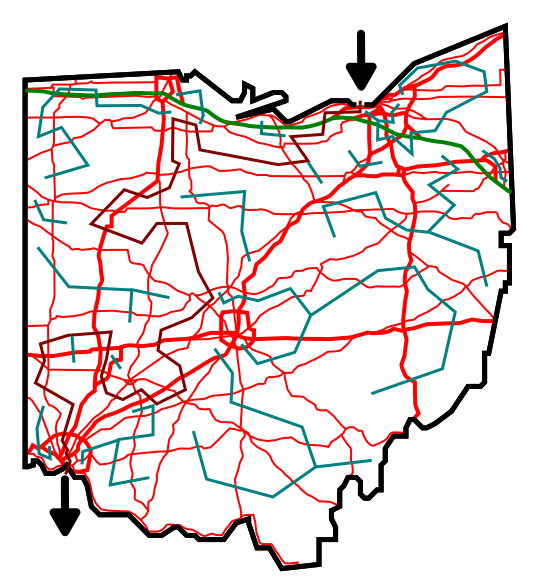
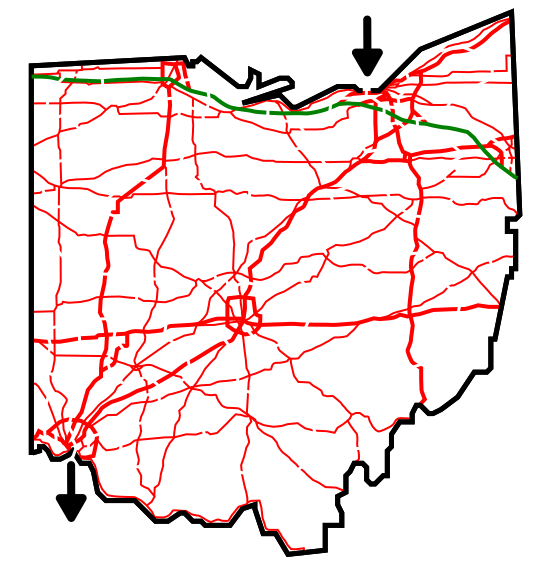
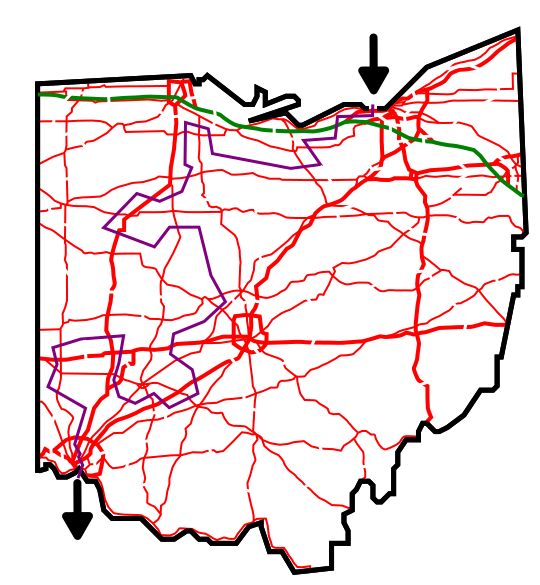
I used the Ohio shape as a comparison for the mazes and when I got to draw and cut all I could think of was drawing the highway road system to cut into. Anyway, click through the gallery to watch the maze get made. I did not show the drawing by steps, just the completed version showing the highway road system.

Step 1 - Draw the Outline

Step 1.5 - Choose the Start and Goal

Step 2 - Draw the Picture

Step 3 - Draw the Maze Solution - burgundy color in my example

Step 4 - Draw the Dead Ends - blue in my example

Step 5 - Convert all Pathways to White - ideally I think these cuts should have been made wider.

Step 6 (Optional) - Make the Maze Solution

ADDITIONAL EXAMPLES OF DRAW AND CUT MAZES

I start with 3 examples of maze art I have made for the site. Click on the image below to see a larger version, or click on the title to go to the page and download the maze.

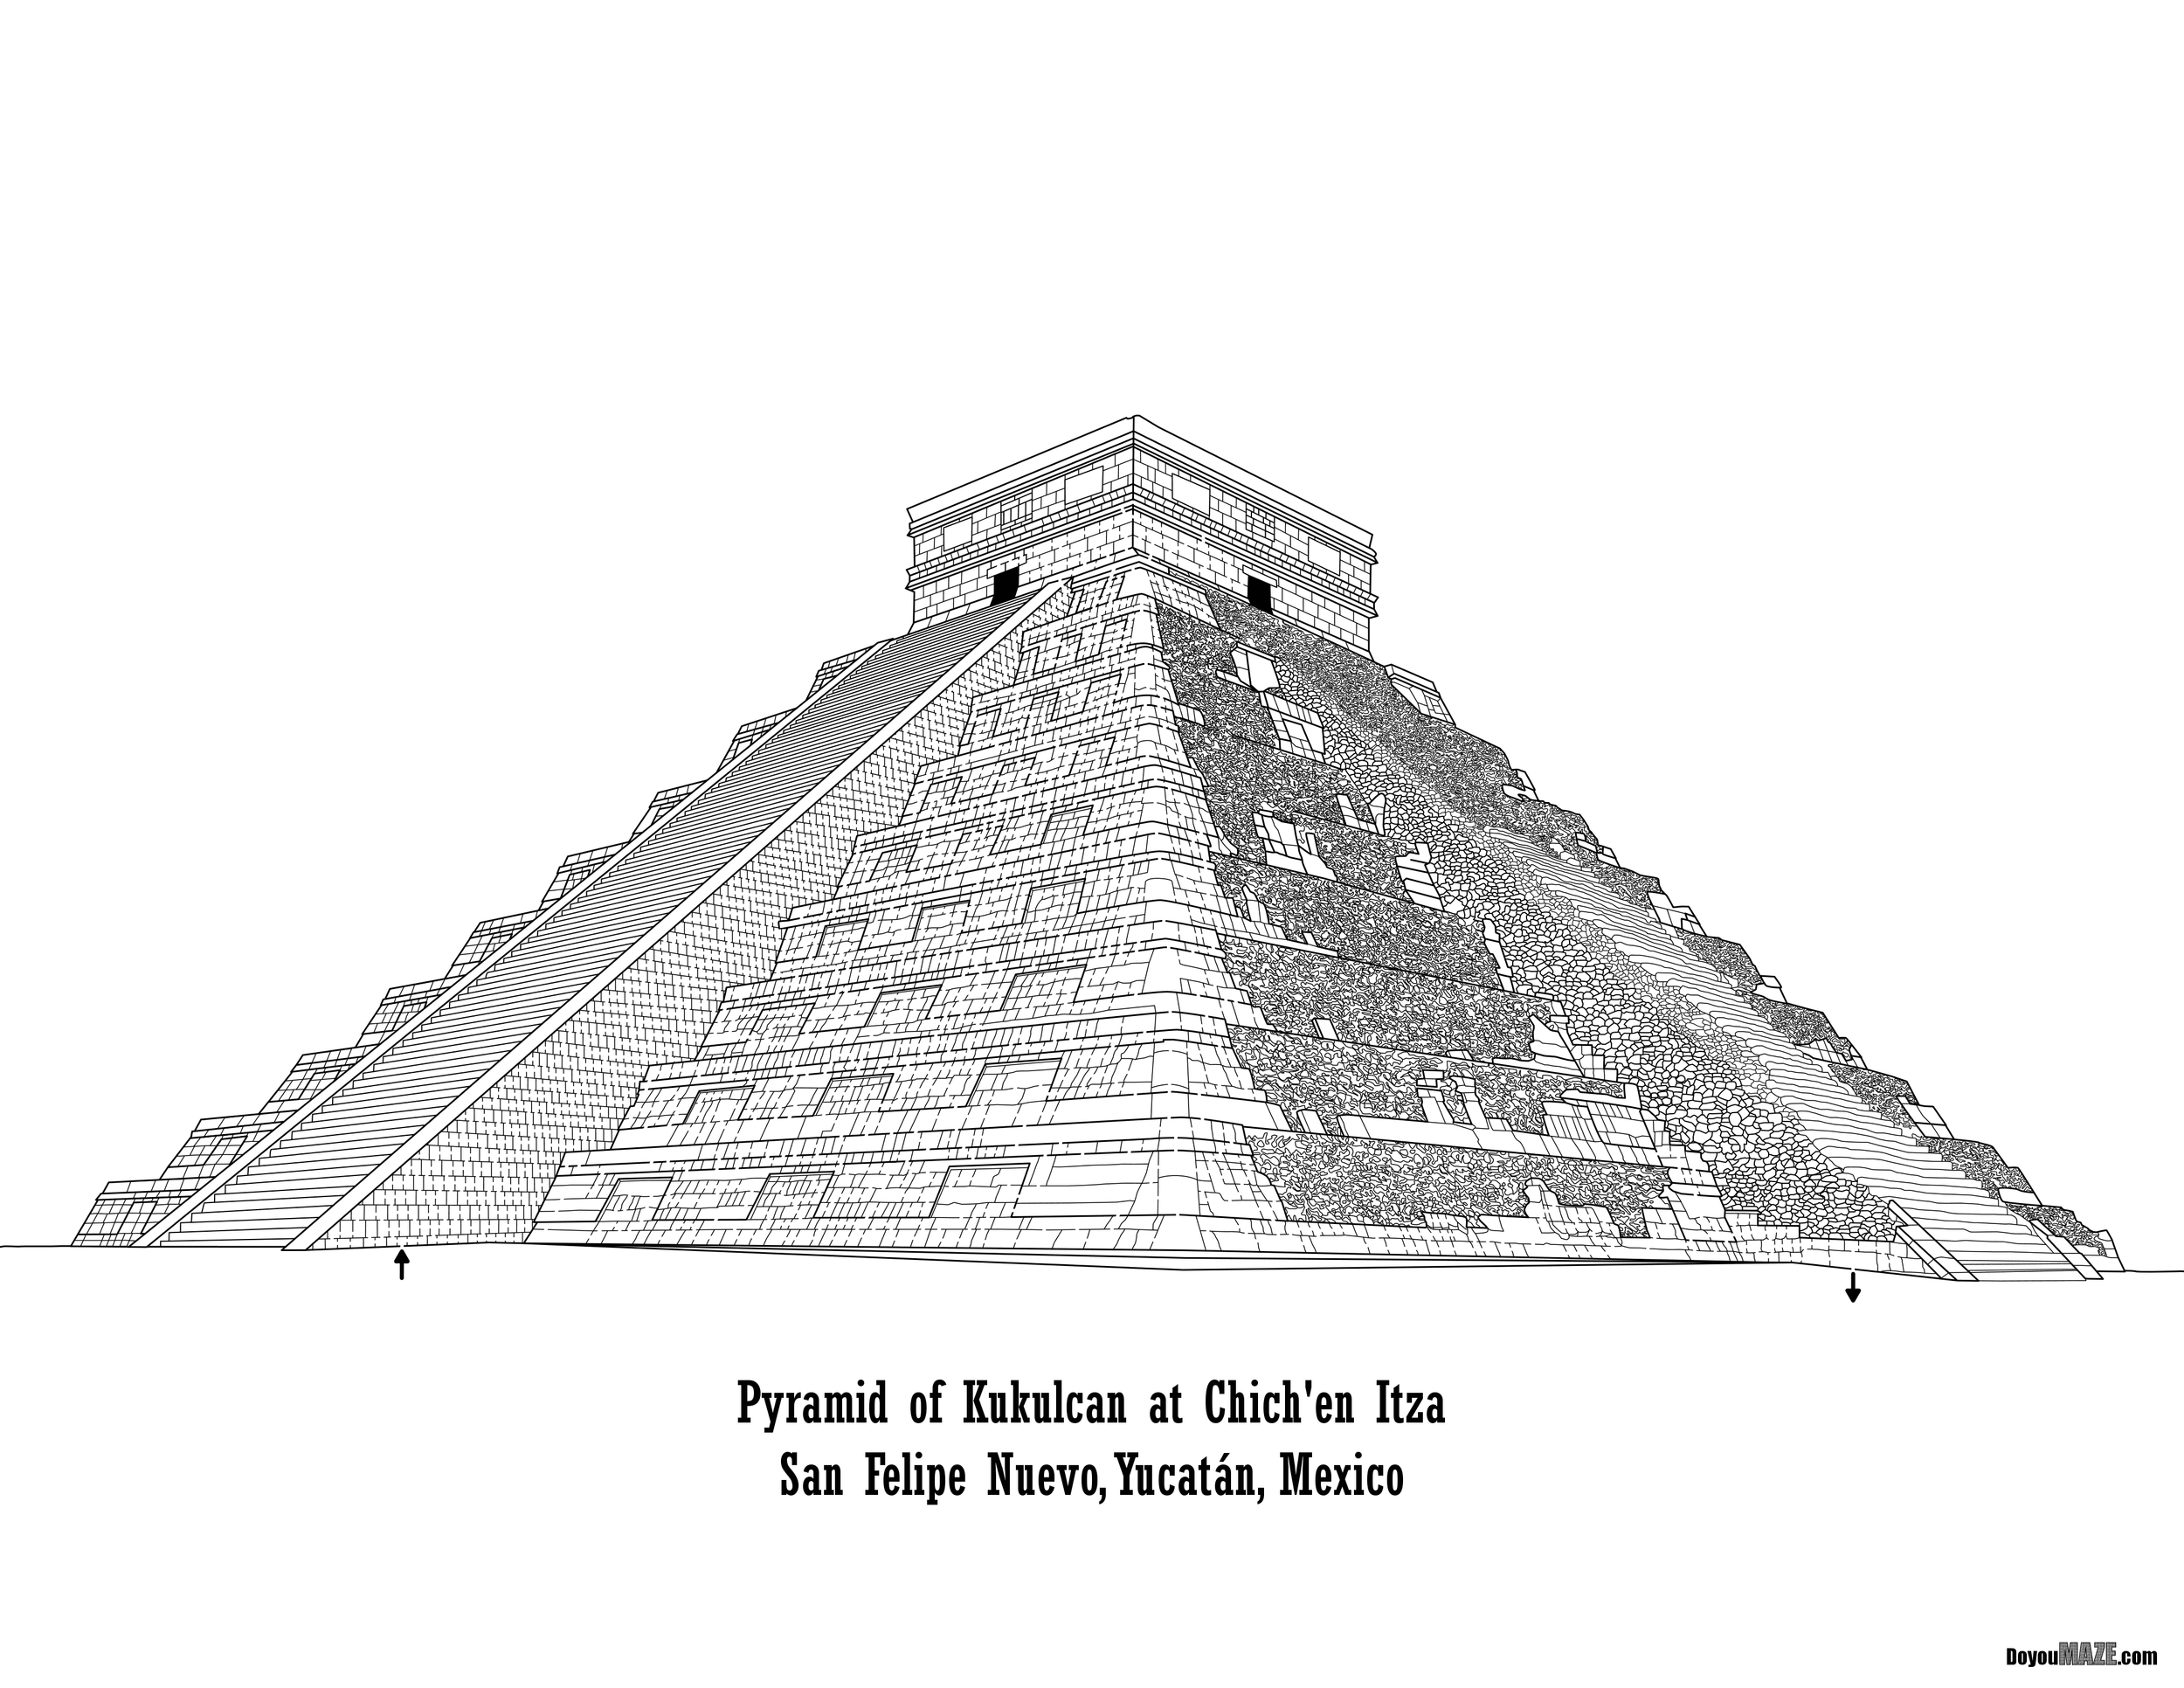
Chichen Itza Pyramid Maze - the stones make a natural location for making maze pathways between

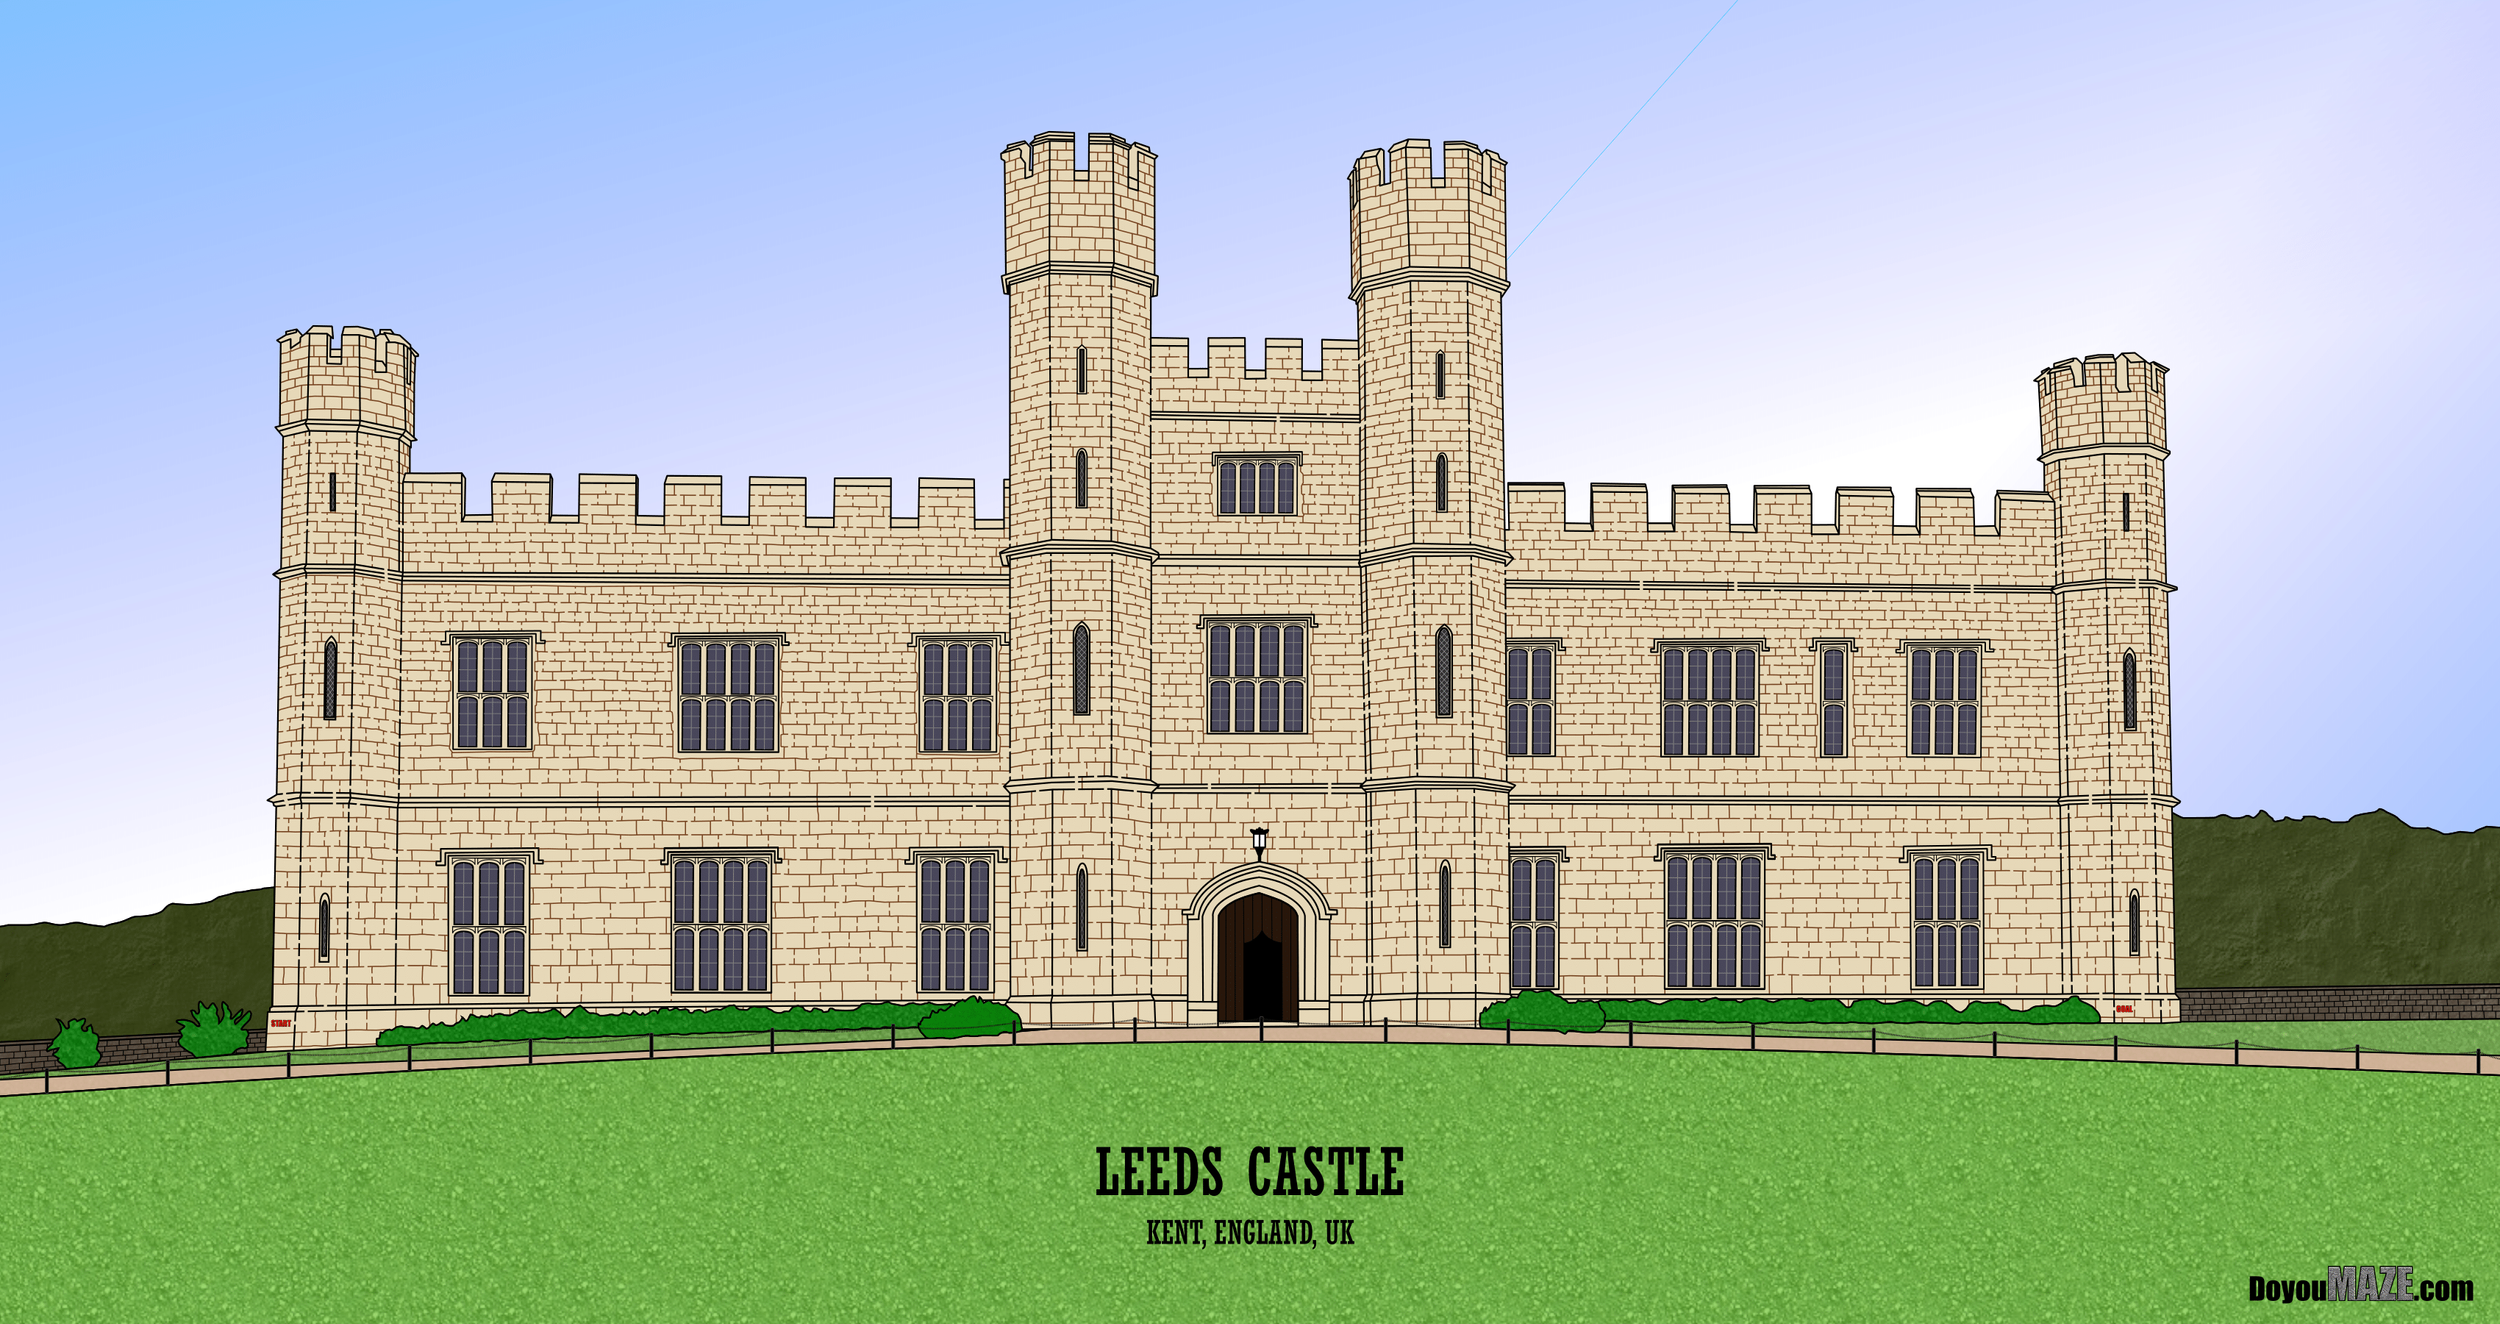
Leeds Castle Maze - Bricks also work well to create cuts into, making a grid-like maze

Heydar Aliyev Center Maze - And the panels on the building do the same - creating nice locations for a maze!

And now the more simple examples:

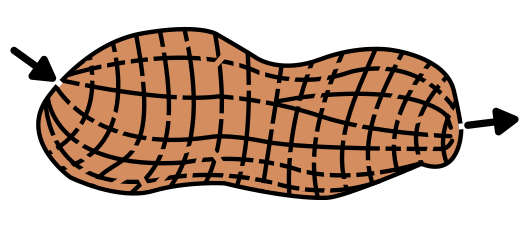
A great example of a Draw and Cut maze is this Peanut maze. The structure of the peanut makes for natural walls (it looks like a grid maze in some respects) that can be cut thru. There are no additional lines needed for this maze, only the drawing of a peanut and then the cuts to make paths.

Peanut Maze

And a second example of a Draw and Cut maze is this Pie maze. The structure of the pie crust and the crust topping made for natural paths after the initial picture of a pie was drawn. Notice that within the main crust of the pie the walls were free drawn to fit the naturally varied structure of a homemade crust.

Cherry Pie Maze

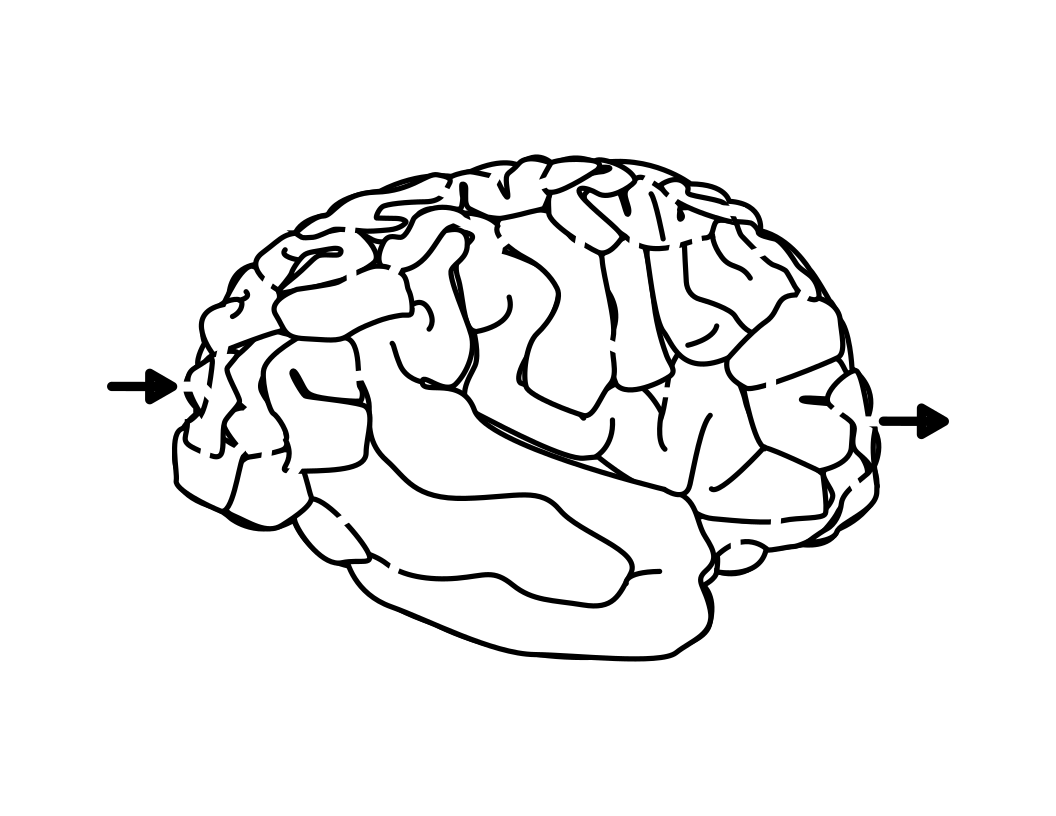
One of my favorite mazes that uses Draw and Cut is this Brain Maze. At first glance this is a drawing of a brain…wait..it’s a maze. That is what makes a great draw and cut maze IMO.

Brain Maze in black and white

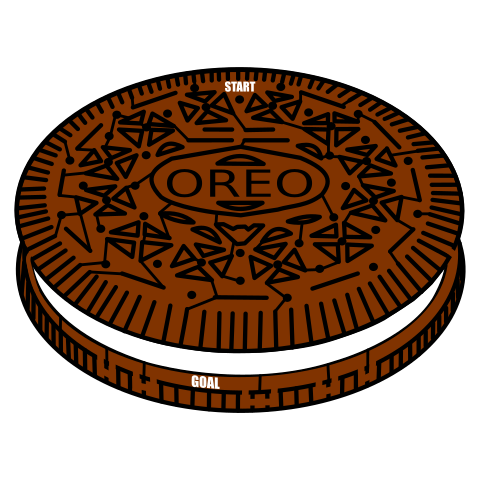
And here is my Oreo Cookie Maze. I needed to add a few lines to close up some pathways, but the overall maze construction is a draw and cut. The design on the cookie makes for a great template to make a maze.

Oreo cookie maze

If you prefer making labyrinths, you can find step by step labyrinth making instructions.

How to Create Maze Art in 6 Easy Steps + CASE STUDY

Have you ever wanted to create a maze ? What about a maze that has enough detail and complexity that it could be considered art ? I love creating maze art and I want to share with you my process. Let’s start with a definition of what exactly I mean by maze art. OK maybe a few possible definitions.

Maze Art - A solvable maze of a subject that is good enough that someone would consider hanging it on the wall as an art piece.

Maze Art - A piece of art that just so happens to contain a solvable maze.

Maze Art - A solvable maze made to look like something that is not a maze, like an object/thing/person/place/landscape.

Maze Art - A solvable maze made to look aesthetically pleasing or interesting and not just to be solved.

All of my definitions includes solvability. I do not include pictures that have design elements of mazes and labyrinths in them but are not solvable. Also, I think when you look at maze art you see the picture first and the maze is secondary (when looking at it, certainly this is not the case when designing it !!!).

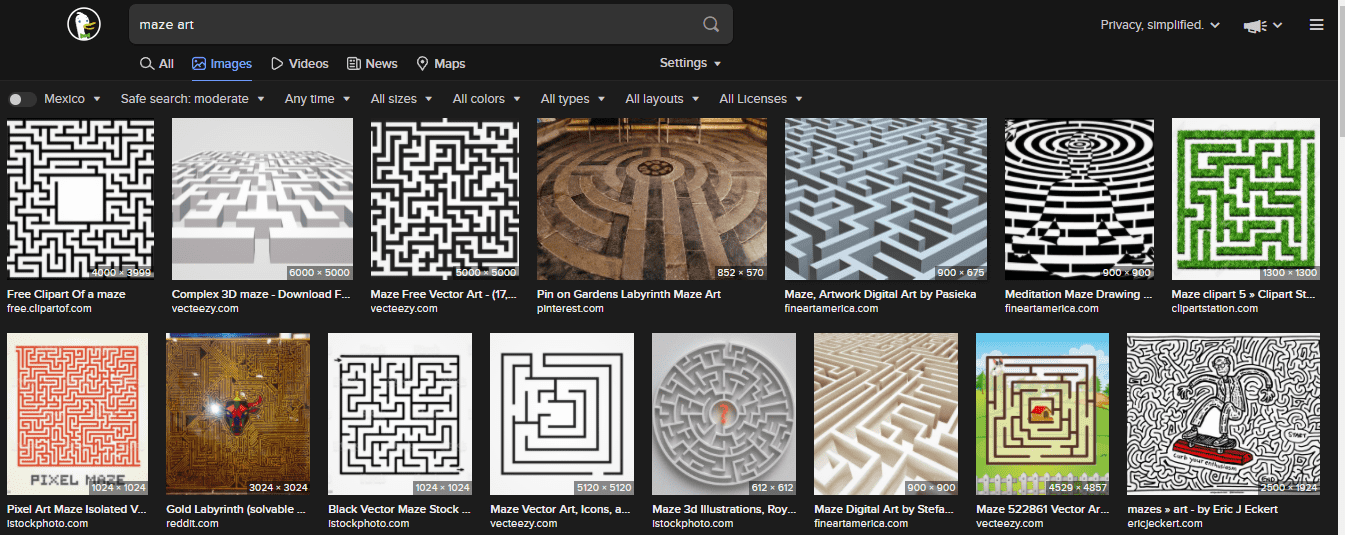
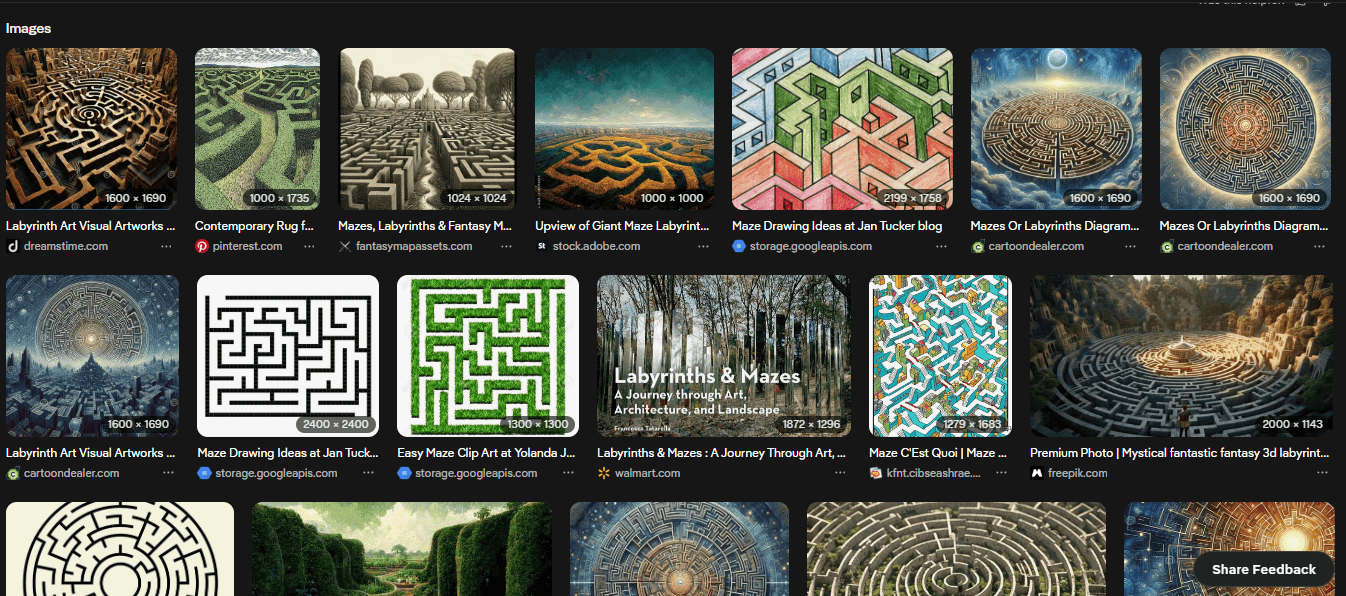
One place you will not find help on defining this is in the Image Search section of your favorite browser. The majority of what you will get back a variety of renderings of boring maze clipart. Well unless you are looking for maze clip art - then you have a very efficient search !!! Every time I do the search I am disappointed with very few exceptions. For awhile I thought AI hasn’t been trained on what is considered art yet (Maybe that’s a good thing?), but we all have seen the new AI art tools by now, so that is not it.

Here is what I found from 3 different searches (update from the future - I did this search in 2026 and the results are much better - maybe this quest is working ! Click on the images to see larger versions.

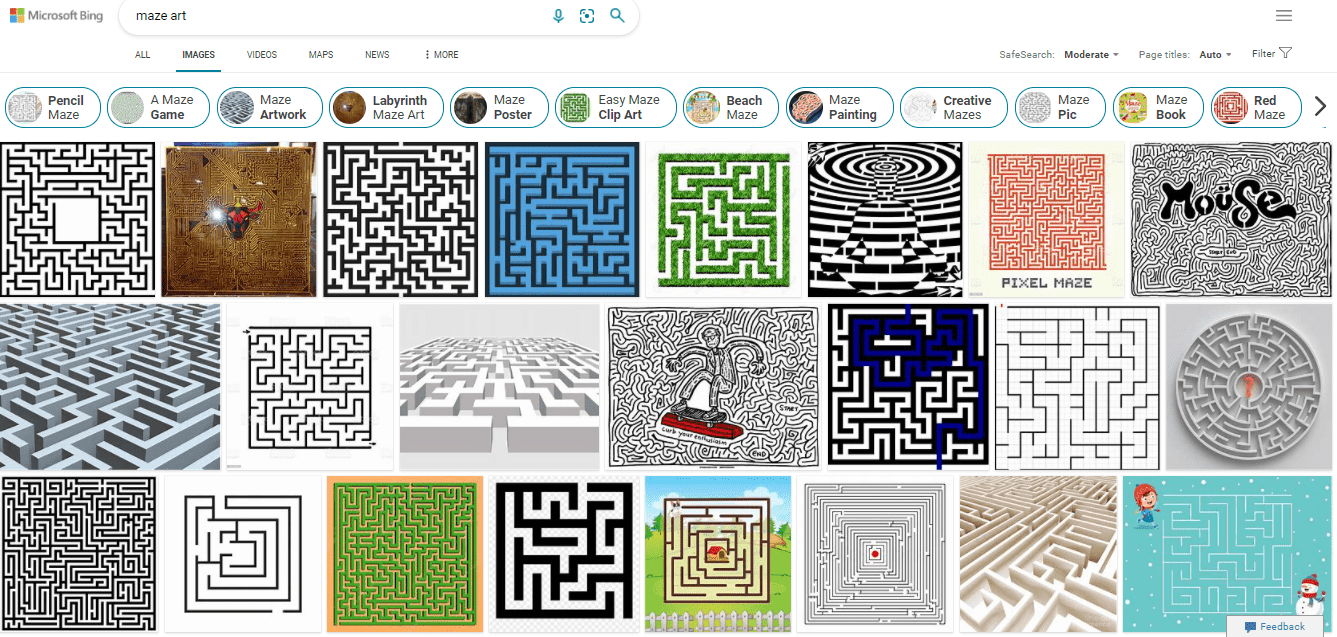
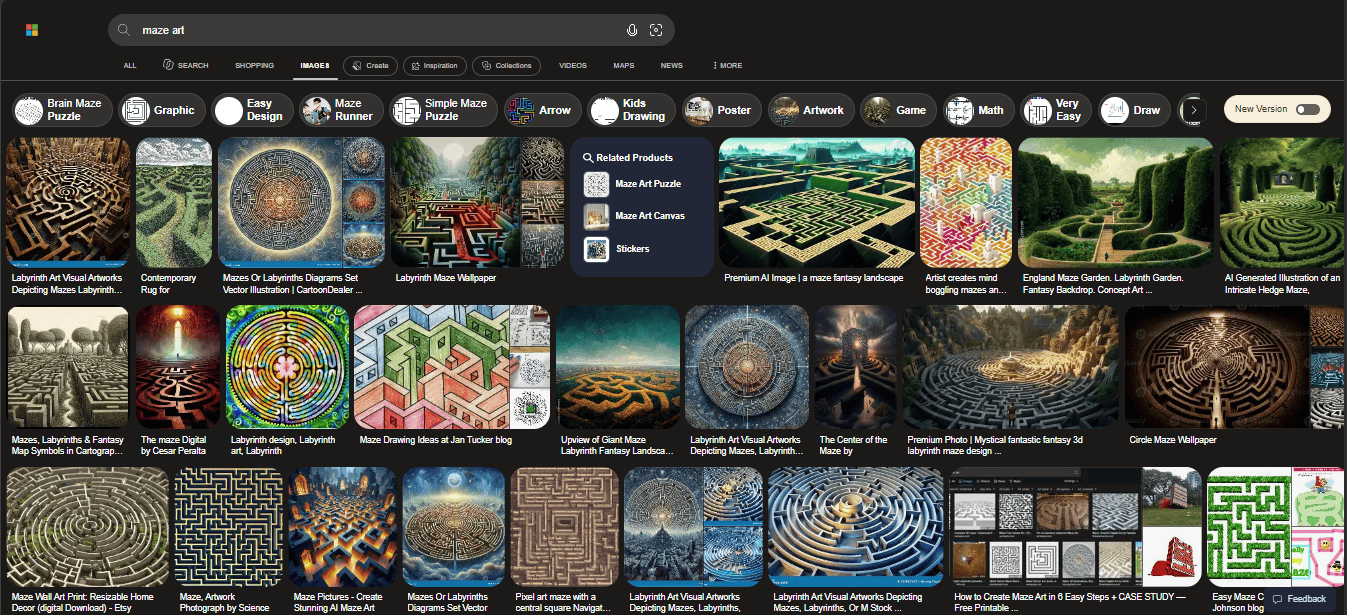
Bing: 2022: About half of the results are of basic clip art. Nothing I would consider putting on my wall except result #2 and the skateboarder in row #2. You also get some cool 3D renderings of mazes but none of them are solvable since they include no start/goal and are not fully viewable. 2026: I have my search set to exclude AI images, but it looks like many of these are AI generated. The images flipped from simple mazes to elaborate maze-like images that are not solvable. Maybe we come back in 2030 and we get the combined !

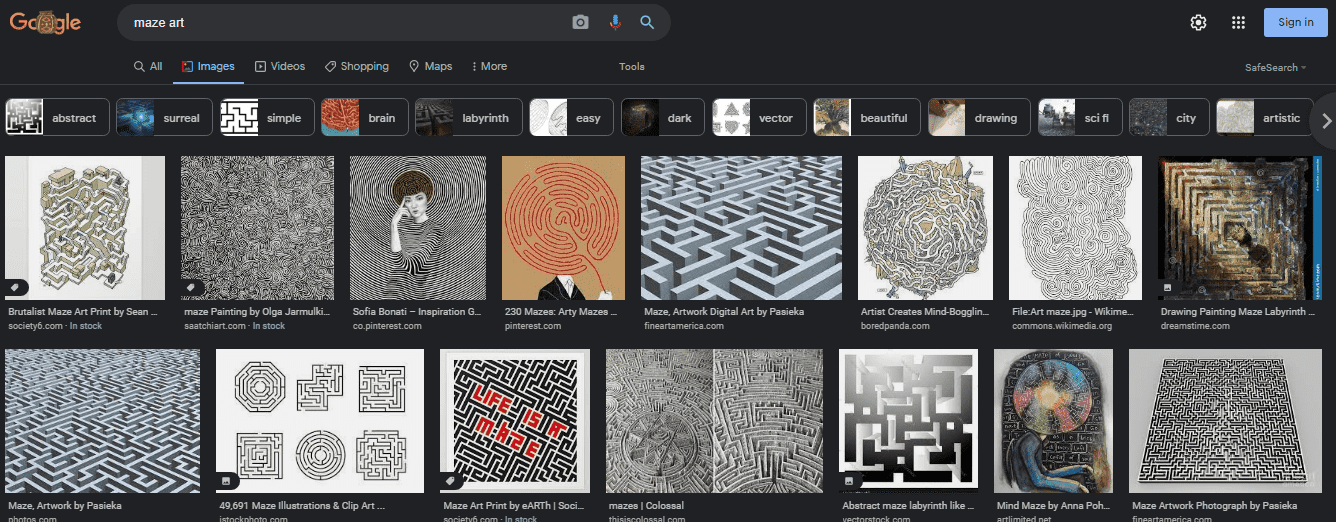
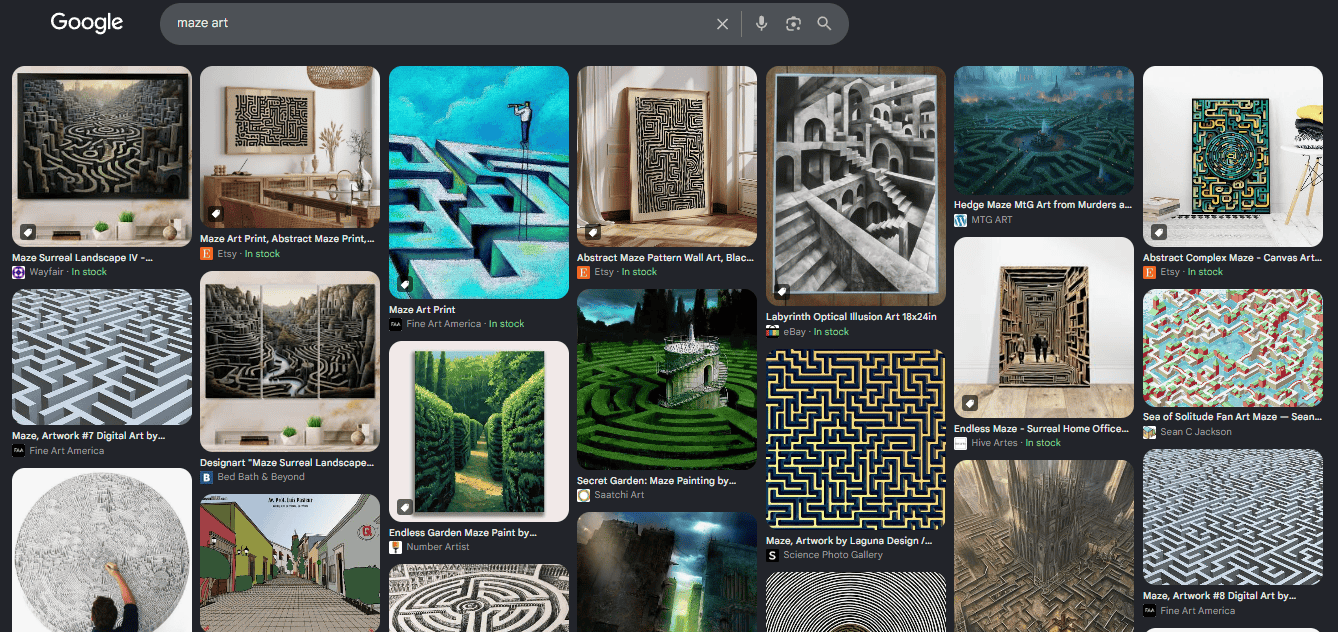
Google: 2022: Much better results. A few clip art images are mixed in. This also includes a mix of art pieces that include maze and labyrinth elements but they are not solvable. But this is closer to what I would hope for from the search at least. 2026: Similar to Bing, we get a lot of fun images but this has a few mazes mixed in. And in row 3, the second image…is one of my mazes ! I made it !

DuckDuckGo: 2022: More majority clip art of basic mazes. Generally a very similar look to the Bing results in a different order. 2026: Looks like a a lot of AI images to me. They are more interesting in 2026 at least.

Here are some examples that I have made that I believe would be considered maze art. They are examples that I think should show up in the searches above. If you are interested in solving them, downloads of all of these mazes can be found on this site.

Building Maze art:

The Alamo Mission Maze

The Alamo Mission Maze art

Lotus Temple Maze

Lotus Temple Maze art

And here are 2 Sign maze art examples:

Spillway Lanes Sign Maze

Spillway Lanes Sign Maze Art

Chicago Theatre Sign Maze

Chicago Theatre Sign Maze Art

You can also find on the site examples of landscape maze art, scene maze art, animal maze art and monument maze art. Take some time to look around !

So that is what I think maze art is, with many other examples and styles possible.

Today is first in a series of posts that will take you through how to make maze art step by step. Now this could mean converting a picture, or drawing something you think of free hand. One thing I can’t help you with is your drawing skills. If I say “Draw me a picture of Abraham Lincoln”, some of you have the skills to do that and some of you don’t, and even those with the skills will have different levels of detail and realism to their finished product. I can’t teach the skill of drawing. Sorry. But, regardless of your skill level, I hope you enjoy the process and consider trying to make some art yourself. Let’s get started.

How to create maze art in 6 “easy” steps:

Step 1 - Choose your maze subject

Seems easy right ? If you are going to make a maze you need to pick what the subject of the maze is first. But I don’t suggest you grab the first photograph you have. Here are some things to consider when making a maze:

  • Objects with right angles are a natural thing to make into mazes. Think about architecture. Buildings are a natural subject to make a maze of. They are made of geometric shapes and are filled with right angles whether it is a house or a skyscraper.

  • Consumer goods make good subject matter also, but chances are you won’t want to invest time in making them. A Bike, lamp, radio, television, desk, and chair could all become maze art. I’m not sure anyone gets very excited about them, but they are possible.

  • Faces are possible, but very difficult for most people (If they are easy for you congratulations !). Any maze art includes a drawing of the subject matter first and foremost, so doing a maze of a friend means you have the ability to draw your friend and it to be recognizable as them. This can be easier if your friend has an extremely recognizable look, say someone like Abraham Lincoln - a large beard and hat with a gaunt face gets you relatively close.

  • Ideally, the picture you choose should not be too busy. Too much detail can be difficult to make into a maze. You do have the option to ignore the detail. But think about a picture of 4 faces vs a picture of 1 face. 4 faces in a picture with all of their individual detail will be very difficult. 1 face is enough.

Step 2 - Take a photograph of the subject (OPTIONAL)

  • If you don’t already have a photograph of your subject matter, take one. Remember from step 1 to make the picture as minimalistic as you can.

  • Taking the photograph also means prepping it as a “before” photo if you are doing a before and after version of the subject. Crop as needed, adjust the brightness, etc.

  • If you are doing something from memory or doing fictional subject matter, no photo is needed obviously.

  • And finally, you can find a photograph to base your maze off of if taking a photo yourself is not feasible. For presentation purposes, having the rights to a photograph will help you to display it in the future.

Step 3 - Draw the Main outline of the subject

  • Determine how you will deal with an object’s perspective. By this I mean if you are making a maze of an object that is square or rectangle in real life it is likely the photograph will not be perfectly square/rectangular. Do you want to represent a building as it is (perfect angles), or how you see it (your perspective - the building is slightly smaller at the top). Maze lines are easier to make without perspective, but either can be done.

  • Use the photograph to draw the major outline of the maze. If you are doing this digitally (As I assume you are) you do not need to leave openings for the paths/entrance/exit.

  • The outer walls of the maze should be done with a thicker maze line to give the picture definition. Inner walls that define the picture should be a smaller thickness (with some exceptions based on the subject).

Step 4 - Begin the design of the maze

  • If you aren’t sure what maze construction you are going to do, check out this section for some ideas. I will say with maze art you will find it looks best when done with free drawn or standard pathways. I also like to use the natural features of the subject as the maze walls where possible - see the Alamo Mission maze above - the bricks naturally became the walls; and the Museum of the North Maze above where the metal panels naturally created a grid maze format.

  • Choose the start and goal, ideally on opposite sides of the picture.

  • Choose the wall design you will use to make the maze walls. Regardless of the design you choose the walls will need to be a smaller width than the previous outer and inner walls. There are many types of pathways you can use from a standard pathway to hand drawn, vertical, horizontal and many more.

  • Consider how difficult you want to make the maze for the solver. For most mazes you don’t want to discourage the solver by making it too difficult.

Step 5 - Draw the maze

  • It took 5 steps to get here, now do the actual work. Funny this is the shortest step to write but typically the longest to complete !

Step 6 - Make any aesthetic changes to complete the maze - Color, Size, Border, Title

  • Black and white is the standard coloring of most mazes, but some mazes will look even better if they are in color. Consider coloring your maze to enhance the way it looks.

  • Some mazes work best in larger/smaller scales. Consider changing the size of your maze to fit the desired presentation you are looking for. This is the advantage of digital mazes vs hand drawn mazes.

  • Consider adding a title and border depending on how your maze will be presented.

Congratulations on creating a piece of maze art !!

Making Maze Art - Case Study #1 - The Largest FREE Stamp in the World

Now I’m going to take you behind the scenes in my making of some Maze Art. Here is a real life example from a maze I made for the site, of the sculpture that is The Largest FREE Stamp in the World. Using the steps I outlined before here is how the Maze got made !!

Step 1 - Choose your maze subject

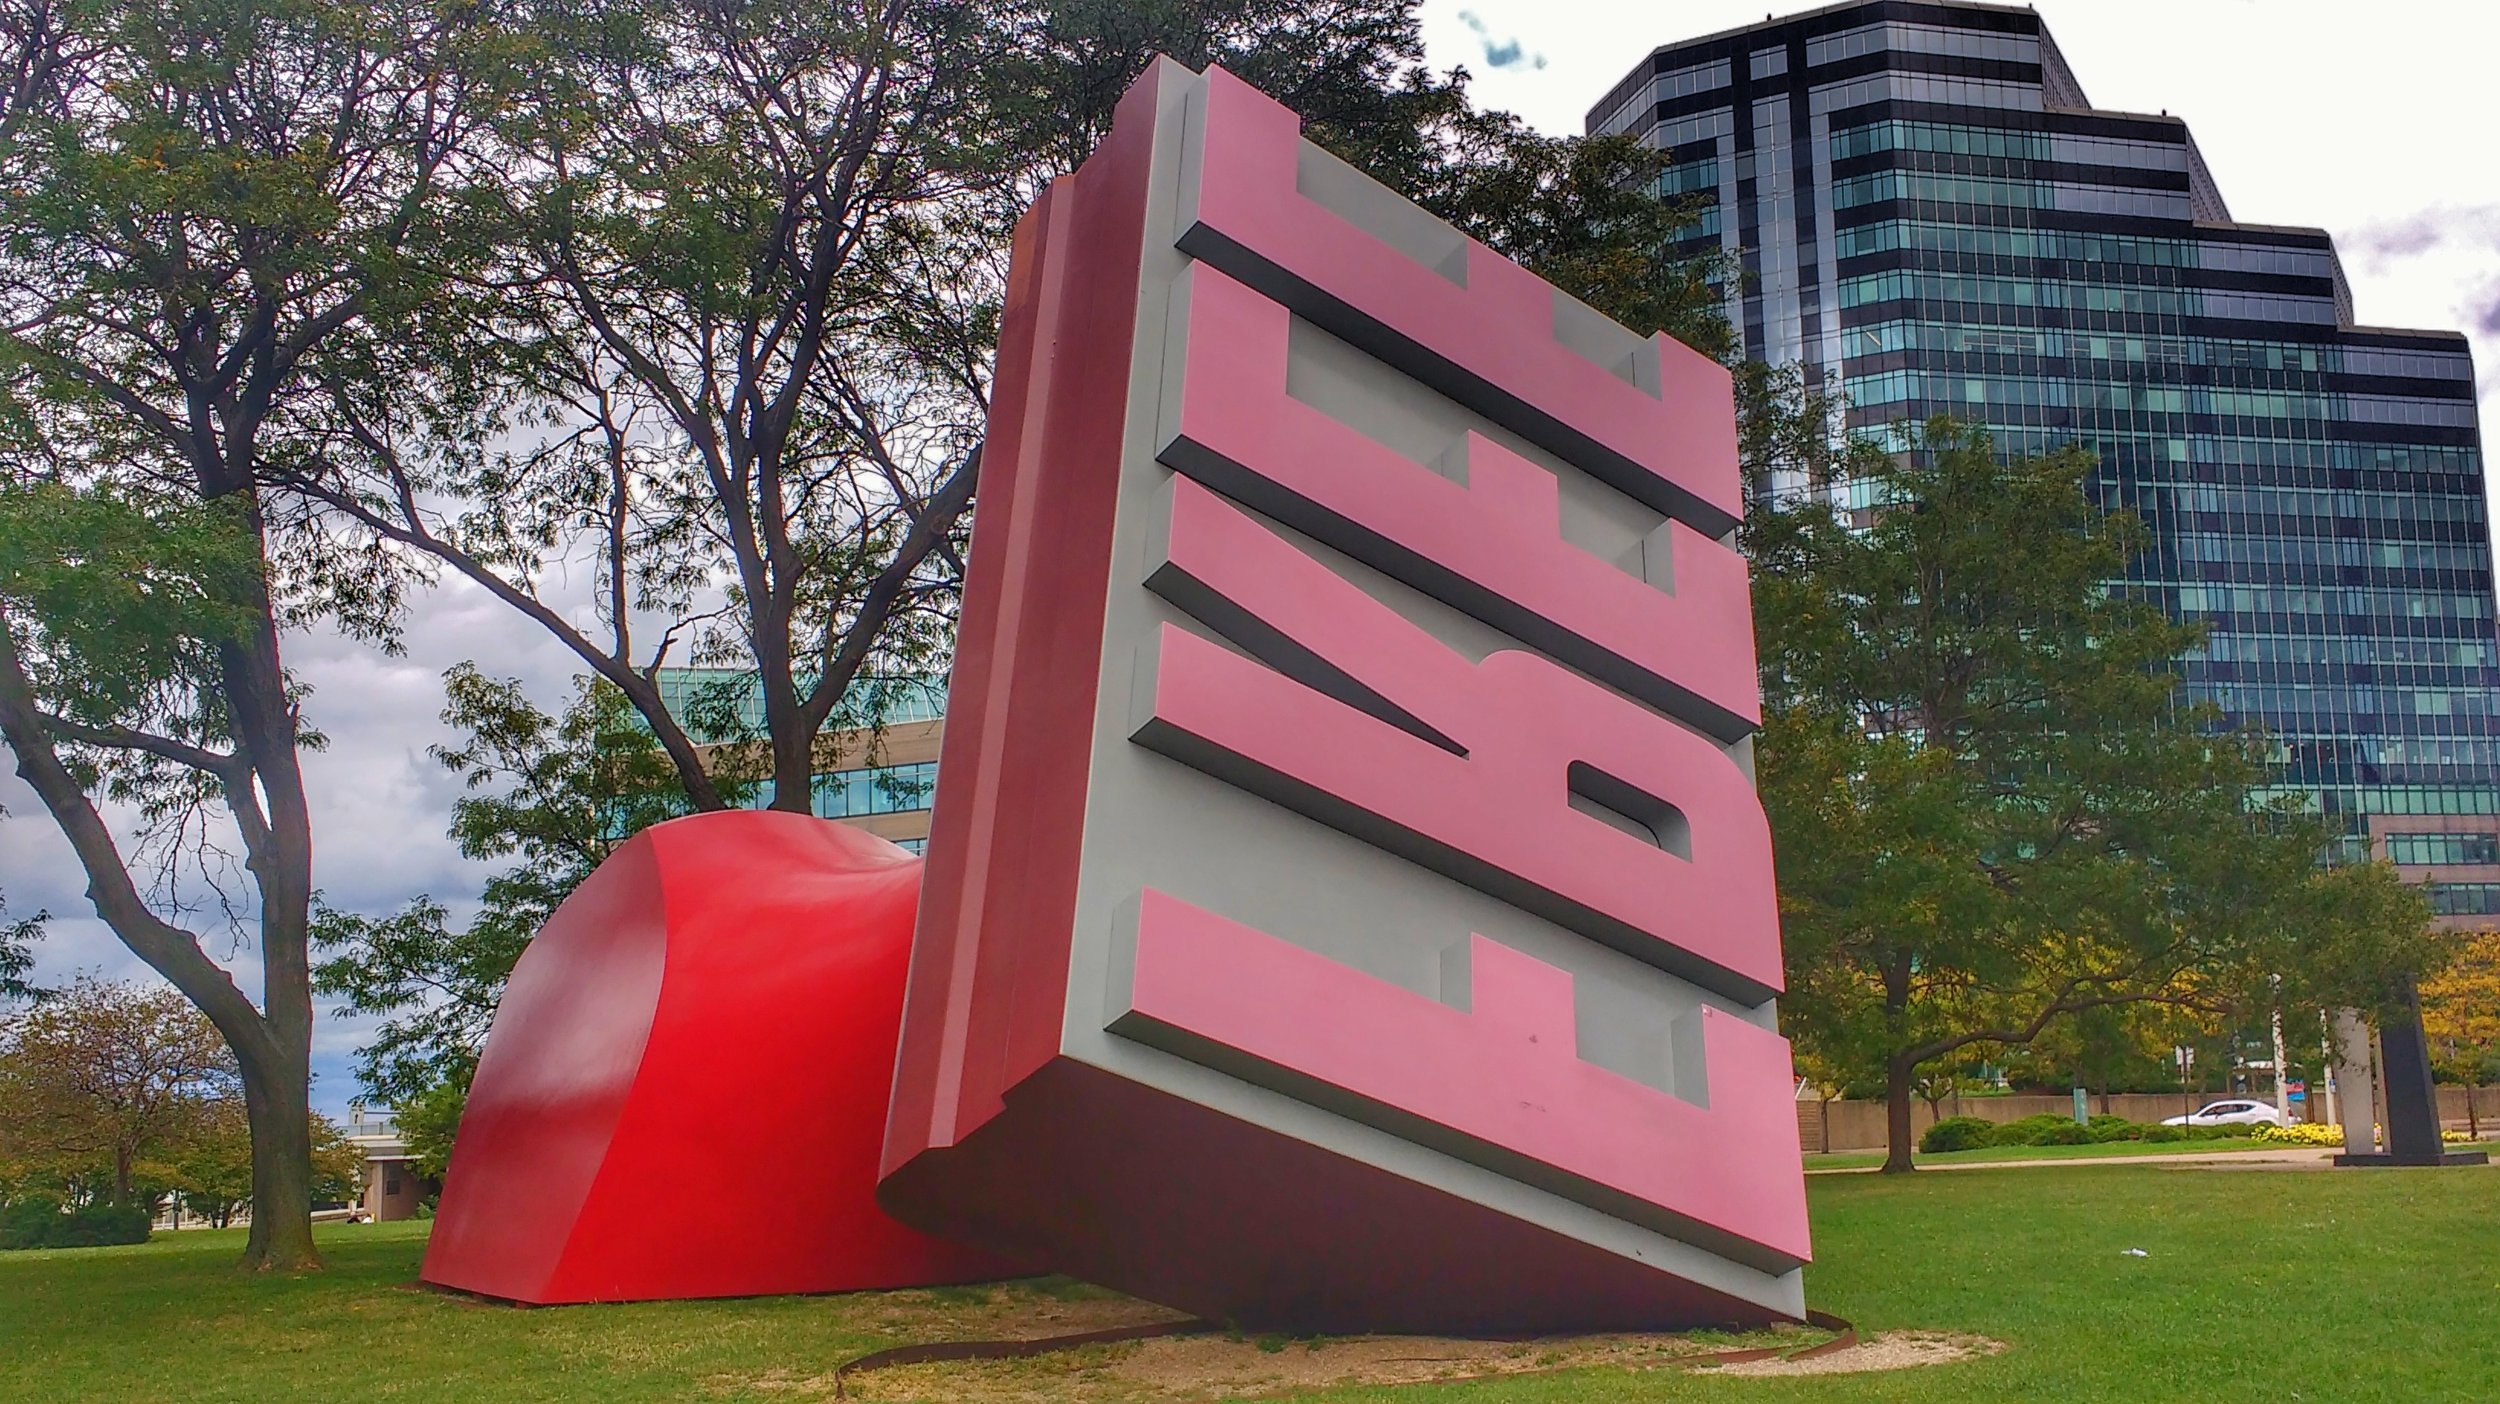
While previously living in Cleveland, Ohio I found my inspiration in the park. If you walk to the Rock and Roll Hall of Fame (and if you are ever in Cleveland that is probably why you are here) you will pass the FREE Stamp on your walk. The stamp is located in Willard Park on the northwest corner of East 9th Street and Lakeside Avenue, having been installed there in 1991. It has an interesting history that involves Standard Oil (Sohio) and their purchase by BP.

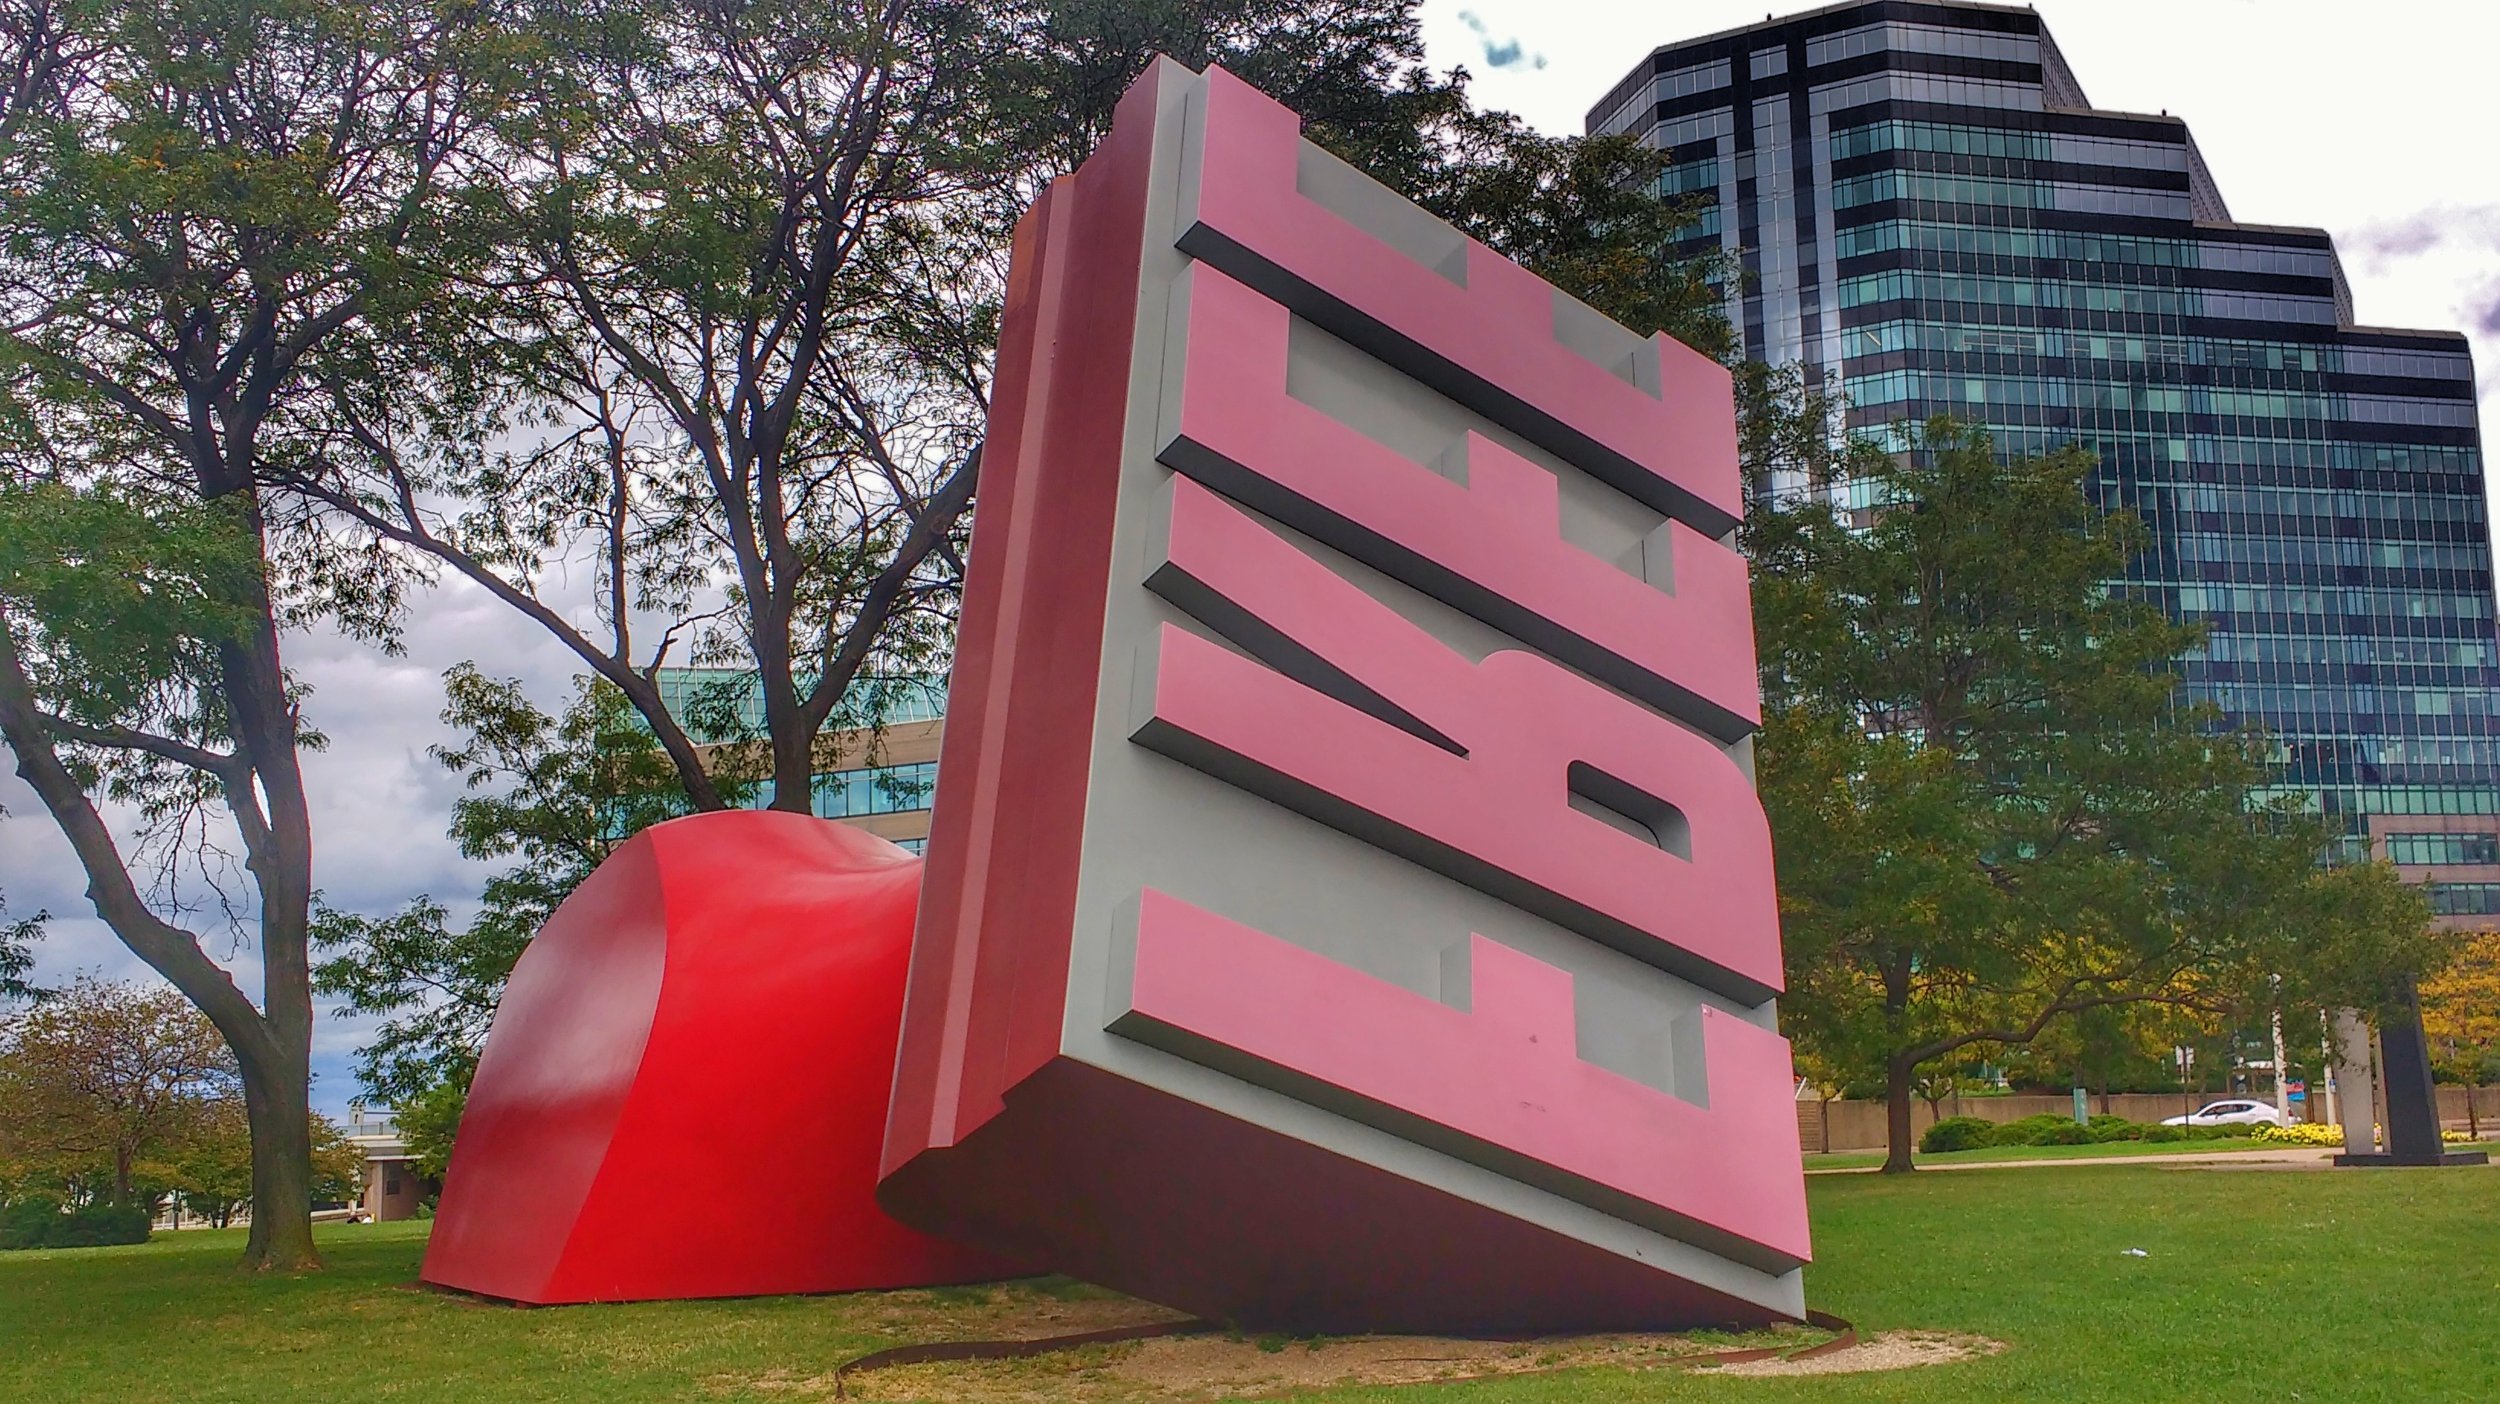
Step 2 - Take a photograph of the subject

I took many photos of the stamp from different angles so I would be able to narrow them down later.

Free Stamp photo - Cleveland Ohio

Eventually, I chose photograph #3, which I cropped and adjusted the color on to account for the overcast day. Here is the final version I used to make the Maze art:

Free Stamp photo - Cleveland Ohio

Step 3 - Draw the Main outline of the subject

Using the photograph in the background I made the maze outline. Here are some points in time during that outline process. You will notice that because this is a digital drawing so I can fix the FREE overlap you see later using layers.

Drawing Free Stamp step 2
Drawing Free Stamp step 3
Drawing Free Stamp step 4
Drawing Free Stamp step 5

Step 4 - Begin the design of the maze

I did not want much difficultly in this maze so I intended to make the dead ends obvious more quickly and have the maze spacing be wide. It seemed natural to make the internal maze lines somewhat match the shape of the sculpture. A typical left to right maze start to finish seems to fit the sculpture. So a relatively simple maze design. I used essentially a free drawn maze construction.

Step 5 - Draw the maze

Below are a few of the points in time in making the stamp maze. Notice that I sometimes rotate the maze in order to make the lines easier to draw at the correct angle. Also notice that the goal of the maze changes late in the process (panel 4) as I have a better idea of how I want the maze solver to maneuver through the maze as I make the internal maze lines. Also in Panel 4 I add a layer to raise the FREE part of the maze above the remaining drawing (most easily seen at the bottom of the last E which no longer has a line thru it).

Drawing Free Stamp step 6
Drawing Free Stamp step 7
Drawing Free Stamp step 8
Drawing Free Stamp step 9

Step 6 - Complete the Maze

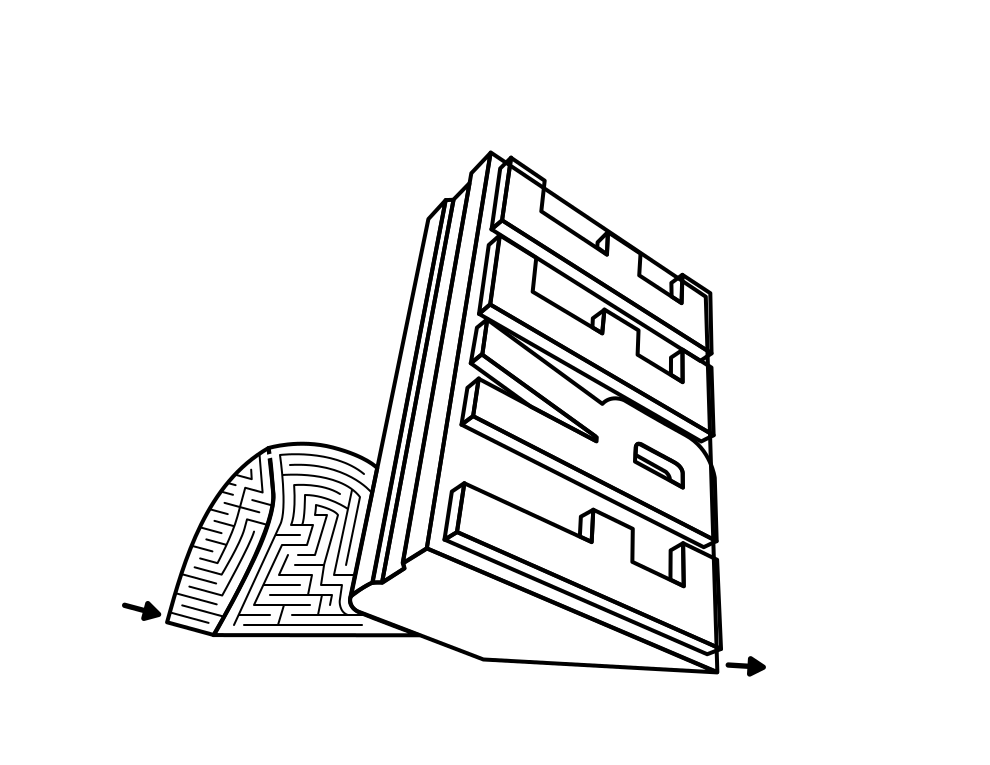
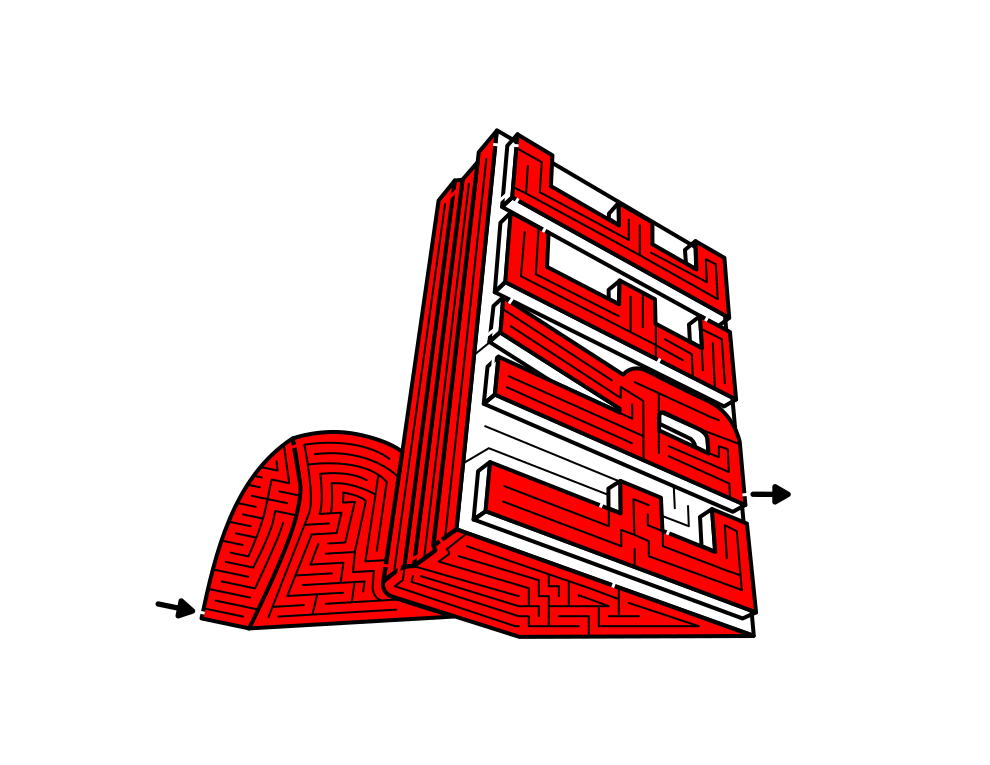
Here is the final black and white version of the FREE Stamp maze.

Free Stamp Maze black and white

I like how it came out, but I think this particular subject matter deserves to be tried in color, to see if it will enhance the maze.

Color the Maze (Optional)

Initially I did a basic 2 color approach. Sometimes less is more. Here is the simple red and white version of the maze:

Free Stamp Maze red and white

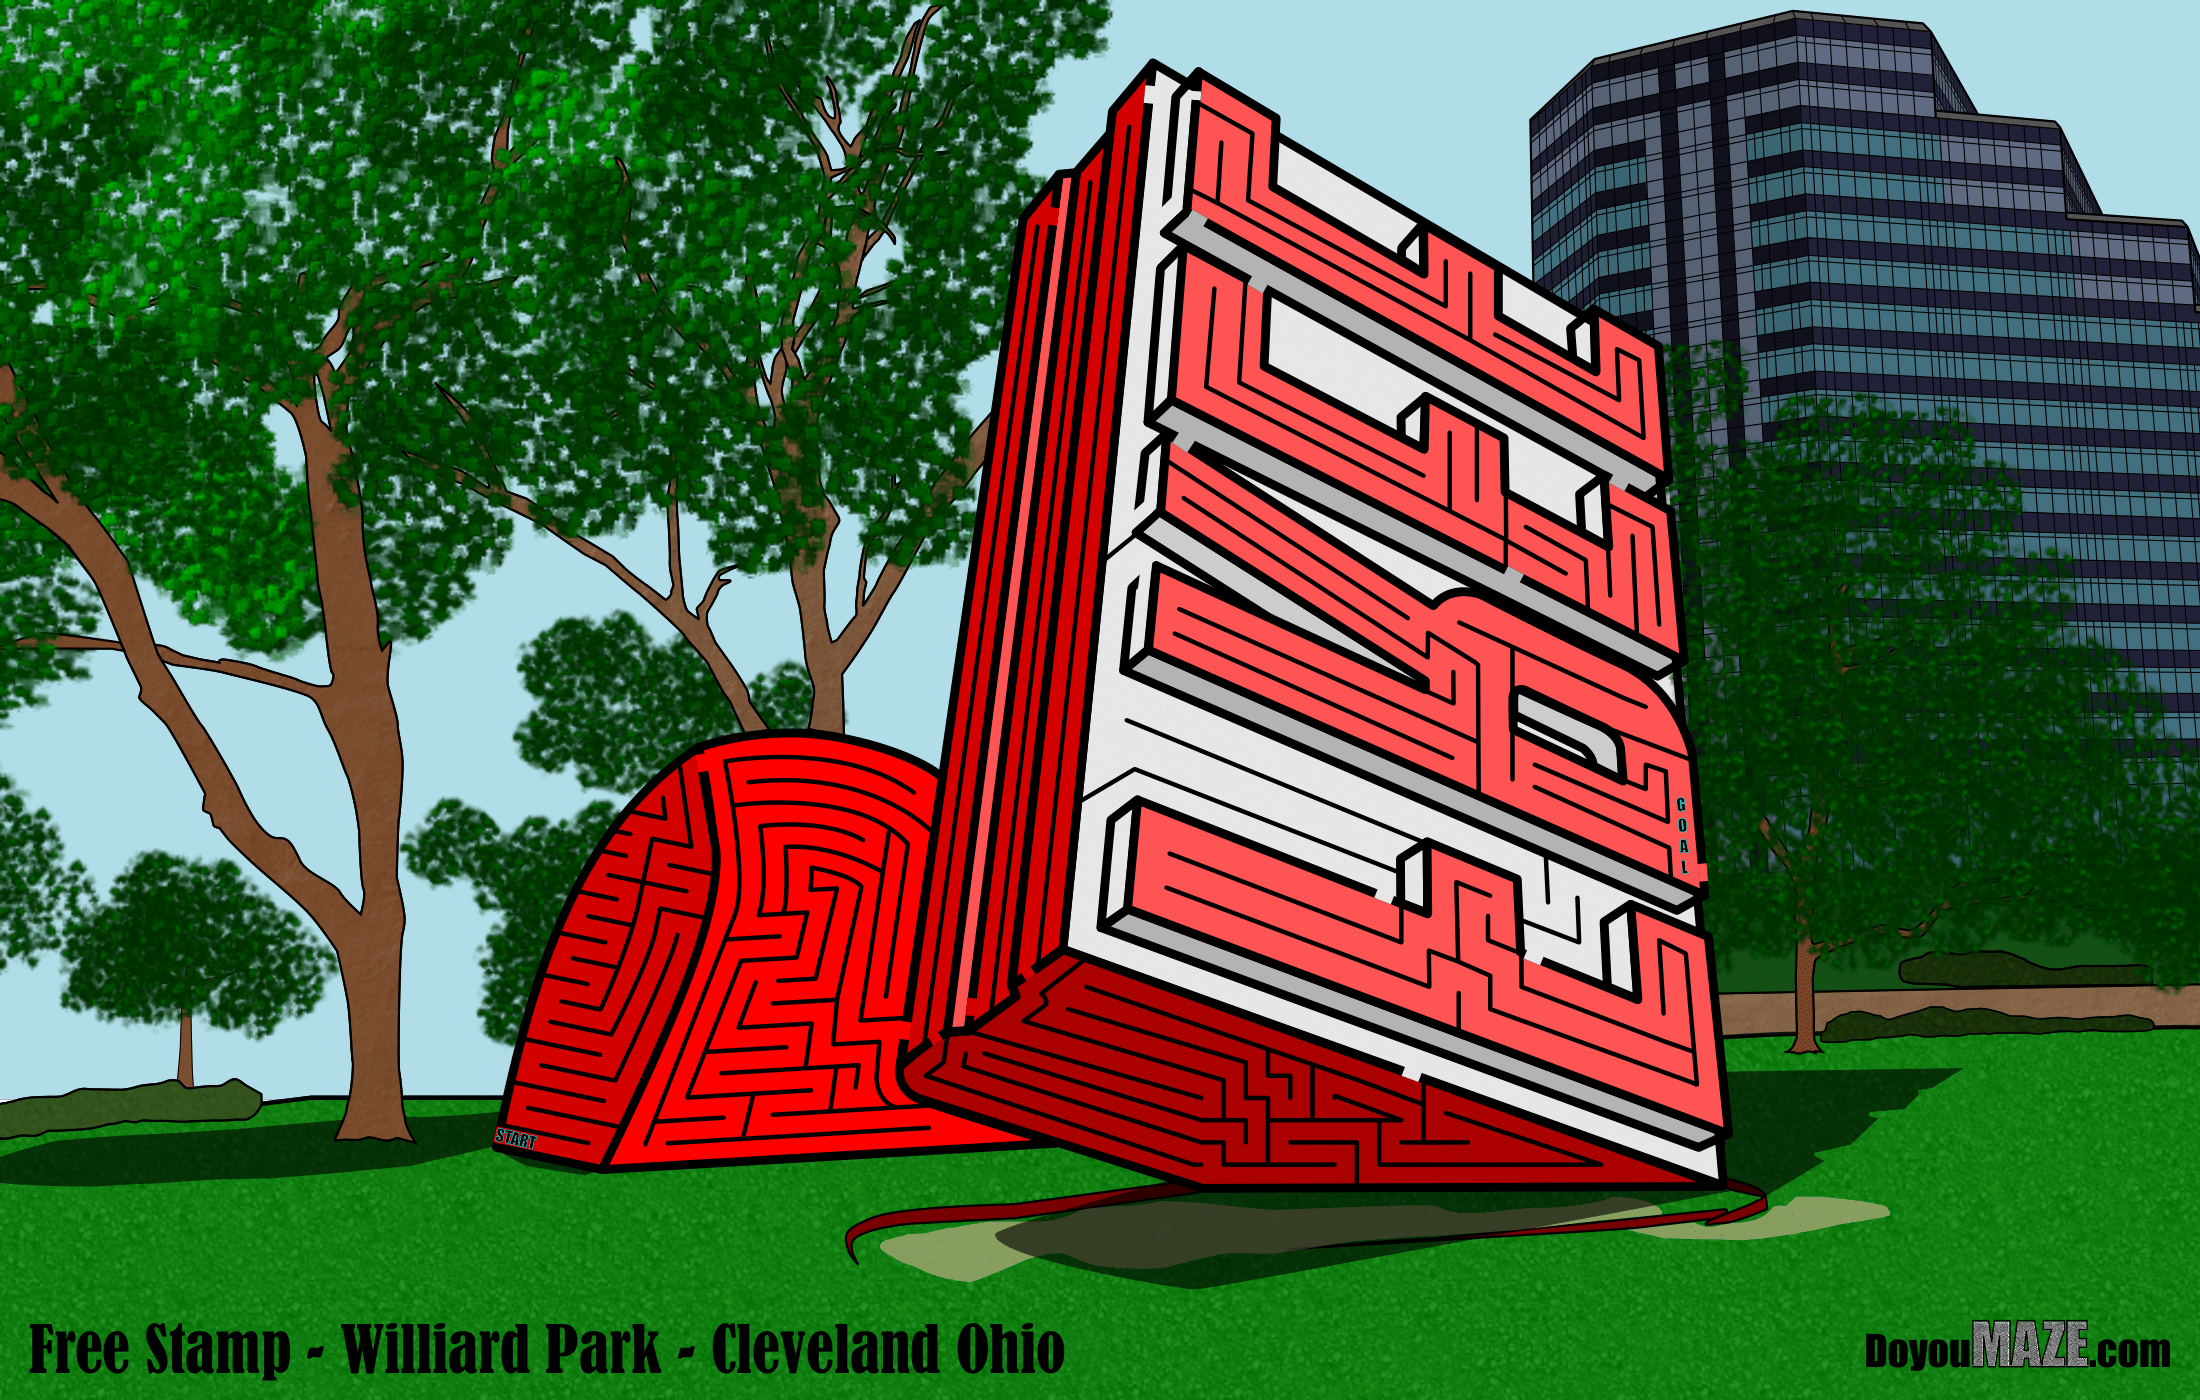
Not bad. But I thought I could do better with a more detailed coloring similar to what you would see in Willard Park. Here is my preferred and final version in full color:

Free Stamp Maze in color
Free Stamp in Cleveland, OH

I do need to mention that the inclusion of the black pathways changes the way you see the colors you select. If you were to try and color match the photo using the tools in your drawing program the result would look off (usually darker). Better to select the colors and adjust them on your own. Also, in order to see the pathways well, it is important to not make the shadowy underbelly of the stamp too dark !!

My original post ended here, but because I make my mazes digitally I can always go back and improve it. So I did. I wrote about the changes I made here: Maze of the Week 46 Redux - The Free Stamp (MOTW#177). I used some of my advanced tips and applied them to this maze. MAZE ART: ADVANCED TIPS TO CREATING YOUR OWN MASTERPIECE. After making 8 big changes, including adding shadows and a detailed background here is the final maze. The actual solvable maze has very minor changes but the presentation is much improved. And you can clearly see that I used my photograph above to draw this !

Free Stamp with added features.