In a series of posts I will show you how to make a maze in a wide variety of design constructions. Today I combine 5 different maze types that are all related. I will walk through how-to’s for each version, with examples and definitions. Each of these mazes use conditions (rules) to determine how a solver can move through the maze. Each example will use the state of Ohio as a template for easy comparison.
This is a long blog post so you can skip ahead with jump links to the section you want using this outline:
QUICK VISUAL COMPARISON GALLERY OF THE 5 MAZE TYPES
NUMBER MAZES
ADDITIONAL NUMBER MAZE EXAMPLES
LETTER MAZES
ADDITIONAL LETTER MAZE EXAMPLE & SOLVING TIP
PUZZLE MAZES
ADDITIONAL PUZZLE MAZE EXAMPLES
FREE DOWNLOADABLE PUZZLE MAZE BOOK
COLOR GRID MAZES
ADDITIONAL COLOR GRID MAZE EXAMPLES
CONDITIONAL PATH MAZES
HOW TO MAKE A CONDITIONAL PATH MAZE
THE MAZE DEFINITIONS:
Number Maze - A maze where moving from the Start to the Goal is done by following a series of numbers in a specific sequence. Examples are counting by 5’s, or by numbers that are divisible by 7.
Letter Maze - A type of conditional maze where the pathways are formed by letters that need to be chosen in a correct sequence, or of a particular type to form a path to solve the maze.
Puzzle Maze - A type of conditional maze that is solved by following a key that explains conditions to solve the puzzle. In a Simple puzzle maze there are no choices for the solver to make, only conditions of movement that must be followed to correctly solve the maze. In a Complex puzzle maze there is a puzzle to solve to create possible pathways for solving.
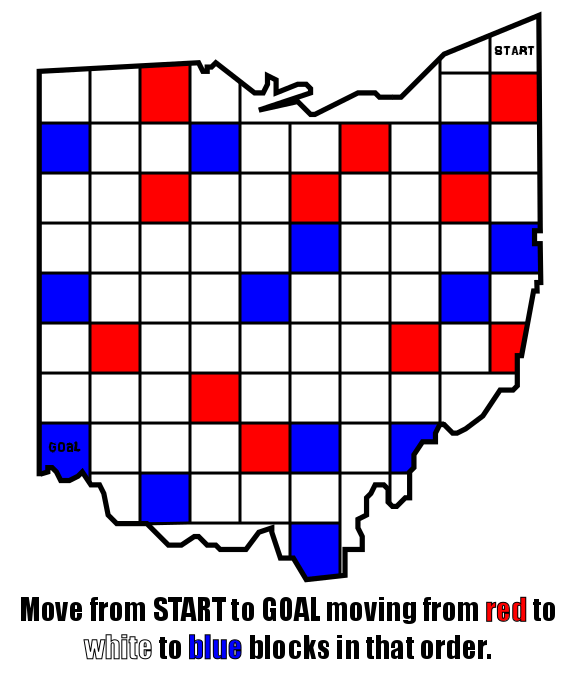
Color Grid Maze - A type of conditional maze where movement between blocks is limited to a specific sequence of colors.
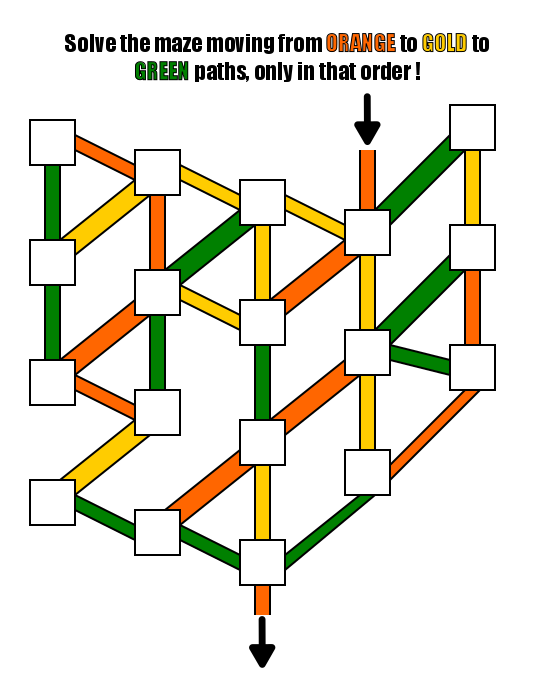
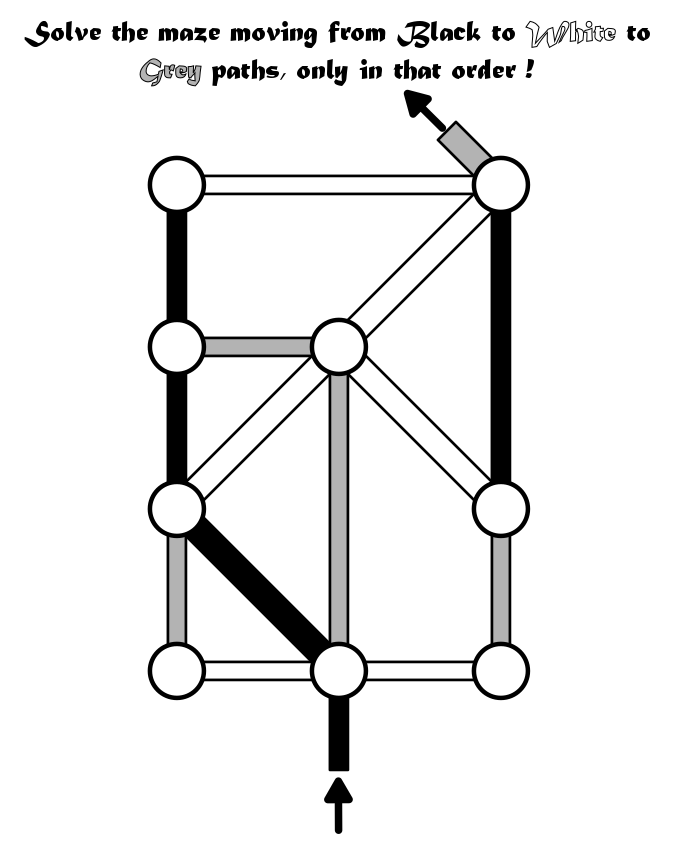
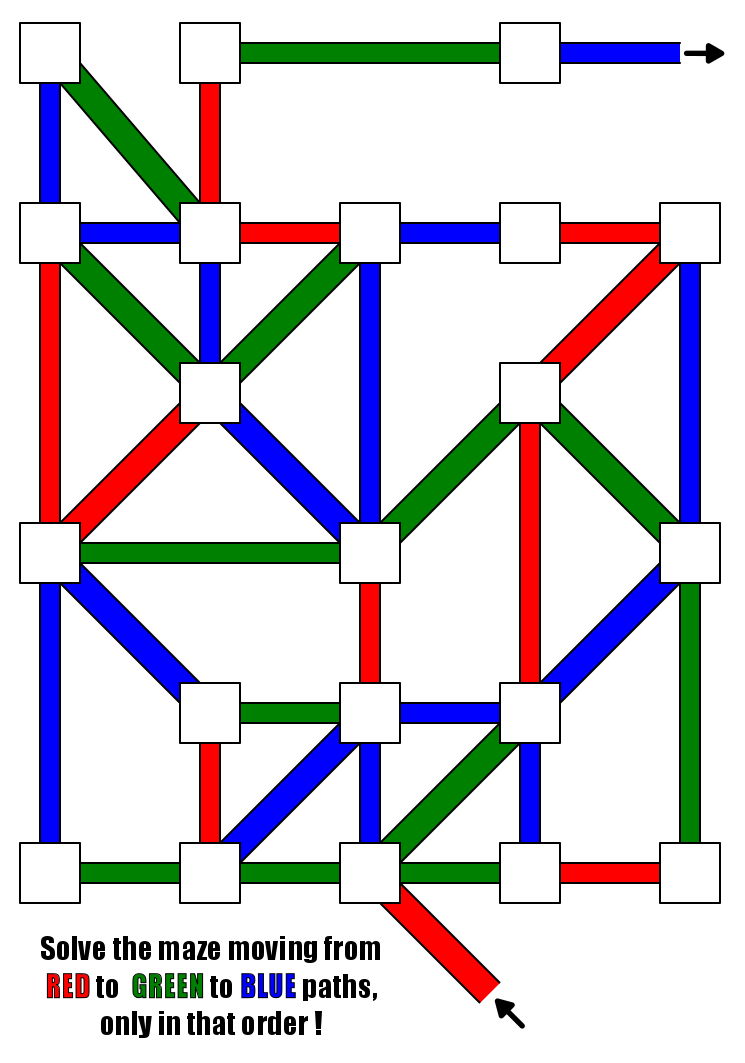
Conditional Path Maze - (sometimes called a Colored Path Maze) A maze where the paths that can be taken are subject to the conditions of the maze maker. Typically this involves a sequence of colored pathways that can only be taken in a specific order.
QUICK VISUAL COMPARISON GALLERY OF THE 5 MAZE TYPES
Notice that each needs directions in order to understand how to solve it. Click on an image to see a larger version of it.
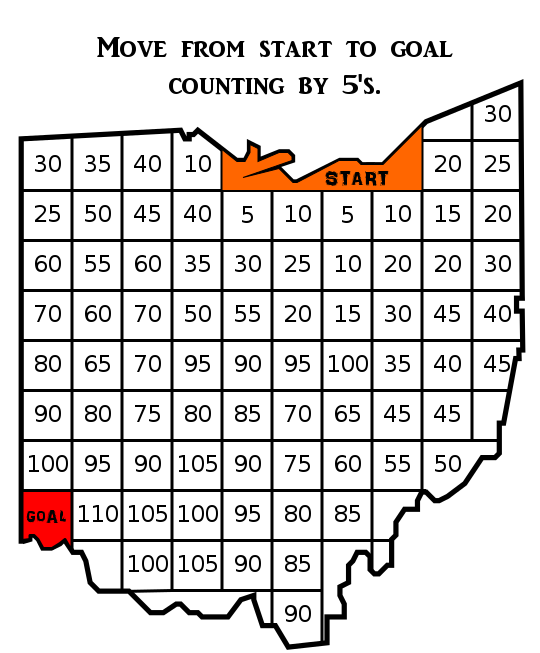
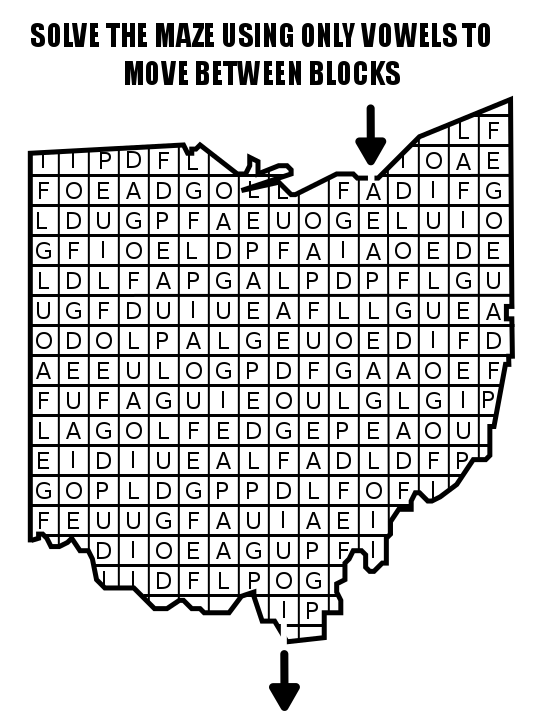
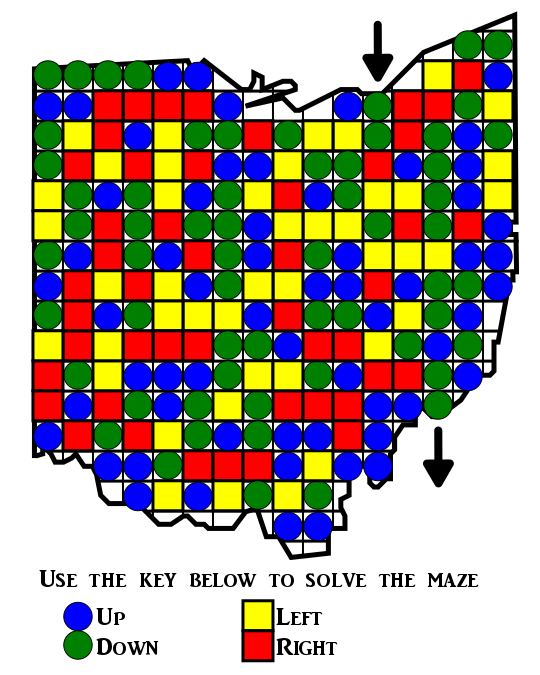
HOW TO MAKE A NUMBER MAZE
Step 1 - Draw the Outline
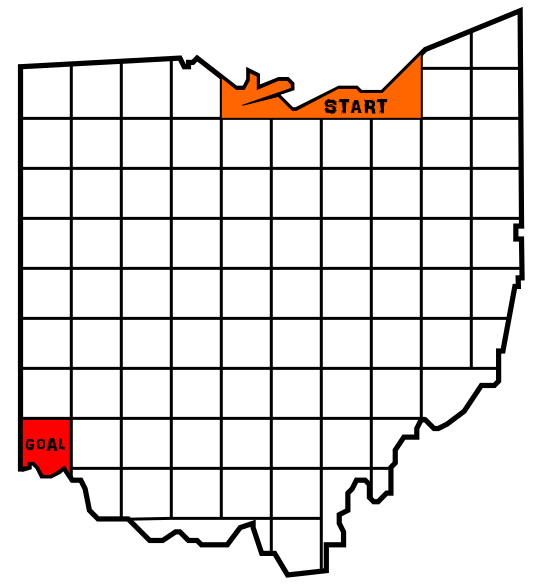
The outline of the maze makes the outer wall of the maze. It can be anything from a simple shape like a square, to a complex picture. The outline should be thicker than the internal lines to give the maze definition. In the example below I chose the state of Ohio. A more traditional maze uses a square or rectangle outline.

Step 2 - Draw a Grid
Draw a grid to fill the outline of the maze.

Step 3 - Choose the Start and Goal
I chose the large block in the north and a grid block in the far corner. As with any gridded maze the start and goal can be either internal or external to the outline. In my example I used internal.
Step 4 - Create the Solution
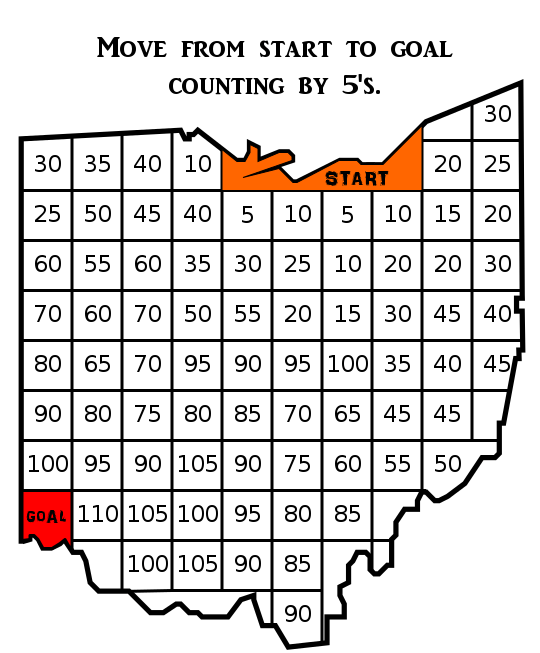
Make the solution to the maze based on the number system you have chosen, filling grids to create a path from the start to the goal of the maze.

Step 5 - Create False Pathways
Fill in any remaining blocks with incorrect answers, or short possible pathways that lead to dead ends. While a normal pathway is drawn to a dead end, a number maze uses possible numbers to create dead pathways. For a good example look at the 5 directly under the START. You may move left, right, or down to the 10 block. Two of these will become false moves.

Step 6 - Add Directions
Can be done at any time in the process, but must be done. Add directions to explain to the solver how they can move through the maze. In my example you can count by 5’s to move from start to goal.
Step 7 - Create a Final Solution
Highlight the correct path in the final version of the maze to create the final maze solution (shown here in gold).

ADDITIONAL NUMBER MAZE EXAMPLES
Here is another example of a Number maze (here called a counting maze) made for children. The structure is a more normal rectangle shape for a number maze and the start and goal are items, in this case a worm going to an apple.
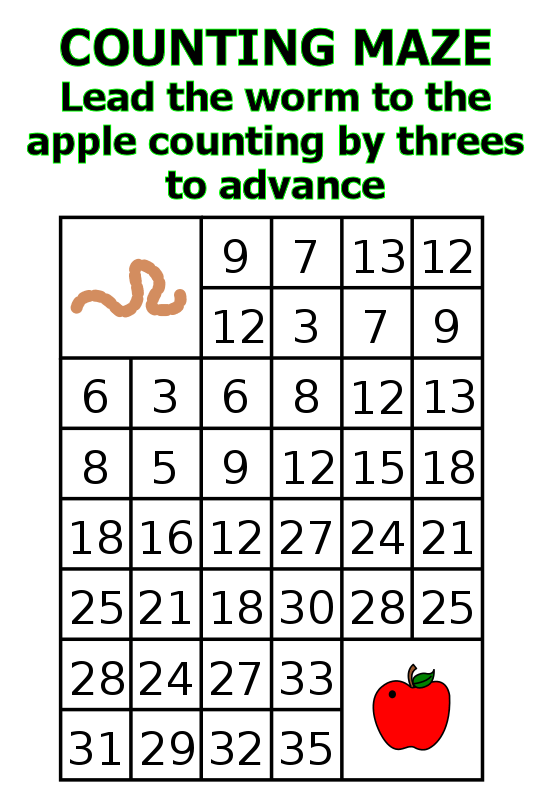
The next example uses a slight variation on the number maze - using larger number to move forward in the maze.

Size and complexity can make a number maze complex. Use only Prime numbers (google search…). Here is larger maze using division.
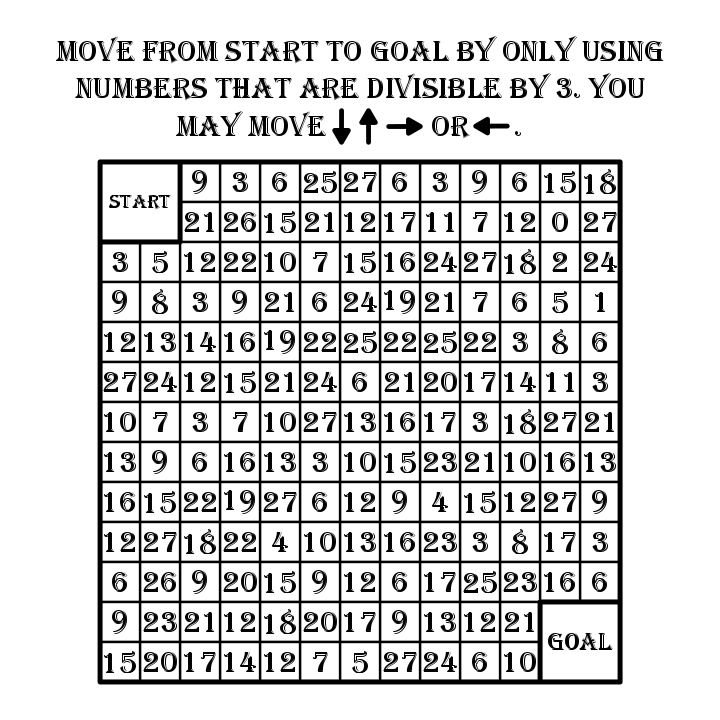
HOW TO MAKE A LETTER MAZE
Step 1 - Draw the Outline
The outline of the maze makes the outer wall of the maze. It can be anything from a simple shape like a square, to a complex picture. The outline should be thicker than the internal lines to give the maze definition. In the example below I chose the state of Ohio. A typical letter maze is square or rectangular in shape.
Step 1.5 - Choose the Start / Goal (optional now)
For the below example I chose the start of Cleveland and decided to choose the goal after completing the solution. As with any gridded maze the start and goal can be either internal or external to the outline. In my example I used external.
Step 2 - Draw a Grid
Draw a grid to fill the outline of the maze. Many of these mazes will be grid shaped squares and rectangles.
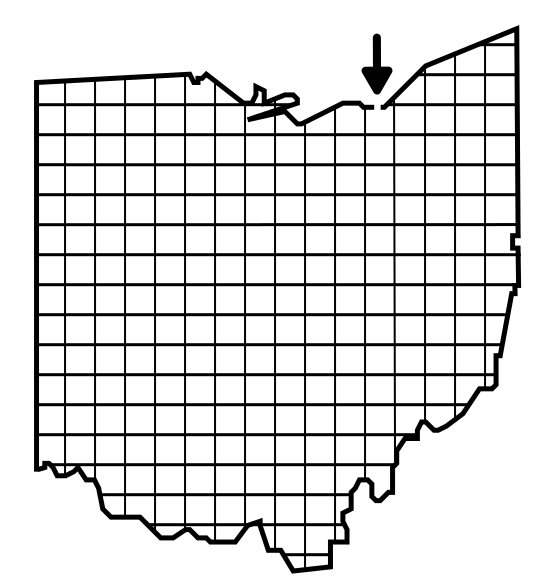
Step 3 - Create the Maze Solution
Make the solution to the maze based on the letter system you have chosen, filling grids to create a path from the start to the goal of the maze. In my example below I will be using vowels to move the maze solver from grid to grid.
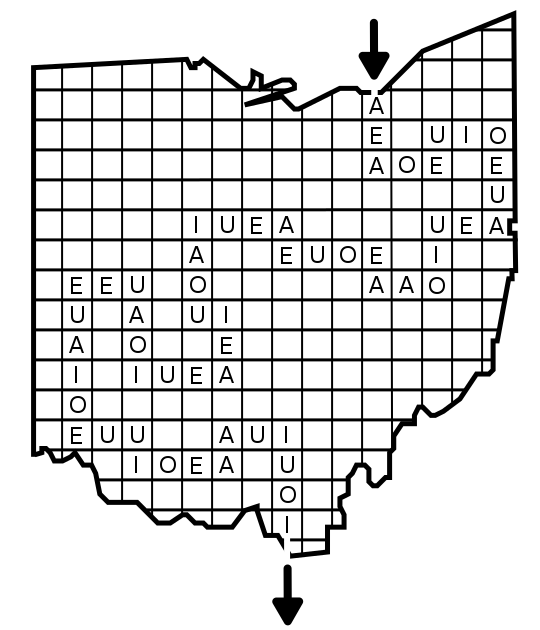
Step 4 - Create False Paths
Create false paths by filling grids with possible branches off the main solution that lead to dead ends. Notice I used the same letters as the correct pathway.
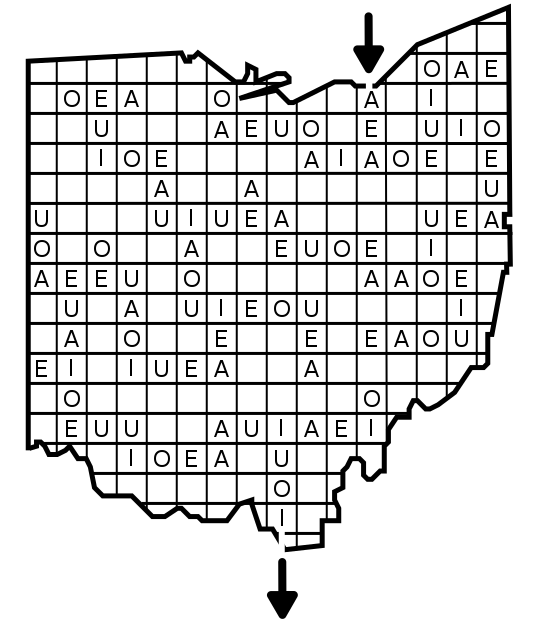
Step 5 - Complete the Maze
Fill in any remaining blocks with incorrect or unusable letters, in my example below consonants.
Step 6 - Check for Unwelcome Words
Any time you make a letter maze you should return back to it after completion to check for curse words. No need for me to make a list…
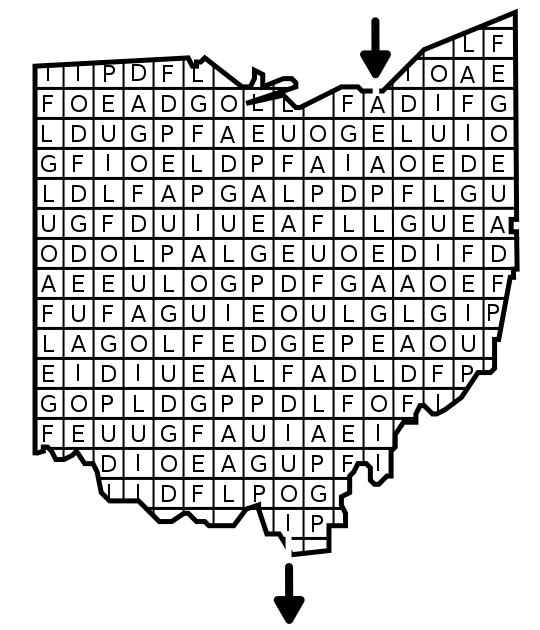
Step 7 - Add Directions
Can be done at any time in the process, but must be done. At directions to explain to the solver how they can move through the maze. In my example you can use vowels to move between blocks.
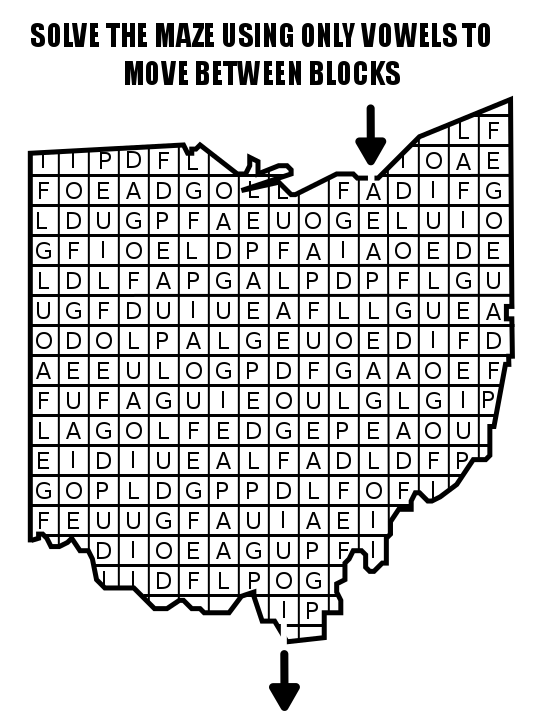
Step 8 - Create a Final Solution
Highlight the correct path in the final version of the maze to create the final maze solution (shown here in gold).
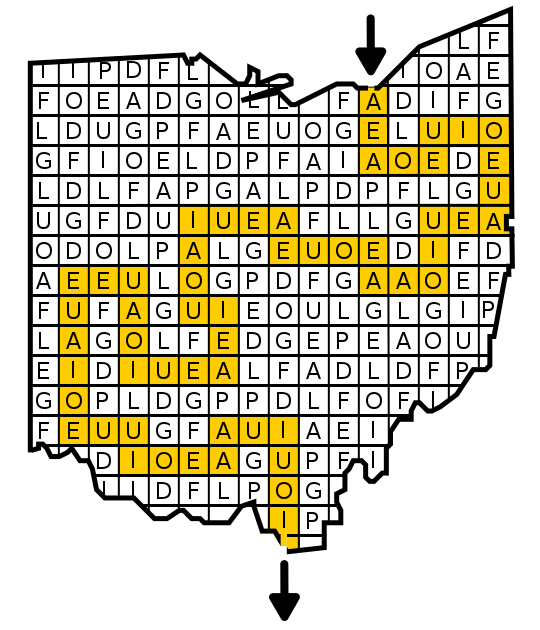
ADDITIONAL LETTER MAZE EXAMPLE & SOLVING TIP
Letter Maze Solving Tip
One way to solve a large Letter Maze is to eliminate the false answers by filling them in with black marker (or by covering with an X). This will leave only the good grids that could create a pathway leaving the solution apparent (most likely).

HOW TO MAKE A PUZZLE MAZE
Steps 1, 2 and 2.5 all the same as above, so we start with step essentially below.
Step 1 - Draw the Outline
Step 2 - Draw a Grid
Step 2.5 - Choose the Start and Goal (optional now)
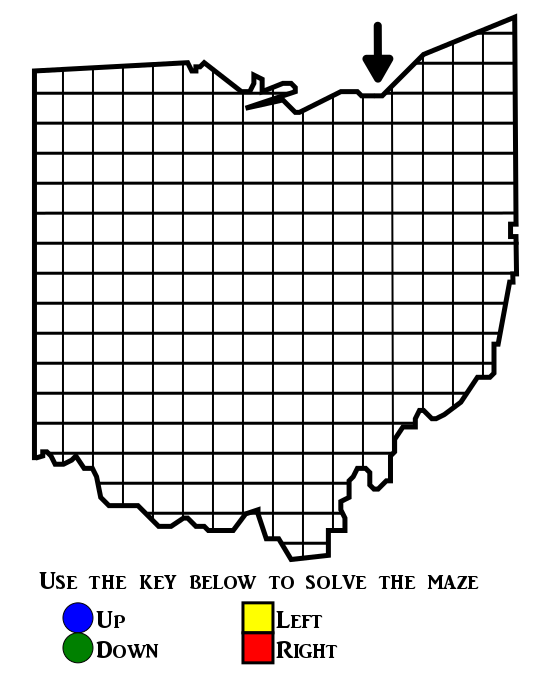
Step 3 - Add the Key the Puzzle
Decide the key that will move the solver through the maze. In my example I did this with 4 simple movements in 4 directions, but you may use any number of symbols and movements. Unlike many mazes that are made you need to make the rules first for this one, and “explain what needs explaning”.
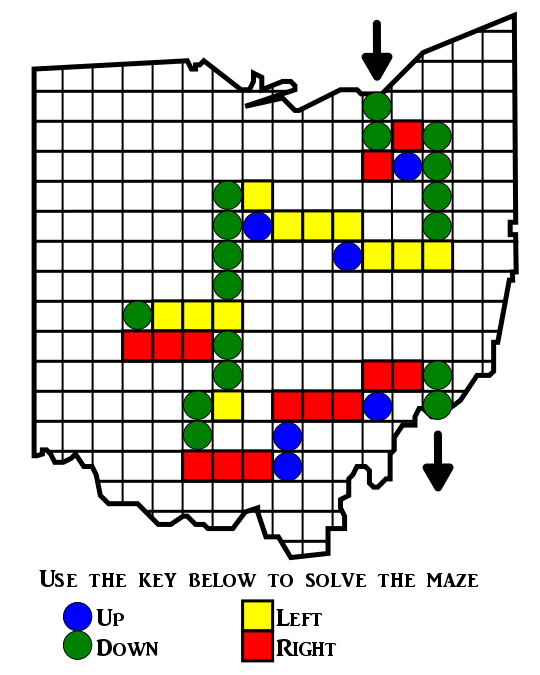
Step 4 - Create the Solution
Make the solution to the maze based on the key and symbol system you have chosen. For my simple puzzle maze there are not actually any decisions to make on the pathways, you need only follow the key to solve the puzzle maze.
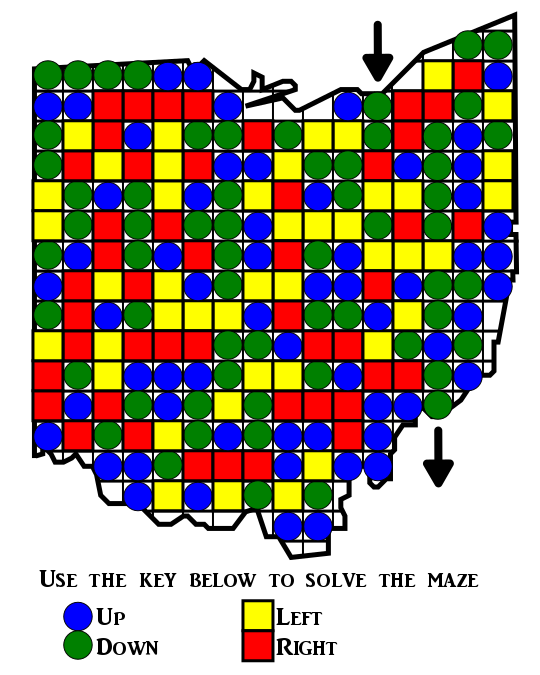
Step 5 - Create False Pathways
Fill in any remaining blocks with incorrect options. These are grid blocks that the solver should never reach if they follow the key correctly.
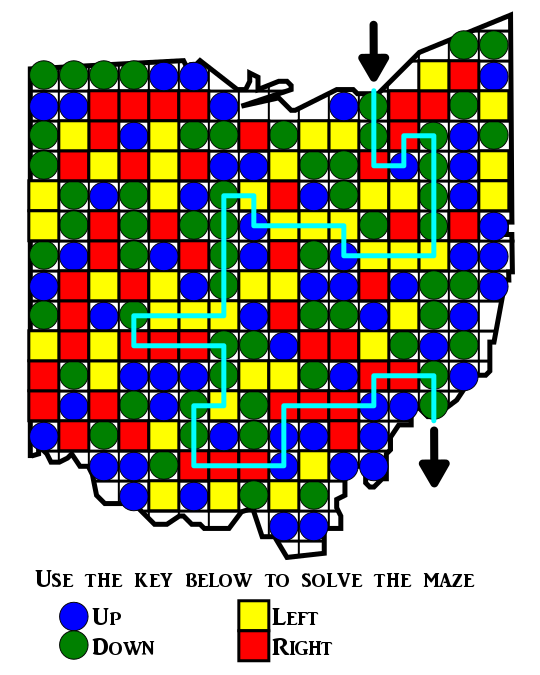
Step 6 - Create a Final Solution
Highlight the correct path in the final version of the maze to create the final maze solution (shown here in aqua).
ADDITIONAL PUZZLE MAZE EXAMPLES
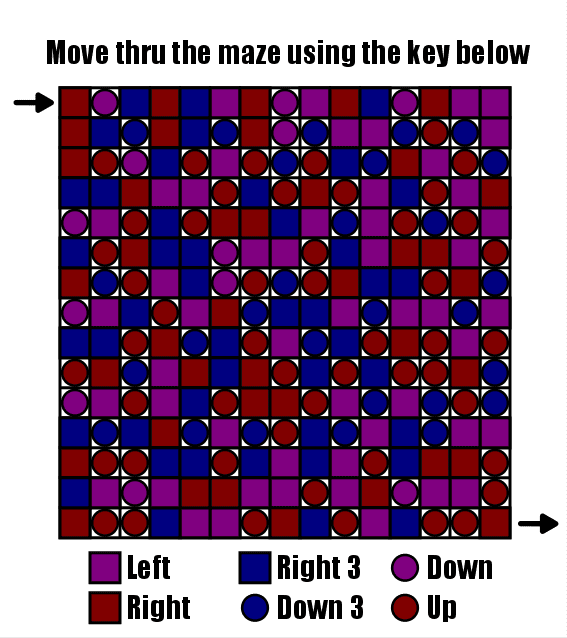
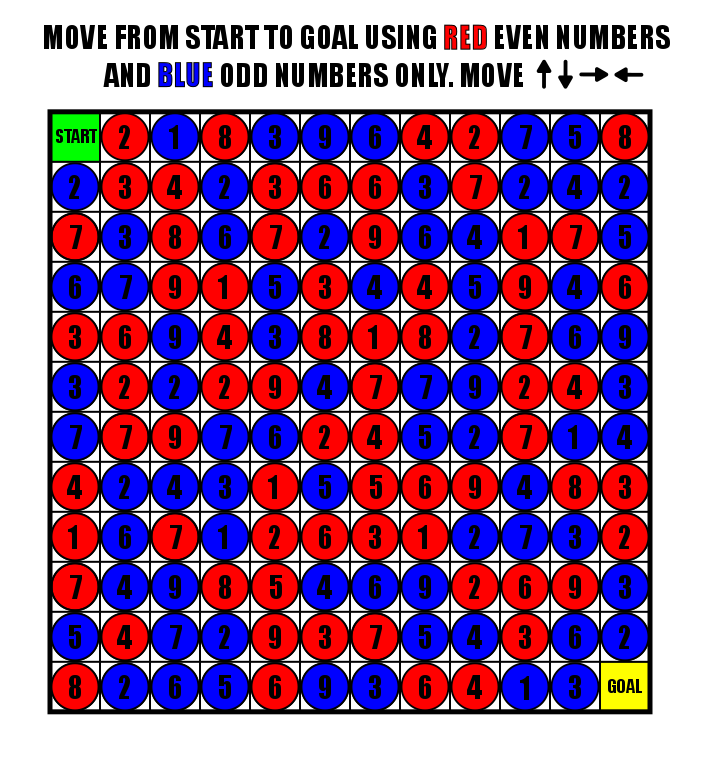
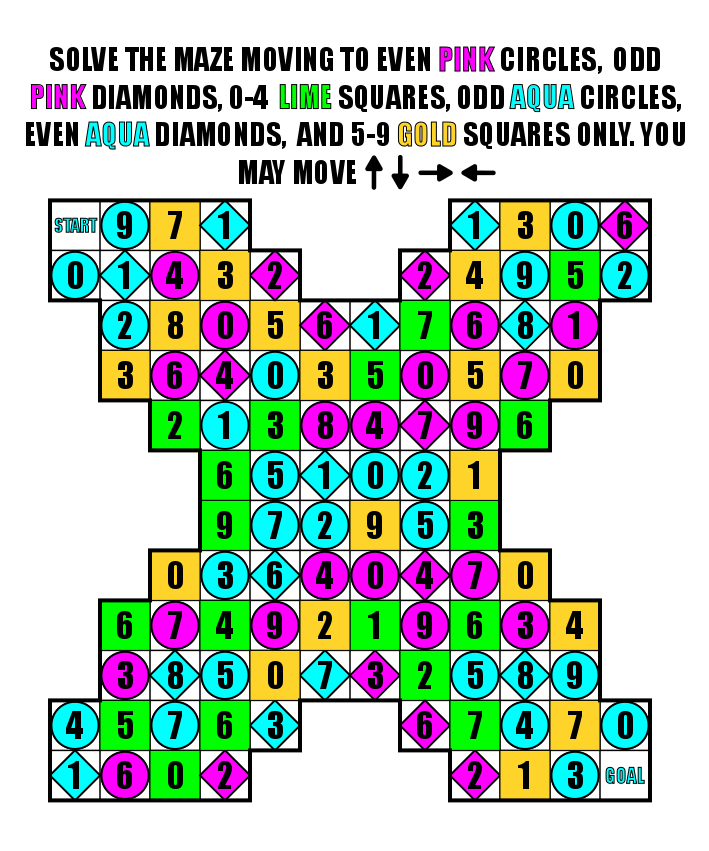
Numbers, colors and shapes are all available to you to play with as shown in the 3 examples below. Click to open a window with a large version. The nice thing about these maze is they can be solved without a writing utensil and on a screen.
FREE DOWNLOADABLE PUZZLE MAZE BOOK
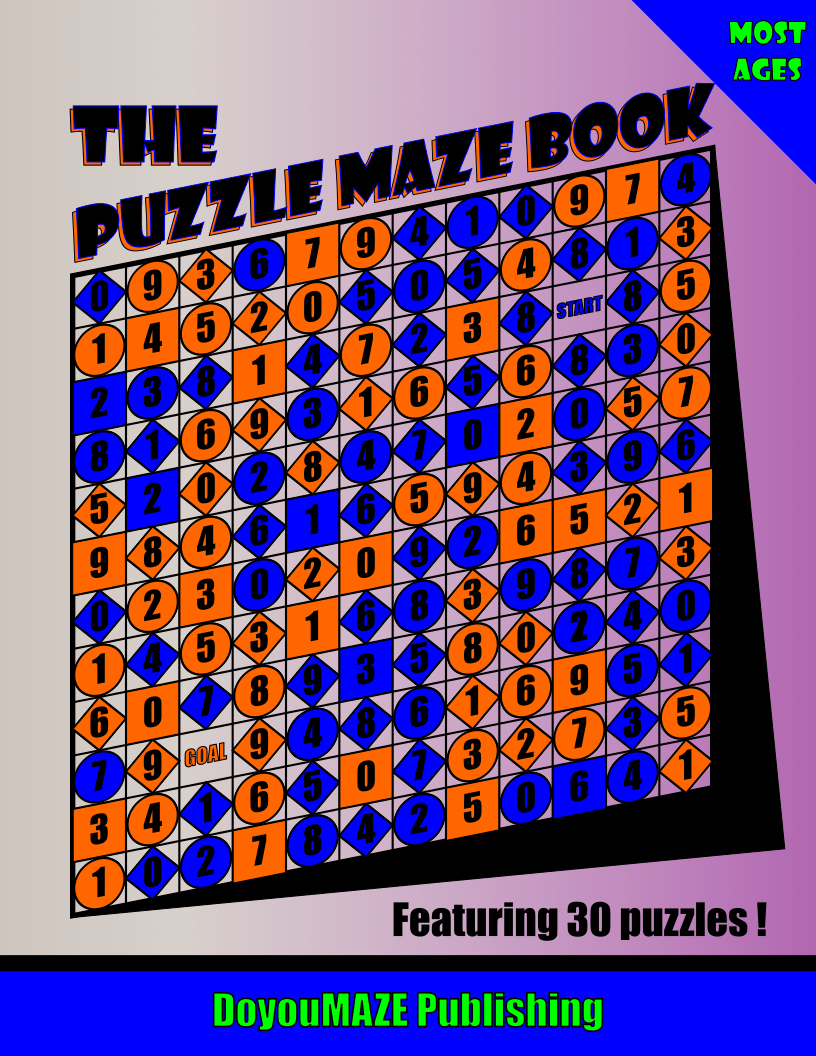
Of all the free books I have available this is one of my favorites. I like the cover and the colors of the mazes make the book look great.
THE PUZZLE MAZE BOOK
30 puzzle mazes. Move from start to goal following the conditions in the instructions. (Please note : this book must be printed in color to solve the mazes, however all mazes can be solved on screen also !)
File Size: 845 KB
MAKING OF A PUZZLE MAZE VIDEO
Shows me making a puzzle maze. Notice I used numbers off to the side for quicker construction with copy and paste !
HOW TO MAKE A COLOR GRID MAZE
Our first 3 steps (steps 1, 2 and 2,5) are similar to above so we speed through them.
Step 1 - Draw the Outline
Step 2 - Draw a Grid
Step 2.5 - Choose the Start and Goal (optional now)
Step 3 - Add Directions to the Maze
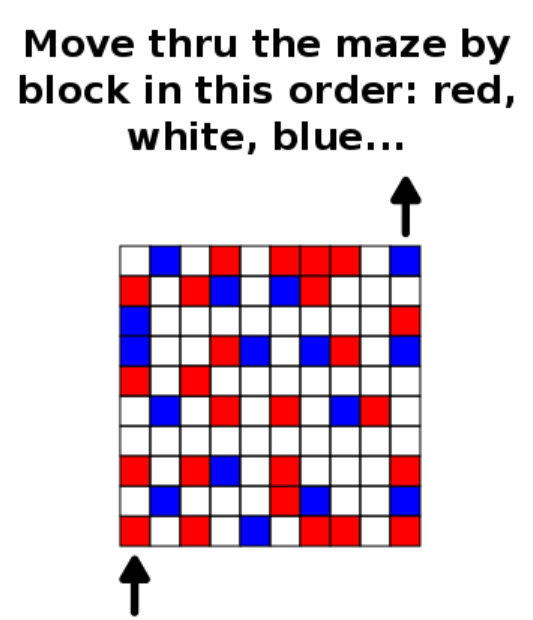
Explain the conditional rules that will dictate the movement of the maze solver through the maze and add these directions. In my example I chose to move from block to block using red, white, and blue. I allow movement in any direction so I do not need to explain any limits since there are none (vs some mazes that only allow N,S,E,W movements and no diagonals).

Step 4 - Create the Solution
Make the solution to the maze based on the color condition you have chosen.

Step 5 - Create False Pathways (colored blocks)
Fill in any remaining blocks with incorrect options. Each block that you make a particular color needs to be considered - can this be used by the solver ? A completed color grid maze will always have one dominant color (in my example white) that helps create non-solutions to the maze more easily.

Step 6 - Create a Final Solution
Highlight the correct path in the final version of the maze to create the final maze solution (shown here in lime, with possible branches in pink). There will always be a third color that is dominant in the color grid (here white) that allows multiple different moves for what is essentially the same solution.

ADDITIONAL COLOR GRID MAZE EXAMPLES
From my examples, I prefer using internal start and goals vs/ external arrows. Black, grey and white versions are most common for use in black and white books.


HOW TO MAKE A CONDITIONAL PATH MAZE
Step 1 - Draw the Decision Stations
A conditional path maze does not NEED an outline, in fact most will not have an outline….but it does need decision stations. For my example, to be consistent I used an outline of Ohio and created decision stations in that general shape. I deleted the Ohio outline in the next step. Space the decision stations far enough apart a pathway can be drawn between them.
Step 1.5 - Choose the Start / Goal (goal is optional)
For the below example I chose the start of Cleveland. I prefer to choose the goal later as I construct the maze based on how difficult I want it to be to solve. I want to also note that I used an arrow and an initial pathway to start the maze. I could have also used a block with the word “START”. This would mean that the initial move is not set, but will most likely have multiple options (further explained in step 2).
Step 2 - Draw Pathways between the Stations
Draw pathways between the decision stations. I do not connect every station to every nearby station. Leave a few open. As you build the solution and false pathways you can adjust these as needed. I find it’s better to have less pathways to start than more. Following up on the discussion above, had I opted for “START” in the first block used the solver would have 3 options to move in (pre colors added of course, but had I chosen that START I would have made at least 2 of them possible first moves).
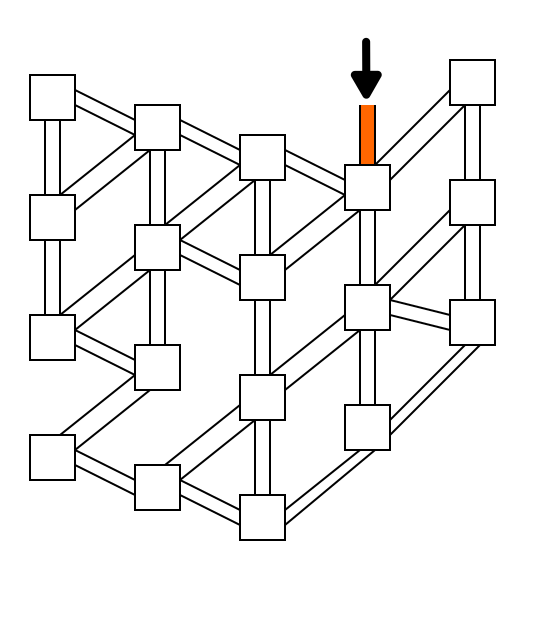
Step 3 - Create a Solution
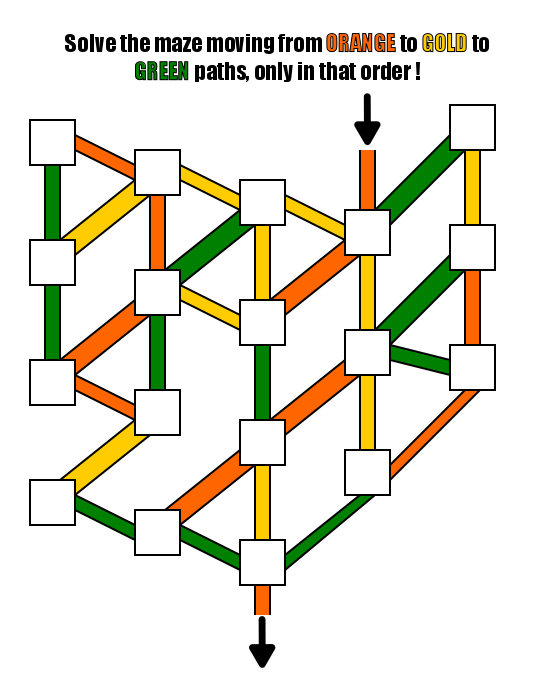
Starting from the entrance color pathways to create a solution. Because this is a Conditional Path maze you will need to decide what those conditions are. In my below example it is to solve the maze by moving from orange to gold to green pathways. Don’t worry, we will add the instructions in a later step. To make the maze more fun and difficult I suggest you loop the solution thru a block more than once. In row 2 the second block from the top is visited twice.

Step 4 - Create False Pathways
Continue to color pathways, giving the solver additional options to move from one station to another. Add and delete pathways as needed. I well designed maze will create confusing loops that take the solver down false paths. In the example below I also added a final pathway to the goal. Similar to the discussion above on START, I could have used a GOAL block instead of the exit pathway and arrow.

Step 5 - Complete the Maze
Add directions to the maze to complete it, telling the solver the conditions for solving.
SIDEBAR: Compare the Conditional Path maze to it’s sibling, the Color Grid maze. Each uses conditional movement to move from start to goal, but the structure is grid based vs. path based. A color grid maze also has much more open movement with a grid away from a wall being able to use 8 directions when it is landed on.
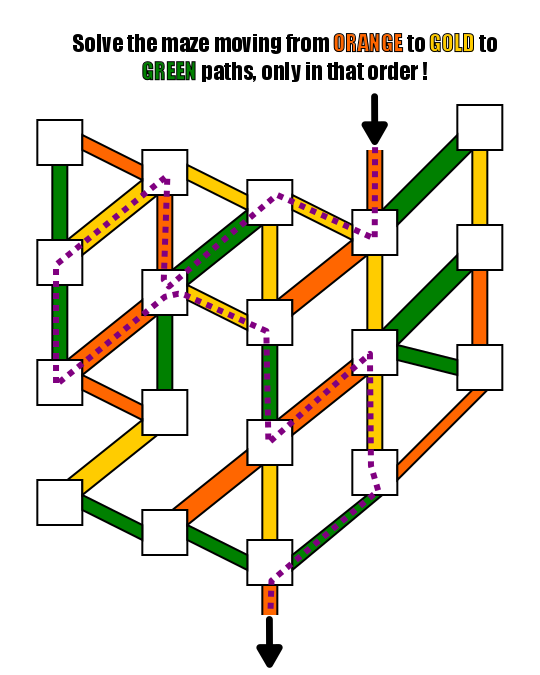
Step 6 - Make the Maze Solution
Highlight the correct path in the final version of the maze to create the final maze solution (shown here as a purple dashed line). If your pathways have multiple possible solutions, mark the best (shortest) solution. I also like to set this maze type to the side for a week and try to solve it later to see how complex it is.
ADDITIONAL CONDITIONAL PATH MAZE EXAMPLES
We have a black and white version for kids, and a larger version for adults. Click to see them in larger windows and solve !
MAZE MAKING TEMPLATES
This simple grid template could be used for 4 of the above maze types. Download below.

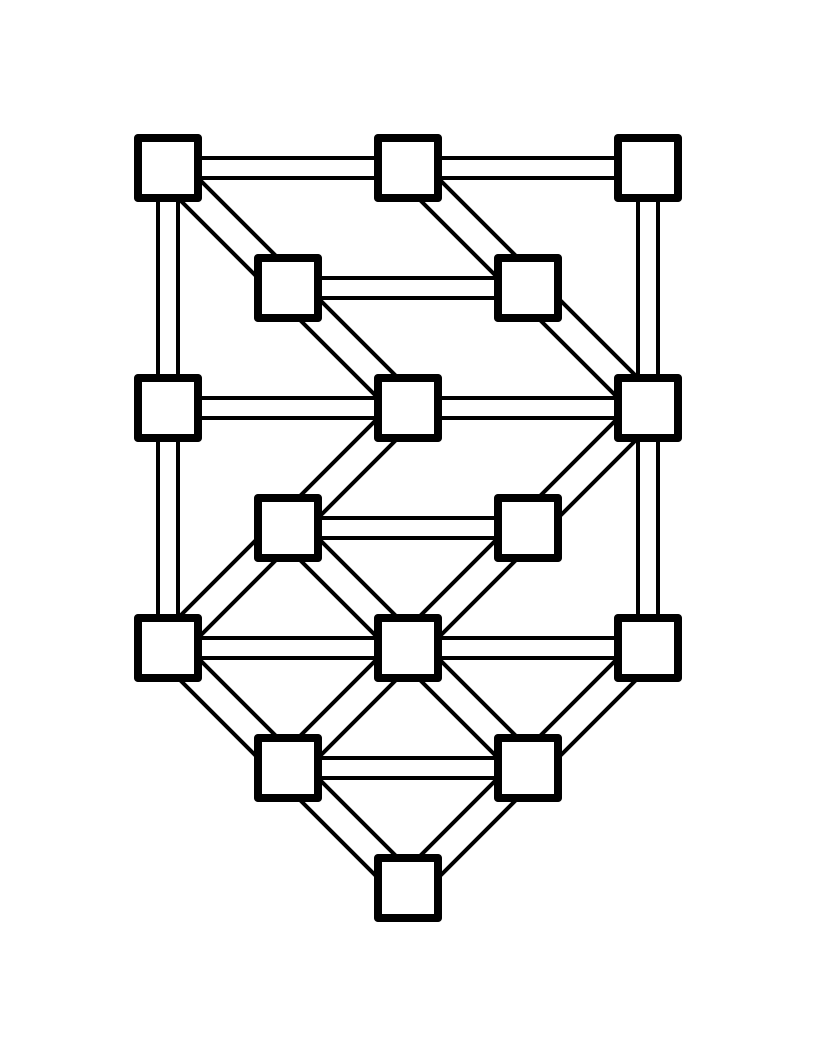
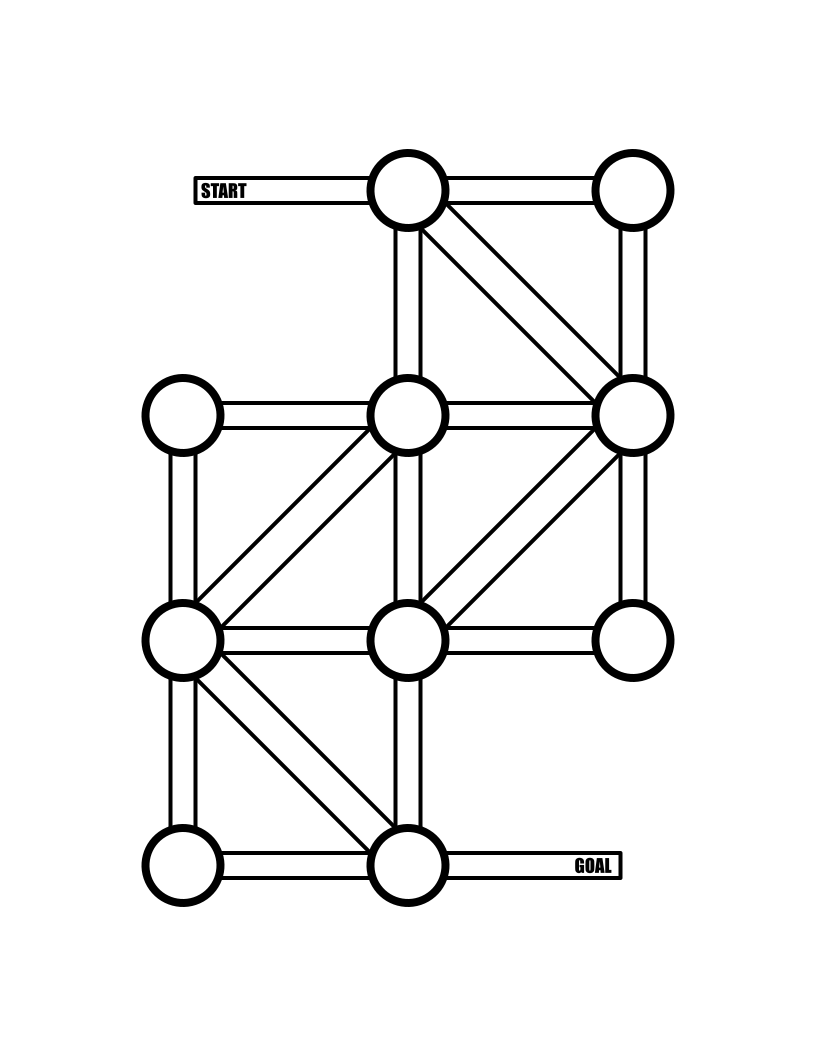
And these 2 templates can be used to make a conditional path maze by adding directions and some colors !
CONCLUSION
While each of these maze constructions uses conditions to solve them, you will rarely find them in bulked themed books focusing on a single type. These mazes are best used for a change of pace when making a book of mixed mazes, puzzles and activities. Each can be made in different difficulty levels from very easy to hard by creating the right rules !