How to Make a Digital Maze of Your Name

I’ve made over 2,700 different names into mazes on the site. You can try to find your name on the name maze page. If you have a name that is common in the United States or a top ten name in another country, there is a good chance you’ll find it ! To read about how I’ve picked the names you can read this post. And of course if you just want to skip everything and have me make the name maze for you, you can request a name maze here, but please check the name page first to make sure it isn’t already there.

Today I will take you thru 5 different options to digitally making your name into a maze. Let’s get started !
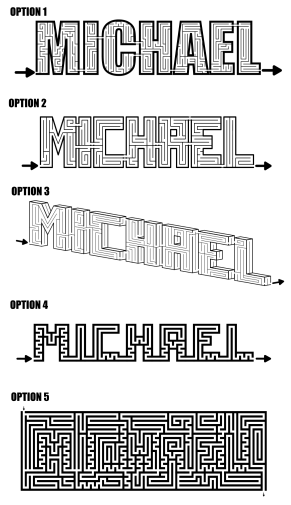
5 Options Michael name mazes

OPTION 1 - USING AN EXISTING FONT

  • Step 1 - Select your Font

A good maze-able font is one that is thick enough that it will allow pathways and walls to be draw within them. That means either a Bold version of a font or a font that is naturally wide. You may want to consider a “blocky” font if your name contains an angled character that does not fit into a square based grid well, K, M, N, S, V, W, X and Y. In the example the fonts are all the same point size, but the bottom 2 fonts will be significantly easier to maze.

Michael name in 4 fonts
  • Step 2 - Prep your Name

After spelling out your name in the font you have chosen, adjust the fill and stroke to essentially hollow out your name. Typically the fill becomes white (or whatever background you are working on) and the stroke becomes black (or the color you want your name to appear in). The Stroke, or outline should be greater than or equal to the width your maze walls will be drawn at.
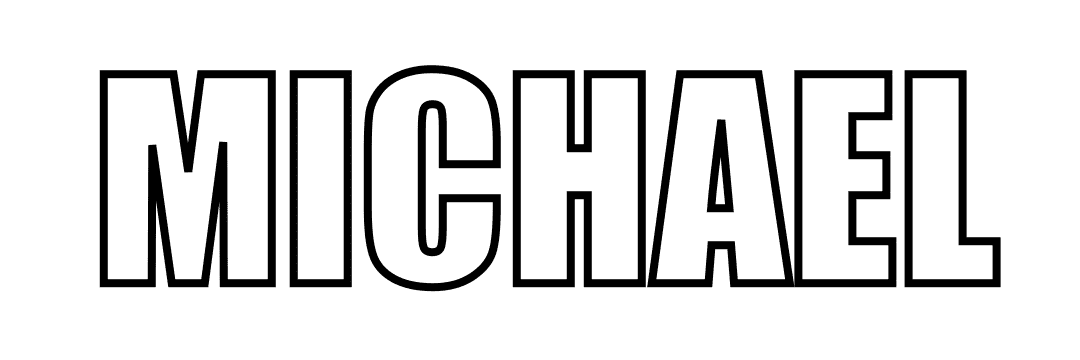
Michael name  black border
  • Step 3 - Create a Background Grid

Align your name with an appropriately sized grid when compared to the font size. This grid will become the basis for your maze walls. In the example below I actually drew on top of the grid (typically transparent in the final product). As you can see the letter height has room for 3-4 pathways in the north south direction. 2 would be a minimum needed to make a maze in a letter which would be suitable to kids. The more pathways, the harder the maze you can make ! If you want to want to get very fancy for curved letters you can skip the grid and use curved hand drawn lines. In this example the C. The A could also use a grid that aligns with the outer wall rather than the horizon.

Michael on a grid
  • Step 4 - Start Maze-ing

There are many different types of mazes and constructions you can use, check out 40+ here, including instructions on how to make them. For my example I am going to use a standard maze construction, but I think a grid maze construction works especially well if you have any of the angling letters mentioned in step 1. Here is a start arrow and the M mazed. Notice the connection between the M and I that was created. I used a width slightly larger than the pathway, but you can equalize that if you prefer that look.

Letter M Mazed
  • Step 5 - Complete the Maze

Continue thru the maze construction process until you have completed the maze. Add the exit arrow and you are complete. With most name mazes there are natural points where the letters can connect to one another without much trouble, as in the A with both the H and E. For the letter C because it has natural connections from both the top and bottom portions I used both to add some complexity to the maze. For all other letters, once you enter a new letter, you can immediately see your goal out to the next letter.

Michael name mazed

For comparison, here is the Michael maze I have on my site in the Name mazes section. It uses the same font as Option 1 but has a much different look based on the scale of the internal paths. This creates a much more difficult maze for the solver ! For construction purposes I also use a consistent connection point between the letters.

Michael name maze

Michael name mazed

OPTION 2 - BY DRAWING INDIVIDUAL LETTERS

  • Step 1 - Set-up a Grid

I will be using a standard square grid shape in this example. First, make a standard size for your letters. I like the height to be between 1.5X and 2X larger than the width. Below see what 3 common options look like. You also need to take into account how many paths you want in a standard upstroke of a letter. Think the left side of the H or an E. Anything less than a width of 8 will be difficult to work with. Notice how the letter H looks in each size.

Grid size comparison
3 different sizes of the letter H in grid form
  • Step 2 - Letter Your Name

Make your name in the size you choose (below is 10 x 16). Space each letter the same distance from the next (I suggest 1 or 2 blocks). Make each upstroke the same width for each letter. If your name contains a W or M you will need to add additional width for those letters, and of course the letter I will be smaller width (with options for the same with J, L and T). Notice the letters are very “blocky” which will help during the maze making, but they do not have to be. Because you are making the Letters using a grid the resulting maze will be much more uniform than using a font to build from.

MICHAEL written in block form
  • Step 3 - Make the Maze

There are many different types of mazes and constructions you can use, check out 40+ here, including instructions on how to make them. Again, I will use the standard maze construction for this example. In my example below I used 1 space between letters. Notice the spacing of the walls are more uniform than in the first option. Also I did the maze walls in the M to match the angle of the letter with no movement options in that section.

MICHAEL block maze

OPTION 3 - BY DRAWING DIMENSIONAL LETTERS

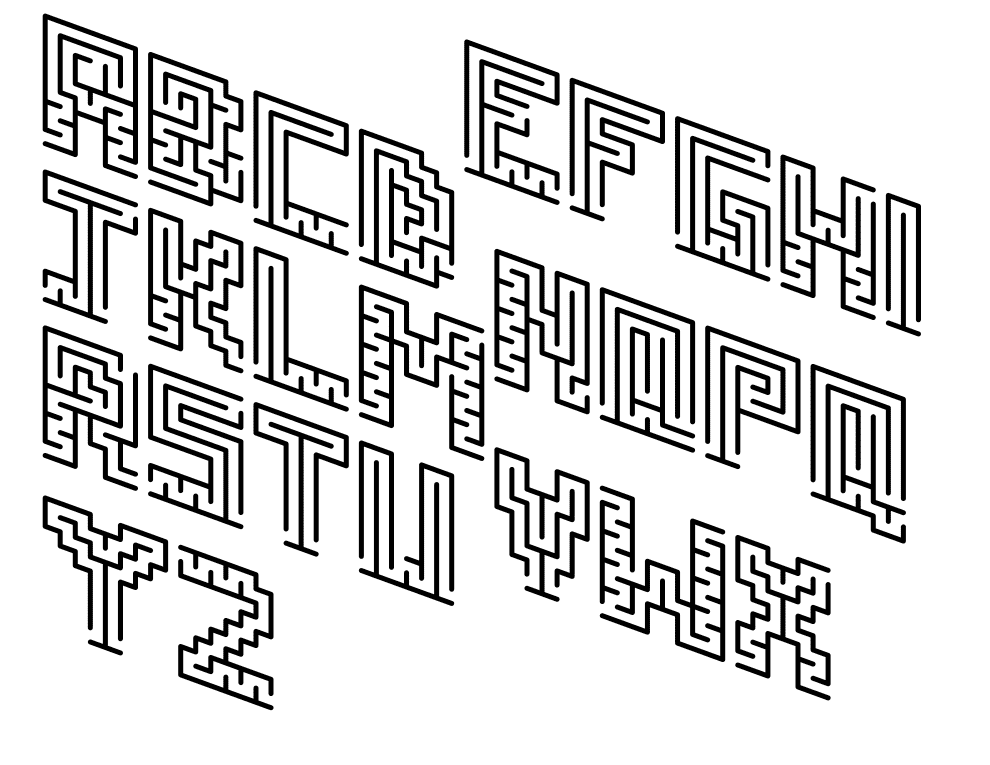
  • Step 1 - Set-up an Axonometric Grid

Use an Axonometric grid to draw a 3-D looking object on a flat surface. Think about drawing a cube. When I set-up this grid I use a low angle % - the higher, the more slope the name would have. In my example I used 10%. You can check what the spacing will look like by drawing placeholders for each letter in your name. Similar to Option #2 above the optimal letter size seems to be height 2X width as in my example below.

7 pink blocks
  • Step 2 - Letter your name

I like a gap of 3 grids between letters - they will eventually be filled in to allow a nice transition for the maze between letters. Again, the M is expanded in this case because it is a wide letter.

MICHAEL written at an angle
  • Step 3 - Give it Depth

Add the depth to each letter using the slope in the other direction of the letters. The depth portion of each letter align naturally to the front of the next letter so there is no need for a connector bridge between the letters as there is in the other 2 options above.

MICHAEL written to look 3-D
  • Step 4 - Make the Maze

Draw the walls of the maze in the same sloping direction as the edge you are on. Use the depth of the maze as the transition between letters. Add start/goal arrows
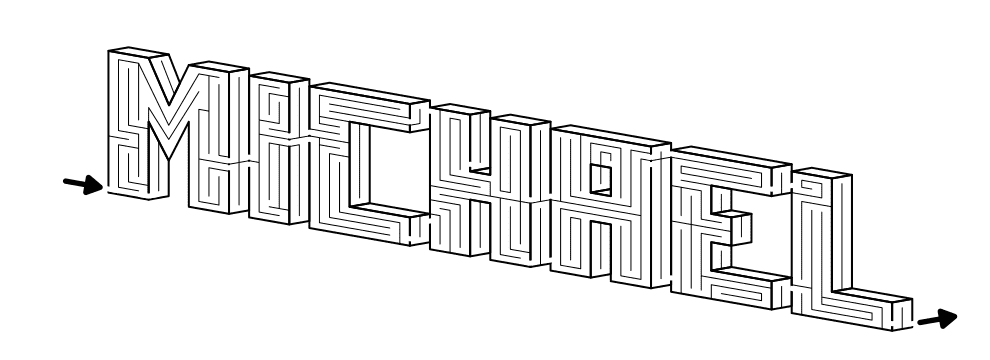
MICHAEL name maze to look 3-D

I hope you found a maze construction you like to make your name a-maze-ing ! And remember that even though each of my mazes were done in black and white fell free to add some color !!! I went with yellow, red and burgundy for the below example, but play around with your own colors and you can find some great combinations. I will say that when you do 3D letters, it can help people read them when you are consistent in your colorations based on the orientation of the letter sides. Here, yellow in front, red on the sides, and burgundy on the (un-mazed) tops. As always, if you use dark colors for the background, you should use light colors for the maze walls. A black maze on a navy or burgundy background would not be enjoyable for the solver !

MICHAEL 3-D maze in color

OPTION 4 - BY USING PRE-MADE MAZED LETTER TEMPLATES

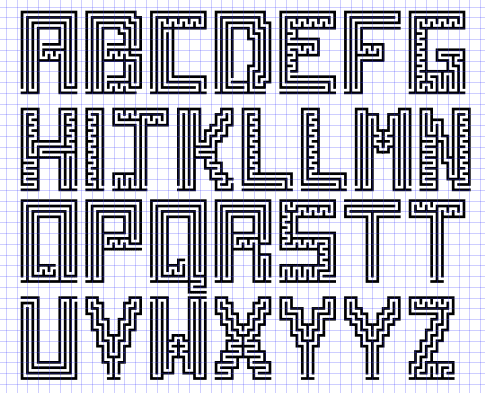
I made an entire book of hidden message mazes. While working on it I decided to make a series of 4 mazed letter templates to be used for making hidden message mazes quickly. I have already done the work of mazing each letter, so you just need to put them together. Below is one of the four templates, but I suggest you click the link above to see the other options (or just to get inspiration to make your own mazed letters!). Some letters always give me trouble when starting from scratch !!

Alphabet mazed

Before we get into to details and step by step, what do you notice about the mazed latters ? Hopefully that they are actually labyrinthic letters - there are no choices along the pathways ! So this is actually how to make a labyrinth of your name….UNLESS, you use this template and add gaps in the letters that lead to dead ends. This would be used in a hidden message version using these letters. In other words, hiding a name into a larger maze. Let’s get onto Option 4.

  • Step 1 - copy the design of my letters

  • Step 2 - spell your name

MICHAEL shown with maze letter templates
  • Step 3 - connect the letters

Notice that my letters almost all align at the bottom with a few exceptions (N, S, W, and Z). With these letters you can adjust surrounding letters, or the maze within the actual letter. Each letter can be adjusted if needed.

Michael name mazed
  • Step 4 - add the start and end arrows

MICHAEL mazed with template letters

HERE IS A QUICK LOOK AT THE MAZE LETTER TEMPLATES

Click to see larger versions of the letters. You can read about them in detail in this blog post: 4 mazed letter templates.
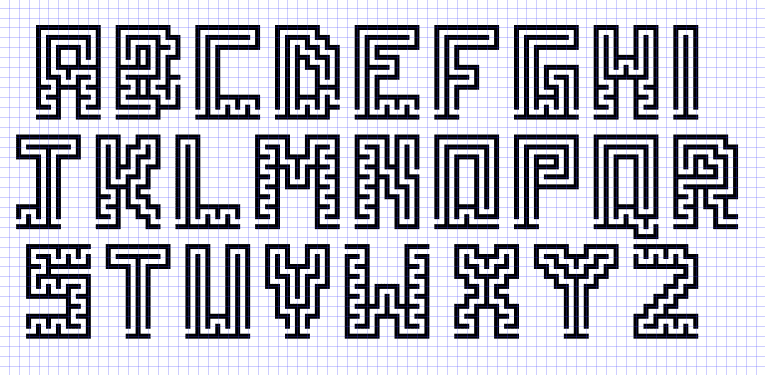
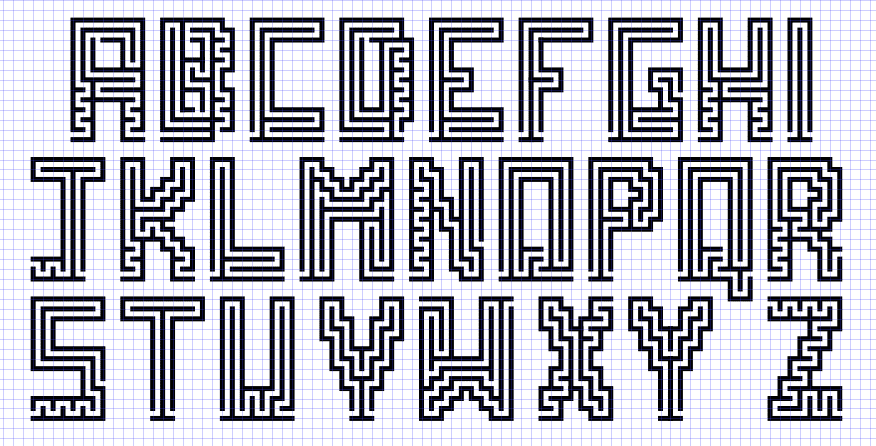
These letters were made as “labyrinths”, but they can easily be made into mazes by adding gaps to the actual letters. This will help hide the name when the maze is unsolved, but will also make the maze harder to solve. Here is an example of the letter A - all would look the same when solved but the second and third examples have more options for the solver.

Letter A mazed 3 ways example

OPTION 5 - HIDDEN NAME MAZE VERSION

This is a variation of option 4 above where I used pre-made letters to create the name Michael. As I mentioned above the result of this is actually a labyrinth of the name Michael, because you cannot get lost like you might in a maze.

  • Step 1 - spell your name using my letter template

Also note that I did change the latter A slightly with a dead end in the opening center of the A.

Michael name mazed
  • Step 2 - begin mazing around the letters

First I added a border around the name. Then I began adding false pathways in the maze. Key to this maze is to not let any false pathway lead anywhere, including back to the actual name.

Michael name being mazed
  • Step 3 - complete the maze

And add a start and goal arrow. This is a hidden name…but not well hidden IMO if you know what you are looking for. This is a relatively easy solve however once you get into the letters because as long as you do not break away between letters where the main gaps of false pathways are you will solve the maze.

MICHAEL as a hidden name maze
  • Step 4 - MAKE A SOLUTION

Check your work. How will the maze look when someone solves it ? I think this hidden name maze looks pretty good !
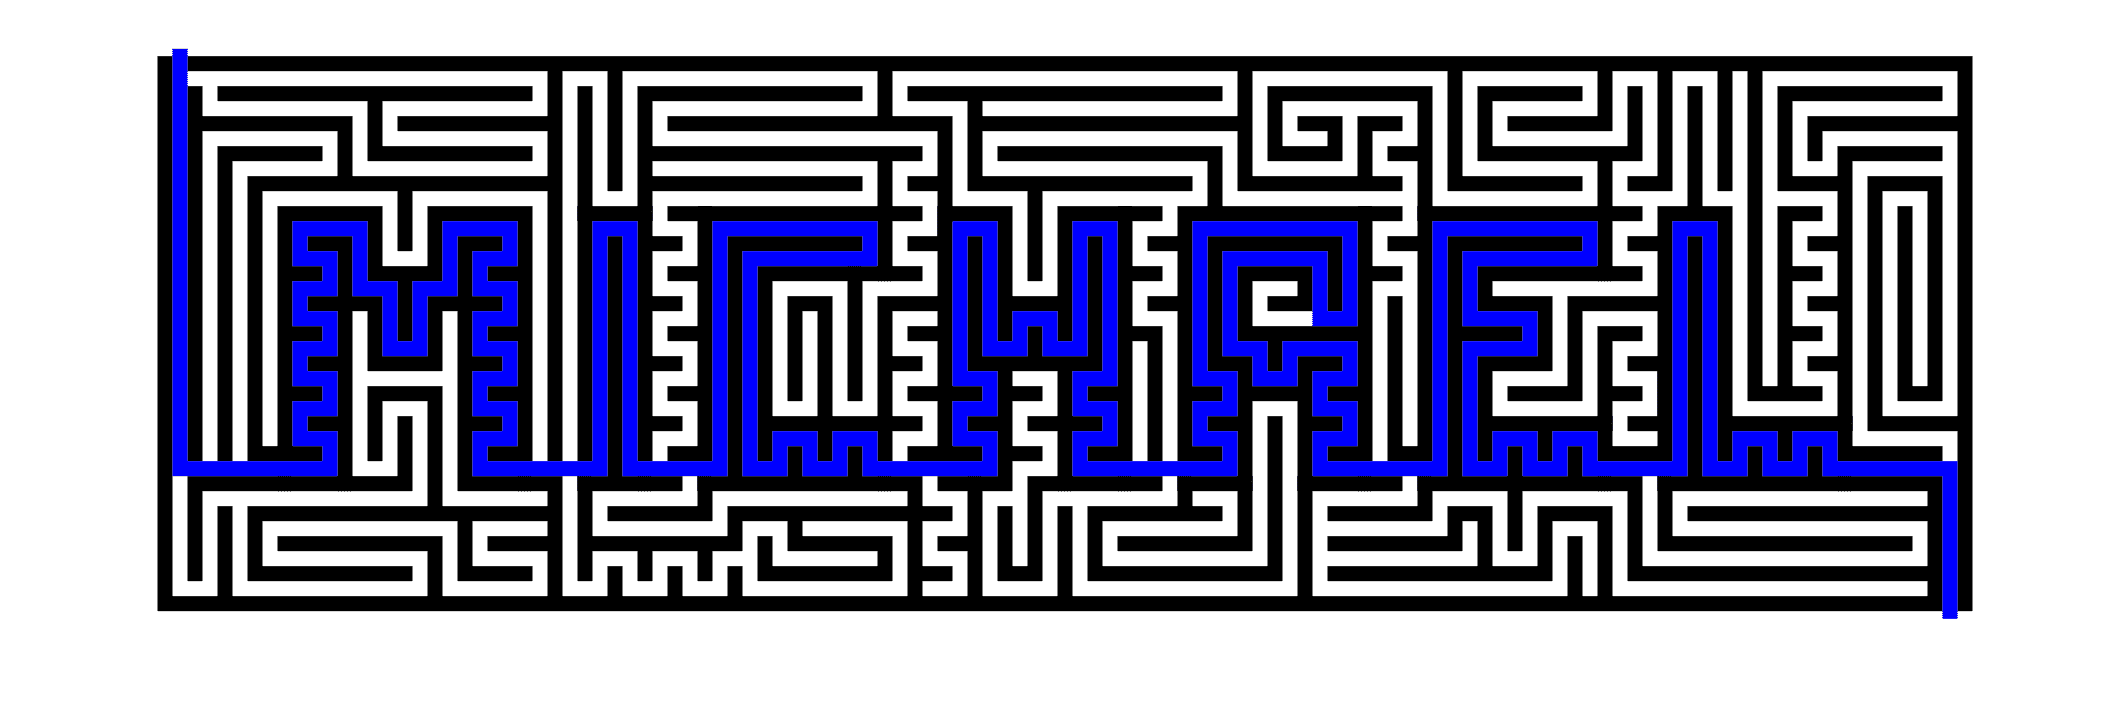
MICHAEL hidden name maze solved

Learn more about this type of maze by reading Creating a Hidden Maze - Case Study #1. Or you can practice solving them with your eyes in this set of posts:

Hidden Message Maze challenge - Part 1

Hidden Message Maze challenge - Part 2

Hidden Message Maze challenge - Part 3

By now you should be able to make a maze of your name !

ADDITIONAL NAME MAZE IDEAS

If you have a family or group of friends how about making an interconnected family maze using all of the names. For a family make the surname/last name the main focus and then add the individual names off of them. I did not maze the names but I might layout like this:

FAMILY NAME IDEA

If you prefer making labyrinths, you can find step by step labyrinth making instructions.
How to Make an Unsolvable Maze

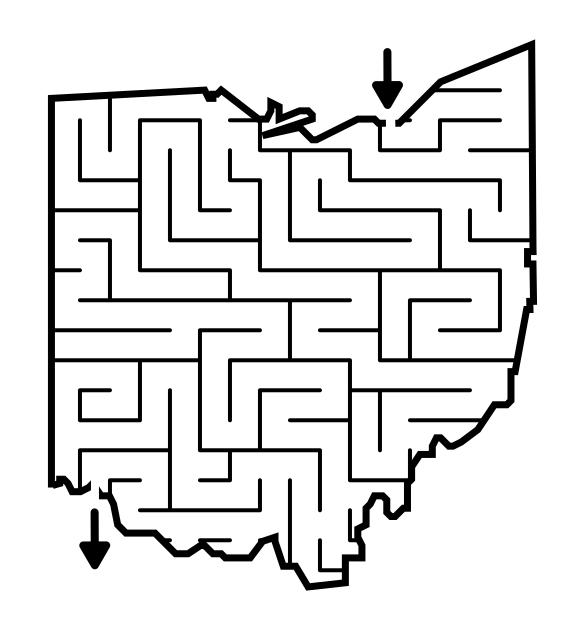
In a series of posts I will show you how to make a maze in a wide variety of design constructions. The 24th example will look at the Unsolvable Maze construction. It is one of the most enjoyable maze constructions to make. Let’s define what I mean by Unsolvable Maze, then get into the example. Every example will use the sample basic outline (the state of Ohio) to better illustrate the differences between each maze type.

Here is an outline for this blog post with jump links if you want to skip ahead to a section:

UNSOLVABLE MAZE DEFINITION

THE 5 RULES OF MAZE DESIGN

HOW TO MAKE AN UNSOLVABLE MAZE - Option 1: No Solution

HOW TO MAKE AN UNSOLVABLE MAZE - Option 2: Extreme Difficulty

12 DESIGN DECISIONS THAT MAKE A MAZE DIFFICULT TO SOLVE

EXAMPLES OF VERY DIFFICULT MAZES

WHERE TO FIND FREE HARD MAZES ON THIS SITE

UNSOLVABLE MAZE DEFINITION:

Unsolvable Maze - A maze that doesn’t have a solution.

UNSOLVABLE MAZE (ALTERNATIVE definition) A maze so difficult that the solver gives up rather than continue solving it. A MAZE THAT IS VIRTUALLY UNSOLVABLE.

THE 5 RULES OF MAZE DESIGN:

These 5 rules apply to any maze you make so we start with them !

1. Always keep an open pathway for the solution

While drawing a maze you will need to juggle multiple open pathways each of which could become the solution. One of them will become the solution. Keep track of it. This is especially important if you are designing pathways in both directions (from the start and from the goal).

2. Clearly mark the start and goal, or the objective of the maze

A maze should have a start and a goal that you can assess just by glancing at it. There are many ways to start and end a maze I review in this blog post: Options for Starting and Ending a Maze

3. Ensure the difficulty matches the intended audience

Most people want to solve a puzzle/maze that is just slightly below or slightly above their skill level. Many things help determine the difficulty of a maze. Size, number of branches, the length of dead ends, the number of choices, the complexity of the rules (if the maze has them).

4. Ensure your maze has a solution

When your maze is complete, solve it to determine the difficulty level and to ensure it is a real, solvable maze. Depending on the complexity of the maze you may want to do this right away or wait so you can properly assess the difficulty.

5. Explain anything that needs explaining

Some mazes have rules or conditions. Explain them with directions. If it isn't obvious, make it so.

There are 2 completely different options to create an unsolvable maze;

Option 1 - Create a maze with no solution, and Option 2 - Make a maze with extreme difficulty. Let’s review the steps for making each type of maze.

HOW TO MAKE AN UNSOLVABLE MAZE - Option 1: No Solution

  • Step 1 - Choose Your Maze Construction

This step-by-step will be much different than previous “How to Makes”. An unsolvable maze can come in ANY maze construction. So determine which construction you prefer.

  • Step 2 - Follow the Step by Step Instructions

  • Step 3 - Close off any Solutions

And there it is. When you make the maze do not leave any solution possible. This is mean. But maybe that is why you are here. To make this even more difficult close up a point in the middle of the maze (not at the end). If you close all possible solutions pathways near the exit, a backward solver will easily figure this out. I assume a designer of this would want to be at their most terrible. If one of these unsolvable mazes makes it past the editor you’ll find these go viral online.

Unsolvable Maze shaped like Ohio

Below is an additional example. Unless this is for April Fool’s Day, or you made a mistake, creating a maze like this is not advisable.

Unsolvable maze example

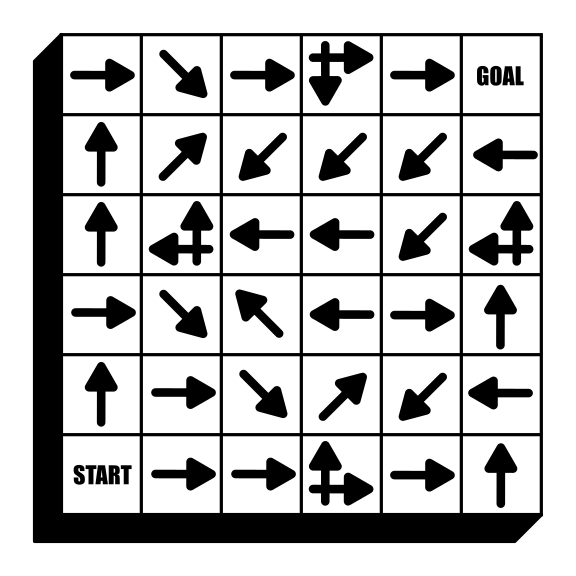
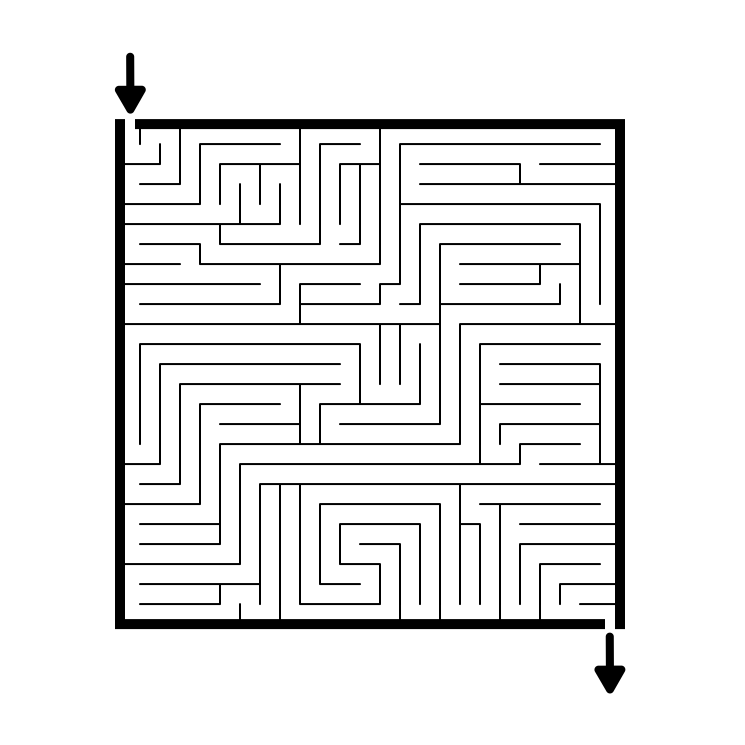
Below I will discuss how to make an Arrow Maze that is very difficult. But there is also the option to create an Arrow Maze with dead ends (unlike other maze types, a properly designed Arrow Maze does not have any). In this first example there is NO solution and if you try to solve it you will eventually find yourself in an everlasting loop ! Try it for yourself.

Arrow maze with continual loops and no solution

HOW TO MAKE AN UNSOLVABLE MAZE - Option 2: Extreme Difficulty

This second option is a variation on the above instructions with a variation only in step #3.

  • Step 1 (same as above) - Choose Your Maze Construction

This step by step will be much different that previous “How to Makes”. An unsolvable maze can come in ANY maze construction. So determine which construction you prefer.

  • Step 2 (same as above) - Follow the Step by Step Instructions

  • Step 3 - Make it REALLY difficult to solve

Make a maze that is extremely difficult to solve using the following 12 things in your toolbox:

12 Designs Decisions That Make a Maze Difficult to Solve:

  1. Make it very large because the larger the maze the more difficult it can become. The more dead ends. The more pathways to keep track of. Just more.

  2. Make a very high number of intersections. The more choices the solver has to make, the more often they will make a wrong turn. Simple math.

  3. Have a main intersection (or multiple) that has many branches to choose from in one spot, with only 1 being correct. Loop a few of the branches back to the same location so the solver continually visits that same location and must keep track of what branches have already been tried. If an intersection has 2 options and you took the wrong one last time the next decision is easy. But what if the intersection has 8 choices ? Which did you already take ?

  4. Make the dead end pathways very long. When you create a dead end, don’t make it obvious just after the choice is made. Make the dead end take a long time to be discovered.

  5. Make many branches off of the dead ends pathways. So you take a long dead end pathway but do not discover it for a long time so you backtrack to your last intersection and take the other branch and it is a dead end also. So you backtrack again to the previous intersection and take the other direction and it is a dead end also ! etc.

  6. Include a few looping dead ends. What do I mean by this ? Well, have an intersection that breaks off into two directions (again, preferably these are long pathways), which both lead back to the exact same spot in the maze. The more looping pathways, the more difficult the maze to solve. It may make the maze less frustrating depending on the temperament of the solver. Would you rather hit a dead end, or not hit a dead end and return to where you started ? Looping pathways and islands also can defeat some maze solving algorithms. like the Wall-Follower Algorithm and the Dead-End Filling Algorithm while hampering others.

  7. Consider using weaving pathways or curved pathways. These paths go under and over one another and make seeing dead ends “early” much more difficult. Weaving Mazes and Pipes Mazes both use this construction method. Much like weaving pathways work to conceal where a pathway leads, curved pathways are harder to predict than mazes made in a grid-like pattern. Varied pathway shapes can obstruct sightlines and make a maze more difficult.

  8. If you are making a specialty maze, give the solver an exponential number of possible moves they can make (see the Slide Arrow Maze example below). An intersection with 4 choices is more difficult to keep track of than an intersection with only 2.

  9. Design the maze in TWO directions. This prevents a person from backtracking to solve a maze from the goal to the start.

  10. Add Rules. The more you need to think when solving a maze, the harder it becomes. For example: Puzzle Mazes have rules of movement to follow based on the rules of the maze. Conditional mazes make the order you move down pathways important. Left turn only mazes speak for themselves in their title. One way pathways limit the solvers movements down pathways.

  11. Add enticing dead ends pathways that travel towards the goal only to track away from it and disappoint the solver who felt they were so close to solving the maze. I call these “almost” pathways. When a solver is following them everything feels great…until it doesn’t.

  12. Consider a time limit. Time pressure is very psychological. Taking a test with a time limit is a much different experience than taking one without one.

I do NOT suggest using this method to make a maze unsolvable:

  • Make the pathways very small or in poor colors (because both are difficult to see), with the need to strain your eyes to solve it. Don’t make a maze designed to be difficult to follow/see, make a maze design that is difficult to SOLVE because it is a complicated puzzle.

EXAMPLES OF VERY DIFFICULT MAZES

The first example is a Slide Arrow Maze. In this type of maze you start at the red arrow and you may move to any block that it is pointing to (but no jumping gaps). So your first move can be to either of the two blocks below it. If you pick the first block below you have 3 subsequent choices. If you pick the second possible arrow you will then have 8 possible next moves. Why this maze is so difficult is that there is only one correct solution, so with so many choices each move you are bound to make many mistakes and get stuck ! Try it. I WANT the solver to get frustrated.

Very difficult Slide Arrow Maze

And this second example I did for a project. This is a regular Arrow Maze, but it is also the Largest Arrow Maze in the world (probably). This is difficult because of its sheer size. I gave a few checkpoints along the way (the blocks with the black background). It also includes hundreds of loops. I think it is a fun maze, but I think many people will get frustrated and stop. If you do try to solve this maze, time yourself and send me a note on how long it took you ! This maze is one of The 5 Hardest Mazes on this Website.

Here are the solving rules if you have never done an Arrow Maze:

Rules to solve an Arrow Maze
The Largest Arrow Maze in the World

WHERE TO FIND FREE HARD MAZES ON THIS SITE

I have created a section of Hard Mazes on the site where I add a new maze each Saturday. I included a variety of maze types to make it more interesting. As mentioned above I wrote about The 5 Hardest Mazes on this Website previously. I also have made a few “largest” mazes like the Arrow Maze above you may find interesting:

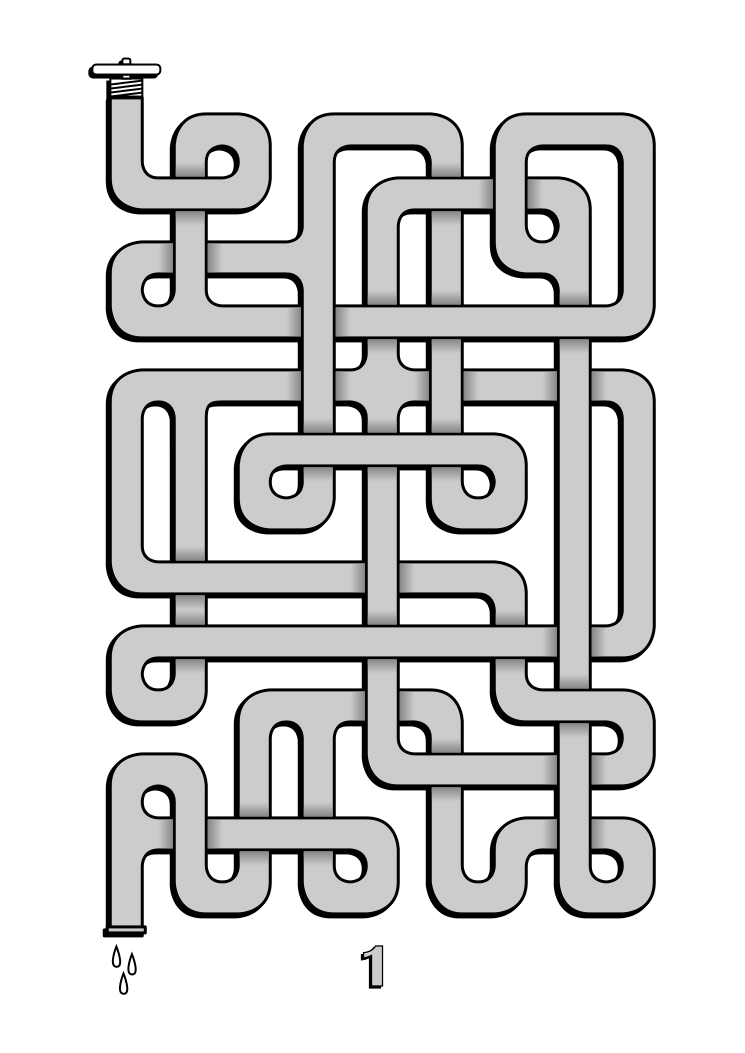
The Largest Pipe Maze in the World

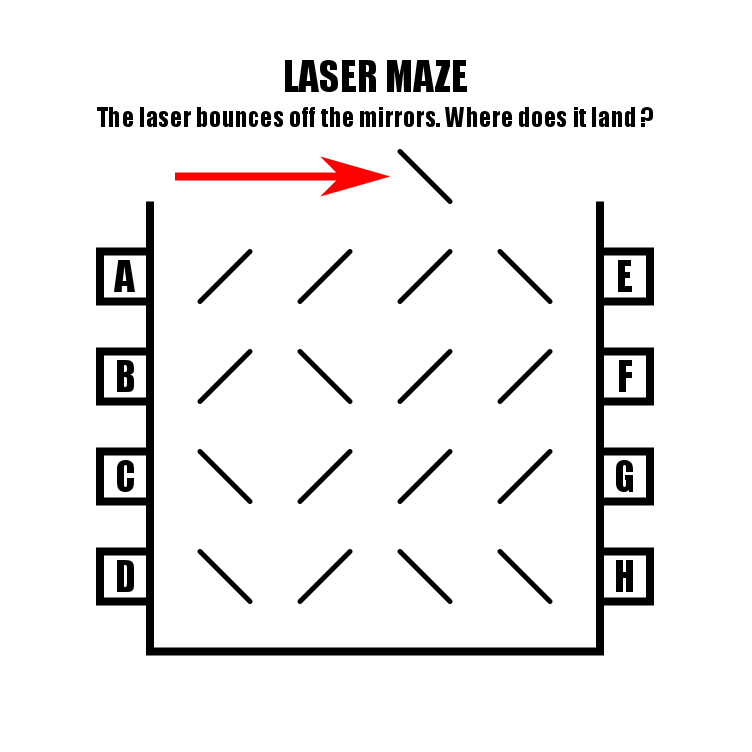
The Largest (Drawn) Laser Maze in the World

The Largest Mobile Maze in the World

Many of the maze art mazes you will find on the home page are also difficult to solve - browse around and enjoy !

Good Luck designing an unsolvable maze !

How to Make a Kids Maze

In a series of posts I will show you how to make a maze in a wide variety of design constructions. The 23rd type of maze construction is the Kids maze. Let’s define what I mean, then get into the example. Every example will use the sample basic outline (the state of Ohio) to better illustrate the differences between each maze type. At the end of the post there is a free downloadable maze book for Kids !

Here is an outline for this blog post with jump links if you want to skip ahead to a section:

KIDS MAZE DEFINITION

THE 5 RULES OF MAZE DESIGN

HOW TO MAKE A KIDS MAZE

ADDITIONAL EXAMPLES OF KIDS MAZES

FREE KIDS MAZE SECTIONS ON THE SITE

START AND GOAL OPTIONS

MAZE TEMPLATES FOR KIDS

FREE DOWNLOADABLE KIDS MAZE BOOK

KIDS MAZE DEFINITION:

Kids Maze - A maze that is geared for young children is an easy maze. You don’t want the child to get frustrated and quit before reaching the goal. Kids mazes have wide pathways and obvious, short dead ends. It also should include labels for the start and goal.

THE 5 RULES OF MAZE DESIGN:

These 5 rules apply to any maze you make so we start with them !

1. Always keep an open pathway for the solution

While drawing a maze you will need to juggle multiple open pathways each of which could become the solution. One of them will become the solution. Keep track of it. This is especially important if you are designing pathways in both directions (from the start and from the goal).

2. Clearly mark the start and goal, or the objective of the maze

A maze should have a start and a goal that you can assess just by glancing at it. There are many ways to start and end a maze I review in this blog post: Options for Starting and Ending a Maze

3. Ensure the difficulty matches the intended audience

Most people want to solve a puzzle/maze that is just slightly below or slightly above their skill level. Many things help determine the difficulty of a maze. Size, number of branches, the length of dead ends, the number of choices, the complexity of the rules (if the maze has them).

4. Ensure your maze has a solution

When your maze is complete, solve it to determine the difficulty level and to ensure it is a real, solvable maze. Depending on the complexity of the maze you may want to do this right away or wait so you can properly assess the difficulty.

5. Explain anything that needs explaining

Some mazes have rules or conditions. Explain them with directions. If it isn't obvious, make it so.

How to Make a Kids Maze

Step 1 - Draw the Outline

The outline of the maze makes the outer wall of the maze. It can be anything from a simple shape like a square, to a complex picture. The outline should be thicker than the internal lines to give the maze definition. In the example below I chose the state of Ohio.

Step 1.5 - Choose the Start and Goal

For the below example I chose the start of Cleveland and the goal of Cincinnati. Consider adding the words START and GOAL to the maze to replace the arrows, or in addition to them,

Ohio Map outline for maze

Note that a kids maze construction can be standard, grid, arrow, or really anything that is able to be adjustable in difficulty for children. Below is a Kids Standard Maze !

Step 2 - Start Drawing the Walls

Starting from entrance, begin drawing walls. Walls should be far apart to build wide pathways. Any dead ends you make should be short and obvious. I also widened the entrance and goal.

23.1 Easy Kids Maze start paths.png

Step 3 - Complete the Walls

Draw the necessary walls to make the final pathways and complete the maze.

23.15 Easy Kids Maze - finish paths.png

Step 4 - Label the Start and Goal

Give kids an extra cue by labeling the Start and Goal of the maze.

Ohio Kids maze

Step 5 - Make the Maze Solution

Highlight the correct path in the final version of the maze to create the final maze solution (shown here in red). Notice how the white spaces ( the dead ends) are obvious.

Ohio Kids maze - Solution

ADDITIONAL EXAMPLES OF KIDS MAZES

You just learned how to make a standard style kids maze, but you have dozens of options to consider.

I have created a gallery of 15 different types of kids mazes. Each of these has it’s own how-to, but I wanted to give you an example of many so you get an idea of the many different types of kids mazes you could create. The use of many different maze types creates a more fun book in my opinion.

FREE KIDS MAZE SECTIONS ON THE SITE

This website is full of free mazes for kids. Here are links to the different styles:

Kids On Line Mazes

Arrow Mazes for Kids

Kids Weaving Mazes

Kids Dot Mazes

Kids Standard Mazes

Kids Laser Mazes

Kids Shape Mazes

Kids Circle Mazes

Kids Line Leads Mazes

Kids Animal Mazes

and more….

START AND GOAL OPTIONS

I want to take the time to show you some of the many options you have for starting and ending the maze. I did not use any labels above, but arrows are pretty standard. You have other options as I outline in Options for Starting and Ending a Maze. Here is the above maze but using 5 different choices to for the start and goal. You have options !

MAZE TEMPLATES FOR KIDS

I have been asked for templates so kids can create their own mazes. Here is a gallery of 7 maze templates with downloads. You can choose the type of start and goal to include and fill in the gaps you want to make a maze ! I included 3 holiday versions that come from my free Christmas Books.

FREE DOWNLOADABLE KIDS MAZE BOOK

Kids Maze Book Cover

EASY MAZES FOR KIDS BOOK

A free downloadable book featuring 30 different mazes. Includes standard mazes, mazes where you need to avoid items, and mazes where you need to collect items ! A nice beginning maze book.

File Size: 2,013 KB

Interested in learning how to make or draw other types of digital mazes ? I have step by step instructions on how to make over 40 different maze types.

If you prefer making labyrinths, you can find step by step labyrinth making instructions.
Maze and Labyrinth News - September 2026

It is that time again. Time for maze and labyrinth news from the past month. This month will focus on the upcoming corn maze season !

Before we get to the corn mazes I thought this article was fun:

Vote for the best corn maze in the USA !

  • Each year USA Today has a Reader’s Choice award for the best corn maze. Their are 19 nominees for you to vote on !

Corn mazes to check out:

  • Dolly Parton - there are over 20 corn mazes this year that were scheduled to celebrate Dolly that have a little extra meaning now. Here are examples from (Michigan)(Alabama), and this article from Canada talking about them. Here are 2 more video examples:

  • The Winnipeg Jets logo

  • This maze celebrates the 150th year of Colorado !

 
  • And a new Labyrinth in VA

I mentioned before that I had updated all of my labyrinth suggestions in the US for 2026. That includes the 10 Labyrinths to Visit in Virginia and 1 Maze. Well the Greenville VA HCC just opened a brand new labyrinth, as detailed in this article, and new labyrinths are always worth a visit !

Some news is evergreen and can be found in past monthly news posts:

June 2025, July 2025, August 2025, September 2025, October 2025, November 2025, December 2025, January 2026, February 2026, March 2026, April 2026, May 2026, June 2026, July 2026 and August 2026.