
I’ve made over 1,850 different names into mazes on the site. You can try to find your name on the name maze page. If you have a name that is common in the United States or a top ten name in another country, there is a good chance you’ll find it ! To read about how I’ve picked the names you can read this post. And of course if you just want to skip everything and have me make the name maze for you, you can request a name maze here.
Today I will take you thru 5 different options to digitally making your name into a maze. Let’s get started !
Option 1 - By Using an Existing Font
Step 1 - Select your Font
A good maze-able font is one that is thick enough that it will allow pathways and walls to be draw within them. That means either a Bold version of a font or a font that is naturally wide. You may want to consider a “blocky” font if your name contains an angled character that does not fit into a square based grid well, K, M, N, S, V, W, X and Y. In the example the fonts are all the same point size, but the bottom 2 fonts will be significantly easier to maze.

Step 2 - Prep your Name
After spelling out your name in the font you have chosen, adjust the fill and stroke to essentially hollow out your name. Typically the fill becomes white (or whatever background you are working on) and the stroke becomes black (or the color you want your name to appear in). The Stroke, or outline should be greater than or equal to the width your maze walls will be drawn at.
Step 3 - Create a Background Grid
Align your name with an appropriately sized grid when compared to the font size. This grid will become the basis for your maze walls. In the example below I actually drew on top of the grid (typically transparent in the final product). As you can see the letter height has room for 3-4 pathways in the north south direction. 2 would be a minimum needed to make a maze in a letter which would be suitable to kids. The more pathways, the harder the maze you can make ! If you want to want to get very fancy for curved letters you can skip the grid and use curved hand drawn lines. In this example the C. The A could also use a grid that aligns with the outer wall rather than the horizon.

Step 4 - Start Maze-ing
There are many different types of mazes and constructions you can use, check out 40+ here, including instructions on how to make them. For my example I am going to use a standard maze construction, but I think a grid maze construction works especially well if you have any of the angling letters mentioned in step 1. Here is a start arrow and the M mazed. Notice the connection between the M and I that was created. I used a width slightly larger than the pathway, but you can equalize that if you prefer that look.

Step 5 - Complete the Maze
Continue thru the maze construction process until you have completed the maze. Add the exit arrow and you are complete. With most name mazes there are natural points where the letters can connect to one another without much trouble, as in the A with both the H and E. For the letter C because it has natural connections from both the top and bottom portions I used both to add some complexity to the maze. For all other letters, once you enter a new letter, you can immediately see your goal out to the next letter.

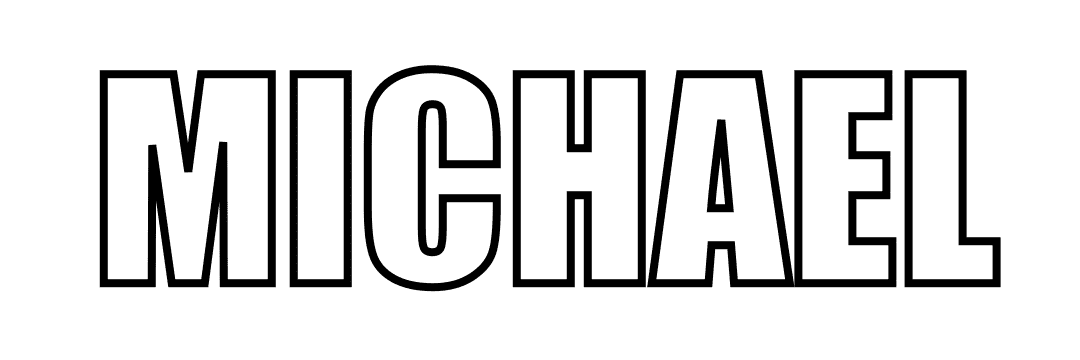
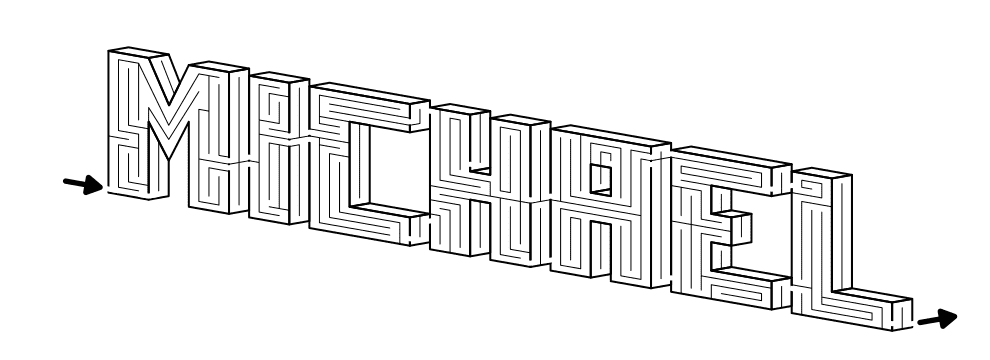
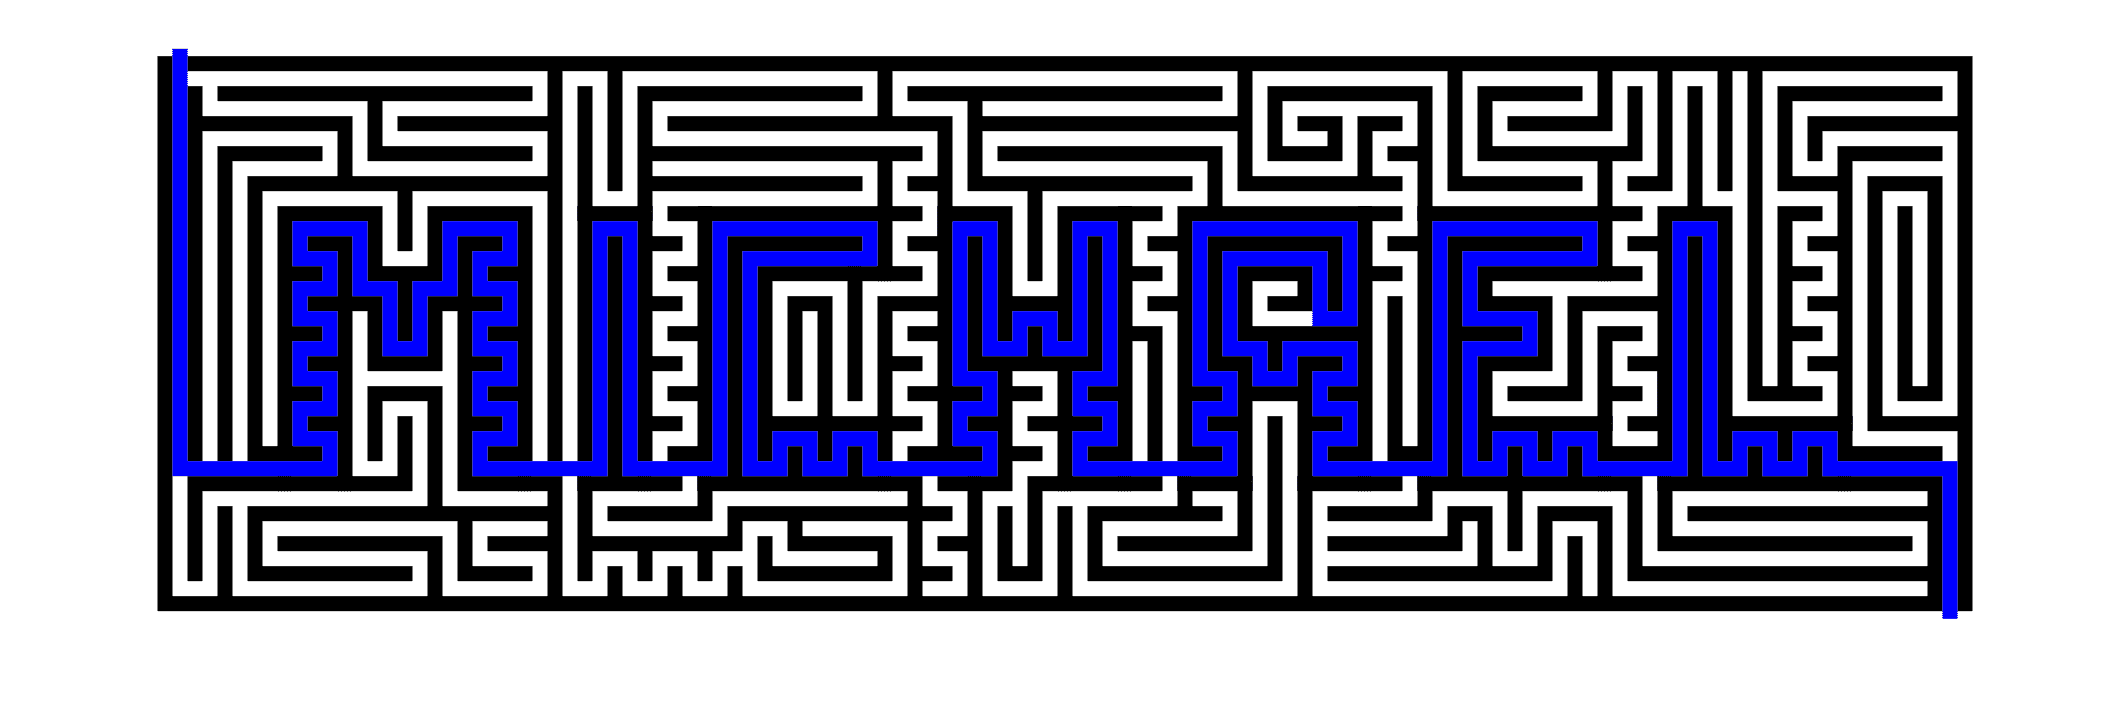
For comparison, here is the Michael maze I have on my site in the Name mazes section. It uses the same font as Option 1 but has a much different look based on the scale of the internal paths. This creates a much more difficult maze for the solver ! For construction purposes I also use a consistent connection point between the letters.

Michael name mazed
Option 2 - By Drawing the Individual Letters
Step 1 - Set-up a Grid
I will be using a standard square grid shape in this example. First, make a standard size for your letters. I like the height to be between 1.5X and 2X larger than the width. Below see what 3 common options look like. You also need to take into account how many paths you want in a standard upstroke of a letter. Think the left side of the H or an E. Anything less than a width of 8 will be difficult to work with. Notice how the letter H looks in each size.


Step 2 - Letter Your Name
Make your name in the size you choose (below is 10 x 16). Space each letter the same distance from the next (I suggest 1 or 2 blocks). Make each upstroke the same width for each letter. If your name contains a W or M you will need to add additional width for those letters, and of course the letter I will be smaller width (with options for the same with J, L and T). Notice the letters are very “blocky” which will help during the maze making, but they do not have to be. Because you are making the Letters using a grid the resulting maze will be much more uniform than using a font to build from.

Step 3 - Make the Maze
There are many different types of mazes and constructions you can use, check out 40+ here, including instructions on how to make them. Again, I will use the standard maze construction for this example. In my example below I used 1 space between letters. Notice the spacing of the walls are more uniform than in the first option. Also I did the maze walls in the M to match the angle of the letter with no movement options in that section.

Option 3 - Drawing Dimensional Letters
Step 1 - Set-up an Axonometric Grid
Use an Axonometric grid to draw a 3-D looking object on a flat surface. Think about drawing a cube. When I set-up this grid I use a low angle % - the higher, the more slope the name would have. In my example I used 10%. You can check what the spacing will look like by drawing placeholders for each letter in your name. Similar to Option #2 above the optimal letter size seems to be height 2X width as in my example below.

Step 2 - Letter your name
I like a gap of 3 grids between letters - they will eventually be filled in to allow a nice transition for the maze between letters. Again, the M is expanded in this case because it is a wide letter.

Step 3 - Give it Depth
Add the depth to each letter using the slope in the other direction of the letters. The depth portion of each letter align naturally to the front of the next letter so there is no need for a connector bridge between the letters as there is in the other 2 options above.

Step 4 - Make the Maze
Draw the walls of the maze in the same sloping direction as the edge you are on. Use the depth of the maze as the transition between letters. Add start/goal arrows
I hope you found a maze construction you like to make your name a-maze-ing ! And remember that even though each of my mazes were done in black and white fell free to add some color !!! I went with yellow, red and burgundy for the below example, but play around with your own colors and you can find some great combinations. I will say that when you do 3D letters, it can help people read them when you are consistent in your colorations based on the orientation of the letter sides. Here, yellow in front, red on the sides, and burgundy on the (un-mazed) tops. As always, if you use dark colors for the background, you should use light colors for the maze walls. A black maze on a navy or burgundy background would not be enjoyable for the solver !

Option 4 - USE MY PRE-MADE MAZED Letter templates
I made an entire book of hidden message mazes. While working on it I decided to make a series of 4 mazed letter templates to be used for making hidden message mazes quickly. I have already done the work of mazing each letter, so you just need to put them together. Below is one of the four templates, but I suggest you click the link above to see the other options (or just to get inspiration to make your own mazed letters!). Some letters always give me trouble when starting from scratch !!

Before we get into to details and step by step, what do you notice about the mazed latters ? Hopefully that they are actually labyrinthic letters - there are no choices along the pathways ! So this is actually how to make a labyrinth of your name….UNLESS, you use this template and add gaps in the letters that lead to dead ends. This would be used in a hidden message version using these letters. In other words, hiding a name into a larger maze. Let’s get onto Option 4.
Step 1 - copy the design of my letters
Step 2 - spell your name

Step 3 - connect the letters
Notice that my letters almost all align at the bottom with a few exceptions (N, S, W, and Z). With these letters you can adjust surrounding letters, or the maze within the actual letter. Each letter can be adjusted if needed.

Step 4 - add the start and end arrows

Option 5 - HIDDEN NAME MAZE VERSION
This is a variation of option 4 above where I used pre-made letters to create the name Michael. As I mentioned above the result of this is actually a labyrinth of the name Michael, because you cannot get lost like you might in a maze.
Step 1 - spell your name using my letter template
Also note that I did change the latter A slightly with a dead end in the opening center of the A.

Step 2 - begin mazing around the letters
First I added a border around the name. Then I began adding false pathways in the maze. Key to this maze is to not let any false pathway lead anywhere, including back to the actual name.

Step 3 - complete the maze
And add a start and goal arrow. This is a hidden name…but not well hidden IMO if you know what you are looking for. This is a relatively easy solve however once you get into the letters because as long as you do not break away between letters where the main gaps of false pathways are you will solve the maze.

Step 4 - MAKE A SOLUTION
Check your work. How will the maze look when someone solves it ? I think this hidden name maze looks pretty good !
By now you should be able to make a maze of your name !
Interested in learning how to make or draw other types of digital mazes ? I have step by step instructions on how to make over 40 different maze types.
If you prefer making labyrinths, you can find step by step labyrinth making instructions.