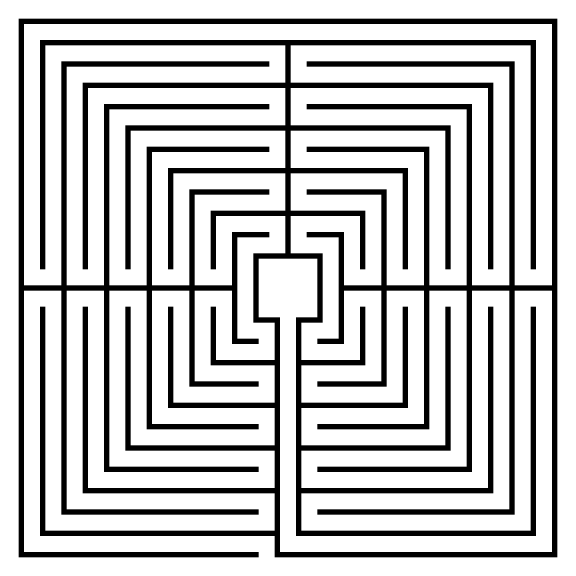
How to Draw an 11 Circuit Square Labyrinth

Drawing an 11 circuit square labyrinth is fun once you learn the starting seed pattern and the rules of building the pathways. Follow this 13 step process and draw your own 11 circuit square labyrinth. You’ll notice that the square version is extremely similar to the regular (classical) version of the labyrinth in terms of making it.

I also want to show you an alternative 11 Circuit Square Labyrinth I made using a different construction method. This version has a large center goal (shown on the left below). If you prefer this version of the 11 Circuit Square Labyrinth these step by step directions can be adapted to make any size circuit. Simply read through step 2 and adjust based on your desired size ! Today I will be showing you how to make the version on the right !
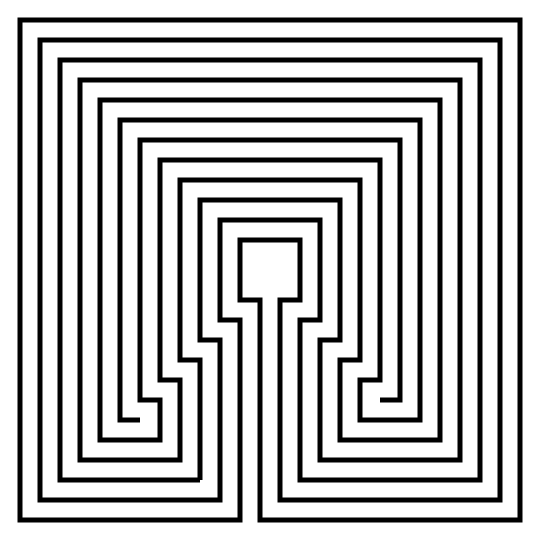
11 Circuit Square labyrinth variant center.

Alternative Method - large center

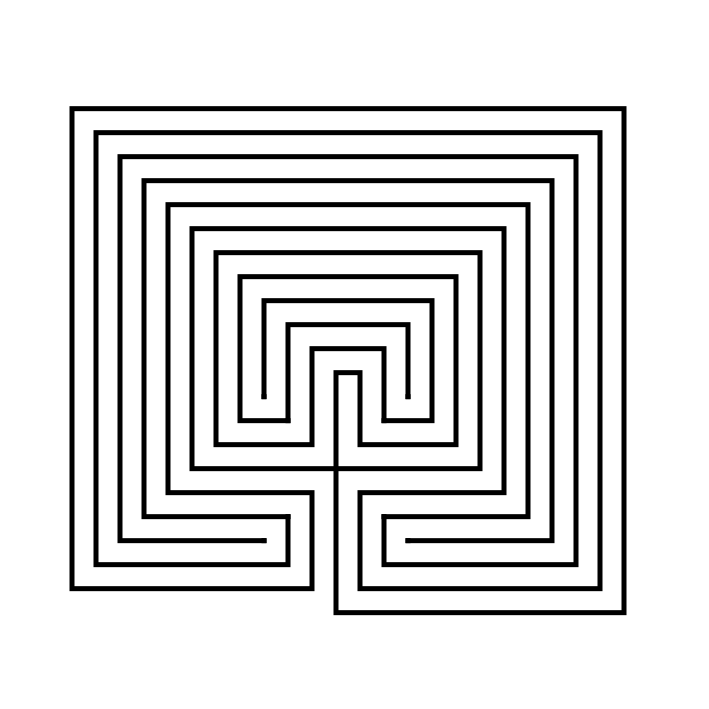
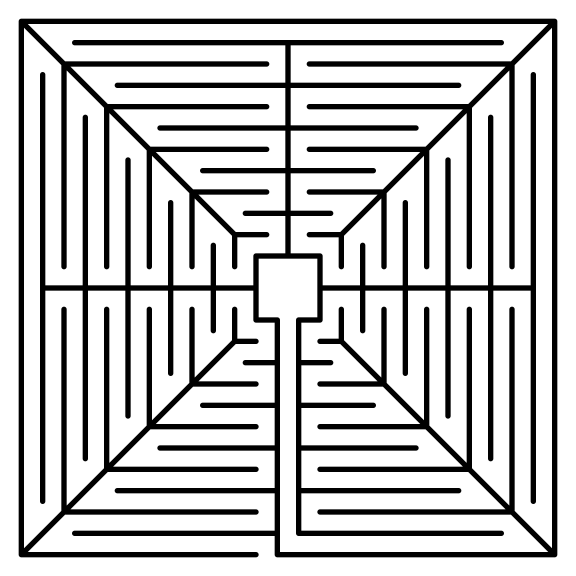
11 circuit square labyrinth

Small goal - learn how to make here !

Here is what you will find in this post:

PART 1: STEP BY STEP LABYRINTH DRAWING INSTRUCTIONS

PART 2: THE LABYRINTH BEING MADE WITH GRIDS SHOWN

PART 3: MORE ALTERNATIVE LABYRINTH CONSTRUCTIONS

PART 4: REAL WORLD LABYRINTH EXAMPLES


PART 1: STEP BY STEP LABYRINTH DRAWING INSTRUCTIONS

Step 1: Draw the starting seed pattern

The starting seed pattern based on an imaginary 6x6 box grid. Start with a centered is a plus sign. Add L shapes one grid away from the plus sign in all 4 quadrants. Now add another L shape in all four quadrants one grid away from the previous L’s. Finally add a dot to each of the four corners. Basically, copy the seed the pattern you see here (notice this is the same as the regular version):
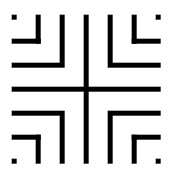
11 circuit square labyrinth seed pattern

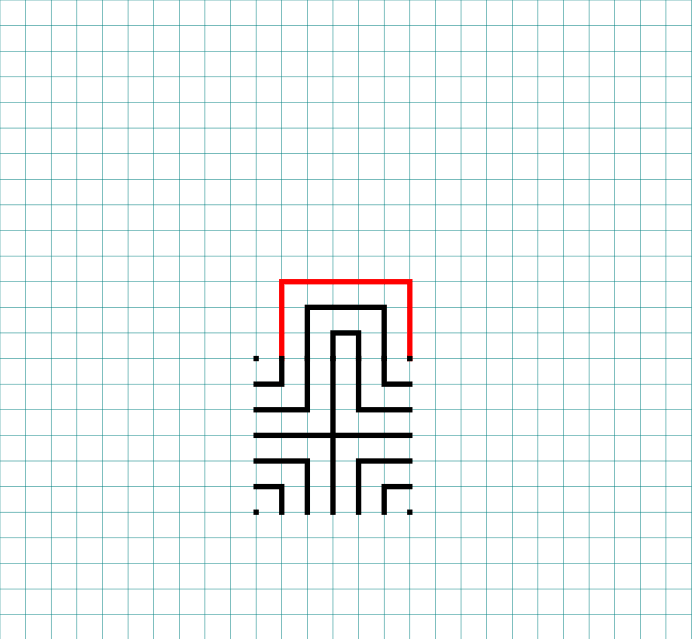
Step 2: Connect the first connection to create the goal

Draw a boxed line from the top of the plus sign to the L directly to the right using that extends 1 grid high. This line will form what will become the goal of the labyrinth.

How to Draw an 11 Circuit Square Labyrinth, step 2

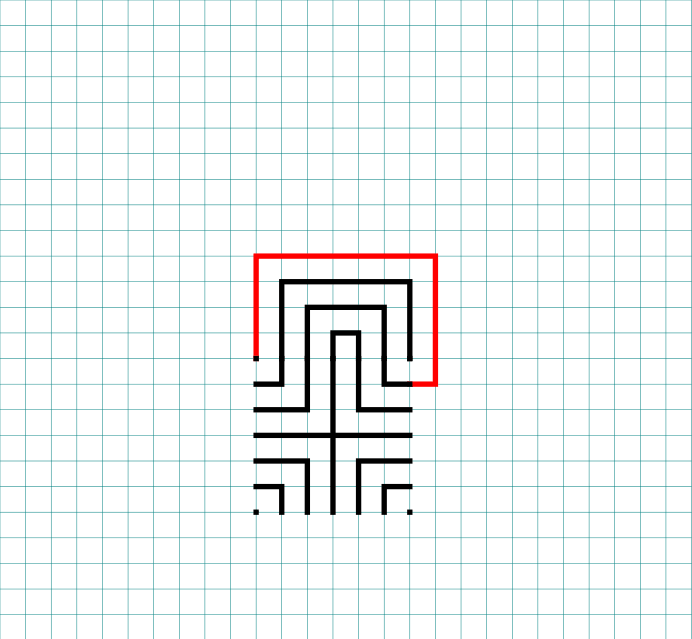
Step 3: Connect the next endpoint to the left to the next endpoint on the right

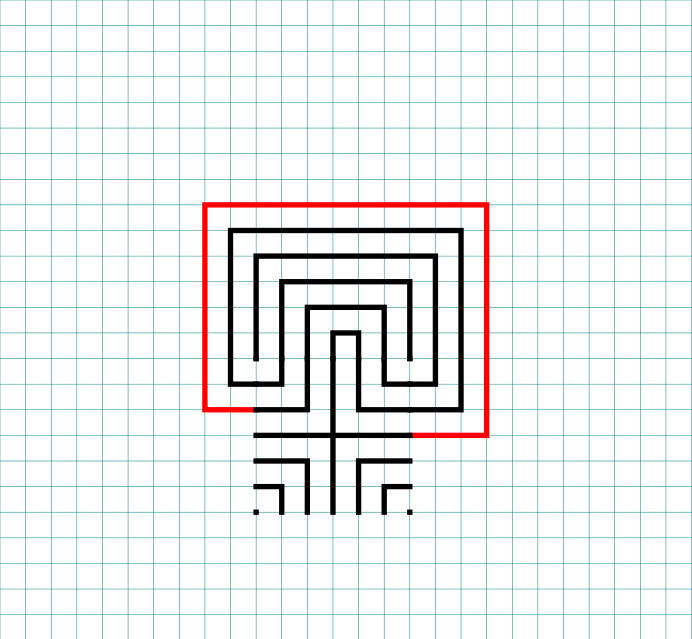
Every step from now on will be basically the same. Move one point to your left (moving counterclockwise) and connect that to the next point on the right (moving clockwise). In this case the large backwards L on the top left of the seed pattern to the small L on the top right of the seed.

How to Draw an 11 Circuit Square  Labyrinth - Part 3

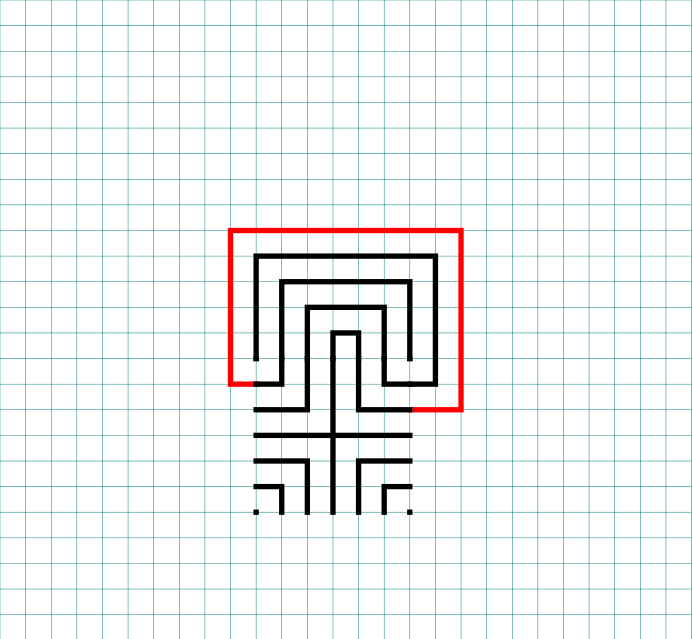
Step 4: Connect the next endpoint to the left to the next endpoint on the right

The small backwards L in the top left to the dot in the top right corner.

How to Draw an 11 Circuit Square Labyrinth - Part 4

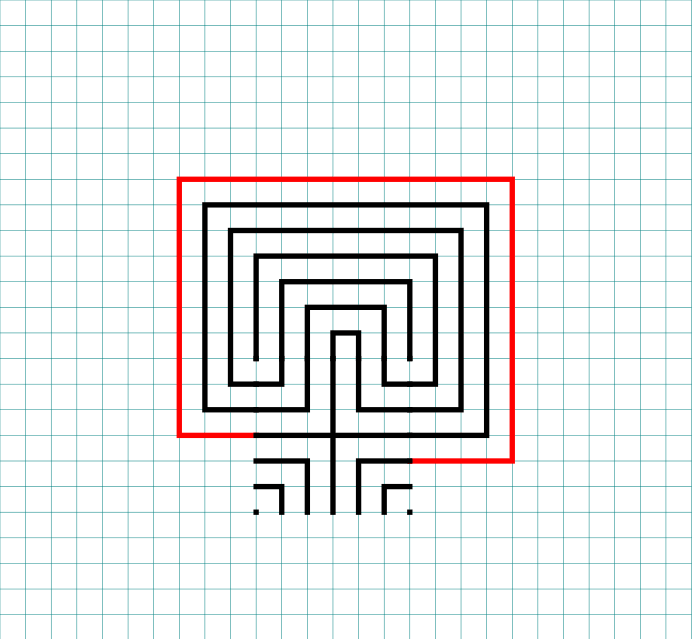
Step 5: Connect the next endpoint to the left to the next endpoint on the right

The dot in the top right corner to the end of the small L in the top right corner.

How to Draw an 11 Circuit Square Labyrinth - Part 5

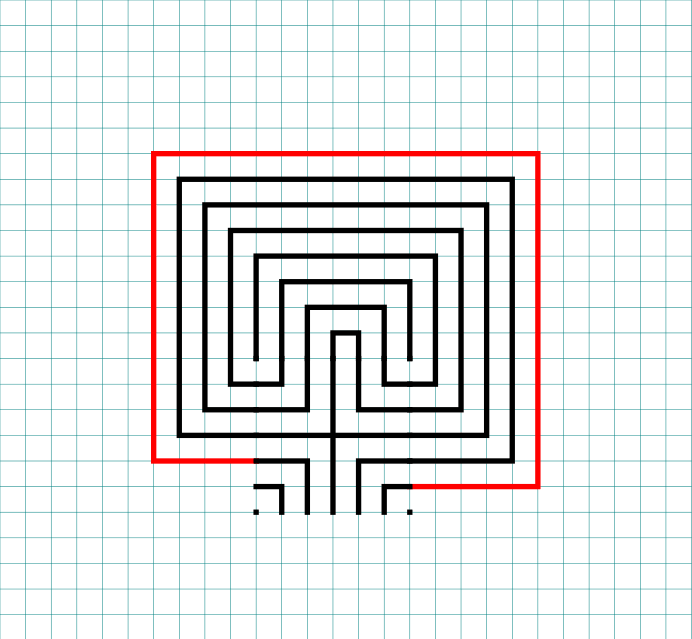
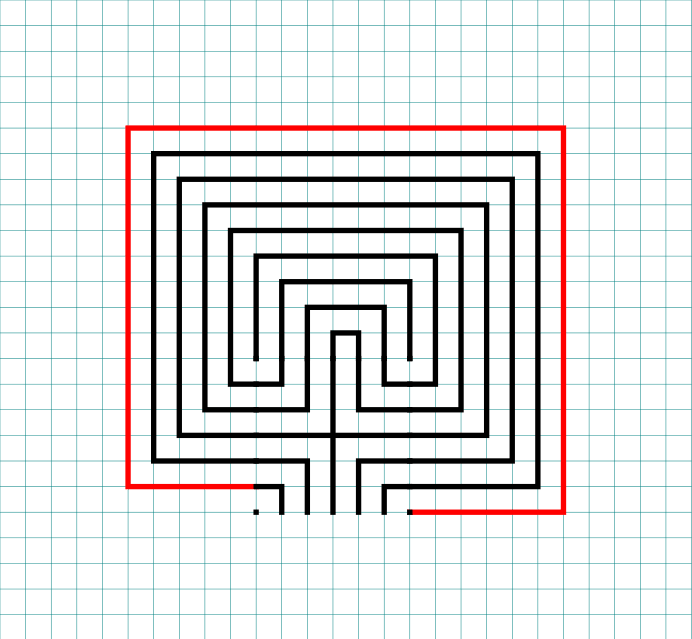
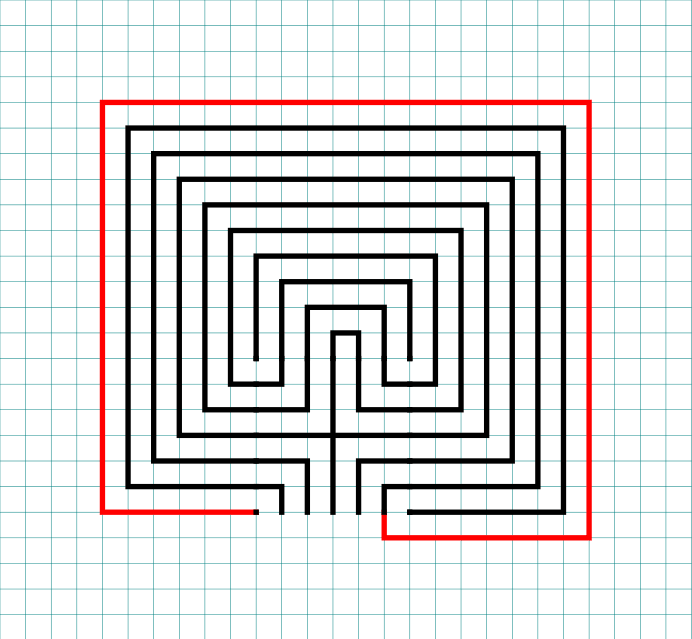
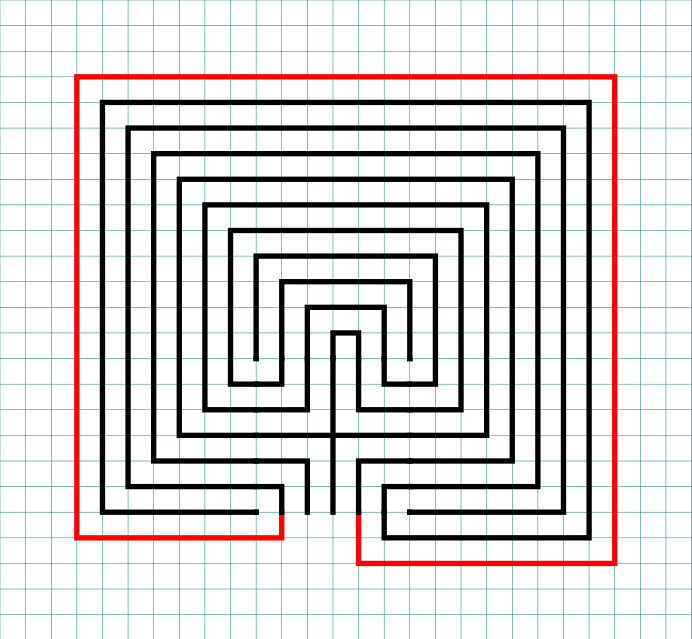
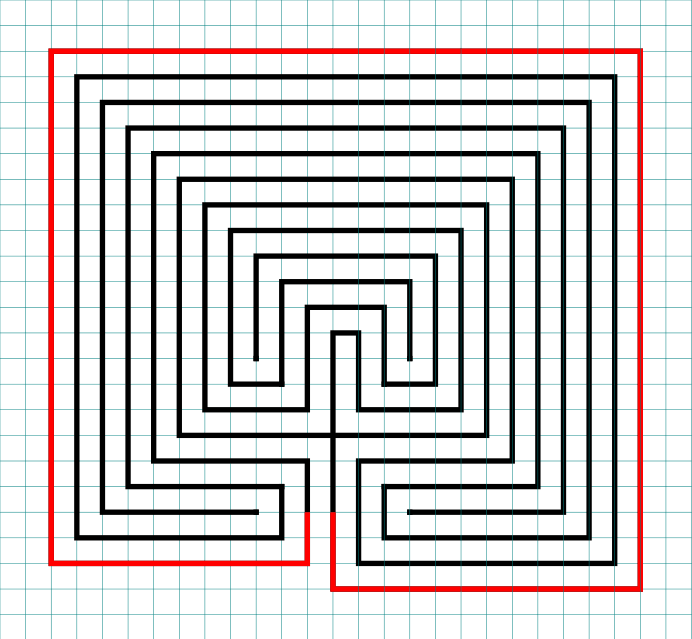
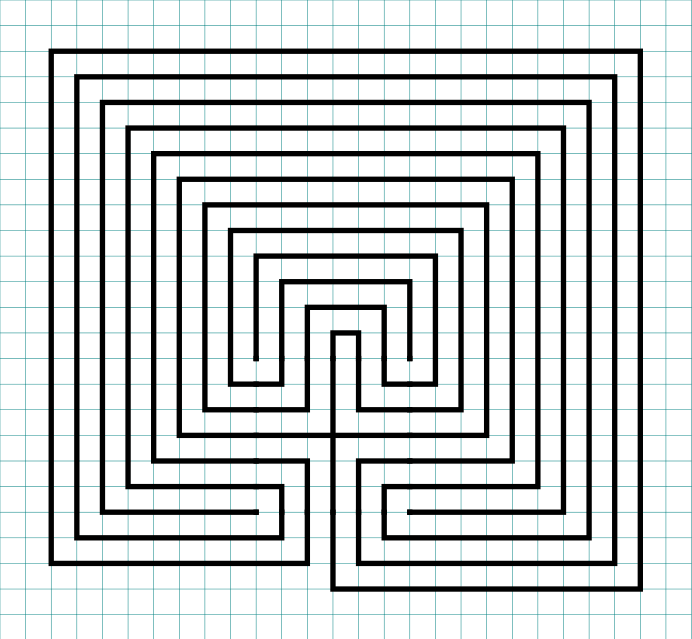
Steps 6 - 13: Connect the next endpoint to the left to the next endpoint on the right

I assume you have the pattern down to complete with only pictures with nice red lines. Follow the graphics to complete connections 5-12. Here is the Summary of the connections you will make starting from the seed:

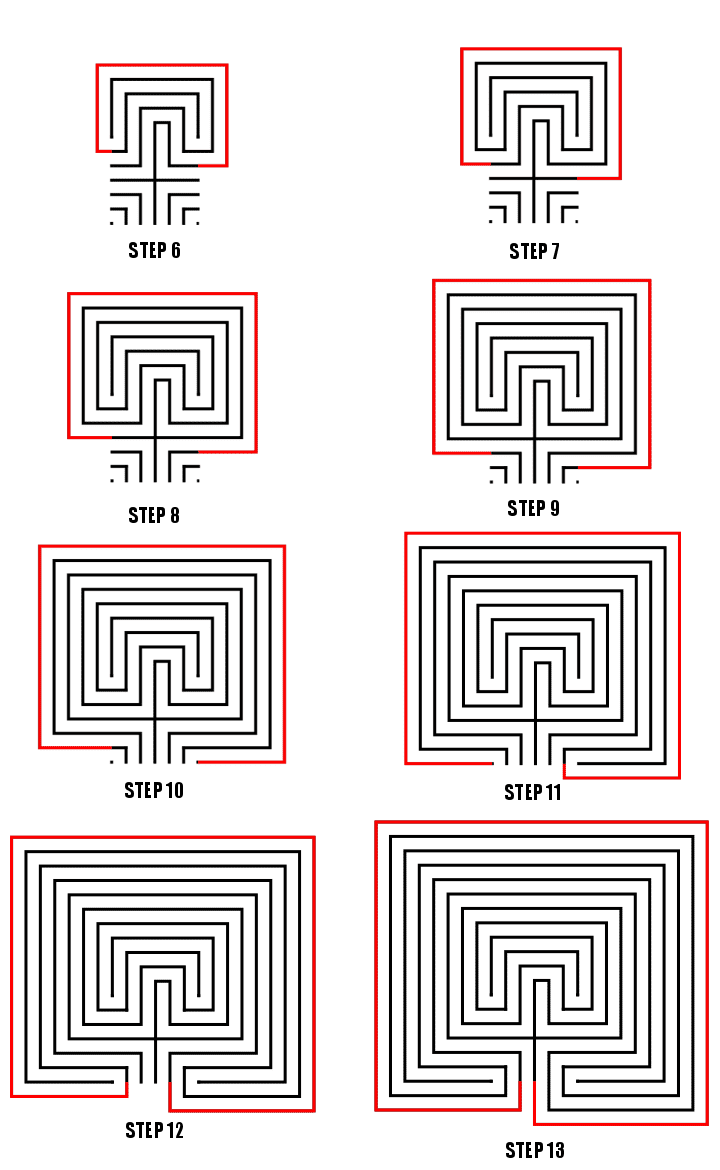
Making an 11 Circuit Square labyrinth steps 6-13

Connections 5-12, Steps 6-13

That completes the drawing of an 11 circuit square labyrinth. If you are interested in a comparison of Classical, Square and Circular Labyrinths check this blog post out.

11 circuit square labyrinth
 

PART 2: THE LABYRINTH BEING MADE WITH GRIDS SHOWN

Nothing special here, just everything you just learned but shown with grids. Use the controls to build the labyrinth step by step. Notice that the labyrinth seed is placed low on the page but the labyrinth still ends up centered on the page,.
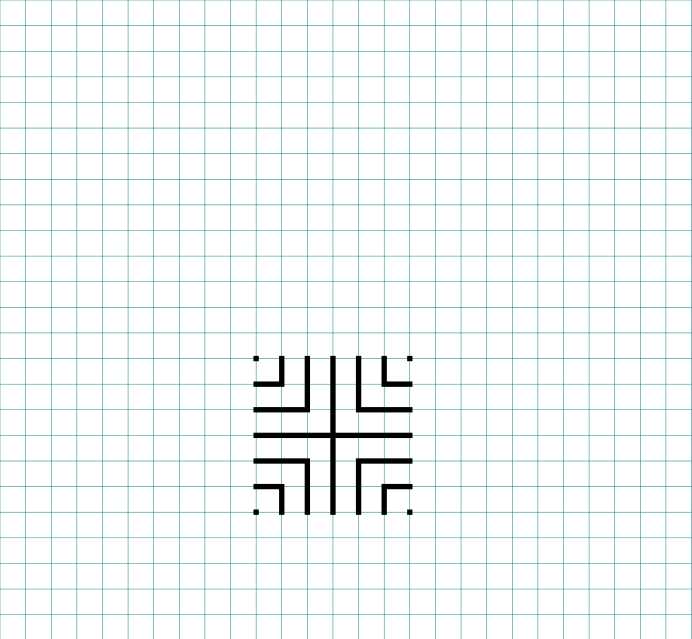
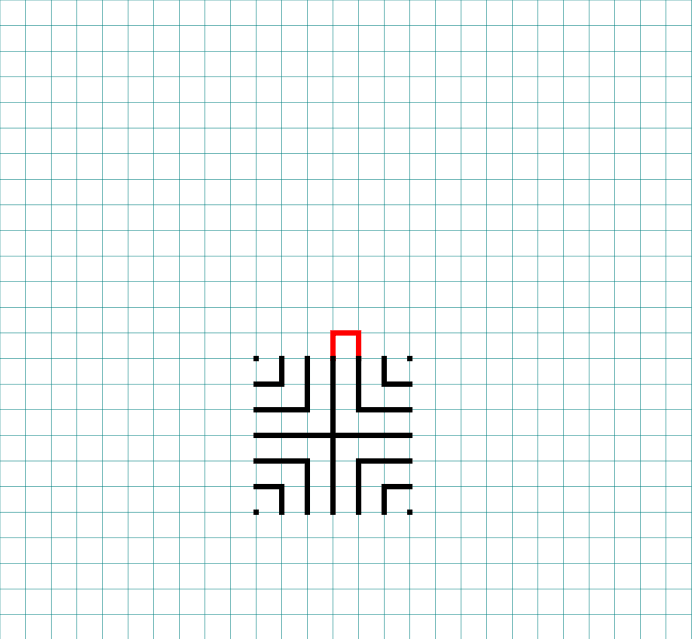
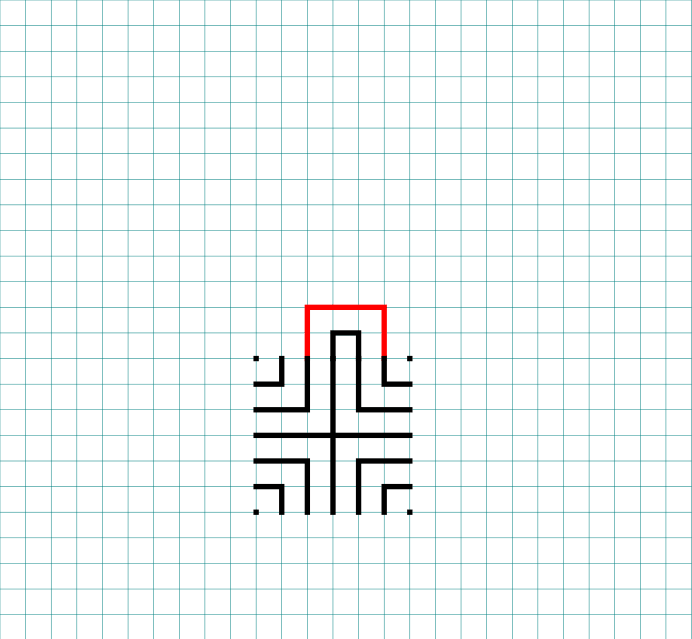
PART 3: MORE ALTERNATIVE LABYRINTH CONSTRUCTIONS

  • Right handed version: You just learned how to make a left handed square labyrinth. You can tell it is left handed because when you enter the first direction you move in is the left. To make a right handed version you flip the seed pattern and draw from right to left. Think of it as happening in a mirror.
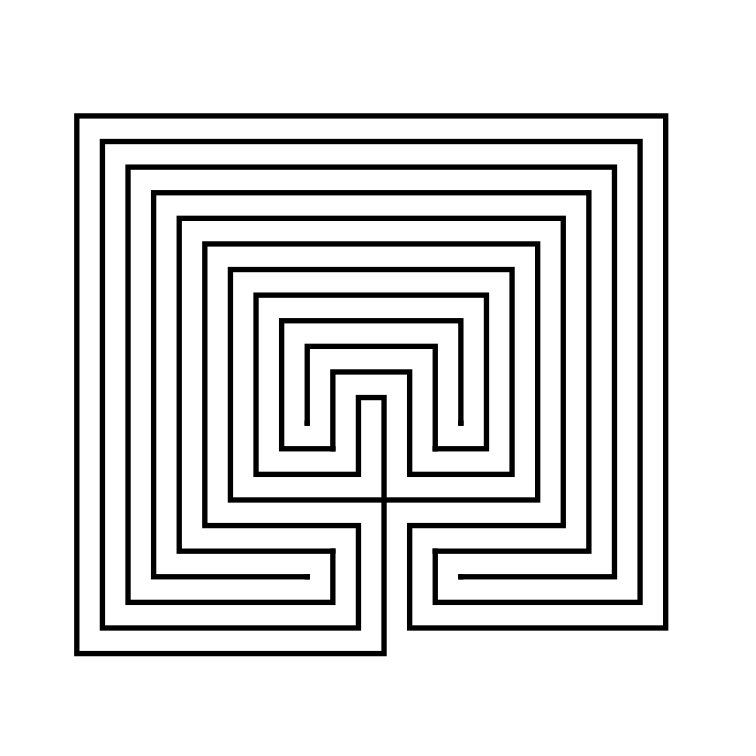
11 Circuit Square Labyrinth right handed
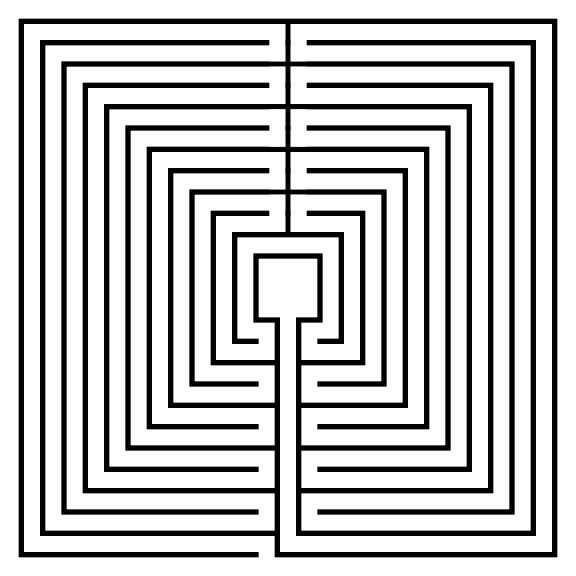
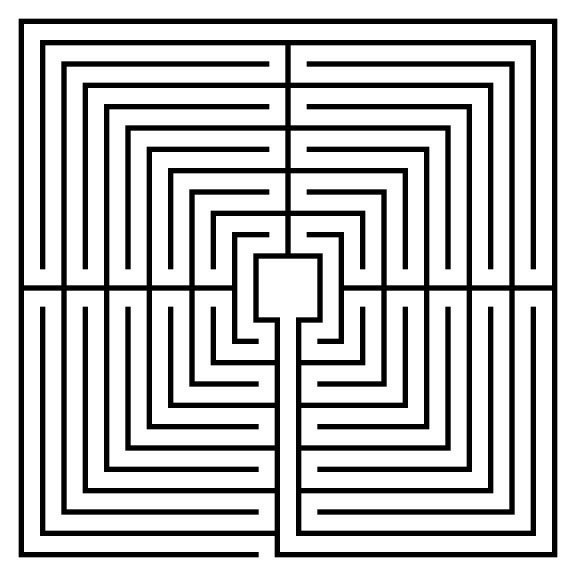
  • Assorted section options: The labyrinth you just learned to draw has 1 section. You can also choose to draw the labyrinth in 2, 4 or 8 sections. I am sure 3, 5 etc. sections are possible, but the geometry of the square makes even numbers a natural fit. Here are what the 2, 4 and 8 sectioned labyrinths look like:
  • The Spiral Labyrinth: No step by step process needed for this. Start in the center and stop when you prefer. To fit with this post I made mine 11 circuits. Yes, spirals are typically circular, but they do not have to be.
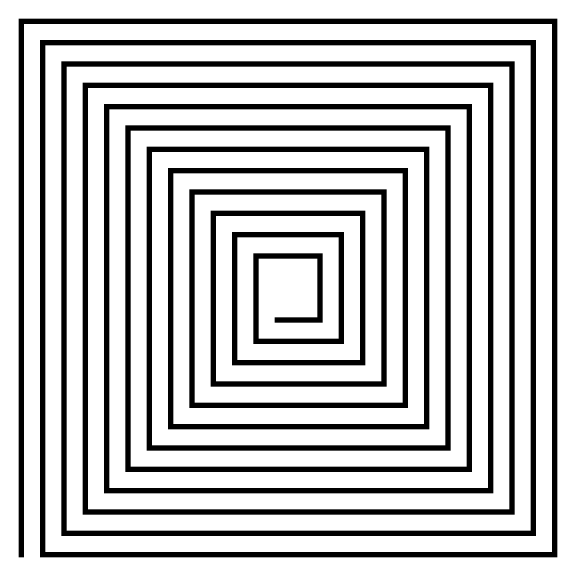
11 circuit square spiral labyrinth
 

PART 4: REAL WORLD LABYRINTH EXAMPLES

Here are some 11 circuit square labyrinths you can find the the US:

  • The St. Benedict Church Labyrinth located in Hollister, CA has 11 circuits and is a Medieval style with unique places to sit and a + shaped center ! It has a 60 foot diameter and is located in the courtyard of the church.

  • There are not many 11 circuits to choose from so I will instead show you the Hunter Presbyterian Church Labyrinth in Lexington, KY. It is only 9 circuits, but is Roman style, yet another new shape to consider !

I think if you made it this far in the post you will want to read this one too:

Weekly Hard Maze #20

Each Saturday I post a new hard maze with all of them sitting in the Hard Maze Archive. I will try to post a variety of maze types to keep things interesting.

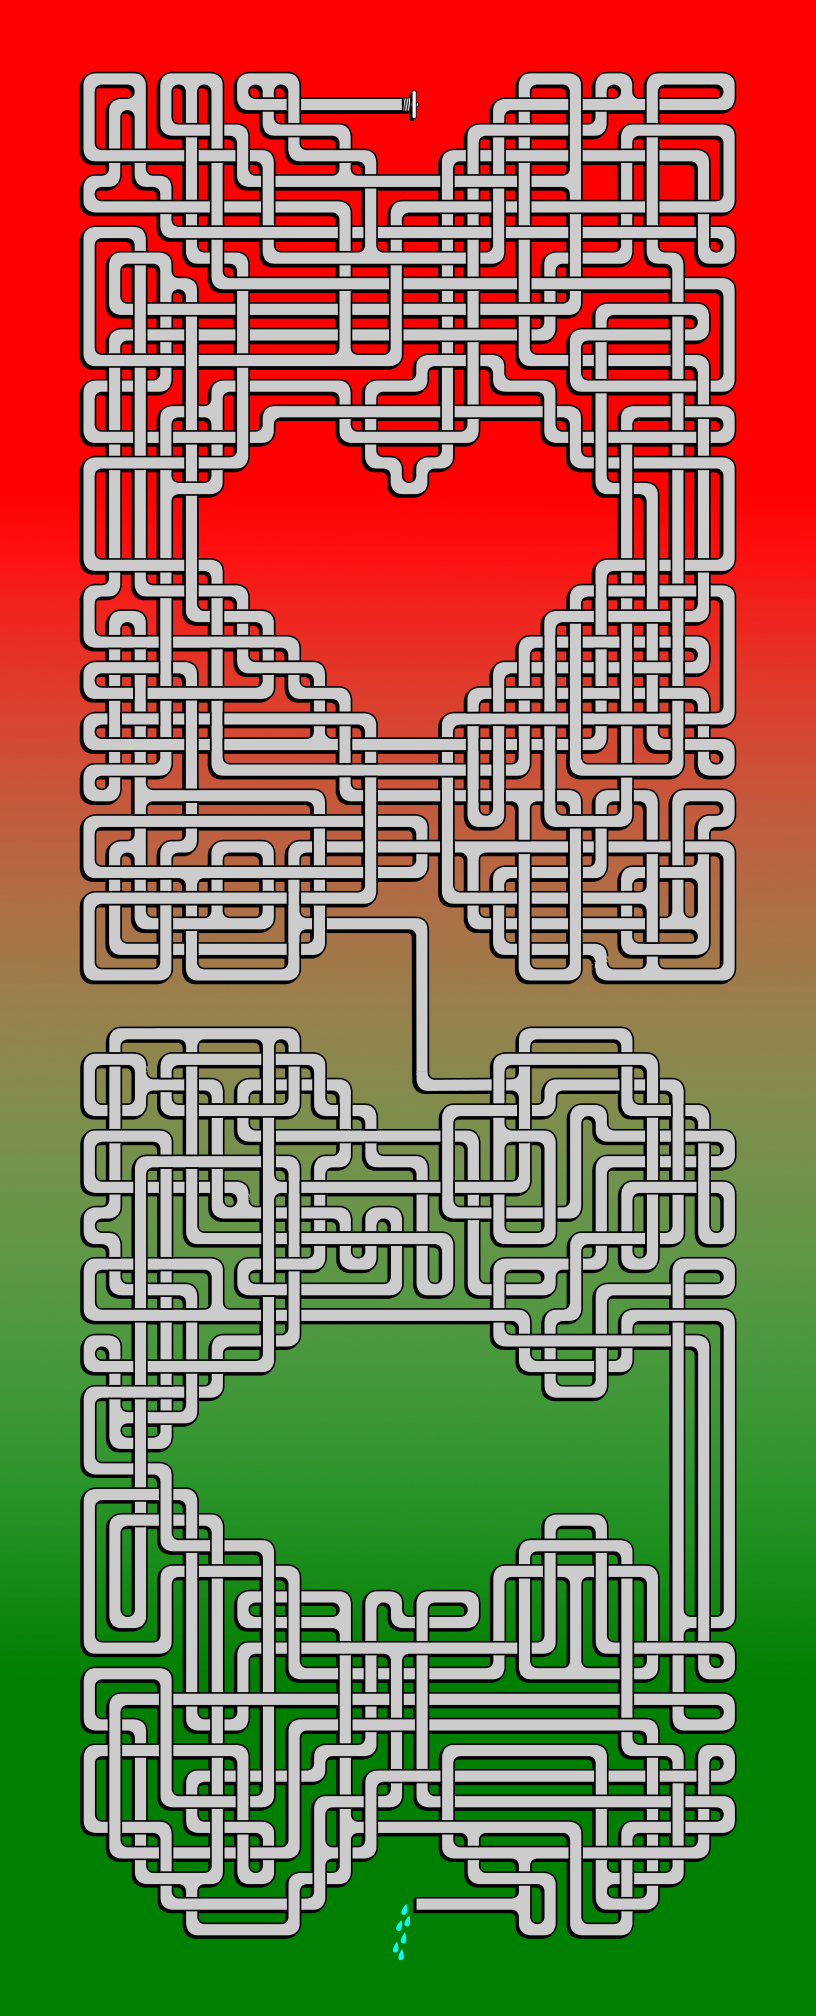
Weekly Hard Maze #20 - Pipes Maze

This is a double pipe maze. It combines a heart and a fish in the plumbing ! Solution will be in the archive. Download is below.

Weekly Hard Maze #20 - Pipes Maze

If you solved that maze quickly and want to try some of my archival hard mazes, these posts should do the trick:

One Maze - Many designs - experiment #19

This is a continuation of my maze design experiments. Read about it in post #1, One Maze - Many designs, and so on with a new post every Friday.

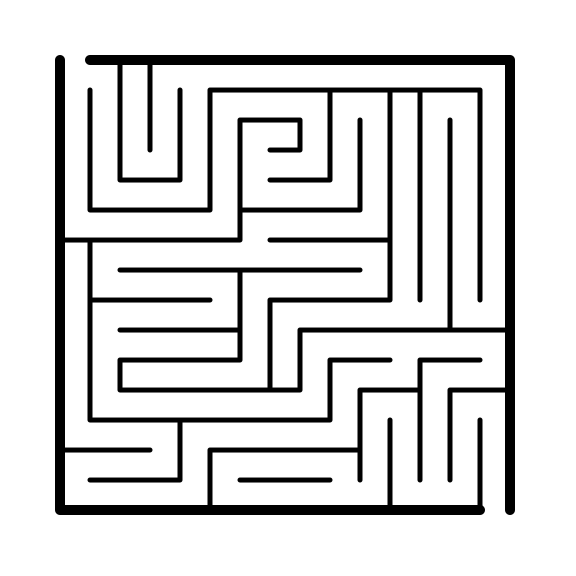
The original maze:

Simple Maze

I used Inkscape and played with layers again this week, but added some colors. 2 of these I really like, let’s see if you agree.

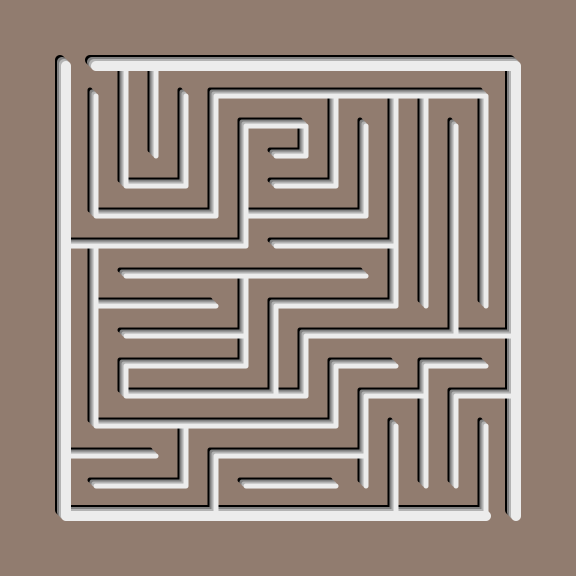
  • The first maze I did a grey background while layering the maze from darker to lighter colors. I like this one!

  • The second maze is a similar concept but using blues to give it more color interest. I prefer the greys !

  • The third maze I made all of the walls white over a blurred black wall to give it a faint black glow. I think it looks cool.

  • The fourth maze takes the 3rd maze and gives it a blue ombre centered blue background.

  • The fifth maze takes the 3rd and gives it a yellow to dark yellow ombre background.

The third and first mazes are my favorites. The glow of black under white gives it a unique look.

How to Draw a 9 Circuit Square Labyrinth

I’ve shown you how to draw square labyrinths using the same seed pattern as the classical labyrinth. Today I will take you through the steps to draw a 9 Circuit Square Labyrinth that has a large square center. In practice this could become a place for meditation or ceremony if built in the real world. Follow this 7 step process and make your own ! You also have the option to make this without the large center square. To see how to do that you can read - How to Draw an 11 Circuit Square Labyrinth and adjust the # of circuits.

Here are the sections of this post:

PART 1: MAKING A SQUARE LABYRINTH (GRIDS SHOWN)

PART 2: ALTERNATIVE CONSTRUCTION

PART 3: REAL WORLD LABYRINTH EXAMPLES

PART 1: MAKING A SQUARE LABYRINTH (GRIDS SHOWN)

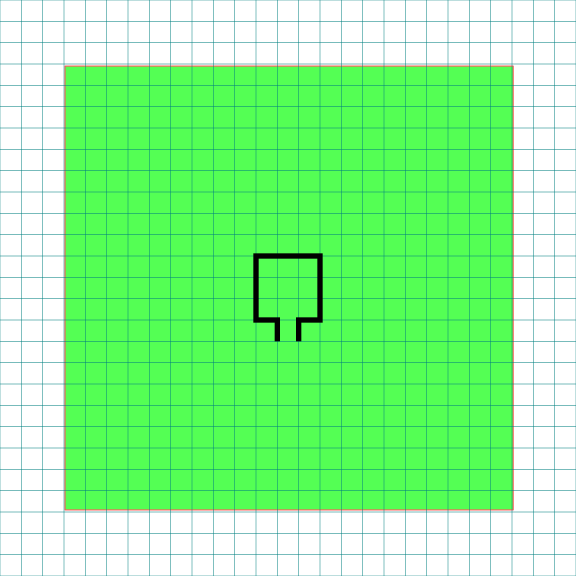
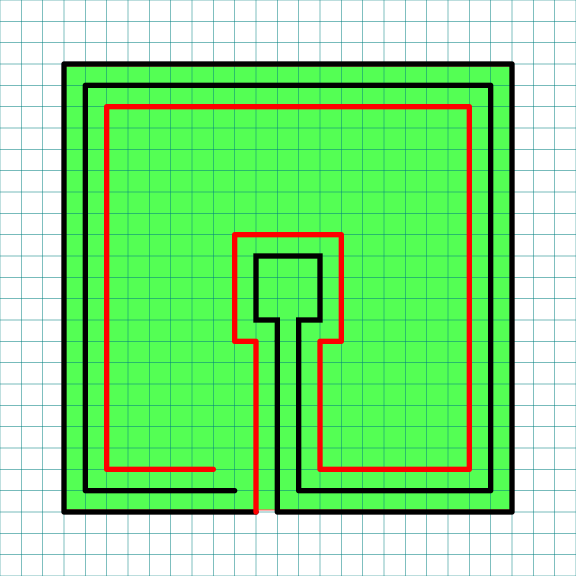
Step 1: Draw the center goal

Draw a box in the center of your paper with a one unit opening at the bottom. To help guide your future lines make a box to represent the outline of the labyrinth size you would like to make. Mine is green, but note that this will be deleted at the end, so color does not matter.

Note: IF you are using a grid, and I suggest you do, the walls of the green square should allow for 9 lines between the edge and the center goal. The total size of the grid network is 21 x 21 when you include the center goal.

9 Circuit Square Labyrinth Center Pad with grids Part 1

Pro Tip: The math on the grid size being 21 x 21 is 9 circuits on one side + 3 grids for the goal + 9 circuits on the other side = 21 grids needed. If you are making a 15 circuit square square labyrinth you can use the same method shown here the guide grid would need to be 15 + 3 + 15 = a 33 x 33 grid. Follow all the steps below and you will create the same style labyrinth but larger !

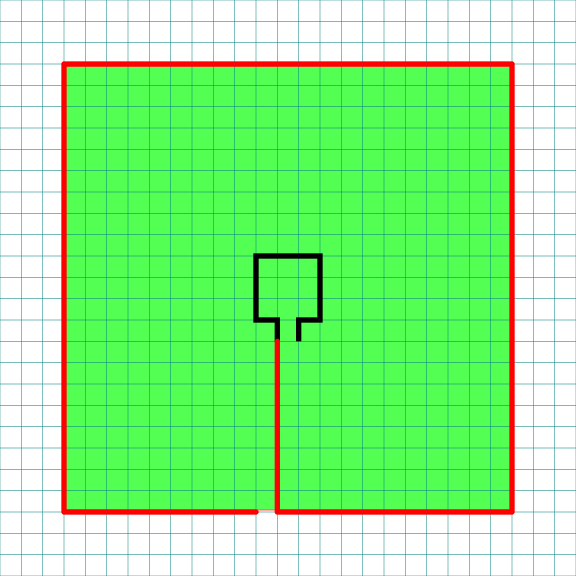
Step 2: Draw the Outer Wall

Draw a the outer wall using the left path from the center, drawing to all way down to the edge and then moving around counterclockwise. Stop when you get one unit away from the edge line as you move around the entire box.

9 Circuit Square Labyrinth Center Pad with grids Part 2

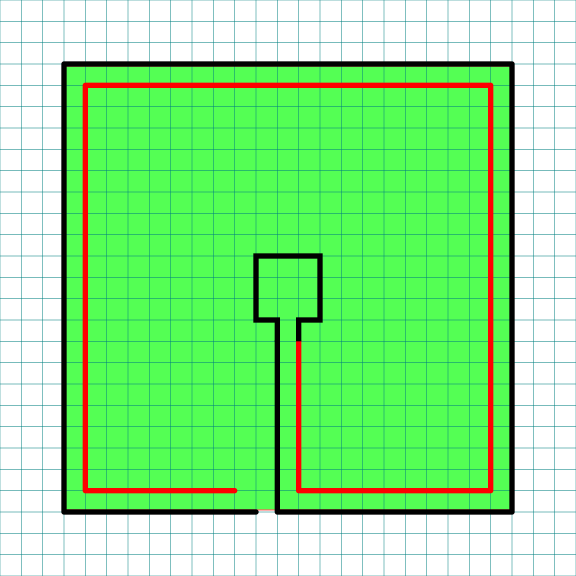
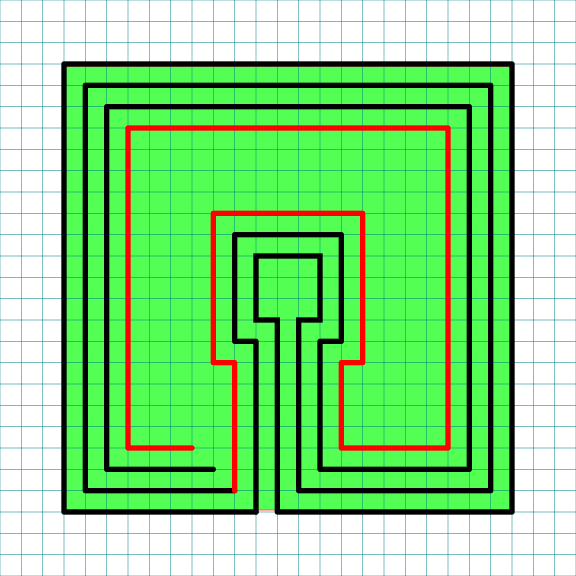
Step 3: Make the next internal line

Repeat the same step as above using the right side of the goal, leaving one unit of distance between this and the previous line to create a pathway. End the line one unit short of the previous line just above it.

9 Circuit Square Labyrinth Center Pad with grids Part 3

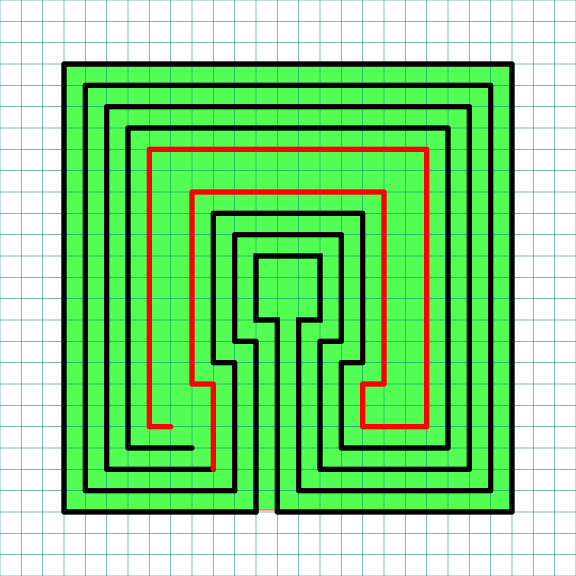
Step 4: Make the next internal line

From here on out the process will repeat. Go back to the previous line you made and make a counterclockwise wall around the labyrinth, keeping one unit from the previous line. Notice this includes moving around the center goal.

9 Circuit Square Labyrinth Center Pad with grids Part 4

Step 5: Make the next internal line

Same as above with the next line.

9 Circuit Square Labyrinth Center Pad with grids Part 5

Step 6: Make the next internal line

Same as above with the next line.

9 Circuit Square Labyrinth Center Pad with grids Part 6

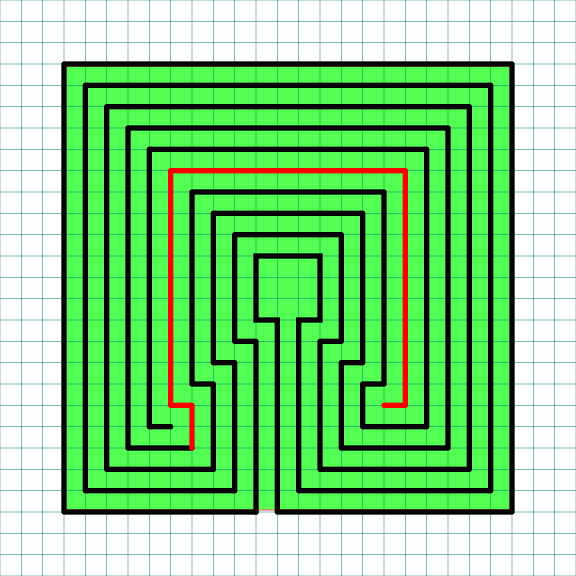
Step 7: Make the next internal line

Same as above with the next line. If everything has been done correctly this is the final line.

9 Circuit Square Labyrinth Center Pad with grids Part 7

Step 8: Clean it up

Delete the background guide and the grids and enjoy your new square labyrinth !

9 Circuit Square Labyrinth

That completes the drawing of a 9 Circuit Square Labyrinth.

9 Circuit Square Labyrinth

9 Circuit Square Labyrinth


PART 2: ALTERNATIVE CONSTRUCTION

The above version is one of many versions of the 9 circuit labyrinth you may find. You may also break the labyrinth into sections similar to concentric circle labyrinths. Here is a 4 sectioned square version as an example (it happens to be an 11 circuit, but the concept remains the same):

11 Circuit Square Labyrinth with 4 sections

Although I did not construct them here as an example, with some work you could make many different number of sections. Here is an example using circular labyrinths that could be adapted to squares (although I would not suggest odd numbers because of the shape). We have already seen 1 and 4 sections (above) and could easily make 2 and 8 section versions.

5 Circuit Circular Labyrinth Construction options sectioned

I think most people would consider it a different category of labyrinth, but there is a square spiral labyrinth also (yes they are typically circular). Here is a 9 circuit square spiral labyrinth. It is easy to make. Start in the center and work your way out until you reach the desired size !

9 circuit Square spiral labyrinth
 

PART 3: REAL WORLD LABYRINTH EXAMPLES

Here is an example of a 9 circuit square labyrinth you can find in the US:

These are all well made square labyrinths with less than 9 circuits:

Additional blog posts you may like:

A Comparison of 3 different types of 11 Circuit Labyrinths

10 of the Most Frequently asked Questions about Labyrinths, with Answers

The 8 best books about mazes, labyrinths and their history