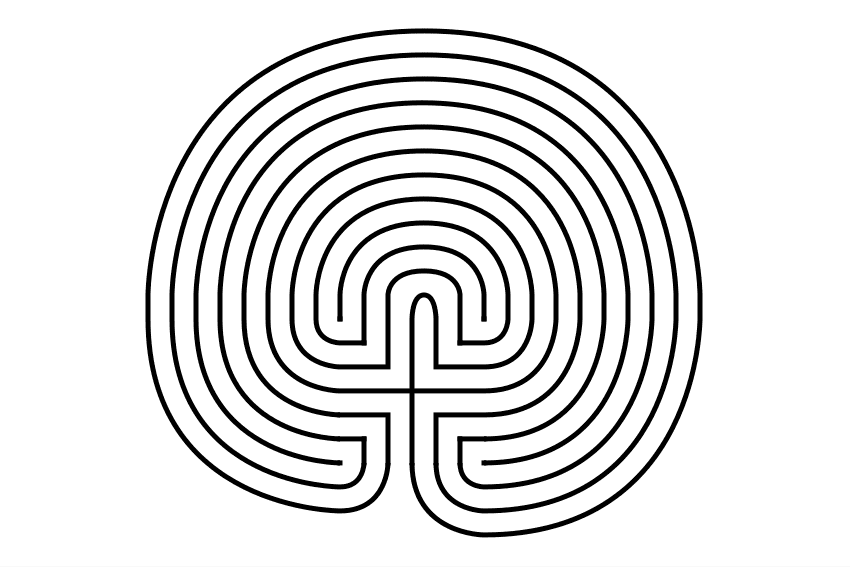
Drawing an 11 circuit square labyrinth is fun once you learn the starting seed pattern and the rules of building the pathways. Follow this 13 step process and draw your own 11 circuit square labyrinth. You’ll notice that the square version is extremely similar to the regular (classical) version of the labyrinth in terms of making it.
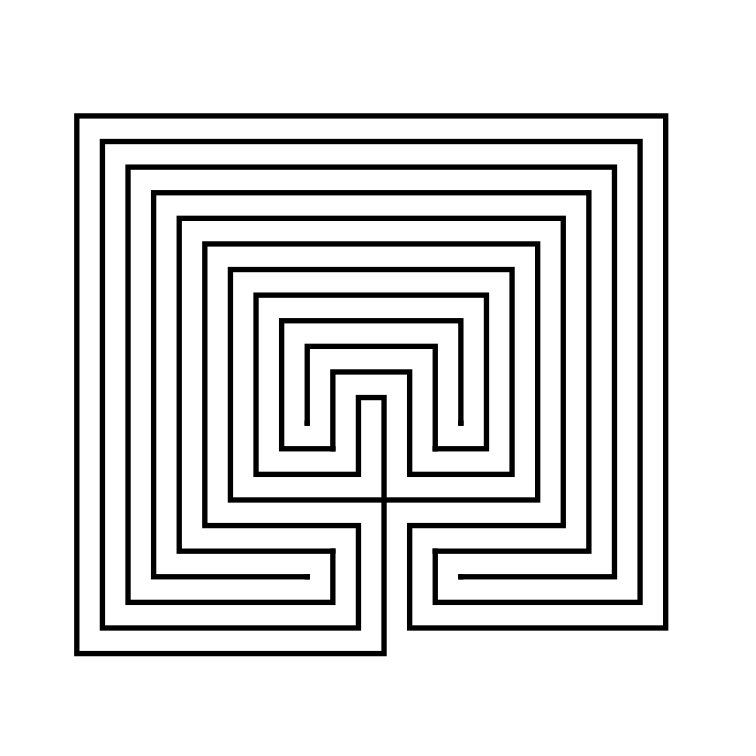
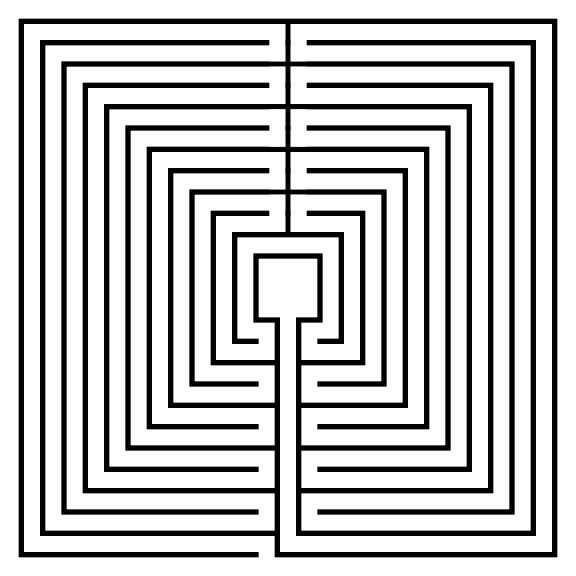
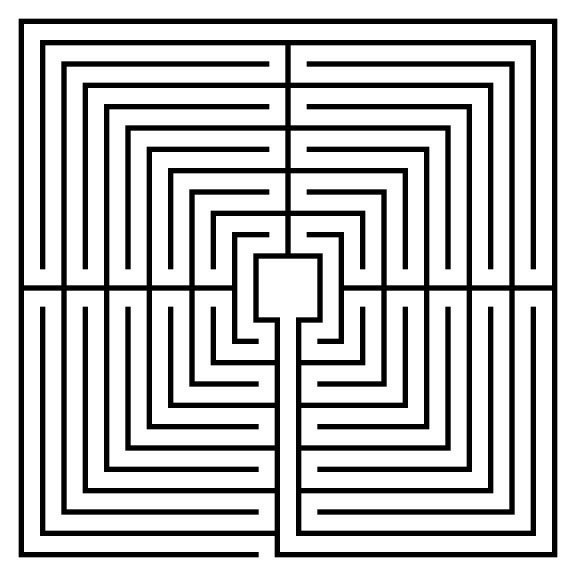
I also want to show you an alternative 11 Circuit Square Labyrinth I made using a different construction method. This version has a large center goal (shown on the left below). If you prefer this version of the 11 Circuit Square Labyrinth these step by step directions can be adapted to make any size circuit. Simply read through step 2 and adjust based on your desired size ! Today I will be showing you how to make the version on the right !
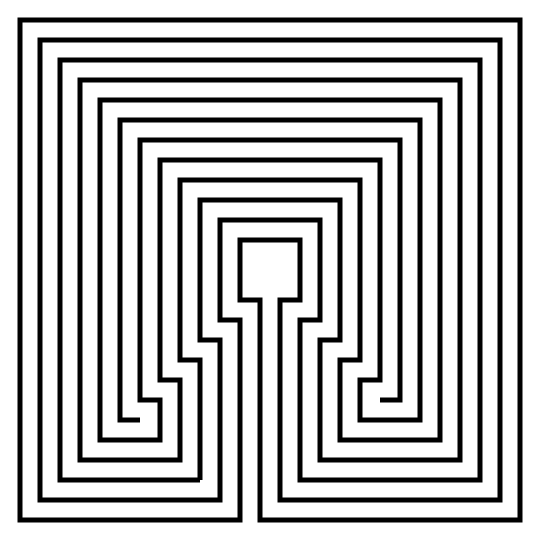
Alternative Method - large center
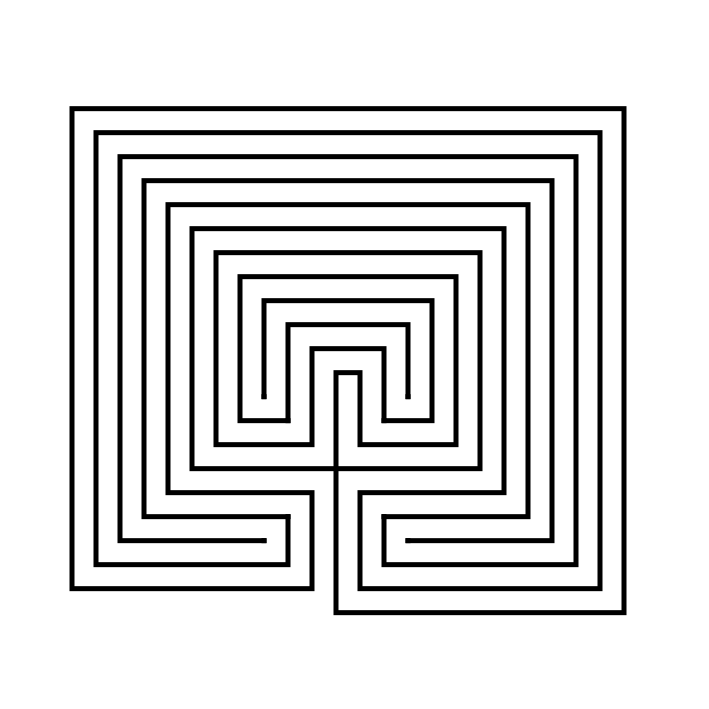
Small goal - learn how to make here !
Here is what you will find in this post:
PART 1: STEP BY STEP LABYRINTH DRAWING INSTRUCTIONS
PART 2: THE LABYRINTH BEING MADE WITH GRIDS SHOWN
PART 3: MORE ALTERNATIVE LABYRINTH CONSTRUCTIONS
PART 4: REAL WORLD LABYRINTH EXAMPLES
PART 1: STEP BY STEP LABYRINTH DRAWING INSTRUCTIONS
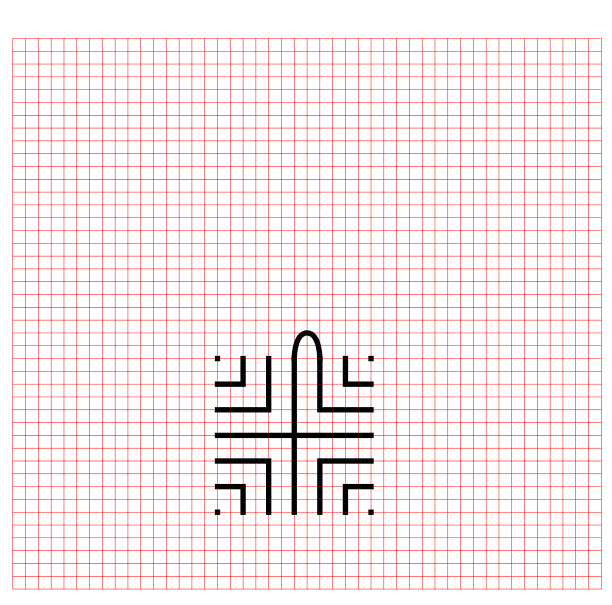
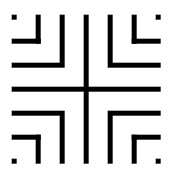
Step 1: Draw the starting seed pattern
The starting seed pattern based on an imaginary 6x6 box grid. Start with a centered is a plus sign. Add L shapes one grid away from the plus sign in all 4 quadrants. Now add another L shape in all four quadrants one grid away from the previous L’s. Finally add a dot to each of the four corners. Basically, copy the seed the pattern you see here (notice this is the same as the regular version):
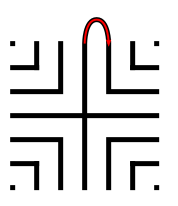
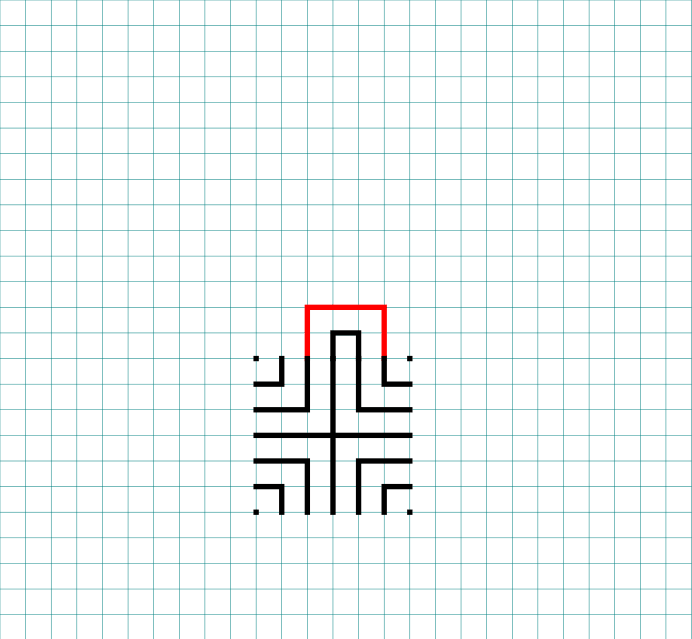
Step 2: Connect the first connection to create the goal
Draw a boxed line from the top of the plus sign to the L directly to the right using that extends 1 grid high. This line will form what will become the goal of the labyrinth.

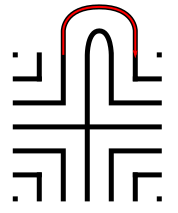
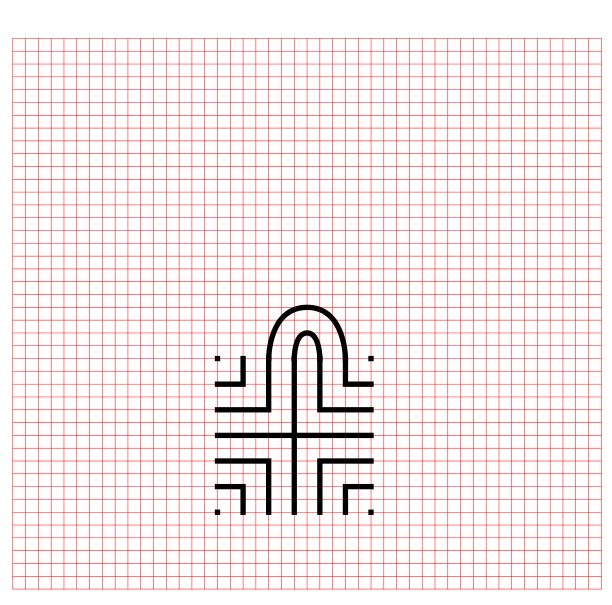
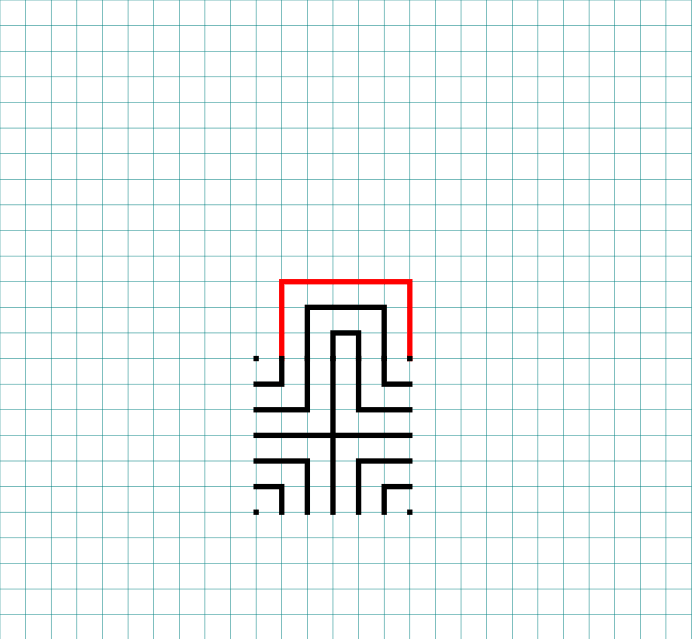
Step 3: Connect the next endpoint to the left to the next endpoint on the right
Every step from now on will be basically the same. Move one point to your left (moving counterclockwise) and connect that to the next point on the right (moving clockwise). In this case the large backwards L on the top left of the seed pattern to the small L on the top right of the seed.

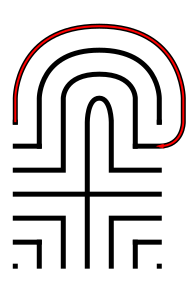
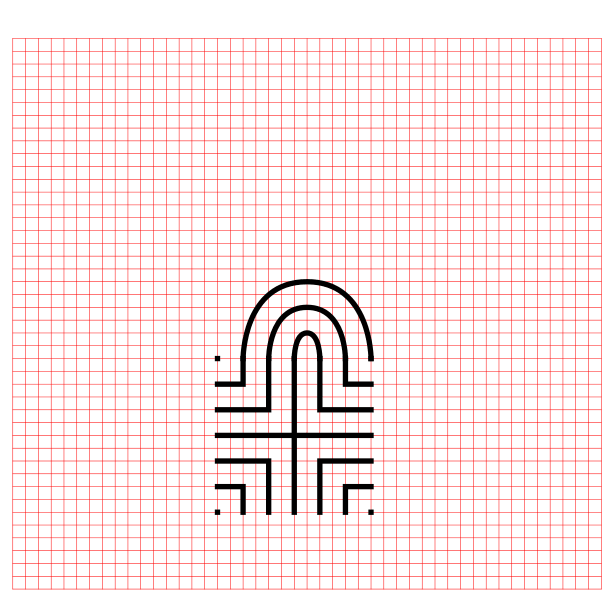
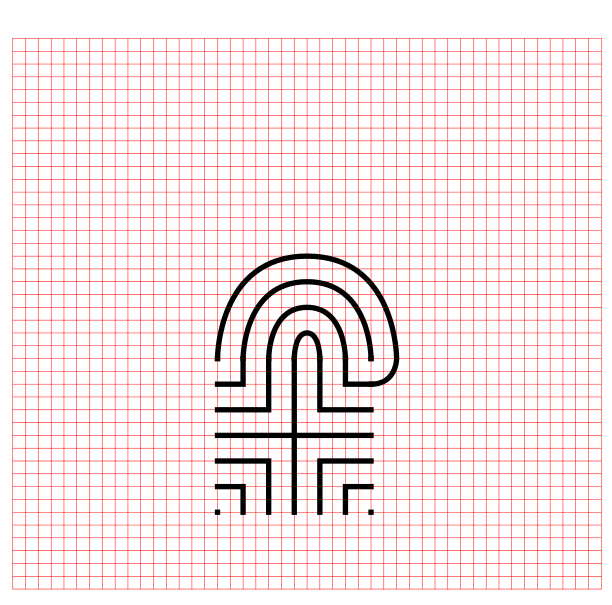
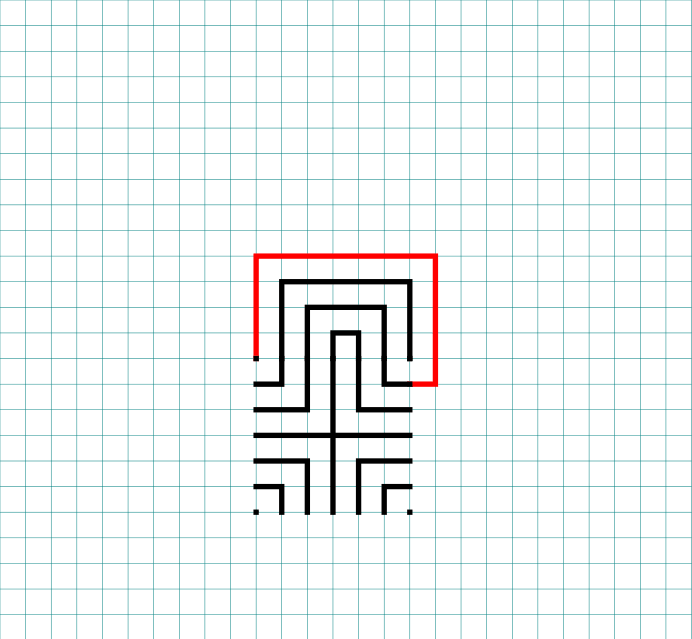
Step 4: Connect the next endpoint to the left to the next endpoint on the right
The small backwards L in the top left to the dot in the top right corner.

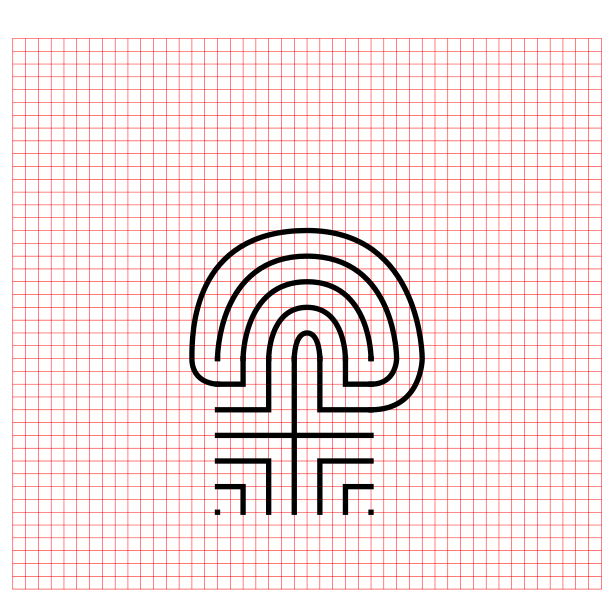
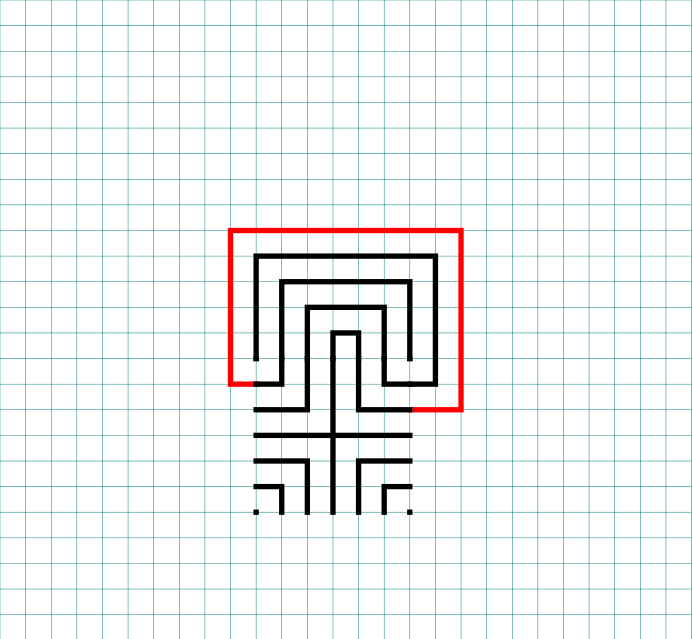
Step 5: Connect the next endpoint to the left to the next endpoint on the right
The dot in the top right corner to the end of the small L in the top right corner.

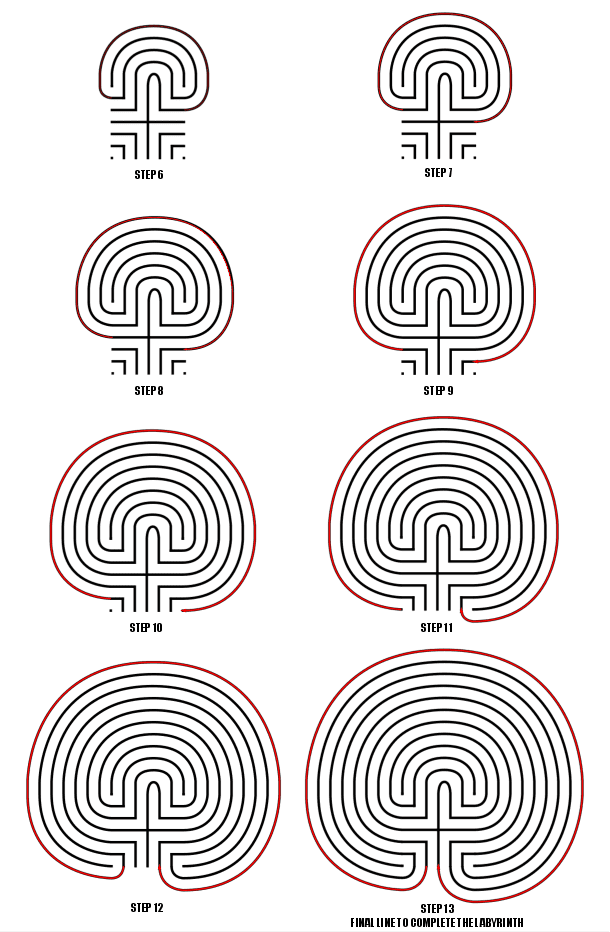
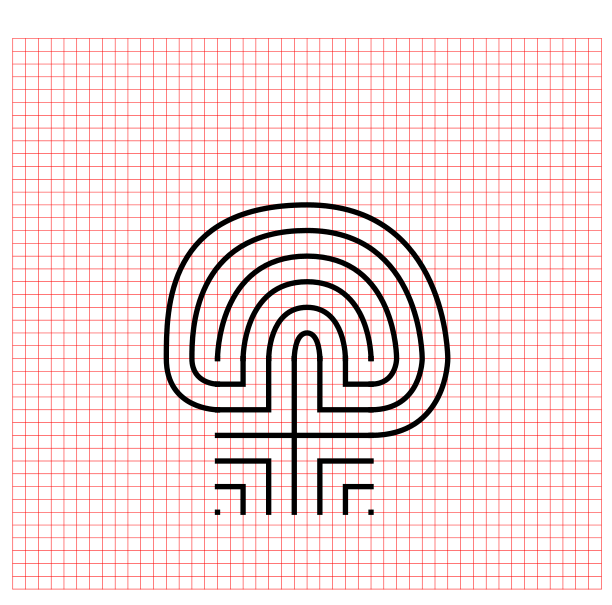
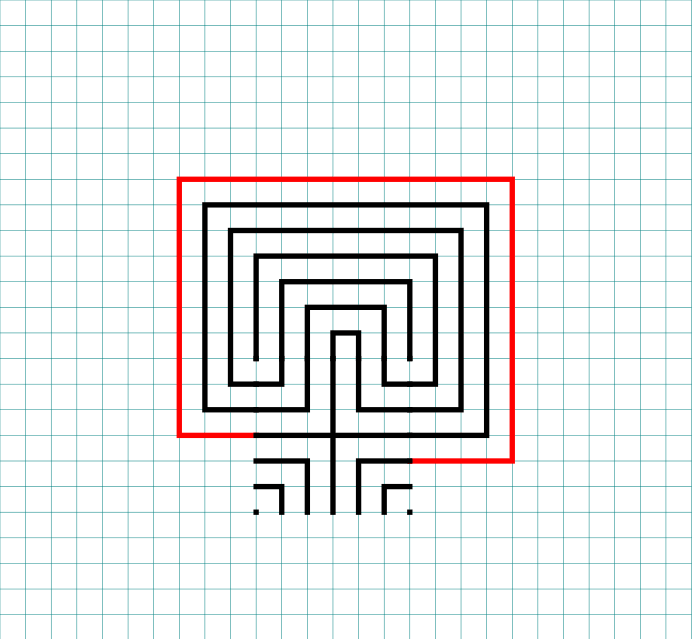
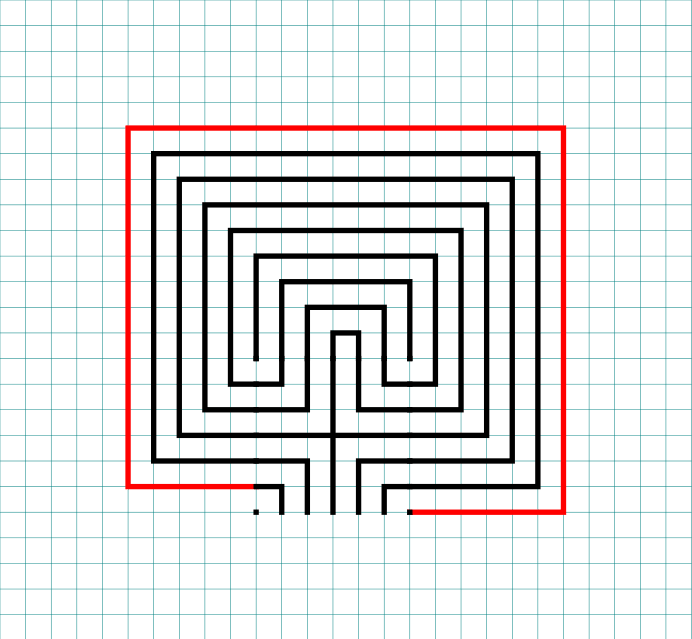
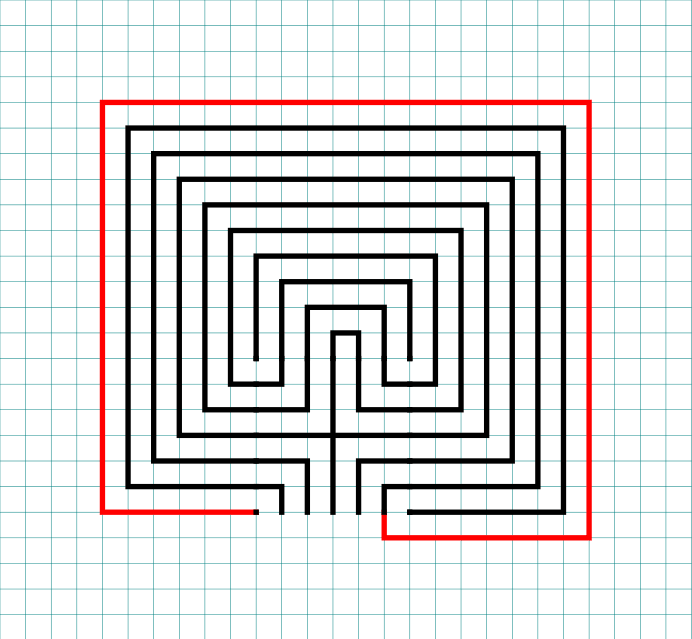
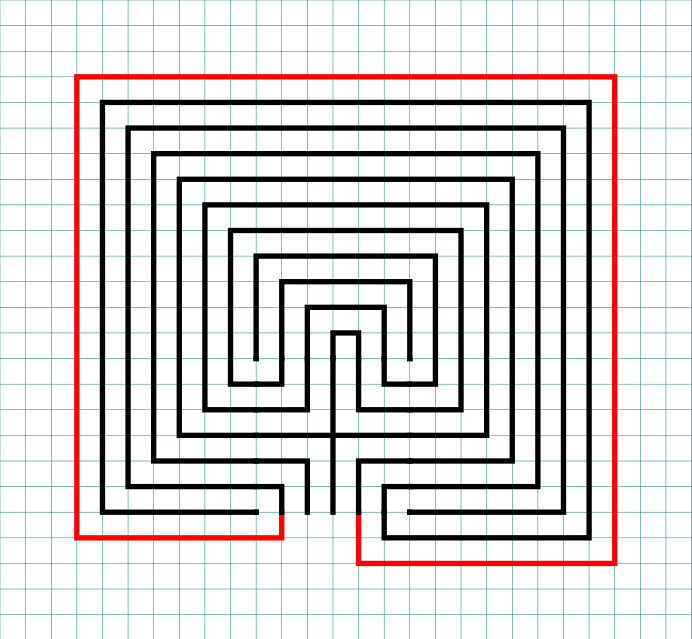
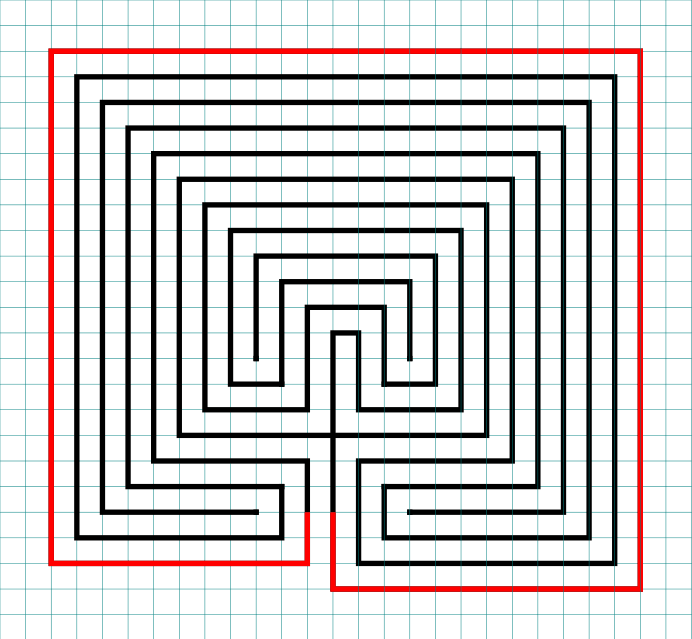
Steps 6 - 13: Connect the next endpoint to the left to the next endpoint on the right
I assume you have the pattern down to complete with only pictures with nice red lines. Follow the graphics to complete connections 5-12. Here is the Summary of the connections you will make starting from the seed:

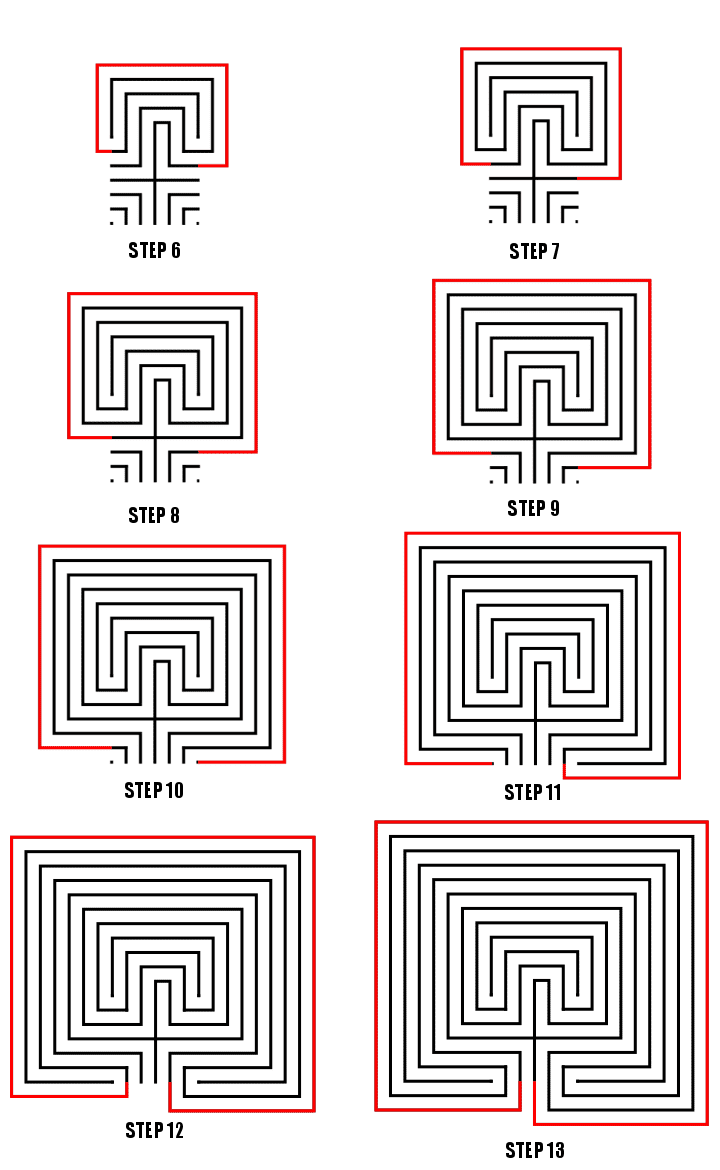
Connections 5-12, Steps 6-13
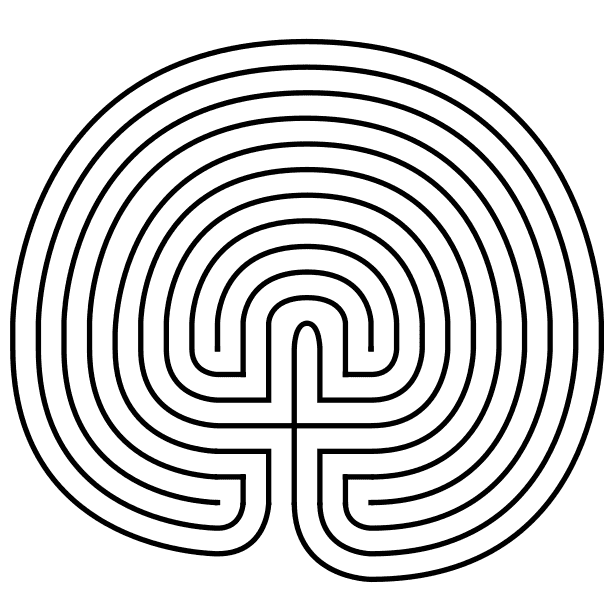
That completes the drawing of an 11 circuit square labyrinth. If you are interested in a comparison of Classical, Square and Circular Labyrinths check this blog post out.
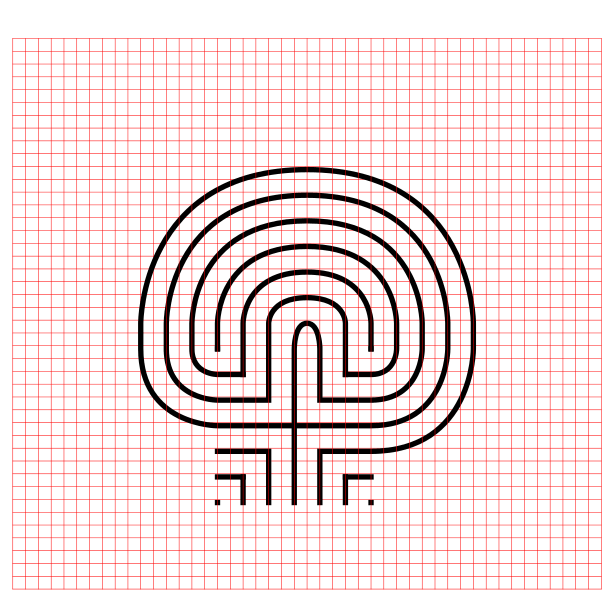
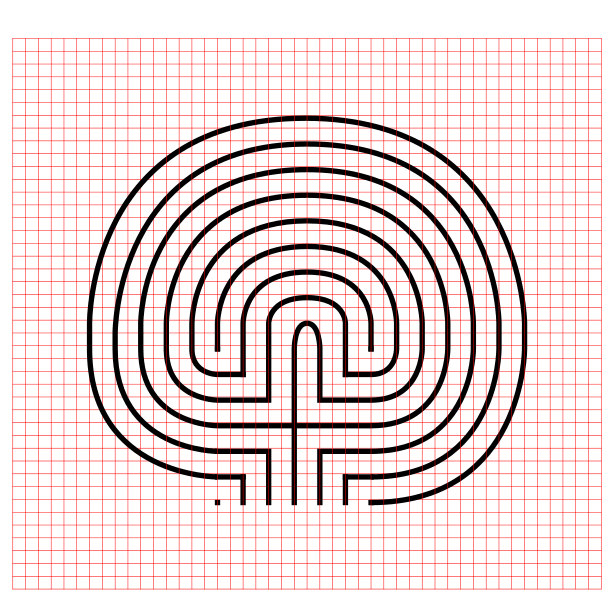
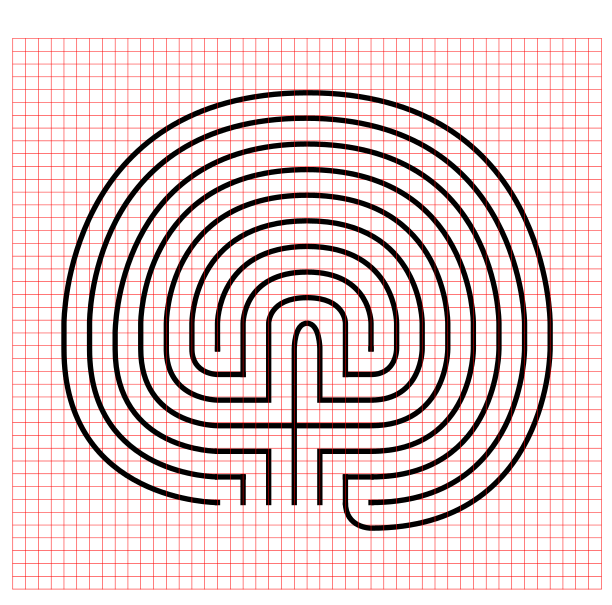
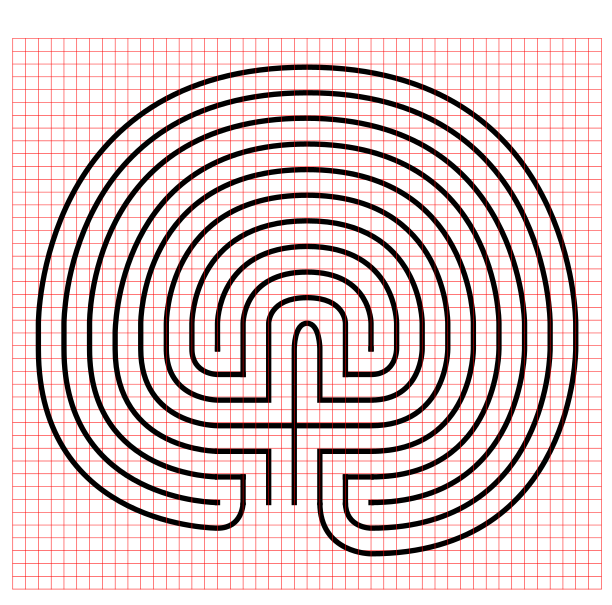
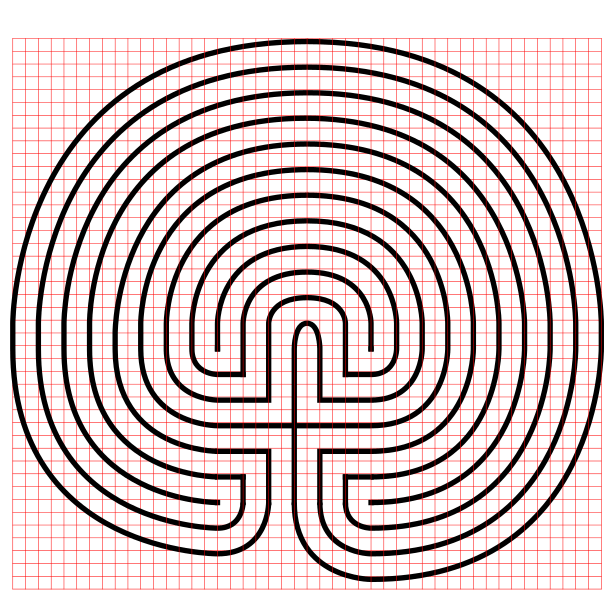
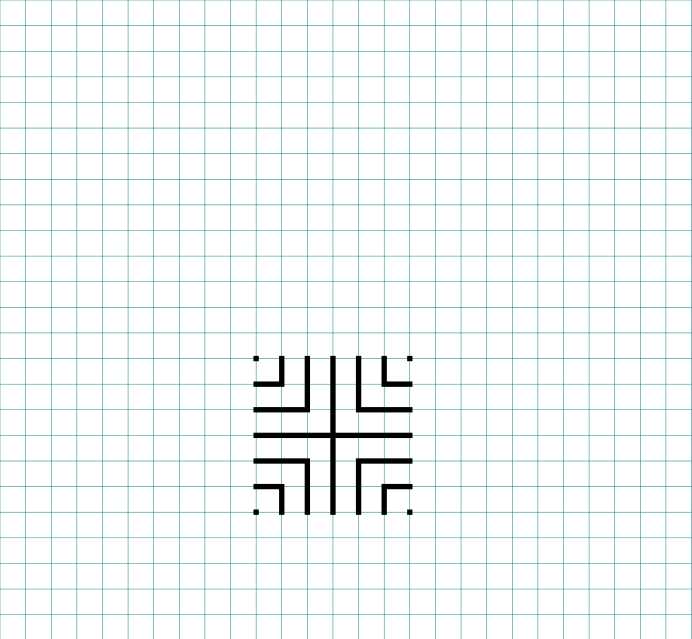
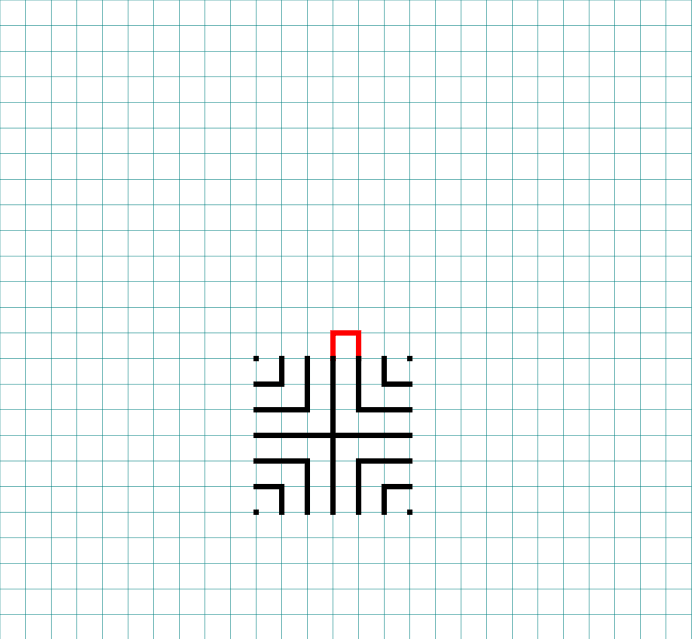
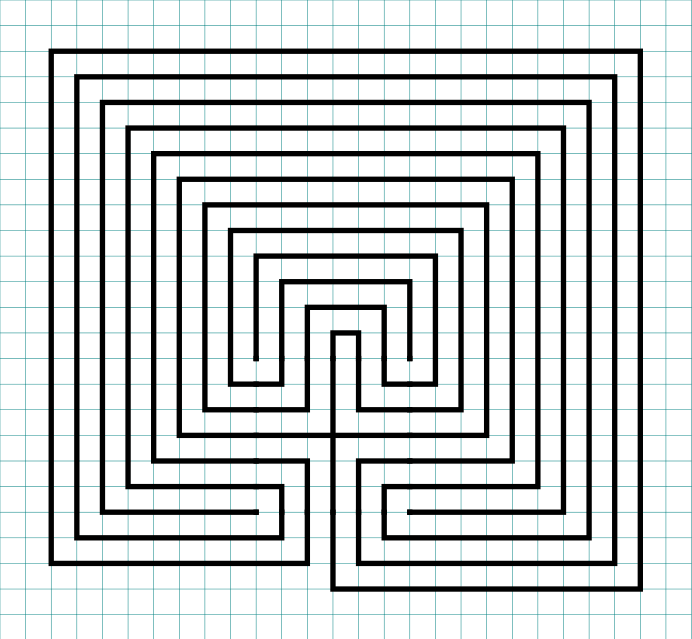
PART 2: THE LABYRINTH BEING MADE WITH GRIDS SHOWN
Nothing special here, just everything you just learned but shown with grids. Use the controls to build the labyrinth step by step. Notice that the labyrinth seed is placed low on the page but the labyrinth still ends up centered on the page,.


PART 3: MORE ALTERNATIVE LABYRINTH CONSTRUCTIONS
Right handed version: You just learned how to make a left handed square labyrinth. You can tell it is left handed because when you enter the first direction you move in is the left. To make a right handed version you flip the seed pattern and draw from right to left. Think of it as happening in a mirror.
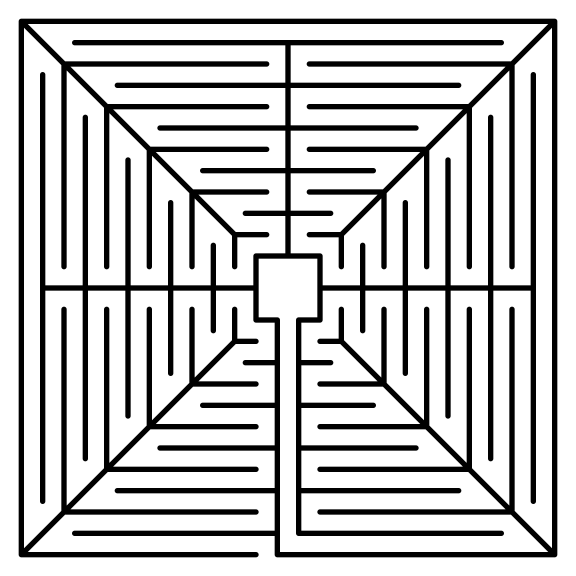
Assorted section options: The labyrinth you just learned to draw has 1 section. You can also choose to draw the labyrinth in 2, 4 or 8 sections. I am sure 3, 5 etc. sections are possible, but the geometry of the square makes even numbers a natural fit. Here are what the 2, 4 and 8 sectioned labyrinths look like:
The Spiral Labyrinth: No step by step process needed for this. Start in the center and stop when you prefer. To fit with this post I made mine 11 circuits. Yes, spirals are typically circular, but they do not have to be.

PART 4: REAL WORLD LABYRINTH EXAMPLES
Here are some 11 circuit square labyrinths you can find the the US:
The St. Benedict Church Labyrinth located in Hollister, CA has 11 circuits and is a Medieval style with unique places to sit and a + shaped center ! It has a 60 foot diameter and is located in the courtyard of the church.
There are not many 11 circuits to choose from so I will instead show you the Hunter Presbyterian Church Labyrinth in Lexington, KY. It is only 9 circuits, but is Roman style, yet another new shape to consider !
I think if you made it this far in the post you will want to read this one too:
A Comparison of 5 different types of 11 Circuit Labyrinths - Compares classical, square, circular, hexagonal and octagonal labyrinths. Once you learn how to make a labyrinth this can help you make aesthetic design decisions.
If you prefer making other labyrinths, you can find step by step labyrinth making instructions for over 20.