We have covered how to draw both classical and square shapes of labyrinths previously. Today I will take you through the steps to draw a new shape, a circular labyrinth. Today we look at how to digitally make a 5 Circuit Circular Labyrinth. This method is a draw and cut method, meaning you will be making edits that remove lines you have previously drawn as you move thru the steps. You could also use this with method using a pencil with a an eraser ! Let’s get started.
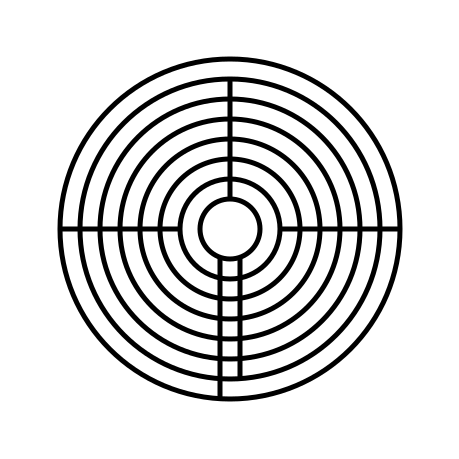
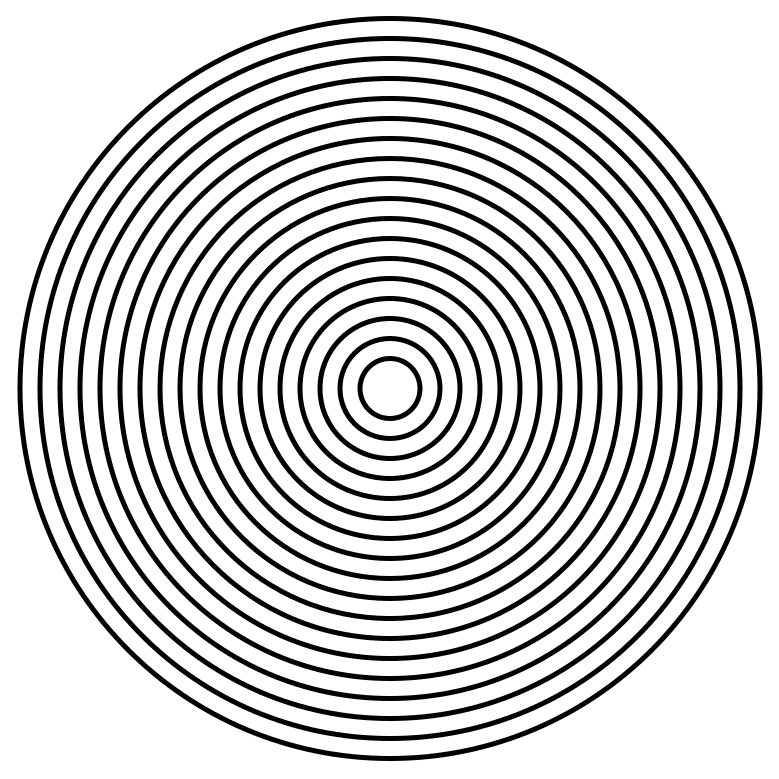
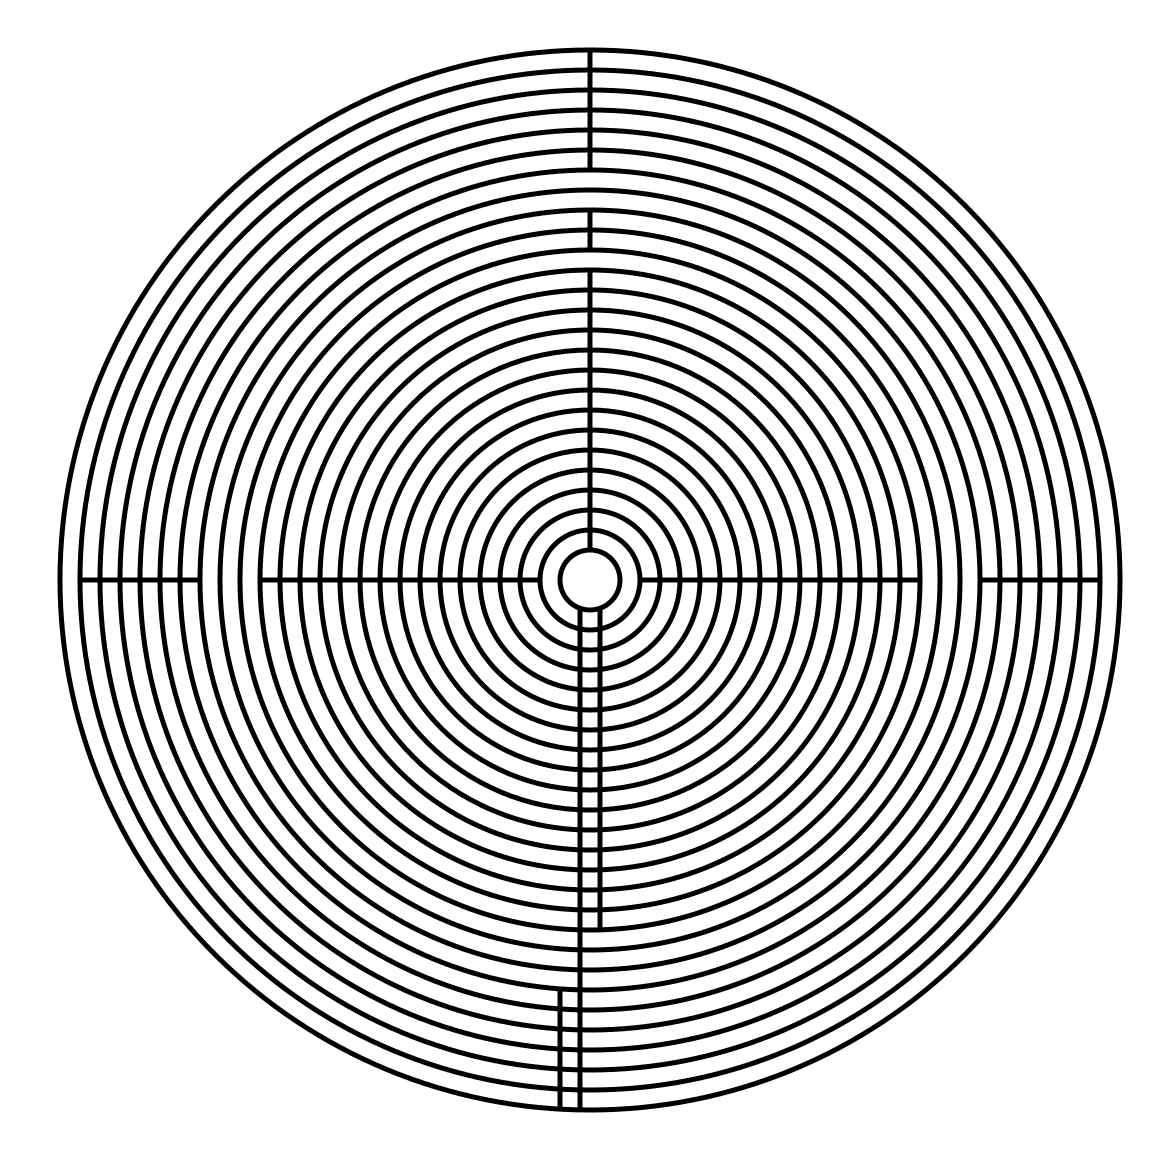
Step 1: Draw 6 Concentric Circles
Draw 6 concentric circles each an equal distance between one another and centered around the middle circle. The middle circle will become the labyrinths goal. You will notice from the example that exactly one more circle would fit into the center of the figure, that would create a very small center.

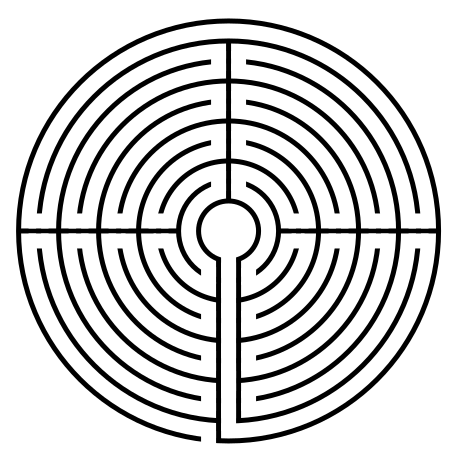
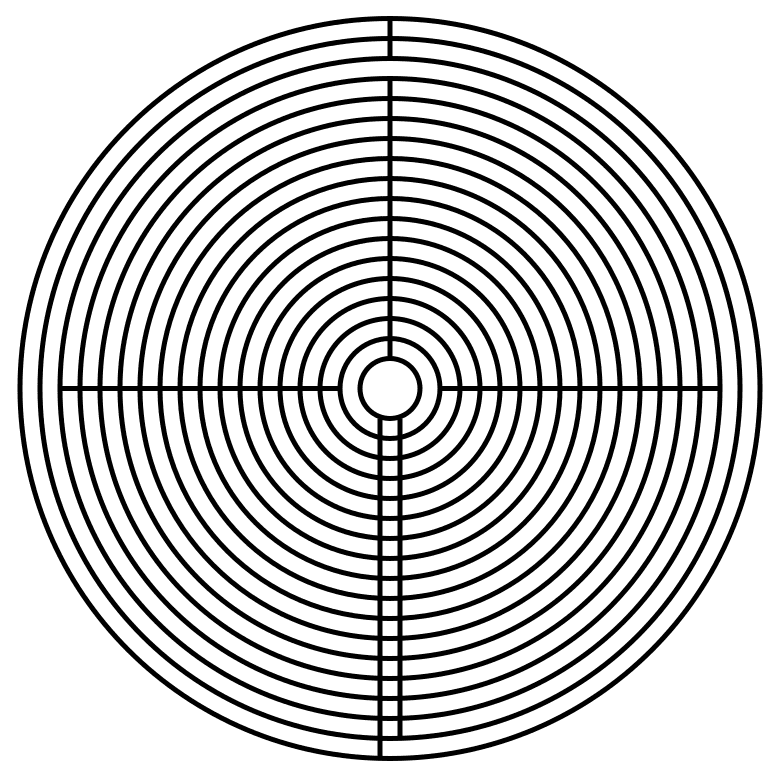
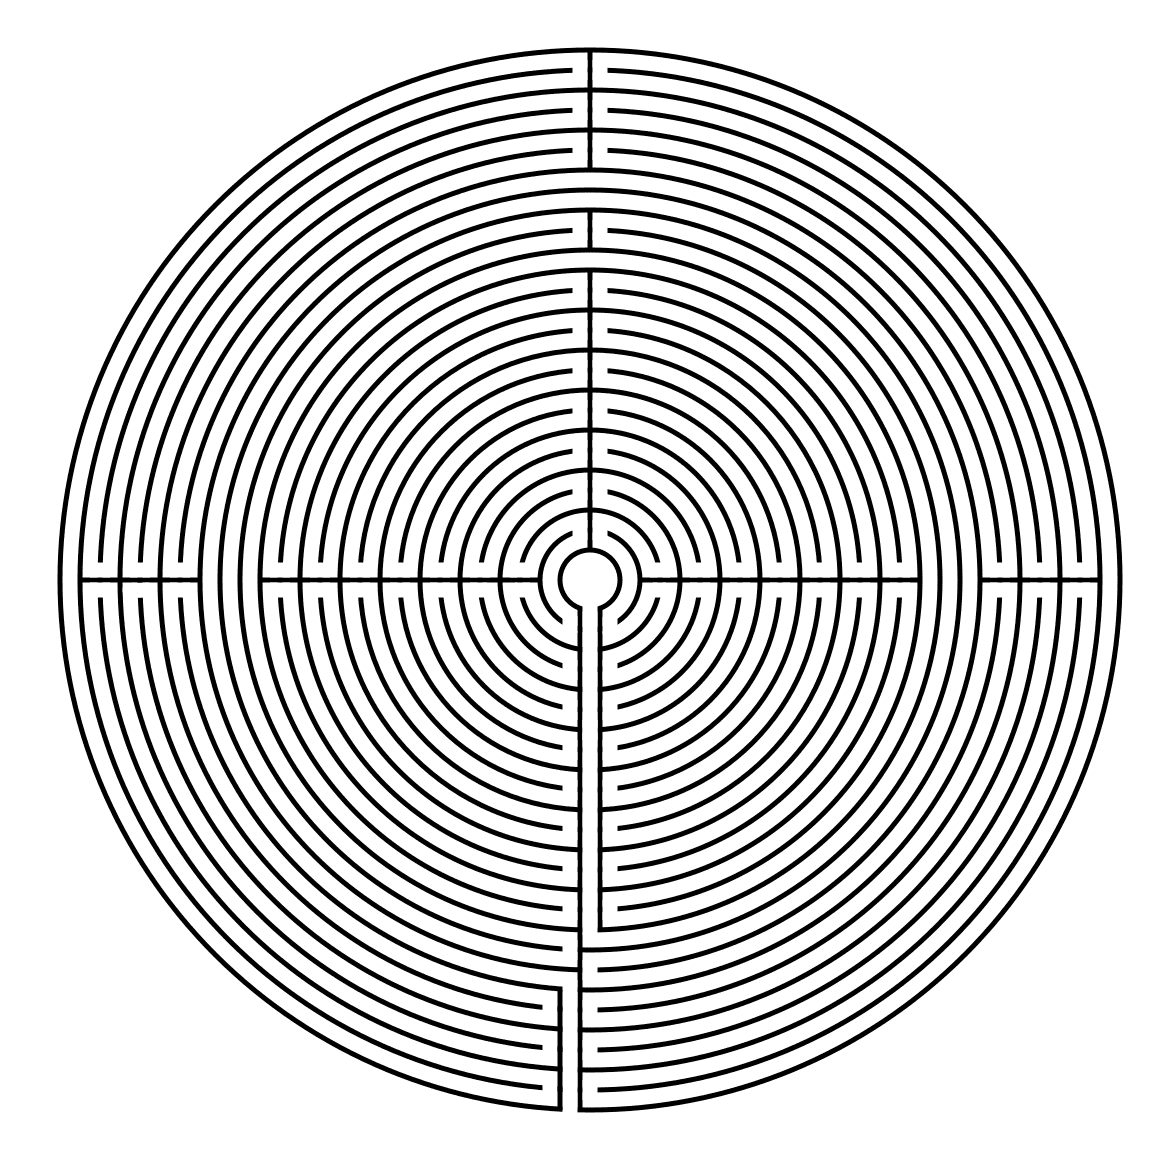
Step 2: Draw the 7 Inner Walls
I could break this into more steps but there are 7 straight lines that form inner walls and pathways. See the example. At 12 o’clock create 2 lines, leaving only the center pathway open. At 3 o’clock add a 2 pathway wall to block circles between 2 and 4. Use 2 lines to draw a pathway from the center to the bottom edge (notice neither are at 6 o’clock). Add an additional line to the left starting from circle 2 that will become the entrance. Add a line at 9 o’clock blocking the pathways between circles 3 and 5.
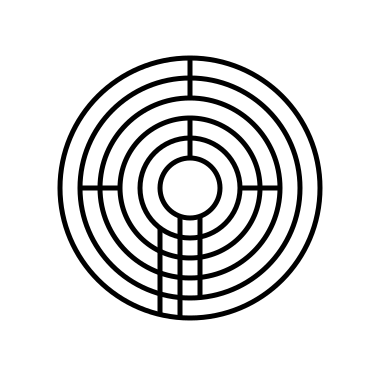
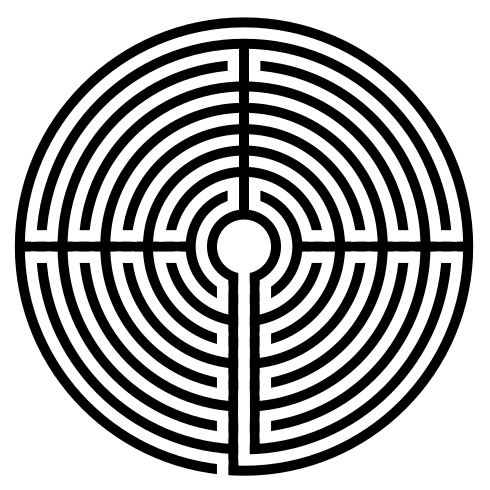
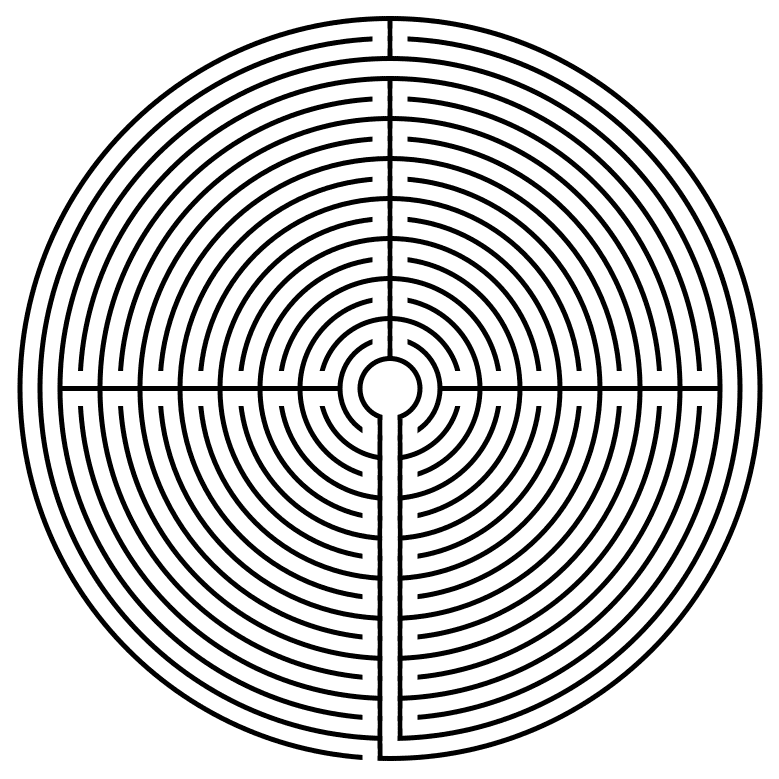
Step 3: Add Pathways Where Needed
Refer to the picture and add pathways where needed, erasing portions of the circles. There are many, and depending on how you draw/erase them the number can change.
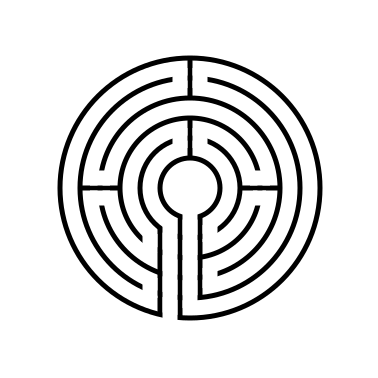
That completes the drawing of a 5 Circuit Circular Labyrinth. Well at least this version of it !
ADDITIONAL CONSTRUCTION OPTIONS
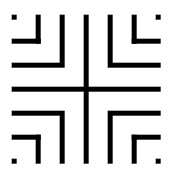
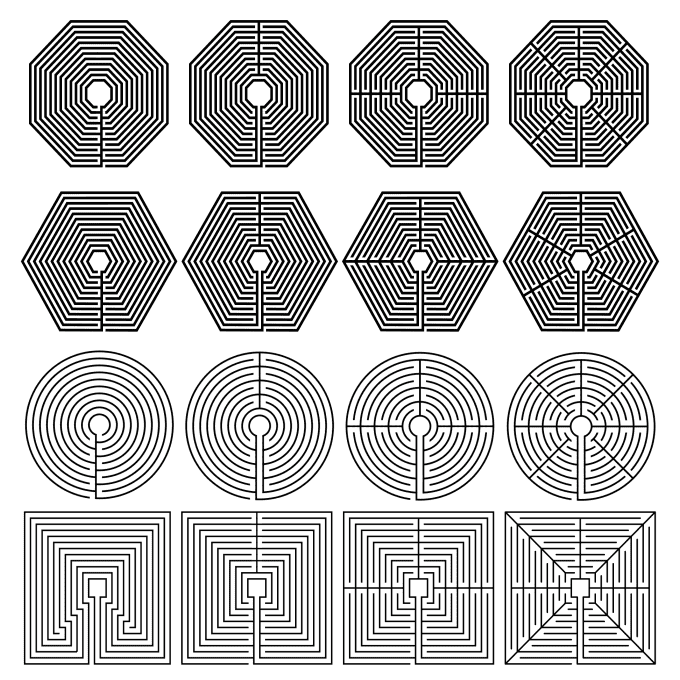
Now I should let you know that there are multiple possible options to configure this labyrinth. You can read about 6 different versions of a 9 circuit circular labyrinth that also apply to 5 circuit circular labyrinths. Let’s take a look at what a 5 circuit circular labyrinth would look like if made with 1/2/3/4/8 and 12 sections. If you were to walk these labyrinths in the physical world this could also be referred to be the number of turnback’s instead of sections.

6 different options for 5 circuit circular labyrinths
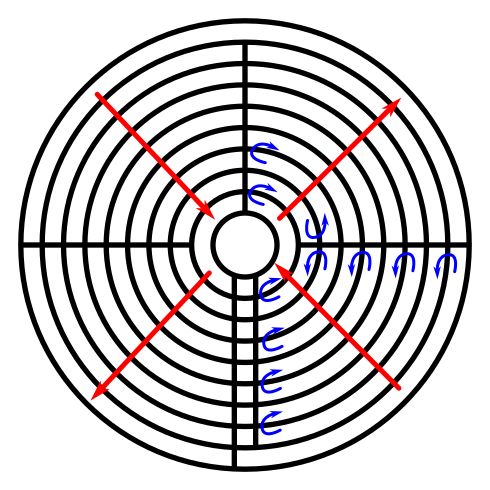
Here is a visual to show what I mean by sections:

Showing “sections” of the labyrinth constructions
The one that you choose is really your personal preference. I prefer the 4 section version. 1 section is a bit boring, while the 12 section looks a bit busy and would not be very much fun to walk. While I do not have individual instructions for these versions, the basic instructions remain the same as above. Step 1 is the exact same, with changes to where lines and drawn and erased in steps 2/3. While the math is easy for these versions of the circular labyrinth (360 degrees / # sections determines the placement of the sectioned walls) you could easily create other #’s of sections using the same formula of 360 / #sections desired.

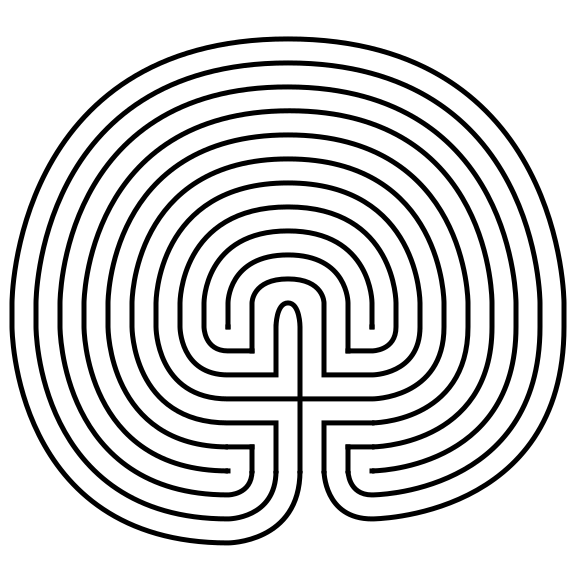
5 Circuit Circular Labyrinth
REAL WORLD CIRCULAR LABYRINTH EXAMPLES
As part of a large research product on labyrinths in the US I was able to find a few circular labyrinths you can visit to see examples in person:
The Medicinehat Medicinals Labyrinth in Deming, NM is a 5 circuit circular labyrinth made of earth and rocks. It has a 65 foot diameter and can be visited with an appointment.
The Lakeside Lavender and Herbs, LLC Labyrinth in La Porte, IN is a 5 circuit circular labyrinth made with lavender plants with stone pathways. It has a 62 foot diameter and can be visited with an appointment.
If you prefer making a different type of labyrinth, you can find step by step labyrinth making instructions. Including: