How to Make a Maze with Standard Maze Paths

In a series of posts I will show you how to make a maze in a wide variety of design constructions. The best place to start this topic is with the standard maze construction. Let’s define what I mean, then get into the example. Every example will use the sample basic outline (the state of Ohio) to better illustrate the differences between each maze type.

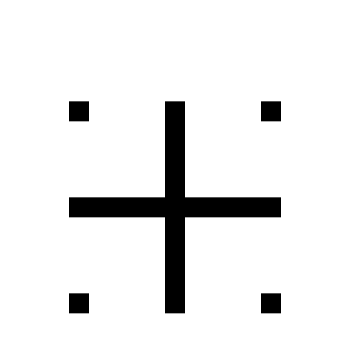
Standard Maze Paths - By standard I mean a maze made with paths based off of a grid framework. The wall width is smaller than the pathway width. This includes wall widths that are less than half the width of the pathways.

HOW TO MAKE A MAZE WITH STANDARD MAZE PATHS

  • Step 1 - Draw the Outline

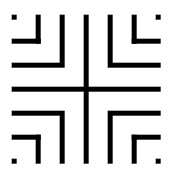
The outline of the maze makes the outer wall of the maze. It can be anything from a simple shape like a square, to a complex picture. The outline should be thicker than the internal lines to give the maze definition. In the example below I chose the state of Ohio.

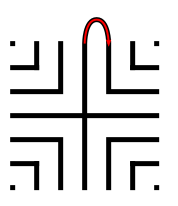
  • Step 1.5 - Choose the Start and Goal

For the below example I chose the start of Cleveland and the goal of Cincinnati. I made an entrance in Cleveland but I usually wait until I am in the last stage of drawing maze lines to draw the exit point for the goal. This is in case I need to adjust the location slightly based off of my design. This works if drawing a maze digitally, but for a hand drawn maze the outline will need to have a pre-determined start and goal.

make an ohio maze outline
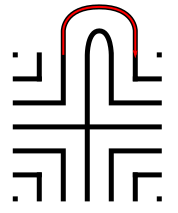
  • Step 2 - Start Drawing the Maze Walls

Using a grid pattern, begin drawing the maze walls starting at the entrance of the maze. Although you do not see the grid in the example below, it is present as I work on drawing the maze on my screen. This particular maze was built using a 30x30 grid with wall widths of 4. The smaller the size of the grid you use, the more difficult the maze can become. This is because a small grid will need more pathways to fill the space you are mazing. Of course be careful to not break the #1 rule of making a maze - never close all the open paths so the maze can eventually be solved using one of the pathways. As you make the maze decide how difficult you want to make it based on your preference or your intended audience. A low amount of path choices, and short dead end paths will make an easy maze. Longer dead ends and lots of path choices make a more difficult maze. The below example is starting off as an easy maze.

making an ohio maze step 2
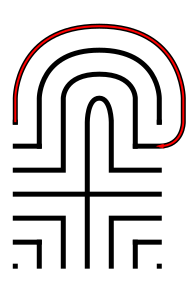
  • Step 3 - Keep Drawing the Maze Walls

Like most mazes the middle part of design is a lot of keep doing what you are doing and draw more walls. There is nothing too complicated in the below example. The solution is not difficult to follow so far as there are still two possible solves still available in my example picture 1, and only 1 in example picture 2. When I design a maze of any type I like to have multiple options open for most of the design process. When I get near the goal of the maze, that is where I decide which path works better. Take a quick moment to solve these mazes using your eyes. Notice the length of the dead ends and how quickly you find the wrong turns. The more novice the target audience for the maze, the shorter the dead ends should be.

making an ohio maze step 3
making an ohio maze step 3.5
  • Step 4 - Complete the Maze

Draw the final walls and draw the exit (if you are making your maze digitally). You have completed the drawing of a standard maze ! As I mentioned above, I reviewed the possible pathways as I was reaching the goal and chose the one that best fit what I wanted to achieve (in terms of difficulty). Just a quick note if you were hand drawing your maze the goal was already drawn in step 1.5. In this case you have the option to complete your maze by drawing from your exit goal to the mostly completed maze.

Ohio Maze in a standard construction
  • Step 5 (Optional) - Draw the Solution

You have two options here - Option 1 - While the correct pathway is fresh in your mind, draw the solution to the maze. This is especially important with more complex mazes. It can also be a check to make sure your maze has a solution. This example maze is easy. Option 2 - Let the maze sit for a few days and try solving it yourself. Was it the difficulty you thought as you were designing it ? Did you enjoy it or did it frustrate you in any way ? Using option 2 means you are more likely to go back and make adjustments to improve the maze. Think of it as proofreading for mazes.

Ohio Maze in standard constructions solution

5 Additional Examples of Standard Mazes

The Cheeseburger maze happens to be in full color and uses a smaller scale (the grid is 10x10 with walls at a 1.5 width) but it is a standard maze. Difficulty is medium because the pathways that are false tend to be longer then normal, so if you take a wrong turn early there may be a delay until you realize it with a longer backtrack to get on the correct path.

Cheeseburger Maze in color

The standard maze is the default for most maze makers because it works well with just about any subject you are making a maze of. Like this full-color Pug maze. A medium difficulty maze. Was made on 16x16 grid with wall widths of 2.5

Pug maze

In the first two examples you can see how this maze construction works with irregular shapes. Now let’s look at how it works on more structured shapes like rectangles. The Zipper maze below, and there are not many zipper mazes out there, has a very rectangular structure that naturally fits with the grid pattern. Yes there are some rounded corners but they are easy to navigate as a designer ! I think you can tell by the scale this is a 4x4 grid with walls of 1.2.

Zipper Maze in color

Next we have another maze a natural fit for a standard maze because of it’s shape, the Barn maze. The entire lower portion fits perfectly with the grid. It was made on a 4x4 grid with walls of 1. I think this maze is medium hard, and definitely not for kids. One of the main reasons I included this maze was because of a specific detail I like. Do you know what it is ? It is the rooster on the roof. I like adding little details, even if they do not effect the solve of the maze.

Barn Maze in color

And our last example is an easy maze with a rectangular structure, the Microwave maze. I include it here because I made the choice to leave a lot of the drawing un-mazed. I could have made the decision to maze the entire microwave, but by leaving things un-mazed I was able to make this a much easier maze.

Microwave Maze in color

Interested in learning how to make or draw other types of digital mazes ? I have step by step instructions on how to make over 40 different maze types HERE.

If you prefer making labyrinths, you can find step by step instructions HERE.

How to Draw an 11 Circuit Labyrinth

Drawing an 11 circuit labyrinth is fun once you learn the starting seed pattern and the rules of building the pathways. Follow this 13 step process and draw your own 11 circuit labyrinth. At the end of the post I have a made a quick 2 minute video showing the drawing of the labyrinth if you are a more visual learner ! The best way to both practice and create this is on a grid to help guide you on the correct spacing. Let’s get started.

Centering a drawn labyrinth on the page (Pro Tip #1)

If you are hand drawing a labyrinth and would like the completed drawing to be centered on the page there is a quick trick to help you do it. The seed you draw will end up being in the bottom half of the page slightly off center to the left. Check out the example below that compares the starting seed pattern center (in red) to the center of the finished drawn labyrinth (blue). The center of the labyrinth ends up being just above the arch of the labyrinth goal you will draw in Step 2.

Making an 11 Circuit Labyrinth tip to align to the center of the page

11 Circuit Labyrinth making tip to align to the center of the page

Step 1: Draw the starting seed pattern

The starting seed pattern based on an imaginary 6x6 box grid. Start with a centered is a plus sign. Add L shapes one grid away from the plus sign in all 4 quadrants. Now add another L shape in all four quadrants one grid away from the previous L’s. Finally add a dot to each of the four corners. Basically, copy the seed the pattern you see here:

11 circuit labyrinth seed pattern

Step 2: Connect the first arch to create the goal

Draw a curved line from the top of the plus sign to the L directly to the right using an arch that extends 1 grid high. The top of the arch should peak halfway between those two points. This line will form what will become the goal of the labyrinth. As a reminder the center of the completed labyrinth will be just above this point.

How to Draw an 11 Circuit Labyrinth, step 2

Additional information to help with your drawing (Pro Tip #2)

Let’s further explain the arching pathways you will be drawing in more detail, because from now on each path you draw will require this information. Each side of the labyrinth has different alignments that create the peak arch point for each pathway. All northern pathways (shown below in red) align above the midpoint of the goal. All eastern pathways (shown in blue) align with the original top right dot in the seeding pattern. Western pathways (shown in green) align to the top left seeding pattern dot. The southern part of the labyrinth also aligns to the corner dots, one for each side (shown as purple and orange). Keep these points in mind as you create your arches/pathways.

Making an 11 Circuit Labyrinth - Showing how peaks align correctly

11 Circuit Labyrinth making tip to align the peaks

Step 3: Connect the next endpoint to the left to the next endpoint on the right

Every step from now on will be basically the same. Move one point to your left (moving counterclockwise) and connect that to the next point on the right (moving clockwise). In this case the large backwards L on the top left of the seed pattern to the small L on the top right of the seed. The arch should peak at the same point as the goal below it in the pattern.

How to Draw an 11 Circuit Labyrinth - Part 3

Step 4: Connect the next endpoint to the left to the next endpoint on the right

The small backwards L in the top left to the dot in the top right corner. The arch should peak at the same point as the goal below it in the pattern.

How to Draw an 11 Circuit Labyrinth - Part 4

Step 5: Connect the next endpoint to the left to the next endpoint on the right

The dot in the top right corner to the end of the small L in the top right corner. The arch should peak at the same point as the goal below it in the pattern.

How to Draw an 11 Circuit Labyrinth - Part 5

Steps 6-13: Connect the next endpoint to the left to the next endpoint on the right

I assume you have the pattern down to complete making the labyrinth with only pictures with nice red lines. Follow the graphic below to complete steps 6 - 13.

How to Draw an 11 Circuit Labyrinth - Steps 6-13

Steps 6-13

11 Circuit Classical Labyrinth

11 Circuit Classical Labyrinth

That completes the drawing of an 11 circuit classical labyrinth. It happens to be the “right handed” version of the labyrinth. If you want to make the left handed version every step above would be the same but moving to the left instead of right. Just imagine following the directions while looking in a mirror. The majority of labyrinths you see will be right handed. The laeft handed versions look odd to many people:

Left Handed 11 Circuit Classical Labyrinth

Left handed 11 circuit labyrinth

If you are interested in a comparison of Classical, Square and Circular Labyrinths the linked post will show you how they compare from a design perspective.

How To Draw an 11 Circuit Classical Labyrinth Video:

Here is a quick 2 minute video to see this in action from my YouTube channel ! Notice how the grids help with the construction !

A video showing How to Digitally Draw an 11 Circuit Classical Labyrinth

How to Draw a Classical 7 Circuit Labyrinth

Drawing a classical labyrinth can be easy and fun once you learn the starting pattern and the rules of building the pathways. Follow the simple 9 step process below and draw your own 7 circuit classical labyrinth. Or, if you are more visual you can skip to the bottom and watch a quick 2 minute video of the labyrinth being made !

Step 1: Draw the starting seed pattern.

It can be seen by some people as originating from a 4x4, 16 box grid. There is a plus sign centered and dots in each of the four corners, with 4 “L” shapes between the + and the corners. See below how the starting pattern (in red) relates to the 16 grid 4x4 box. Here is that visually:

4x4 grid of blocks
Classical 7 Circuit Labyrinth Seed Pattern shown on a grid for comparison

And how the seeding pattern looks without any guidelines:

Classical 7 Circuit Labyrinth Seed Pattern

Classical 7 Circuit Labyrinth Seed Pattern

Pro tip: Do not center the initial pattern on the page or in the space you are using to build your classic labyrinth. Start it 1/3rd of the way from the bottom as the majority of the building will take place above the initial pattern. If you care about left/right centering also move slightly to the left on the page. Centering will come with practice so consider yourself lucky if you get it right the first time !! Below is a labyrinth showing the center of the initial seed pattern compared to the center of the final labyrinth.

Classical 7 Circuit Labyrinth center alignment explanation

Step 2: Create the goal of the labyrinth

Connect the top of the plus sign to the first point directly to the right using an arching pattern. This first connection will create the goal of the labyrinth. Notice that the goal of this classical labyrinth is small compared to other constructions. If you were creating this pattern for a physical labyrinth this would mean a small central gathering place.

Making a classical 7 Circuit Labyrinth Step 2

Arching connection - creating the goal

Classical 7 Circuit Labyrinth -  Step 2 - Create the Goal

Classical 7 Circuit Labyrinth - Step 2 - Create the Goal

Step 3: Connect the first pathway arch

Moving to the next point to the left, the top of the backwards “L” in this case, connect it to the next point to the right, or the dot in the far right corner, again using an arching pattern. The peak of this line will align with the peak from the goal you drew in Step 2. It also should create a pathway the same width as your seed pattern. Notice that we have moved one spot to the left and connected it to the next spot on the right. This pattern will continue for this labyrinth and most that you create ! Each new arch you draw will peak above the previous peak at the top of the labyrinth.

Making a Classical 7 Circuit Labyrinth Step 3

Drawing Arch #2

Let’s fast forward a bit to further explain the arches with more detail. Each side of the labyrinth has different alignments that create the peak arch point for each pathway. All northern pathways (shown below in red) align above the midpoint of the goal. All eastern pathways (shown in blue) align with the original top right dot in the seeding pattern. Western pathways (shown in green) align to the top left seeding pattern dot. The southern part of the labyrinth also aligns to the corner dots, one for each side (shown as purple and orange).

Peak points for each drawn pathway by side

Steps 4 - 9: Connect the next arch, moving from the left

For each step continue to move to the next point left, connecting each subsequent point to the next point on the right in an arching pattern. Step 9 will connect the final points and complete your classical labyrinth ! As you connect each point ensure you create pathways that are equal sizes (or alternatively create walls an equal distance apart from the previous wall).

Making a Classical 7 Circuit Labyrinth Steps 4 - 9

Steps 4 - 9

And that does it. You’ve drawn a classic 7 circuit labyrinth ! You get better each time you make one ! Hopefully this helped make this drawing easy and fun !!

The Left Handed 7 Circuit labyrinth

Now we have just made a right handed version of a classic labyrinth (Did you know it was right handed ?) . What you might not know is there is a left handed version of the same labyrinth. Take everything you just learned in the steps above and reverse them as if you are looking into a mirror. The seeding pattern stays the same but the first arch moves to the left followed by arches drawn to the left in each additional step.

Left handed 7 circuit classical labyrinth

Left handed 7 circuit labyrinth

If you are more visual here is a quick video review of what we did from my YouTube channel (where I show how to make mazes/labyrinths and also show the making of maze art):


About the 7 circuit labyrinth:

The 7 circuit classic labyrinth is said to represent the journey of life. The path is the journey that we all take, and the center is the goal that we are all trying to reach. The 7 circuits represent the 7 stages of life: birth, childhood, youth, adulthood, middle age, old age, and death. When found in the real world (as opposed to drawn on paper), the labyrinth can be used as a tool for meditation by walking the path slowly and mindfully. As you walk, you can focus on your breath and your thoughts. You can also use the labyrinth to reflect on your life and to set goals for the future.

Additional posts you might like:

Interested in learning how to make or draw other digital labyrinths ? You can find many different step by step instructions HERE.

I have step by step instructions on how to make over 40 different maze types HERE.

The 12 best maze/labyrinth movies of all time

The top 12 maze generation websites

How to Draw a 3 Circuit Labyrinth

Drawing a classical 3 circuit labyrinth is both easy and fun once you learn the starting pattern and the rules of building the pathways. Follow this simple 5 step process and draw your own 3 circuit classical labyrinth. If you are more visual (or you are curious to watch) there is a 1 minute video at the end showing the process.

  • Step 1: Draw the starting seed pattern.

The starting seed pattern is a plus sign with four dots in each of the four corners in the space apart from the lines to form pattern below.

3 Circuit Labyrinth starting seed pattern

3 Circuit Labyrinth starting seed pattern

PRO TIP: Start the pattern on the page in front of you slightly below center and left of center (perfecting this will come with practice). See the example showing your starting center vs. your ending center.

Labyrinth making tip - how to place the labyrinth on the page

Labyrinth making tip

  • Step 2: Connect the first arch (or draw the goal)

Draw a curved line from the top of the plus sign to the dot in the top right corner of the starting pattern. The top of the arch should peak halfway between those two points. This line will form what will become the goal of the labyrinth.

Making a 3 Circuit Labyrinth  - Step 2 - Draw the Goal

3 Circuit Labyrinth - Step 2 - Draw the Goal

  • Step 3: Connect the next arch from the left

Draw a curved line from the left corner dot to the end point on the right side of the plus sign. Space the line an equal distance from the wall to the inside as you draw the curved line. Notice that you have moved one point to the left and connected that to the next point on the right. This theme will continue for almost all labyrinths you construct.

Making a 3 Circuit Labyrinth  - Step 3 - Draw the next arch

3 Circuit Labyrinth - Step 3 - Draw the next arch

  • Step 4: Connect the next arch from the left

Draw a curved line from the end point of the left side of the plus sign around to the dot on the bottom right side of the pattern (Again, the next on the left to the next on the right). Space the line an equal distance from the wall to the inside as you draw the curved line.

Making a 3 Circuit Labyrinth - Step 4

3 Circuit Labyrinth - Step 4 - Draw the next arch

  • Step 5: Connect the next arch from the left

Draw a curved line from the last remaining dot on the bottom left of the pattern around to the bottom point of the plus sign to complete the labyrinth (see the pattern ?). Space the line an equal distance from the wall to the inside as you draw the curved line.

3 Circuit Labyrinth  - Step 5 - Draw the final arch

3 Circuit Labyrinth - Step 5 - Draw the final arch

That does it. The final 3 circuit classical labyrinth after 5 easy steps !!! If you struggle along the way I suggest you watch the video below which contains a grid structure that may help.

Additional construction option: You have just made a right-handed classical labyrinth. To make a left-handed version change step 2 and connect your first arch to the left instead of the right, then continue reversing the steps and you will create the inverse version of the labyrinth !

3 Circuit Classical Labyrinth

3 circuit classical labyrinth

Notice where the starting pattern is in relation to final labyrinth, not centered, but towards the bottom left, both left of center and south of center.

Here is the quick video showing what we just learned from my YouTube channel ! Notice how the grid structure both guides and helps the construction. If you are wondering the vector graphic program I use in the video is Inkscape, which is open source and available for free to download and use.

A quick video showing the digital drawing of a 3 Circuit Classic Labyrinth

Other posts you may like:

How to make other labyrinth types HERE.

How to make over 40 different maze types HERE.

The 12 Best Maze and Labyrinth Movies Of All Time

The 8 best books about mazes, labyrinths and their history