
Drawing an 11 circuit labyrinth is fun once you learn the starting seed pattern and the rules of building the pathways. Follow this 13 step process and draw your own 11 circuit labyrinth. At the end of the post I have a made a quick 2 minute video showing the drawing of the labyrinth if you are a more visual learner ! The best way to both practice and create this is on a grid to help guide you on the correct spacing. Let’s get started.
PART 1: STEP BY STEP LABYRINTH MAKING INSTRUCTIONS (WITH TIPS)
PART 2: VISUAL STEPS WITH GRIDDING SHOWN
PART 3: VIDEO SHOWING THE LABYRINTH BEING MADE
PART 4: LABYRINTH DATA AND FACTS
PART 1: STEP BY STEP LABYRINTH MAKING INSTRUCTIONS
Centering a drawn labyrinth on the page (Pro Tip #1)
If you are hand drawing a labyrinth and would like the completed drawing to be centered on the page there is a quick trick to help you do it. The seed you draw will end up being in the bottom half of the page slightly off center to the left. Check out the example below that compares the starting seed pattern center (in red) to the center of the finished drawn labyrinth (blue). The center of the labyrinth ends up being just above the arch of the labyrinth goal you will draw in Step 2.

11 Circuit Labyrinth making tip to align to the center of the page
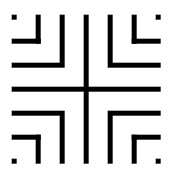
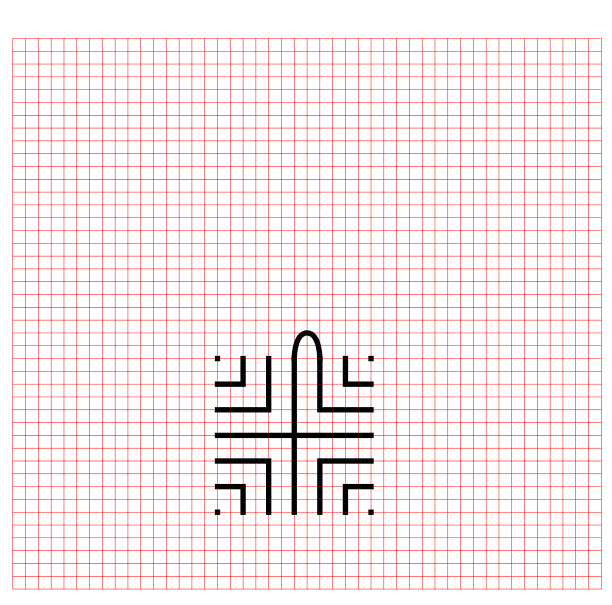
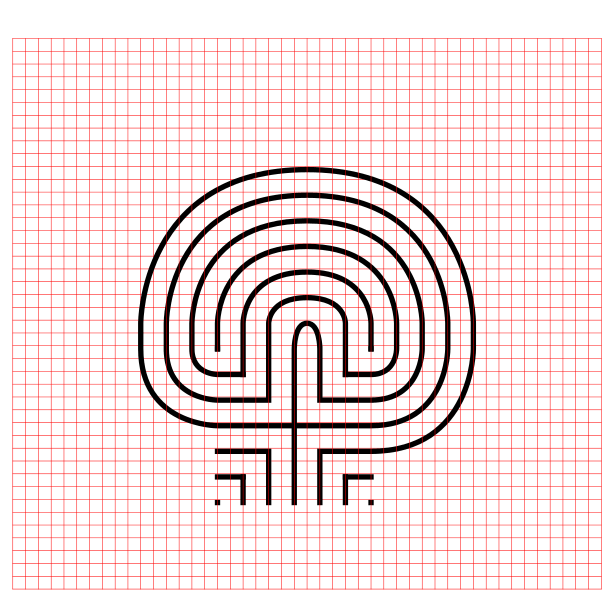
Step 1: Draw the starting seed pattern
The starting seed pattern based on an imaginary 6x6 box grid. Start with a centered is a plus sign. Add L shapes one grid away from the plus sign in all 4 quadrants. Now add another L shape in all four quadrants one grid away from the previous L’s. Finally add a dot to each of the four corners. Basically, copy the seed the pattern you see here:
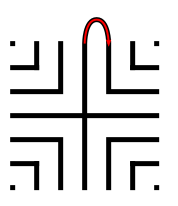
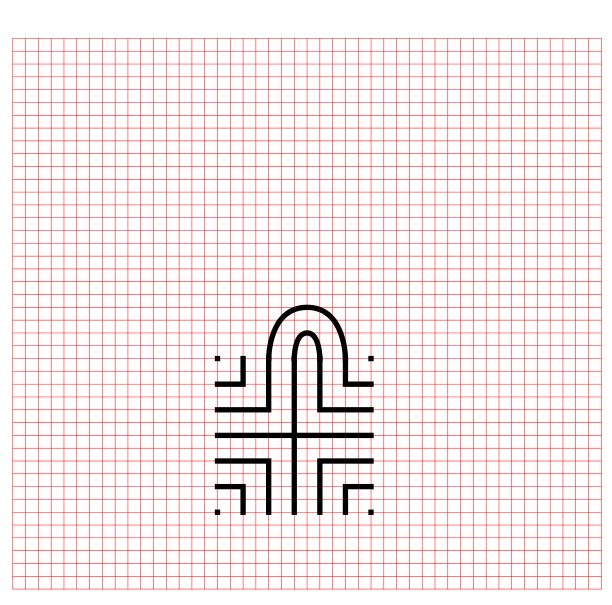
Step 2: Connect the first arch to create the goal
Draw a curved line from the top of the plus sign to the L directly to the right using an arch that extends 1 grid high. The top of the arch should peak halfway between those two points. This line will form what will become the goal of the labyrinth. As a reminder the center of the completed labyrinth will be just above this point.
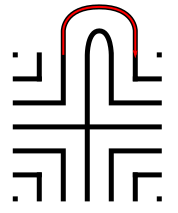
Additional information to help with your drawing (Pro Tip #2)
Let’s further explain the arching pathways you will be drawing in more detail, because from now on each path you draw will require this information. Each side of the labyrinth has different alignments that create the peak arch point for each pathway. All northern pathways (shown below in red) align above the midpoint of the goal. All eastern pathways (shown in blue) align with the original top right dot in the seeding pattern. Western pathways (shown in green) align to the top left seeding pattern dot. The southern part of the labyrinth also aligns to the corner dots, one for each side (shown as purple and orange). Keep these points in mind as you create your arches/pathways.

11 Circuit Labyrinth making tip to align the peaks
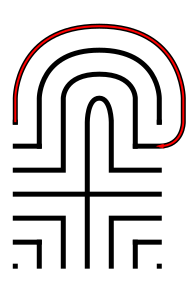
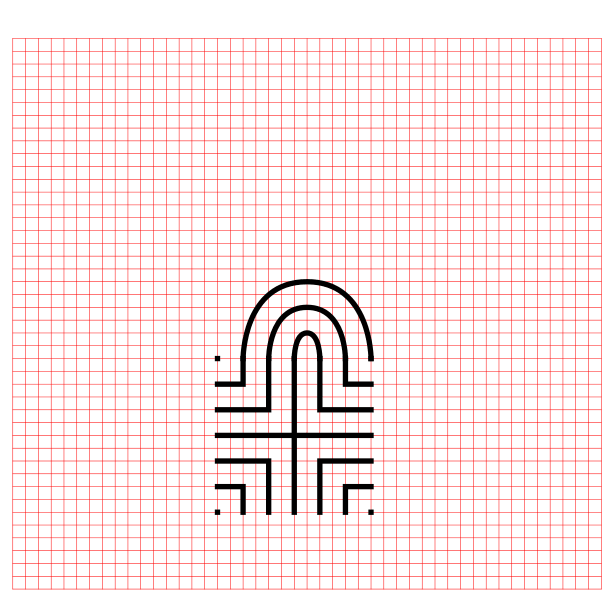
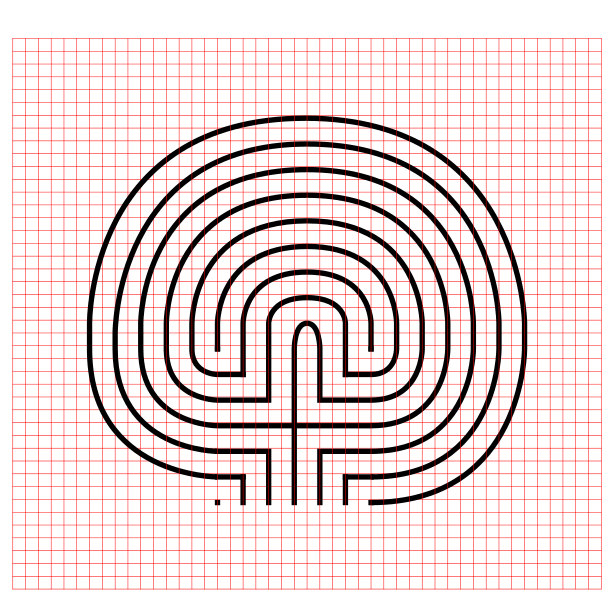
Step 3: Connect the next endpoint to the left to the next endpoint on the right
Every step from now on will be basically the same. Move one point to your left (moving counterclockwise) and connect that to the next point on the right (moving clockwise). In this case the large backwards L on the top left of the seed pattern to the small L on the top right of the seed. The arch should peak at the same point as the goal below it in the pattern.
Step 4: Connect the next endpoint to the left to the next endpoint on the right
The small backwards L in the top left to the dot in the top right corner. The arch should peak at the same point as the goal below it in the pattern.

Step 5: Connect the next endpoint to the left to the next endpoint on the right
The dot in the top right corner to the end of the small L in the top right corner. The arch should peak at the same point as the goal below it in the pattern.
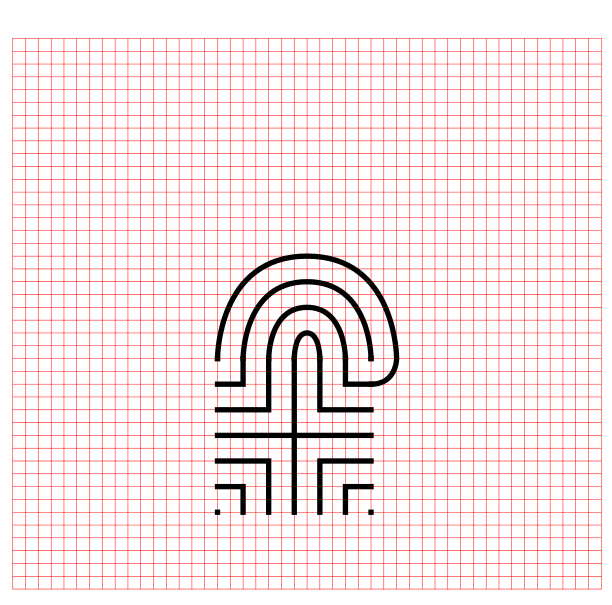
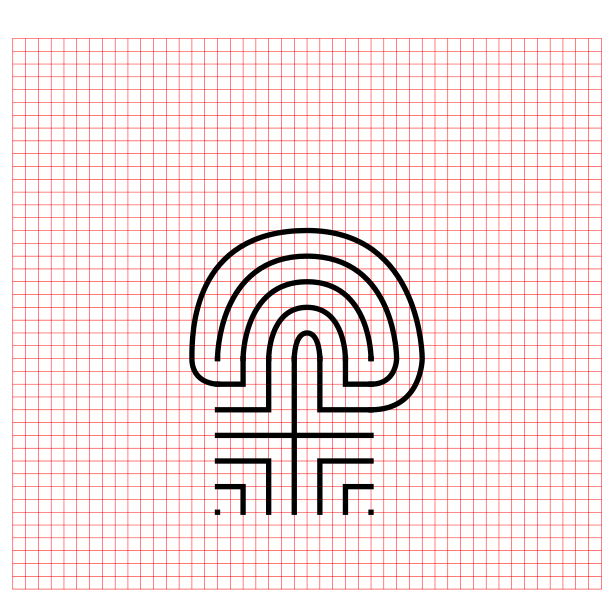
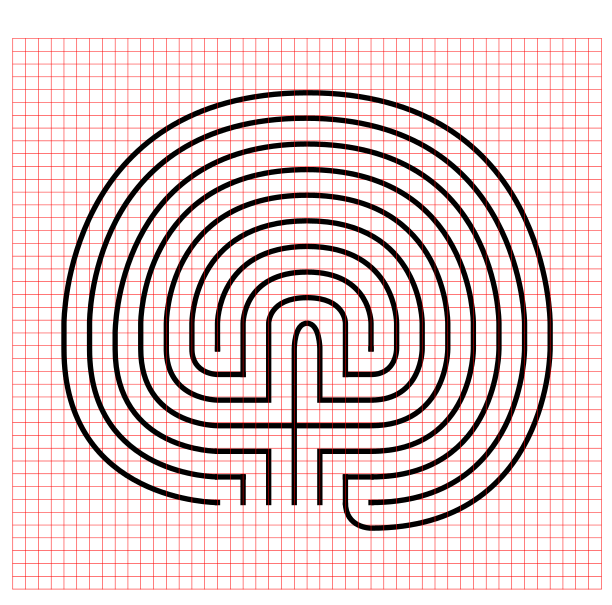
Steps 6-13: Connect the next endpoint to the left to the next endpoint on the right
I assume you have the pattern down to complete making the labyrinth with only pictures with nice red lines. Follow the graphic below to complete steps 6 - 13.
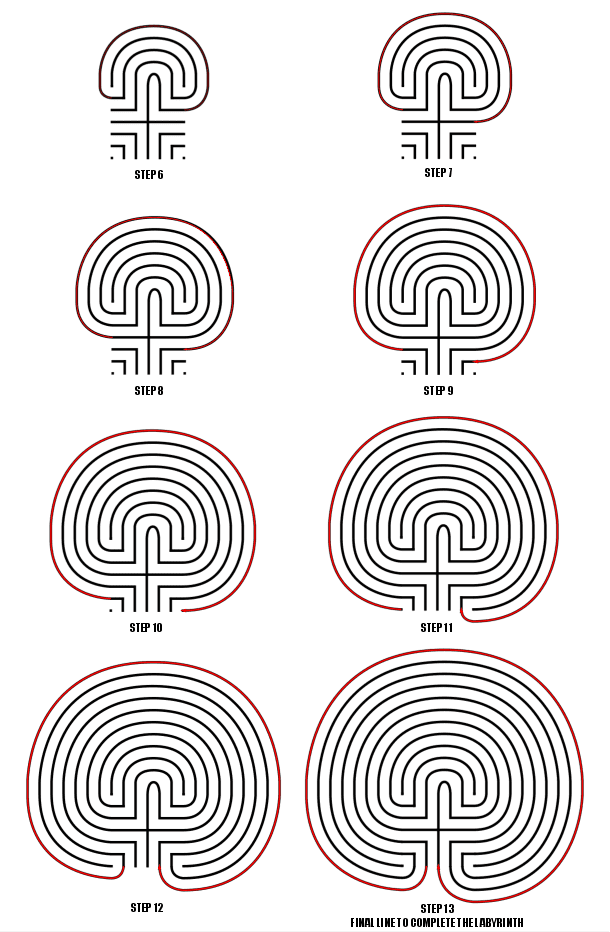
Steps 6-13
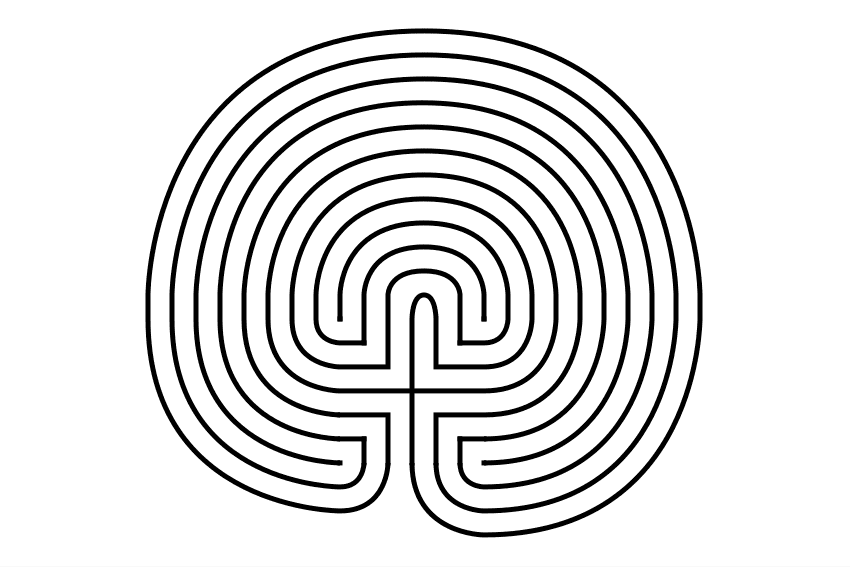
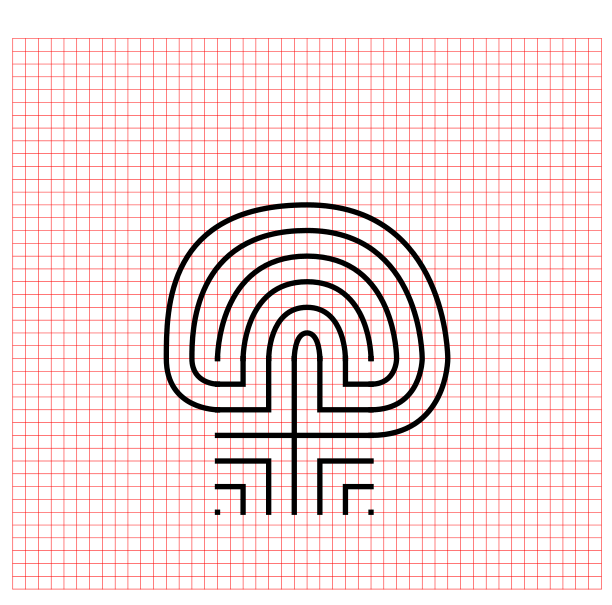
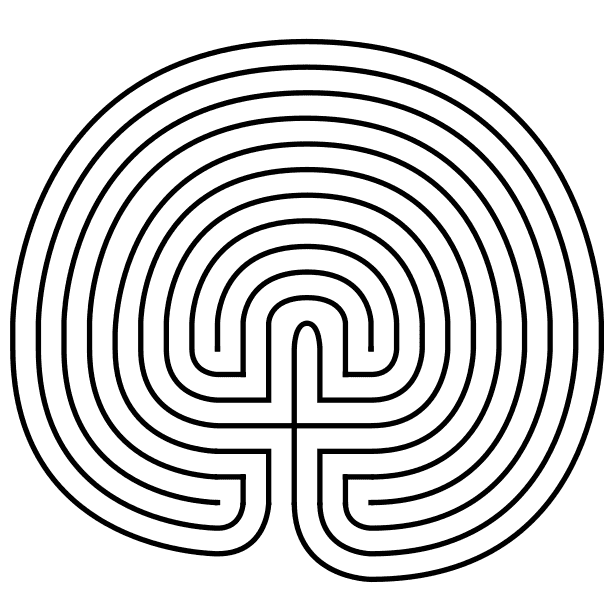
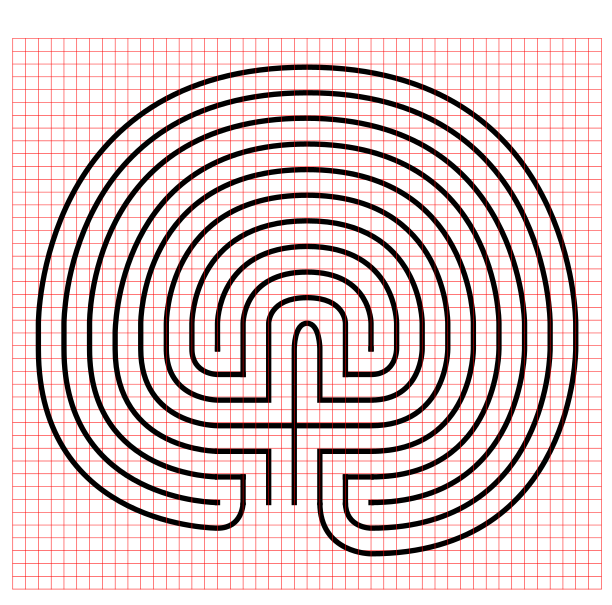
11 Circuit Classical Labyrinth
That completes the drawing of an 11 circuit classical labyrinth. It happens to be the “left handed” version of the labyrinth. If you want to make the right handed version every step above would be the same but moving to the right instead of left. The direction is determined by the way you turn first when you enter the labyrinth. Just imagine following the directions while looking in a mirror. The majority of labyrinths you see will be right handed. The right handed versions look odd to many people:

Left handed 11 circuit labyrinth
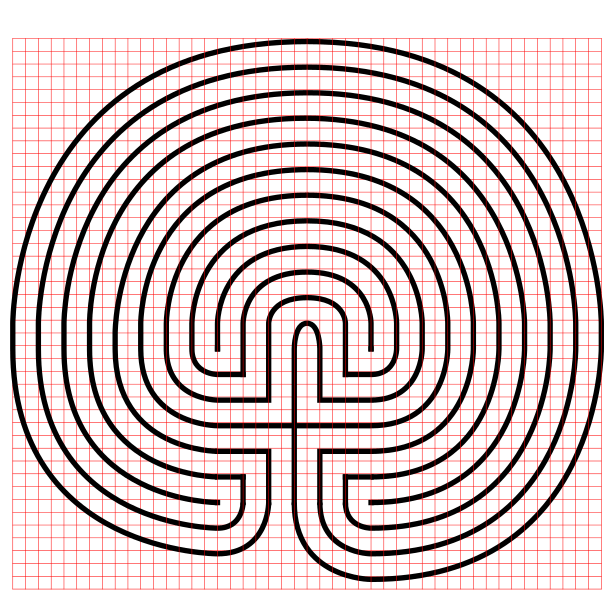
PART 2: VISUAL STEPS WITH GRIDDING SHOWN
Use the controls to build the labyrinth. As discussed above, notice where the initial seed is placed on the page. The grids are twice as dense only because of the peak on the northern side of the labyrinth. You could make it half as dense except for that point where you make the goal and subsequent arches.


PART 3: VIDEO SHOWING THE LABYRINTH BEING MADE
How To Draw an 11 Circuit Classical Labyrinth Video:
Here is a quick 2 minute video to see this in action from my YouTube channel ! Notice how the grids help with the construction !
PART 4: LABYRINTH DATA AND FACTS
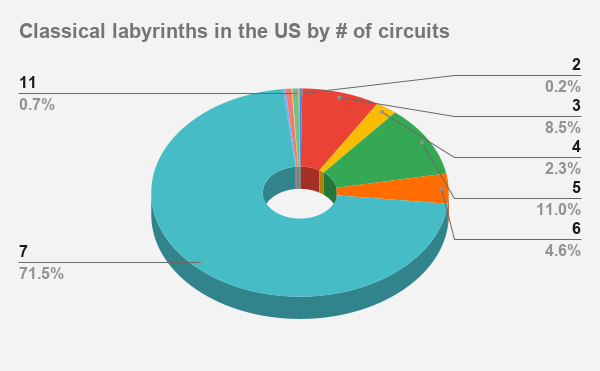
The majority of classical labyrinths in the US have 7 circuits at 71.5%. 11 circuits do exist, making up 26% off all labyrinths in the US, but they are typically Medieval style. You just learned how to make a rare US labyrinth, at 1% of the total.
Here is an example of one of those rare labyrinths you can visit:
The Church of the Good Shepherd Labyrinth in Yukon, Oklahoma was made by placing brick pavers in the grass. It has a 60 foot diameter and features a tree in the center.
Other posts that may interest you:
Interested in learning how to make or draw other digital labyrinths ? You can find many different step by step instructions HERE.
Including:
How to draw a 5 Circuit Circular Labyrinth
A Comparison of 3 different types of 11 Circuit Labyrinths
How to Draw a Classical 7 Circuit Labyrinth