Drawing a classical 3 circuit square labyrinth is both easy and fun once you learn the starting pattern and the rules of building the pathways. Follow this simple 5 step process and draw your own 3 circuit classical square labyrinth.
Step 1: Draw the starting seed pattern.
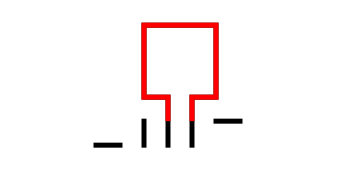
The starting seed pattern for this labyrinth is not the typical plus sign you may be used to. Instead it is 3 vertical lines, with 2 horizontal lines. The horizontal line on the left aligns with the bottom of the 3 vertical lines, while on the right side it aligns with the top of the vertical lines. Each line is the same length. See below:

3 Circuit Labyrinth Square starting seed pattern
Step 2: Draw the center goal
At the 2 rightmost vertical lines draw a line up one grid. This will become the opening to the center goal. Draw a square centered on top of this. Grid-wise this is a 3x3 square.
3 Circuit Square Labyrinth - Step 2 - Draw the Goal
Step 3: Draw the next level
Connect the top of the remaining left vertical line to the far corner of the right horizontal line. It is an upside-down squared U shape started with a small horizontal move on the left side. See below.

3 Circuit Labyrinth - Step 3 - Draw the next arch
Step 4: Draw the next level
Connect the left side of the horizontal line around the structure clockwise until it reaches the end of the rightmost vertical line. Again this creates an upside-down square U shape plus a horizontal connection in the last section. See below.
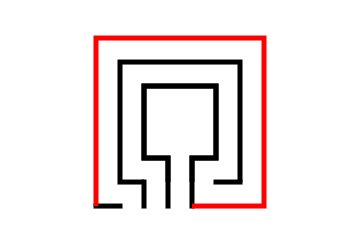
3 Circuit Square Labyrinth - Step 4 - Draw the next arch
Step 5: Connect the final arch from the left
Connect the ends of the bottoms of the final 2 vertical lines around the structure to complete the labyrinth.

3 Circuit Square Labyrinth - Step 5 - Draw the final arch
That does it. The final 3 circuit classical square labyrinth after 5 easy steps !!!

3 circuit classical square labyrinth
And here is the same labyrinth shown with grids so you can understand the shape better.

Alternative construction option: You have the option to use the more traditional starting seed pattern to create a 3 circuit square labyrinth, but this is not the most common construction. This version does not have a large square center and ends up not even being a perfect square. Here is the 5 step process to create it.
PRO TIP: this is the same construction and instructions as a 3 circuit classical shaped labyrinth but instead of curving the corners you draw the lines and corners at 90 degree angles !
Step 1: Draw the starting seed pattern.
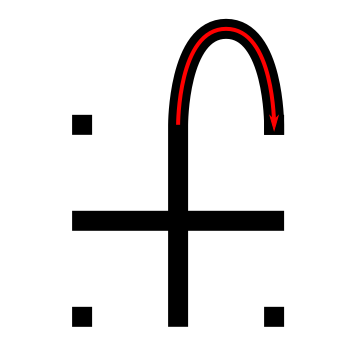
The starting seed pattern is a plus sign with four dots in each of the four corners in the space apart from the lines to form pattern below.

Step 2: Connect the first “arch”
Draw an upside -down U shaped line from the top of the plus sign to the dot in the top right corner of the starting pattern. The top of the arch should peak halfway between those two points. This line will form what will become the goal of the labyrinth.

Step 3: Connect the next “arch” from the left
Draw an upside down U shaped line from the left corner dot to the end point on the right side of the plus sign. Space the line an equal distance from the wall to the inside. Notice that you have moved one point to the left and connected that to the next point on the right.

Step 4: Connect the next “arch” from the left
Draw another clockwise line from the end point of the left side of the plus sign around to the dot on the bottom right side of the pattern (Again, the next on the left to the next on the right). Space the line an equal distance from the wall to the inside as you draw the line. Again this looks like an upside-down U plus the connections to the appropriate ends.

Step 5: Connect the next “arch” from the left
Same process as before but this time you connect the bottom left dot from the seed to the bottom of the plus sign.

That completes the process for this alternative version.