
In this post I will show you how to draw a hexagon and then expand that out to a full digital 11 circuit hexagonal labyrinth.
How to Draw an Hexagon
If you want to draw an hexagon with equal lengths here is the method I would use.
Step 1 Draw a straight line
Step 2 Rotate the line 60 degrees
Obviously this is a digital method where you can copy and paste then rotate, but it also works if you are hand drawing. Use a pencil and protractor and ensure you use the same length of line.
Step 3 Rotate the line 60 degrees again
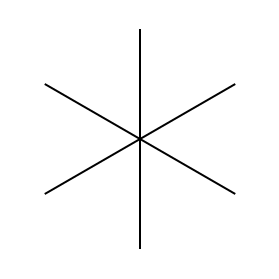
This will create what looks like a widely spaced asterisk.

Step 1 Draw a line

Step 2 Rotate 60 degrees
Step 3 Rotate 60 degrees again
Step 4 Connect the ends of the lines
This will create outer walls of the hexagon that are the same length.

Connect the ends of the lines
Step 5 (both are optional) Delete the original lines and rotate the hexagon
You can delete the guidelines to create your final hexagon, but you may not want to. Why ? Because when you create a labyrinth using this template the guidelines you used also guide you on when you turn the lines (or alternatively embed the hexagon) for your next layer of the labyrinth. You also have the option to rotate the hexagon to have a wall parallel to the bottom of the page/screen, but I did not do this in my example.

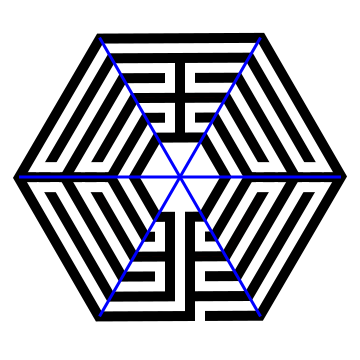
Blue line Hexagon
Before we get into the step by step instructions, I want you to notice where the walls of the labyrinth make their turns. I have highlighted them below in blue - if you made your Hexagon using my method above and you did not delete the guidelines here you can see that each turn happens at these guides. The example is a 5 circuit version, but it will be true for ANY size circuit labyrinth.
How to Draw a 11 Circuit Hexagonal Labyrinth
Step 1 Draw 12 concentric hexagons
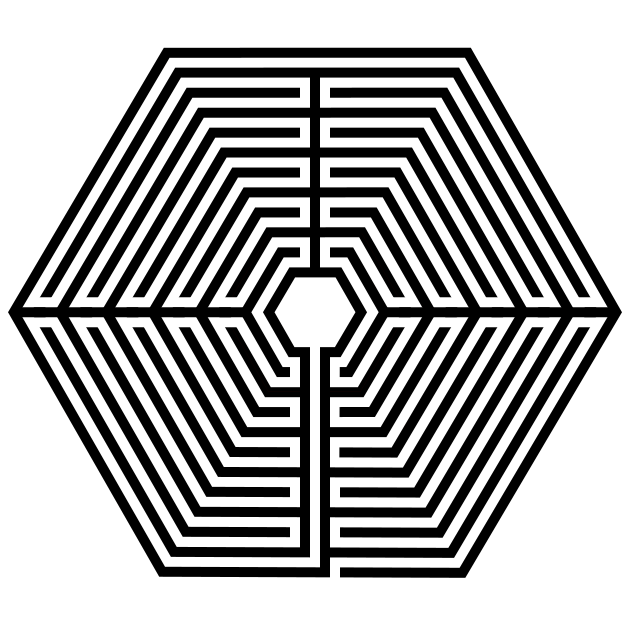
Now that you know how to draw a good hexagon let’s get started drawing our labyrinth by drawing 12 of them. I always use a standard equal construction, meaning that the width of the walls equals the width of the pathways in between them. For this version I have rotated the hexagon so that bottom is parallel to the bottom of the page.
PROTIP: Start your drawing with the center goal so you do not run out of room !
PROTIP: To create a hexagon of x# of different circuits, you just need to draw x+1# of hexagons. So a 23 circuit labyrinth needs 24 hexagons, etc.
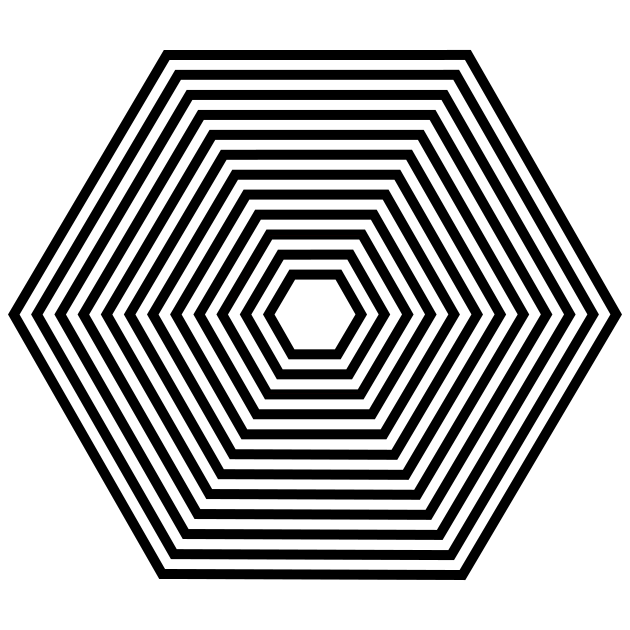
Step 1 - Draw 12 concentric hexagons
Step 2 Draw the internal sections
In this step we draw our internal turnaround points which create sections for the labyrinth. In our example we have 4 sections. At 9, 12, and 3 o’clock draw straight lines that cut off all but 1 pathway. At 12 this is the outside path and at 3, and 9 it is the most internal pathway. Finally create what will become the final pathway to the goal by adding 2 walls centered at 6 o’ clock. The left wall of those 2 walls should not cover the outside pathway.

Step 3 Break the walls into pathways
Each section will need 10 ‘cuts’ to make the pathways wind thru the section. Also cut the final walkway to the goal and the entrance just to the right of that through the outside wall.

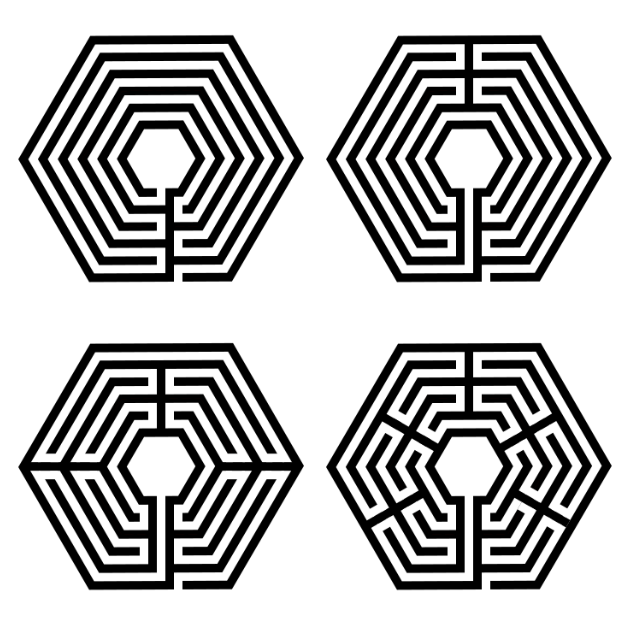
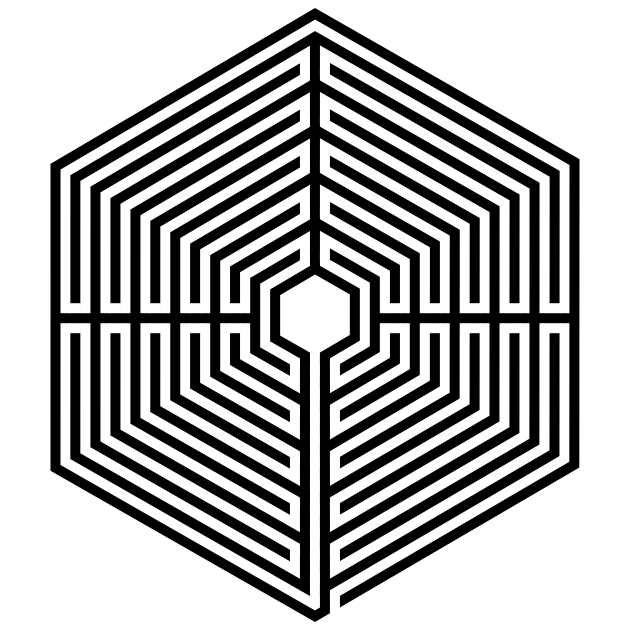
A note about turn-backs. My example above has 4 sections. But you can also draw the same labyrinth with more or less turn-backs (sections). Below I have a 1 section, 2 section, 4 section (the one we just made) and a 6 section version of hexagonal labyrinths. If you imagine walking these, the more sections, or turn-backs, the more back and forth walking you will do. All examples are 5 circuit hexagonal labyrinths.
A note about orientation. I also wanted to show you how the labyrinth would look if we had not rotated it. In this version the entrance and final pathway to the goal lead from a corner instead of the center on a flat portion on the outer edge. Here are how the 2 and 4 sectioned labyrinths would look:
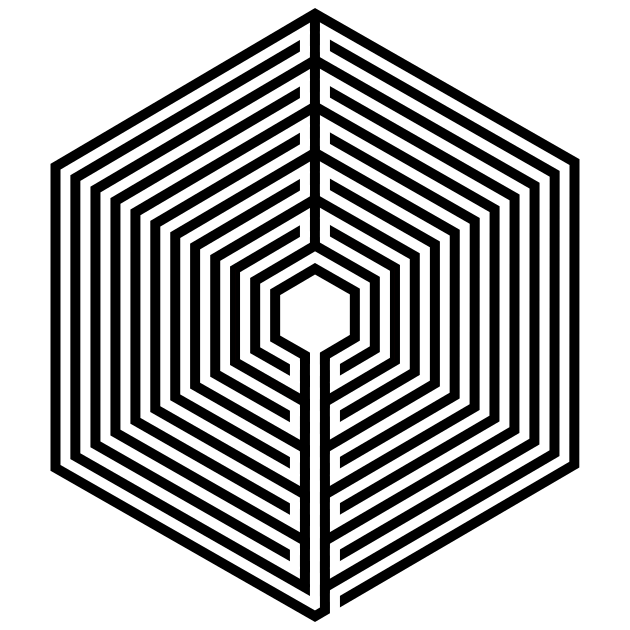

And let’s compare the standard 4 section versions in more detail because we can adjust our steps above to make another version. Step 1 is the same except for the orientation of the hexagons you draw. Step 2 is actually the same as far as where the lines are drawn and what pathways are left open. And Step 3 is also the same since you cut the pathways in the same place ! So essentially the steps are pretty much the same ! So if you want to make the “corner” version you can !
Additional posts you might like (maze artwork - the websites specialty):