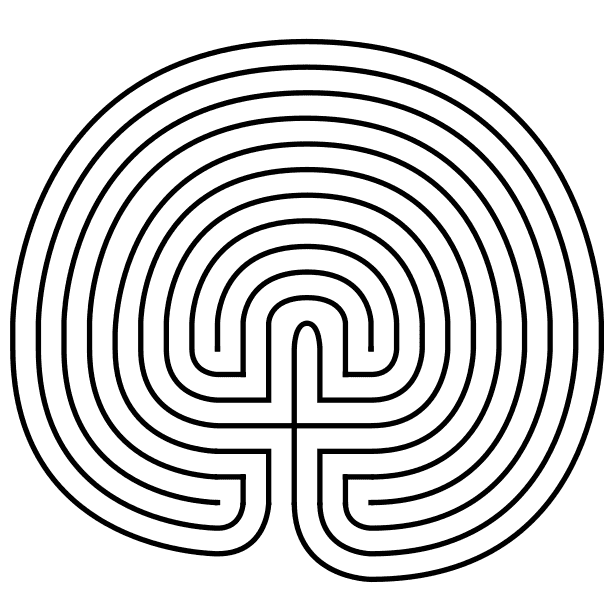
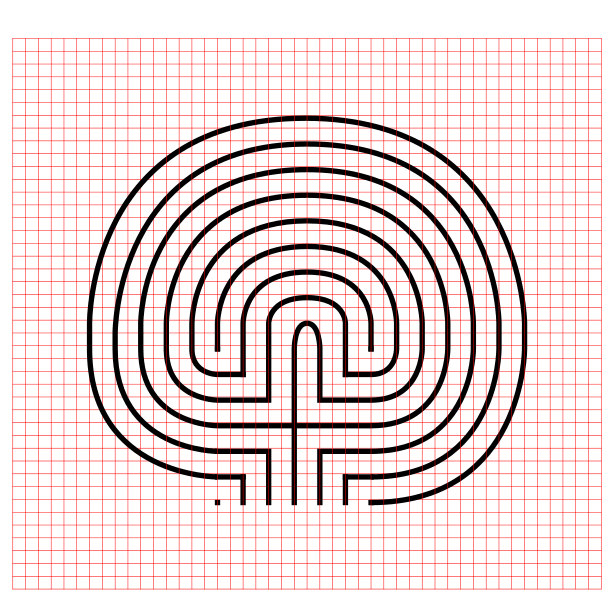
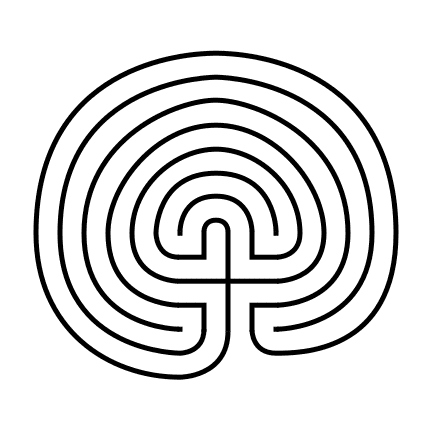
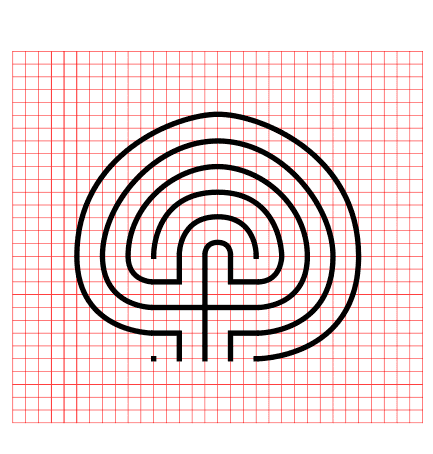
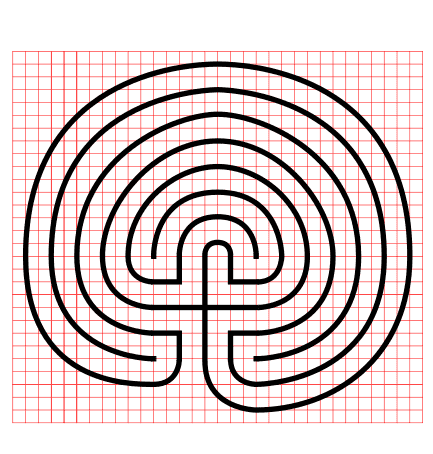
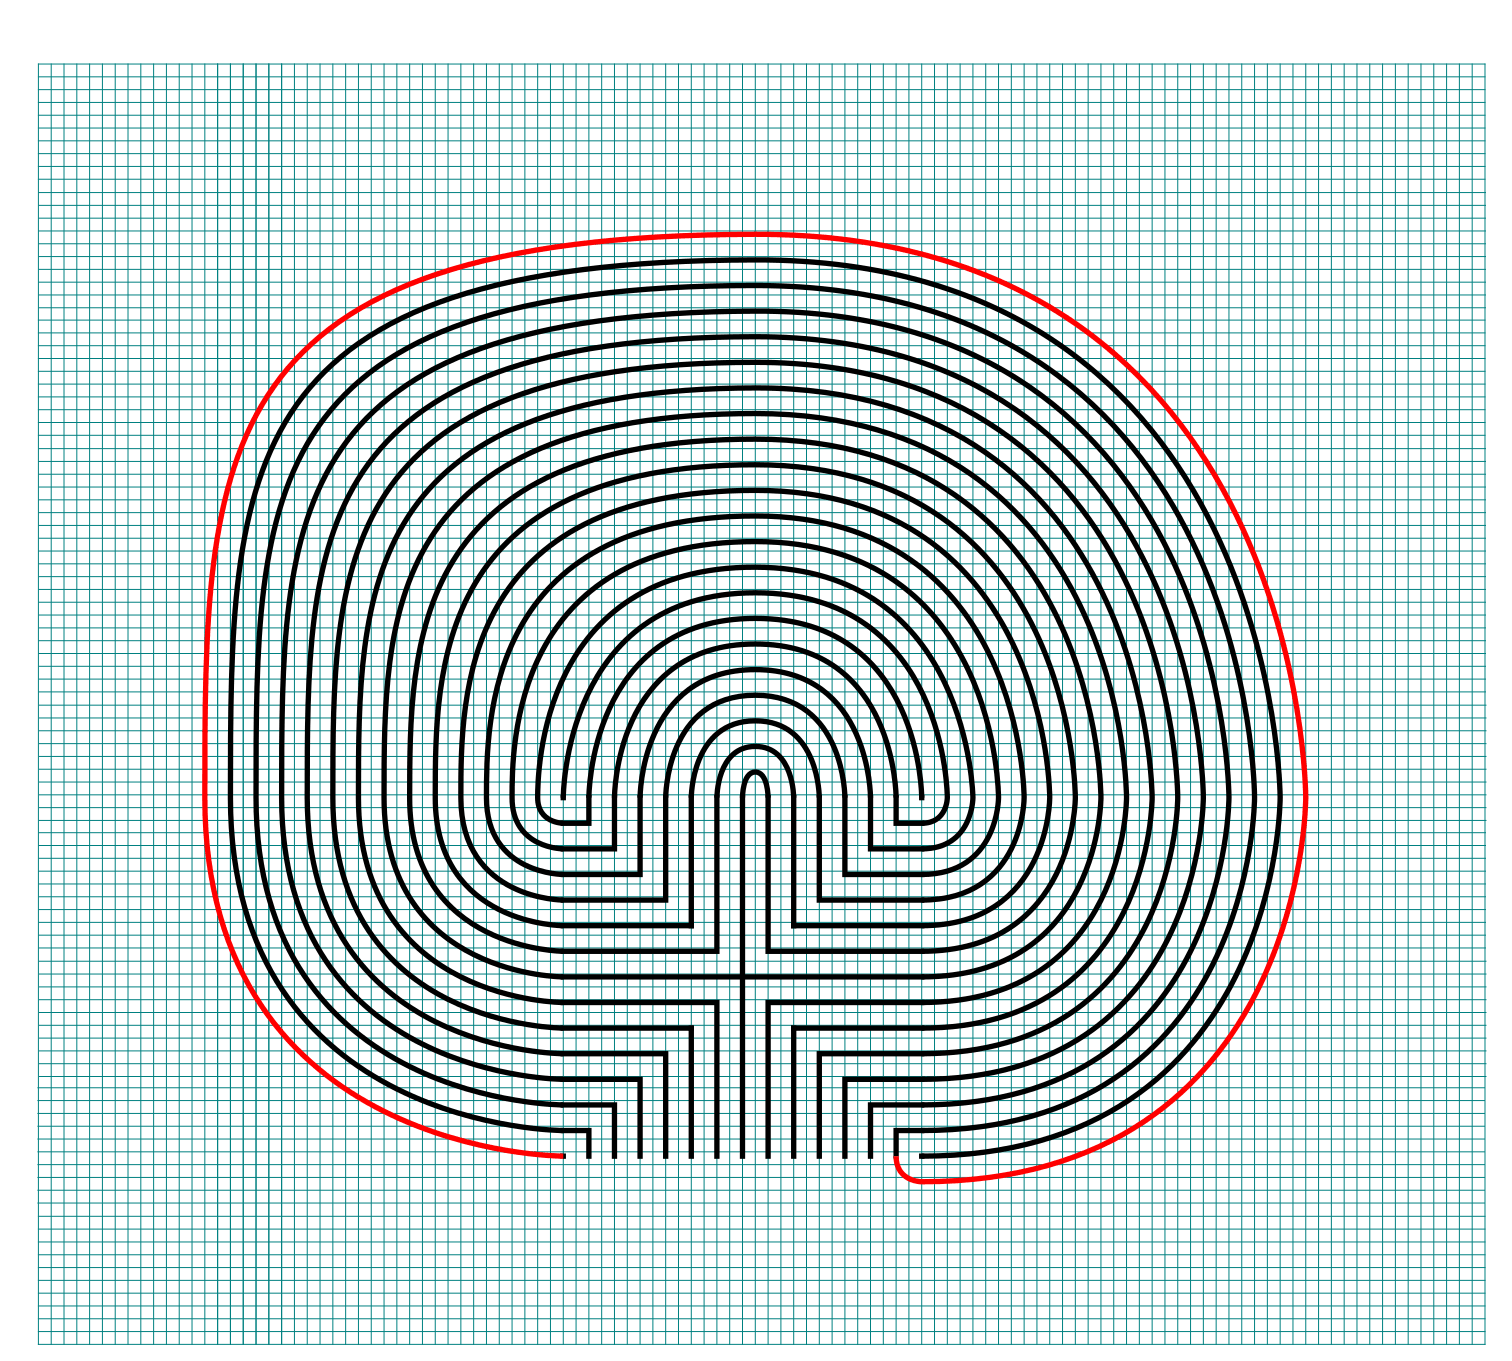
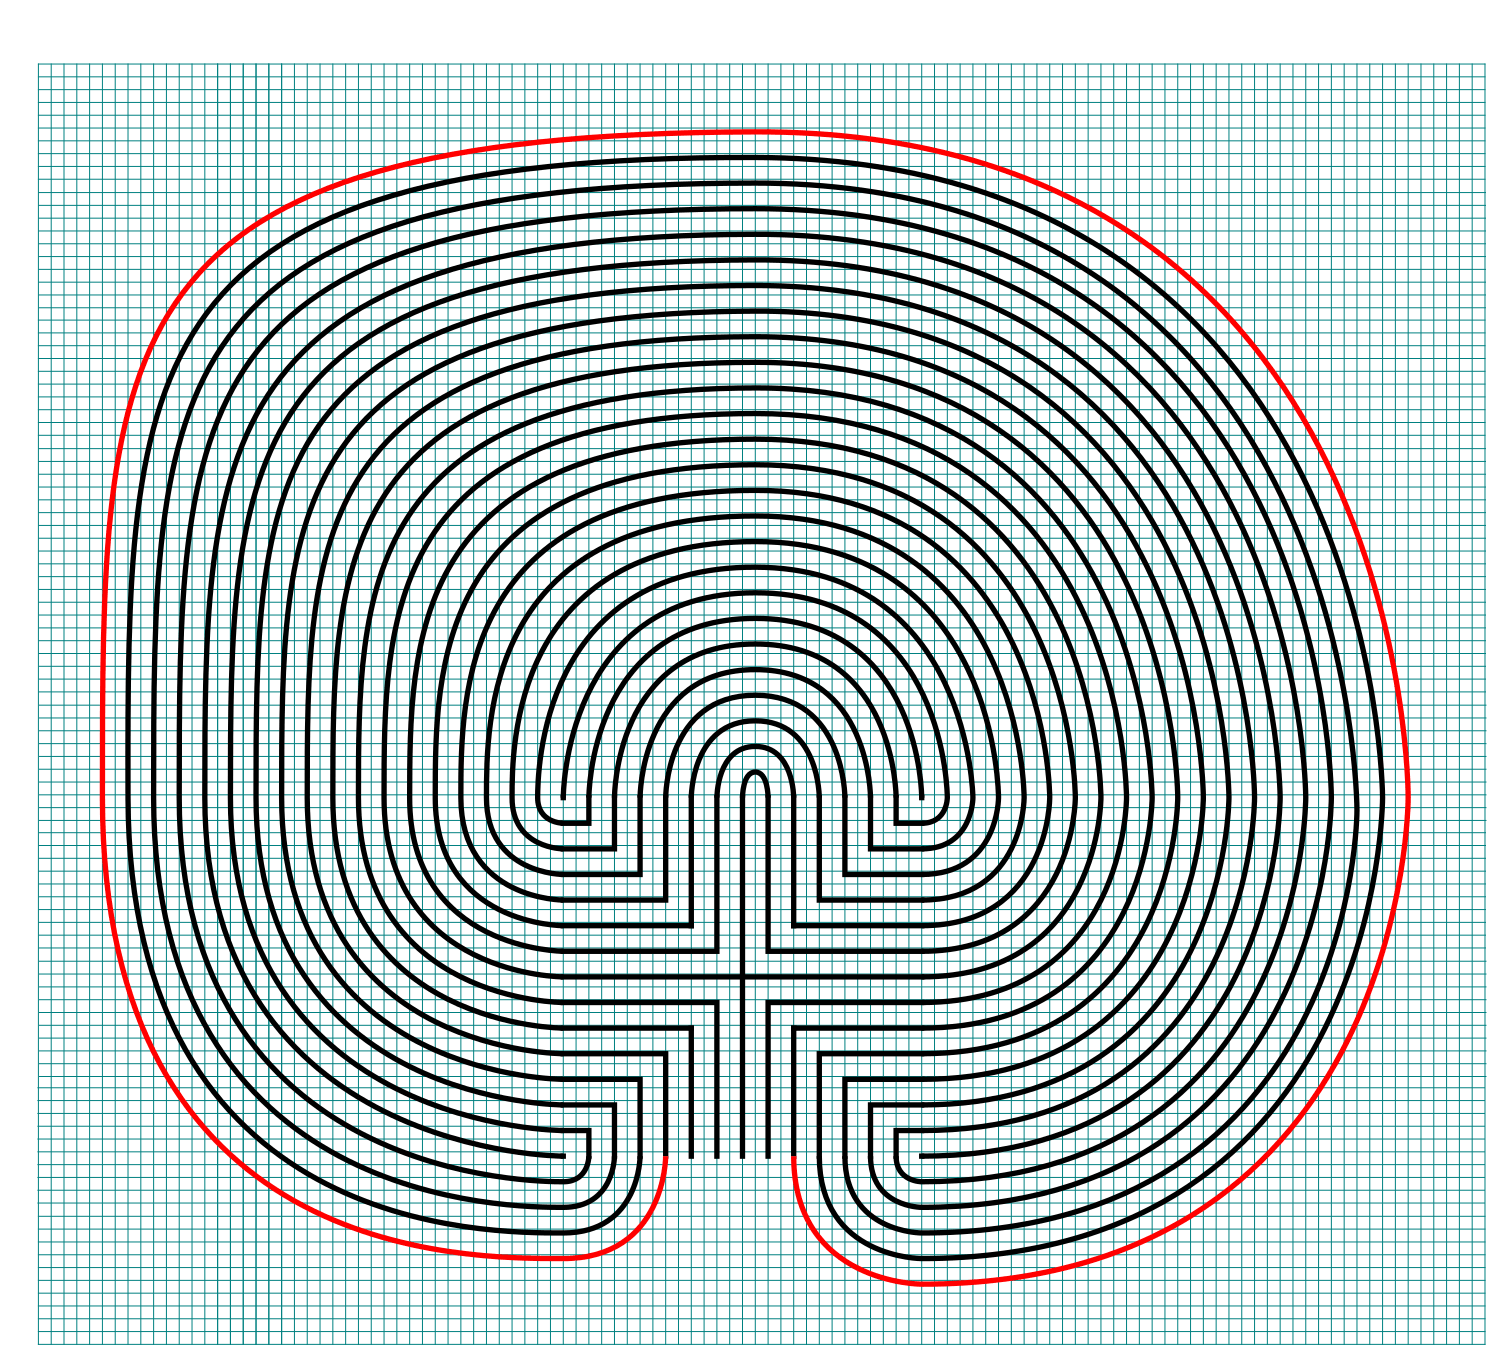
Drawing a massive 27 circuit classical labyrinth feels like running a marathon. I have never run a marathon. That might be a lie. To draw it step by step it takes a 29 step process. Writing that out and going step by step is laborious, so instead I am going to give you the cheat codes. It saves me time. If you decide to create this it probably won’t save you any. The truth hurts. Let’s get on with it.
The truth about this labyrinth is not how many circuits it has - but that once you understand how seeding and drawing arches works, you can make any size classical labyrinth. I did extensive research on the over 4,000 labyrinths in the US, and the most circuits I found was 15 (and there are only 3 of them). So you will not be finding this labyrinth anywhere but drawn on paper or your digital screen.
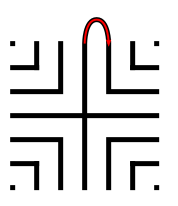
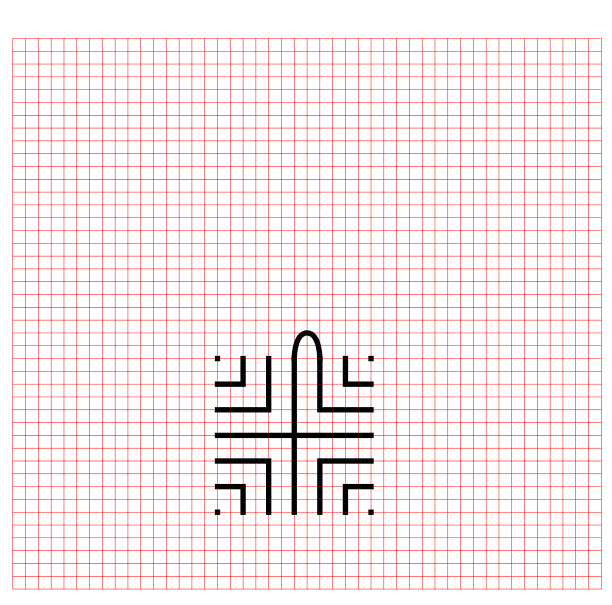
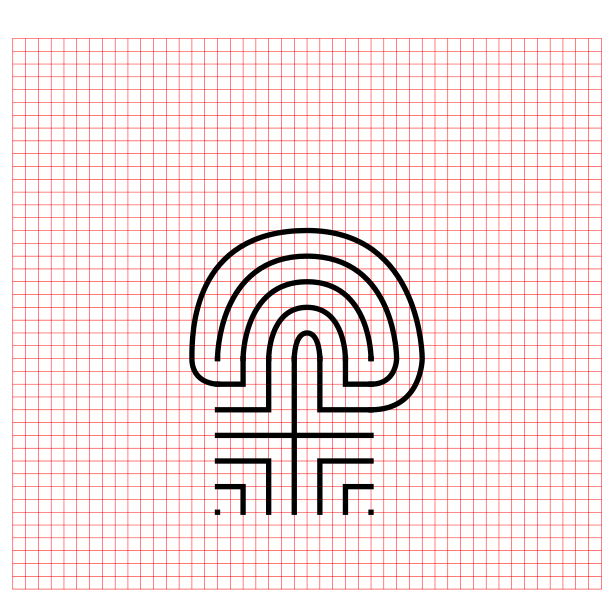
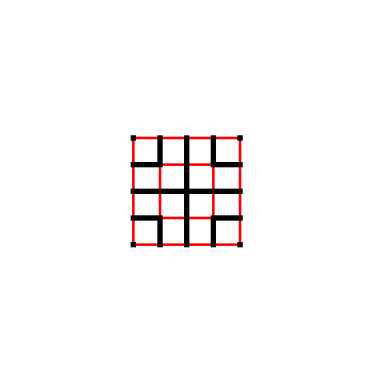
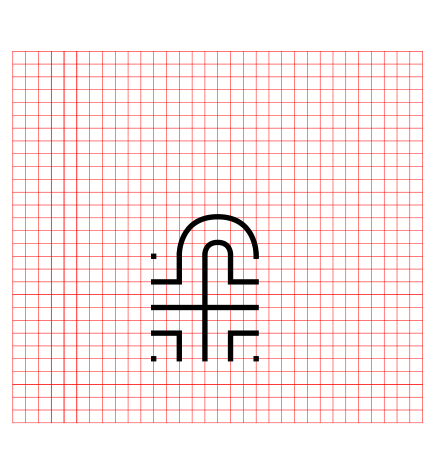
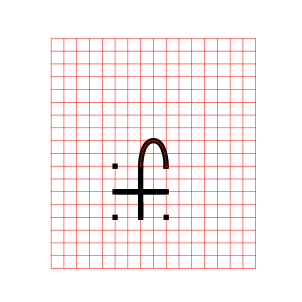
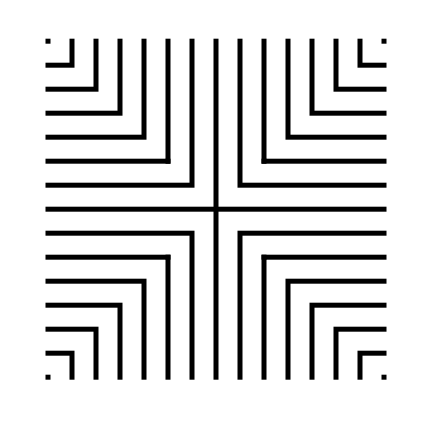
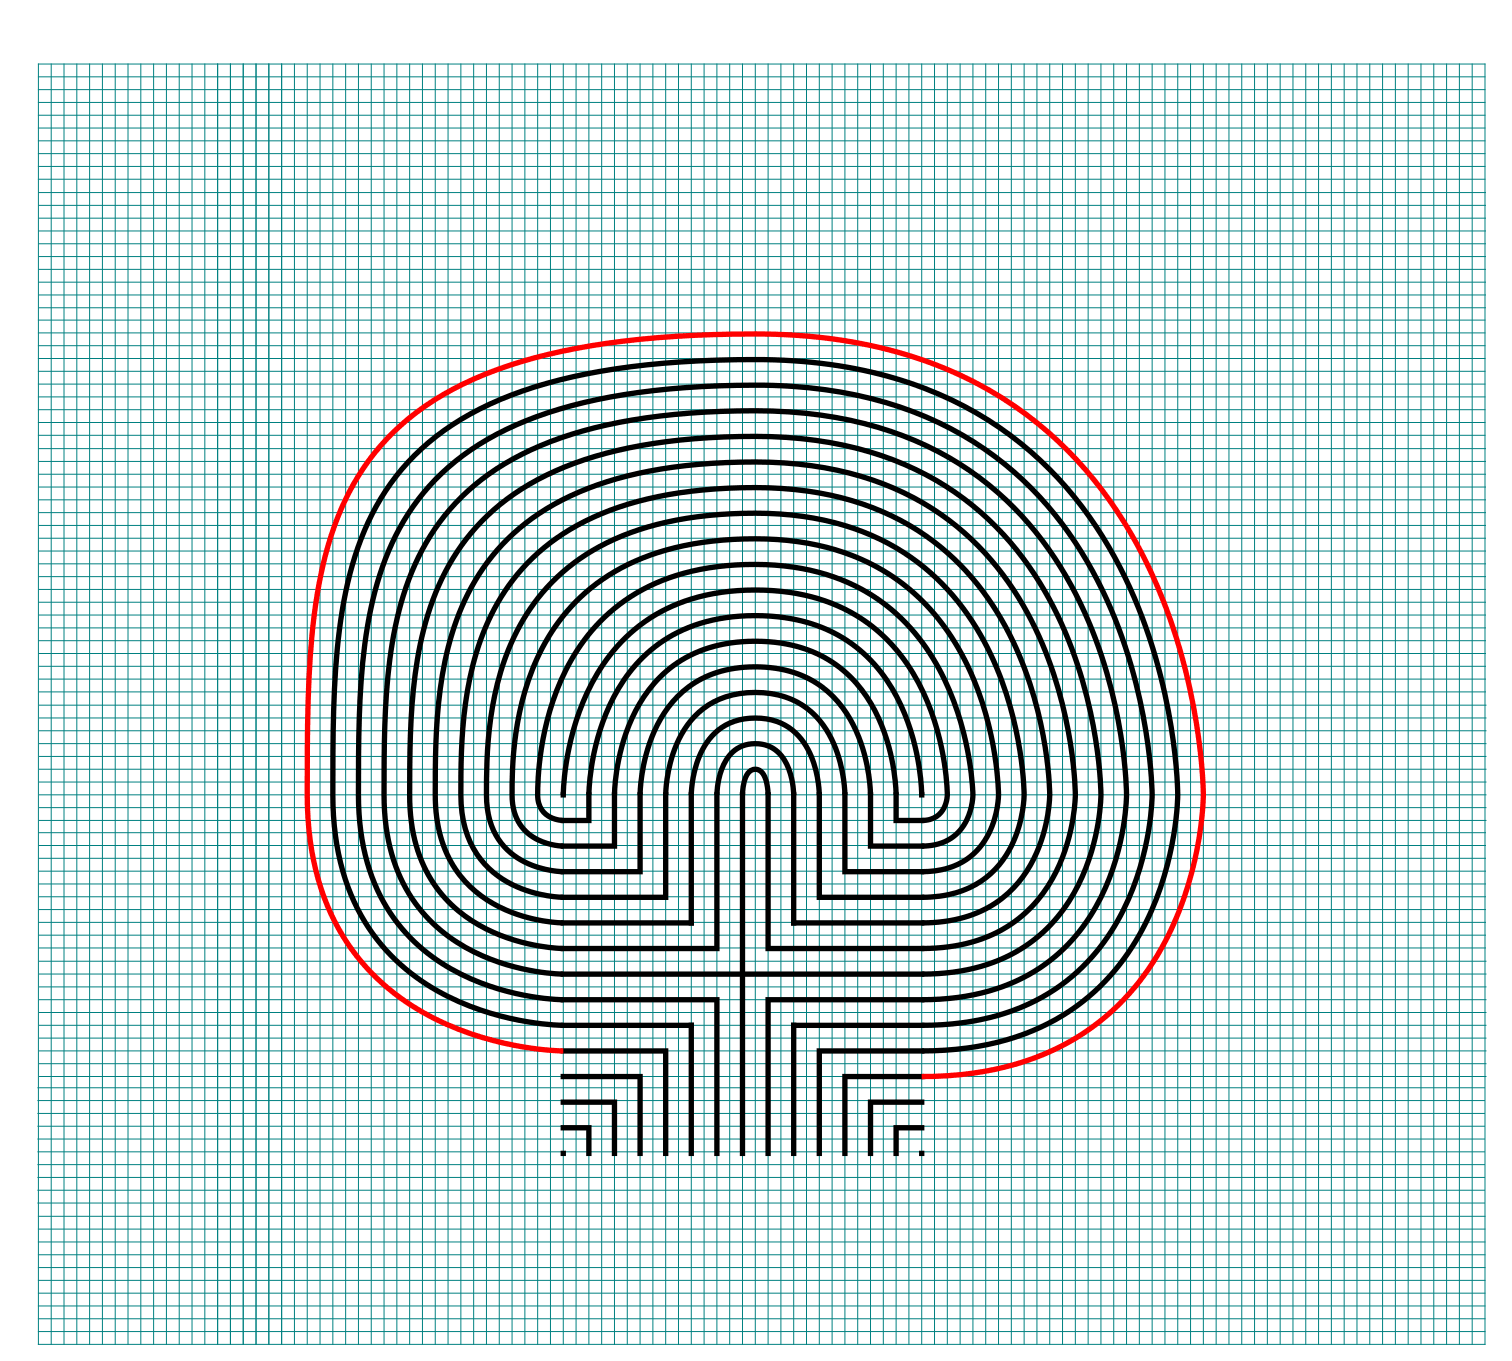
Step 1: Draw the starting seed pattern
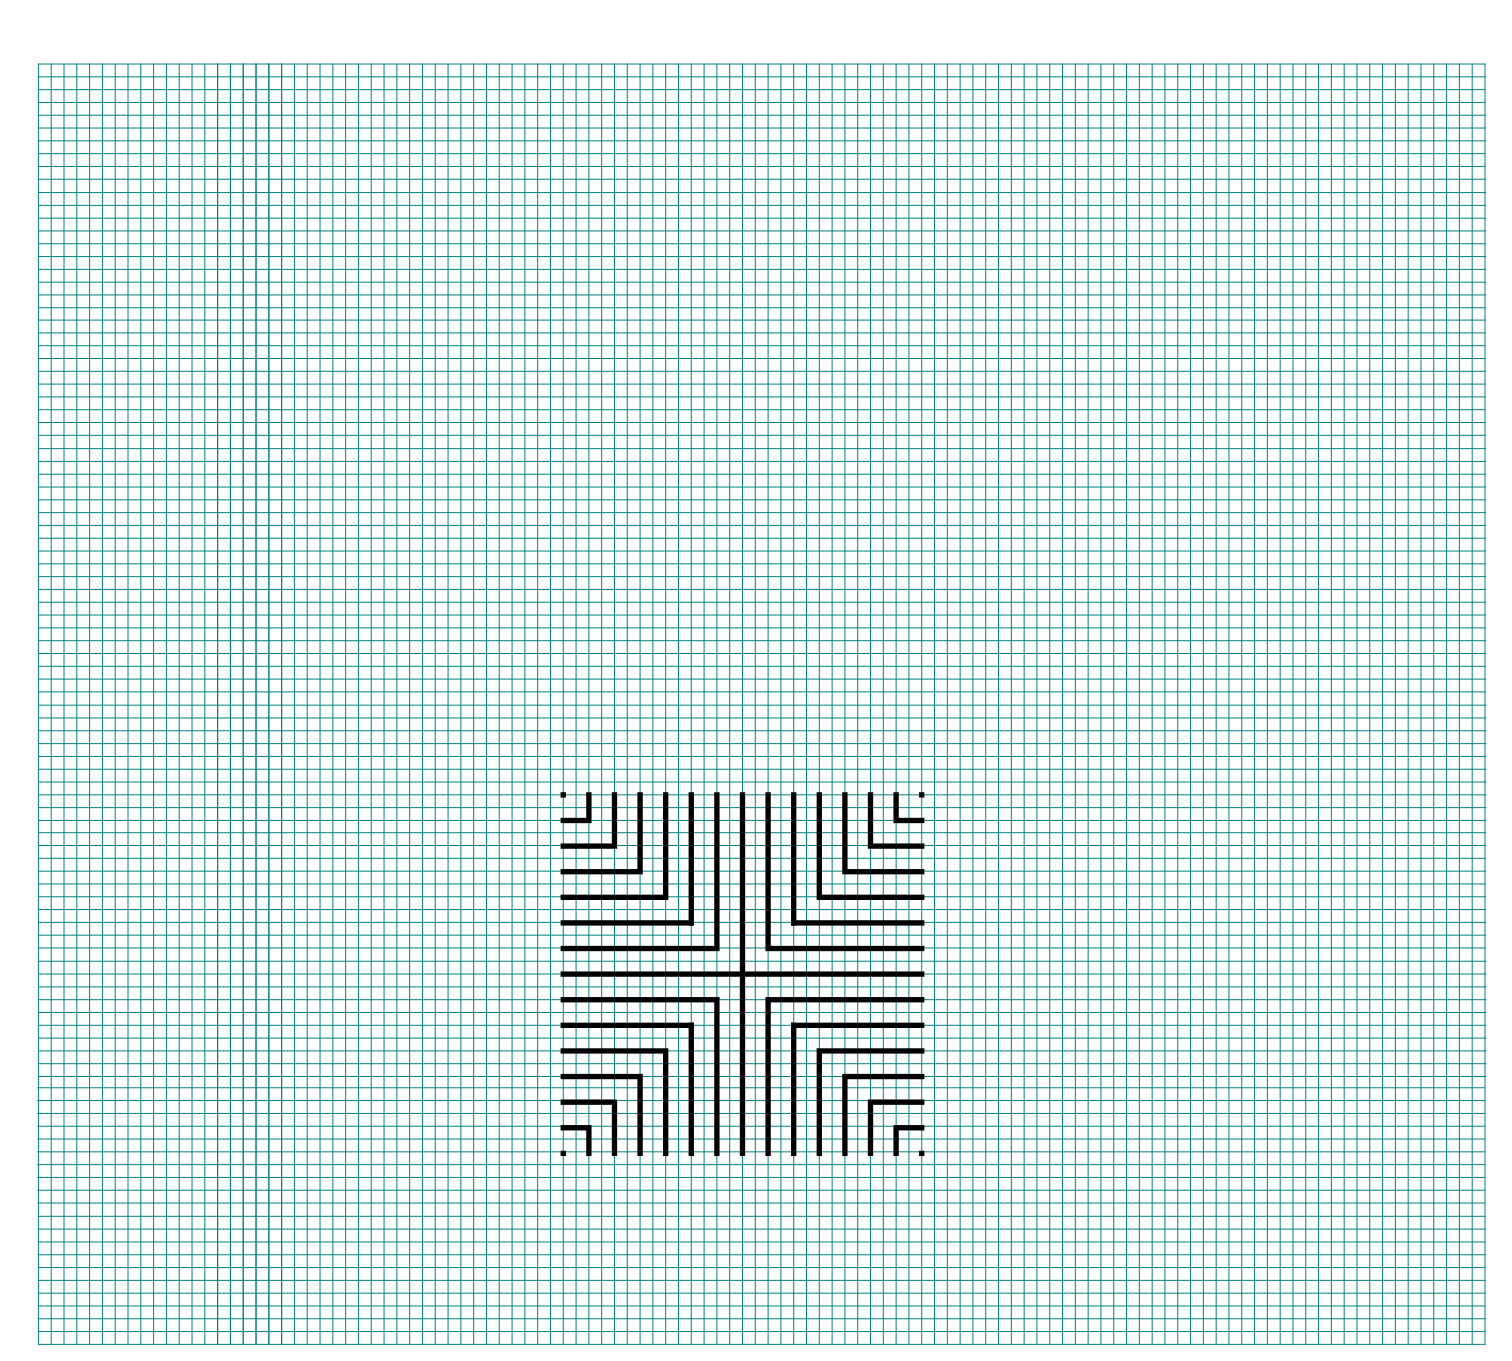
The starting seed pattern based on an imaginary 14 x 14 box grid. Start with a centered is a plus sign. Add L shapes one grid away from the plus sign in all 4 quadrants. Repeat until you have 6 L per quadrant. Finally add a dot to each of the four corners. Basically, copy the seed the pattern you see here:
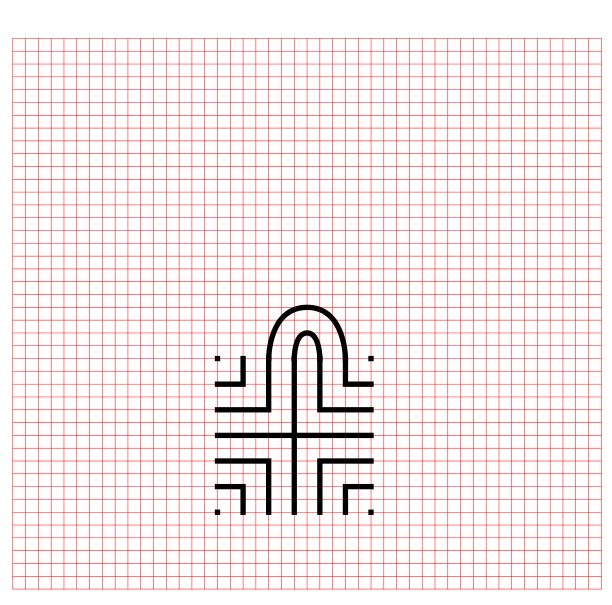
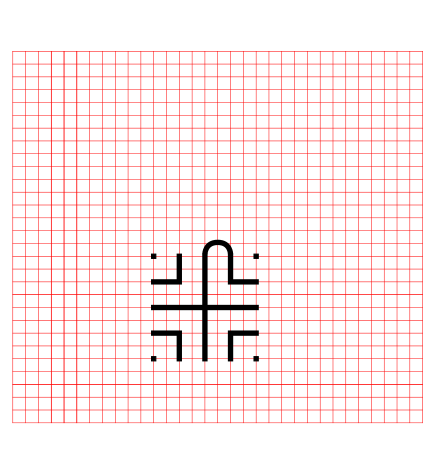
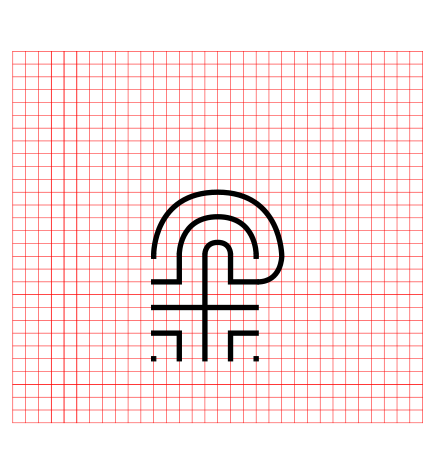
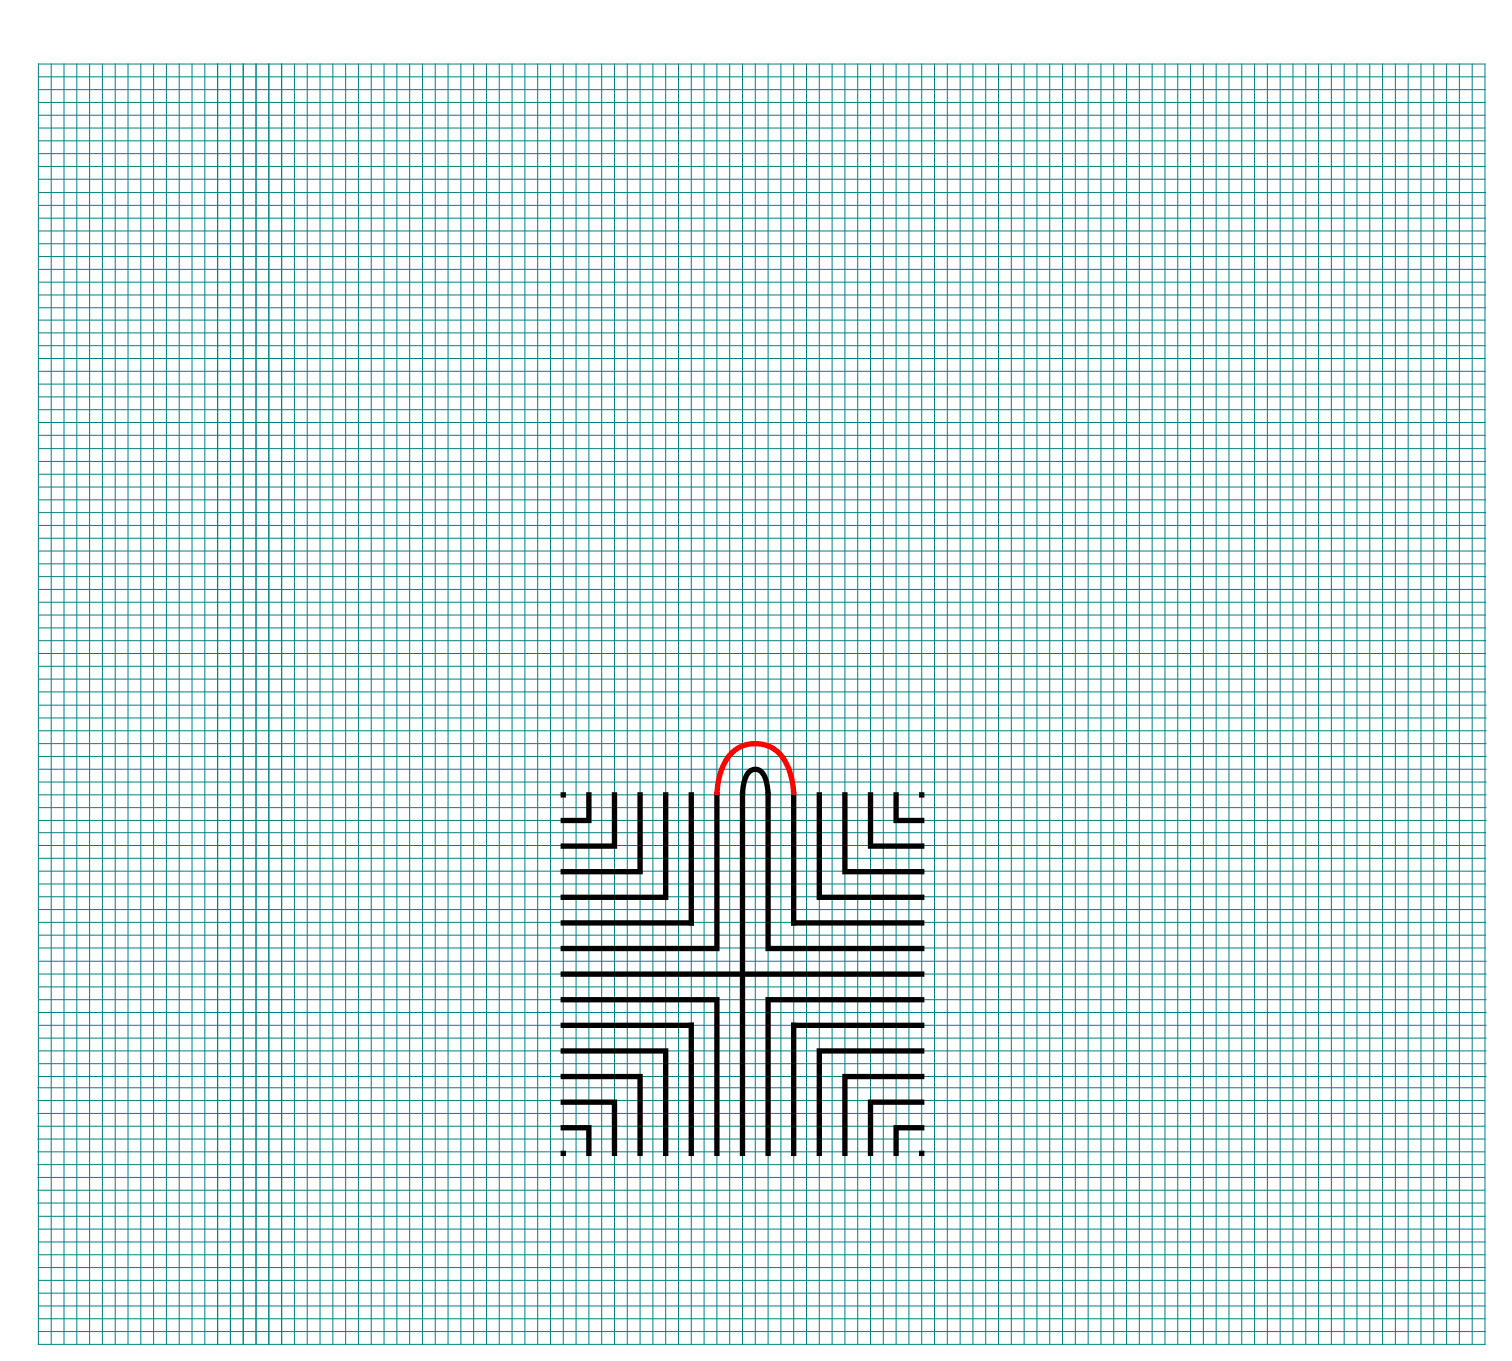
Step 2: Connect the first arch to create the goal
Draw a curved line from the top of the plus sign to the L directly to the right using an arch that extends 1 grid high. The top of the arch should peak halfway between those two points. This line will form what will become the goal of the labyrinth.

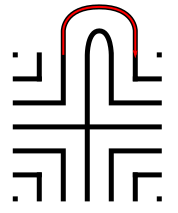
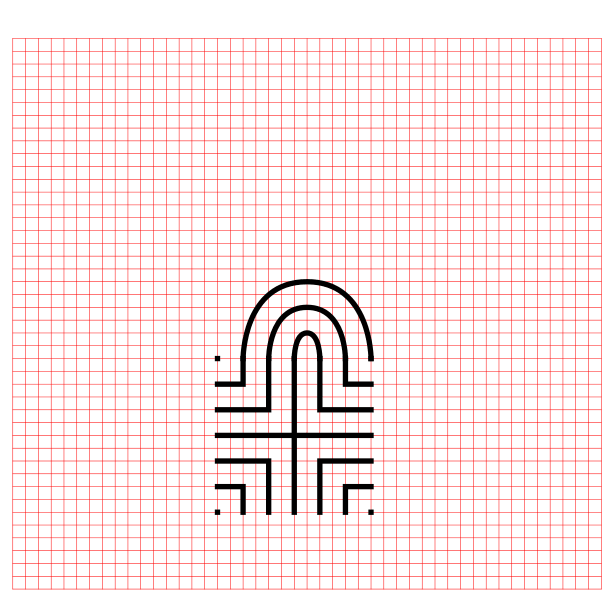
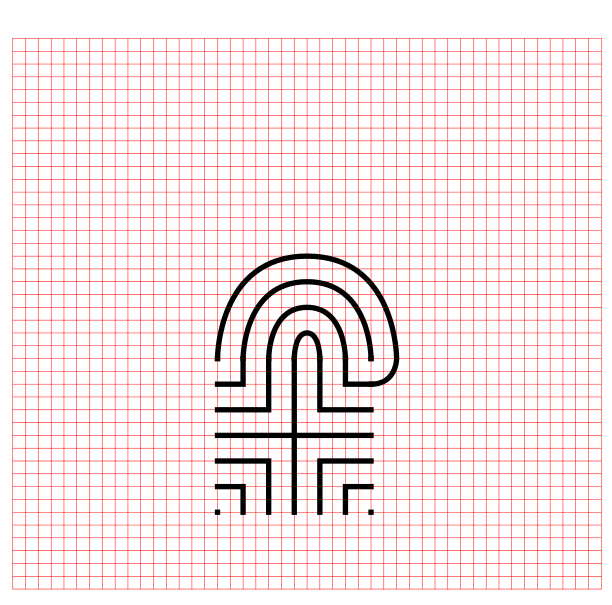
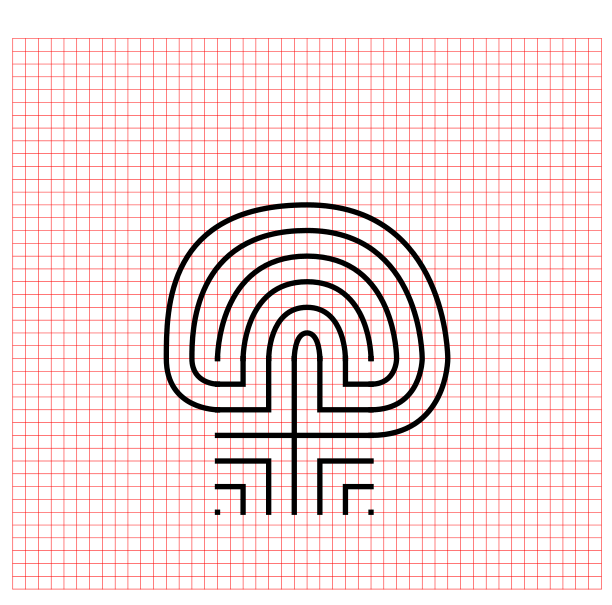
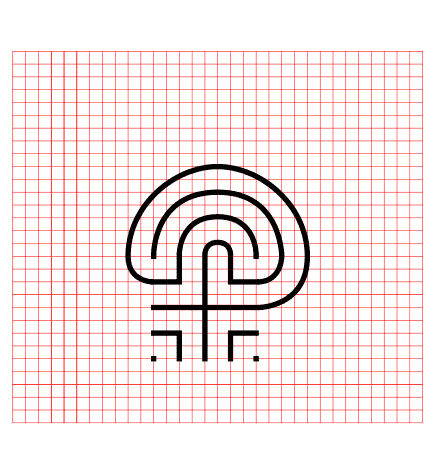
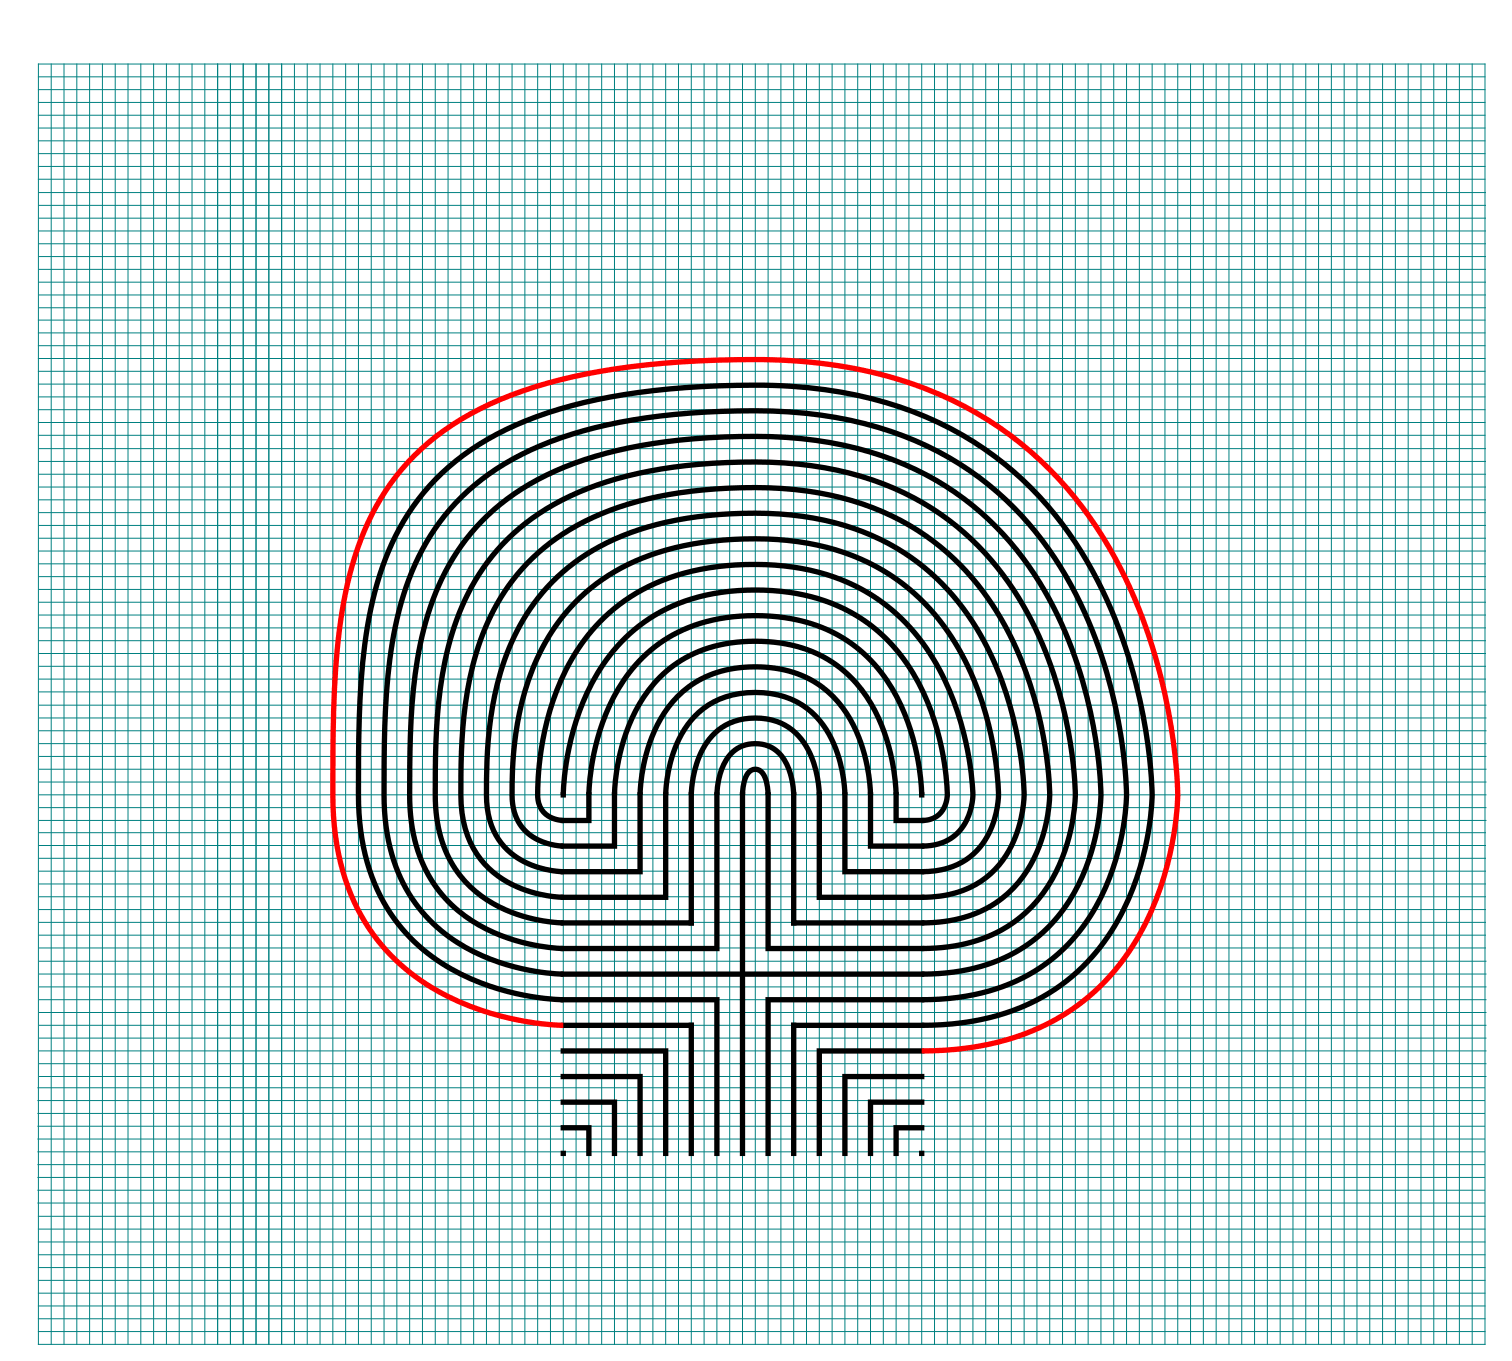
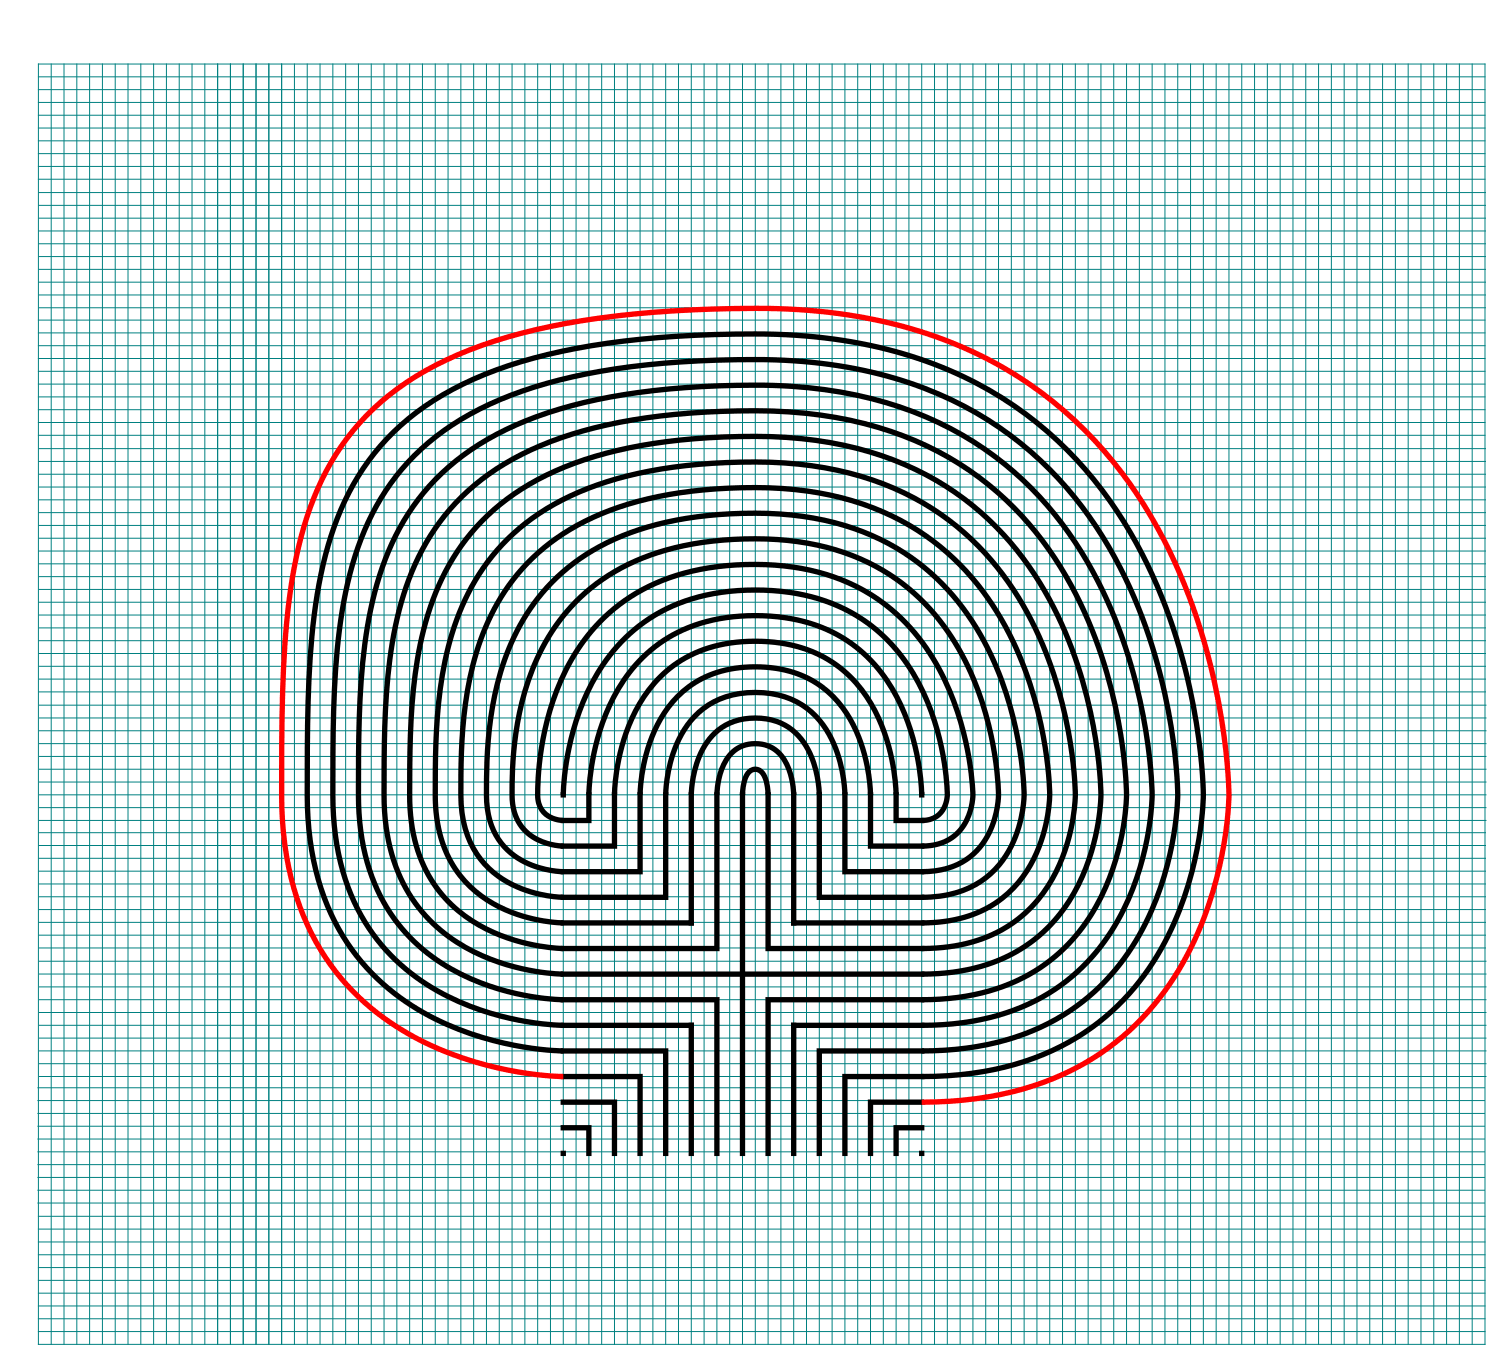
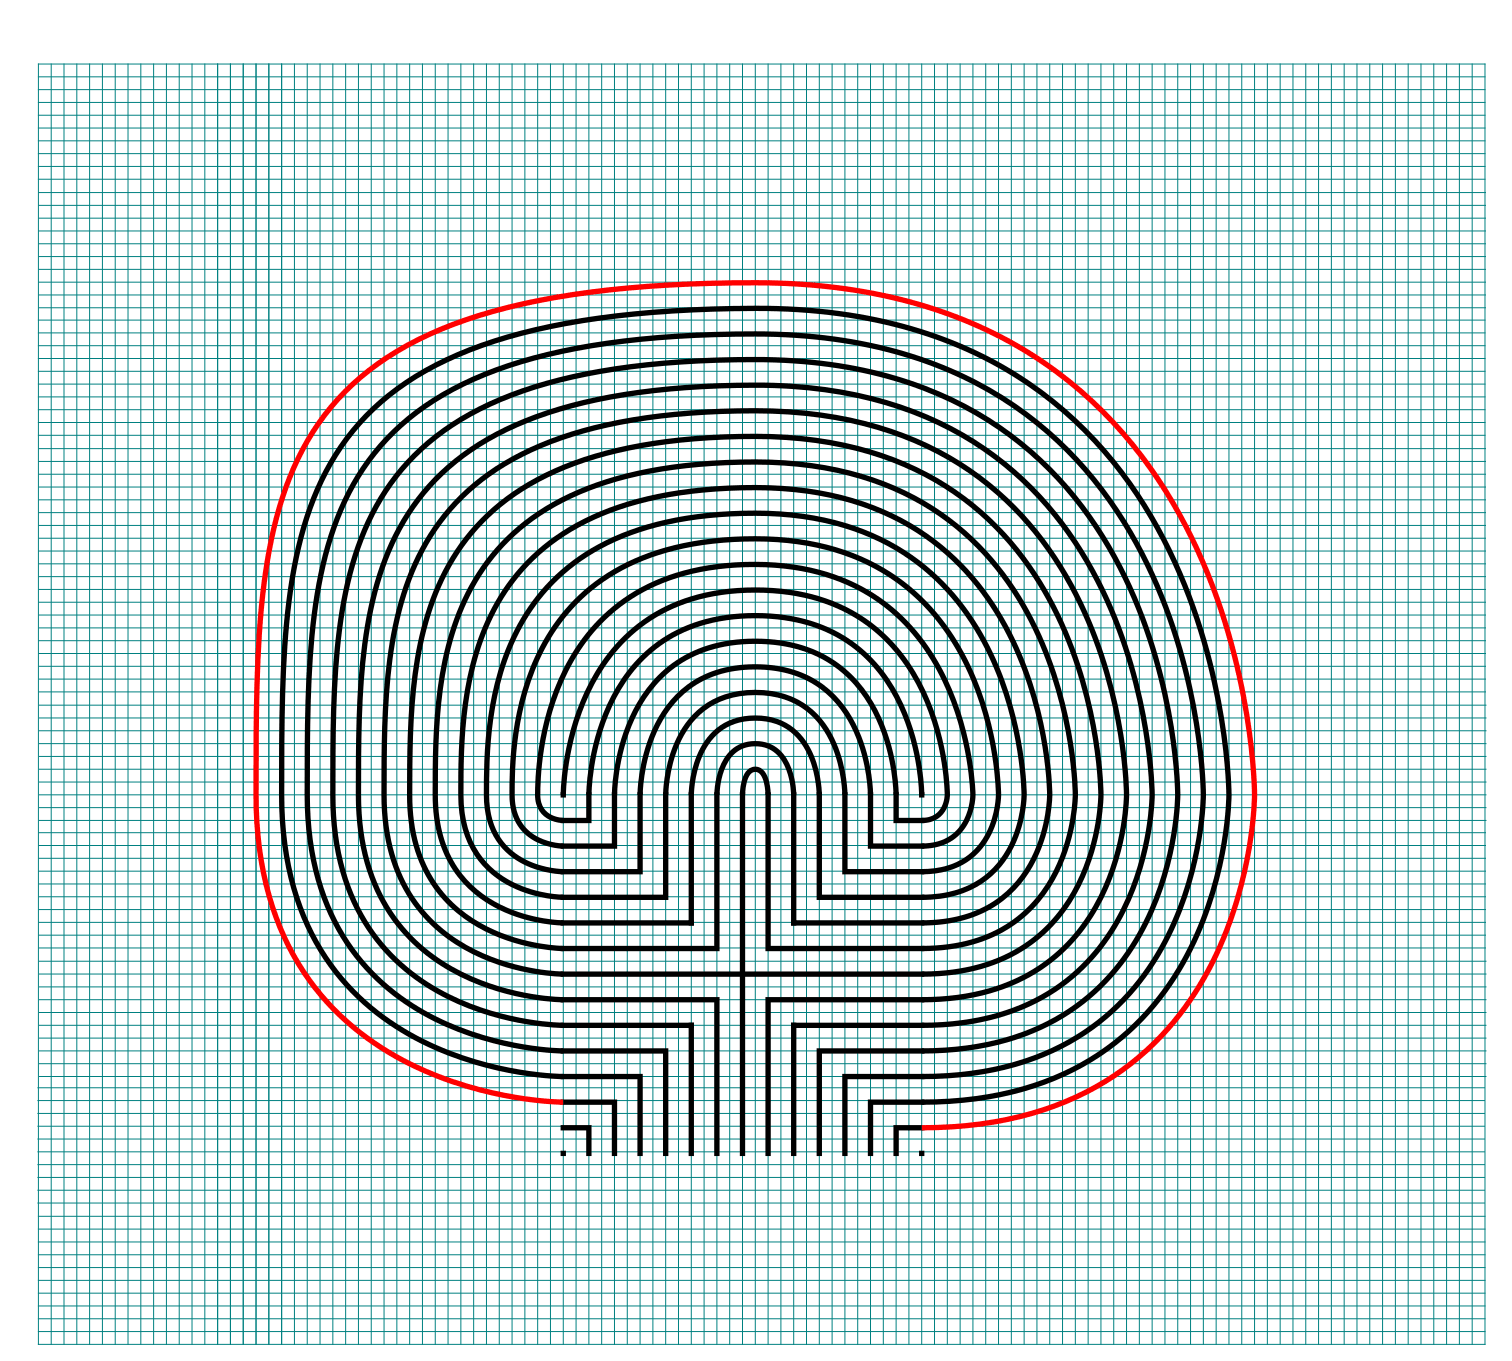
Steps 3 - 29: Connect the next endpoint to the left to the next endpoint on the right
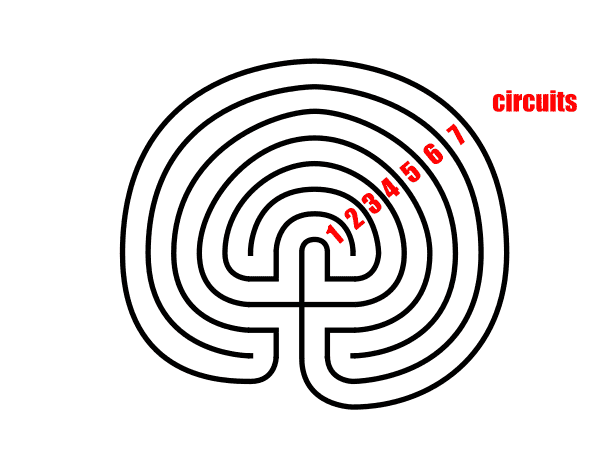
Every step from now on will be basically the same. Move one point to your left (moving counterclockwise) and connect that to the next point on the right (moving clockwise).On the right find the listing of connection points. We already connected points 1 to 1. TIP: the top of all the arches will all align above the same point.

TIP: Now that you see the seed pattern numbered and paired you can see that there is a method to convert your seed to a # of circuits. It is the # of pairs minus 1.
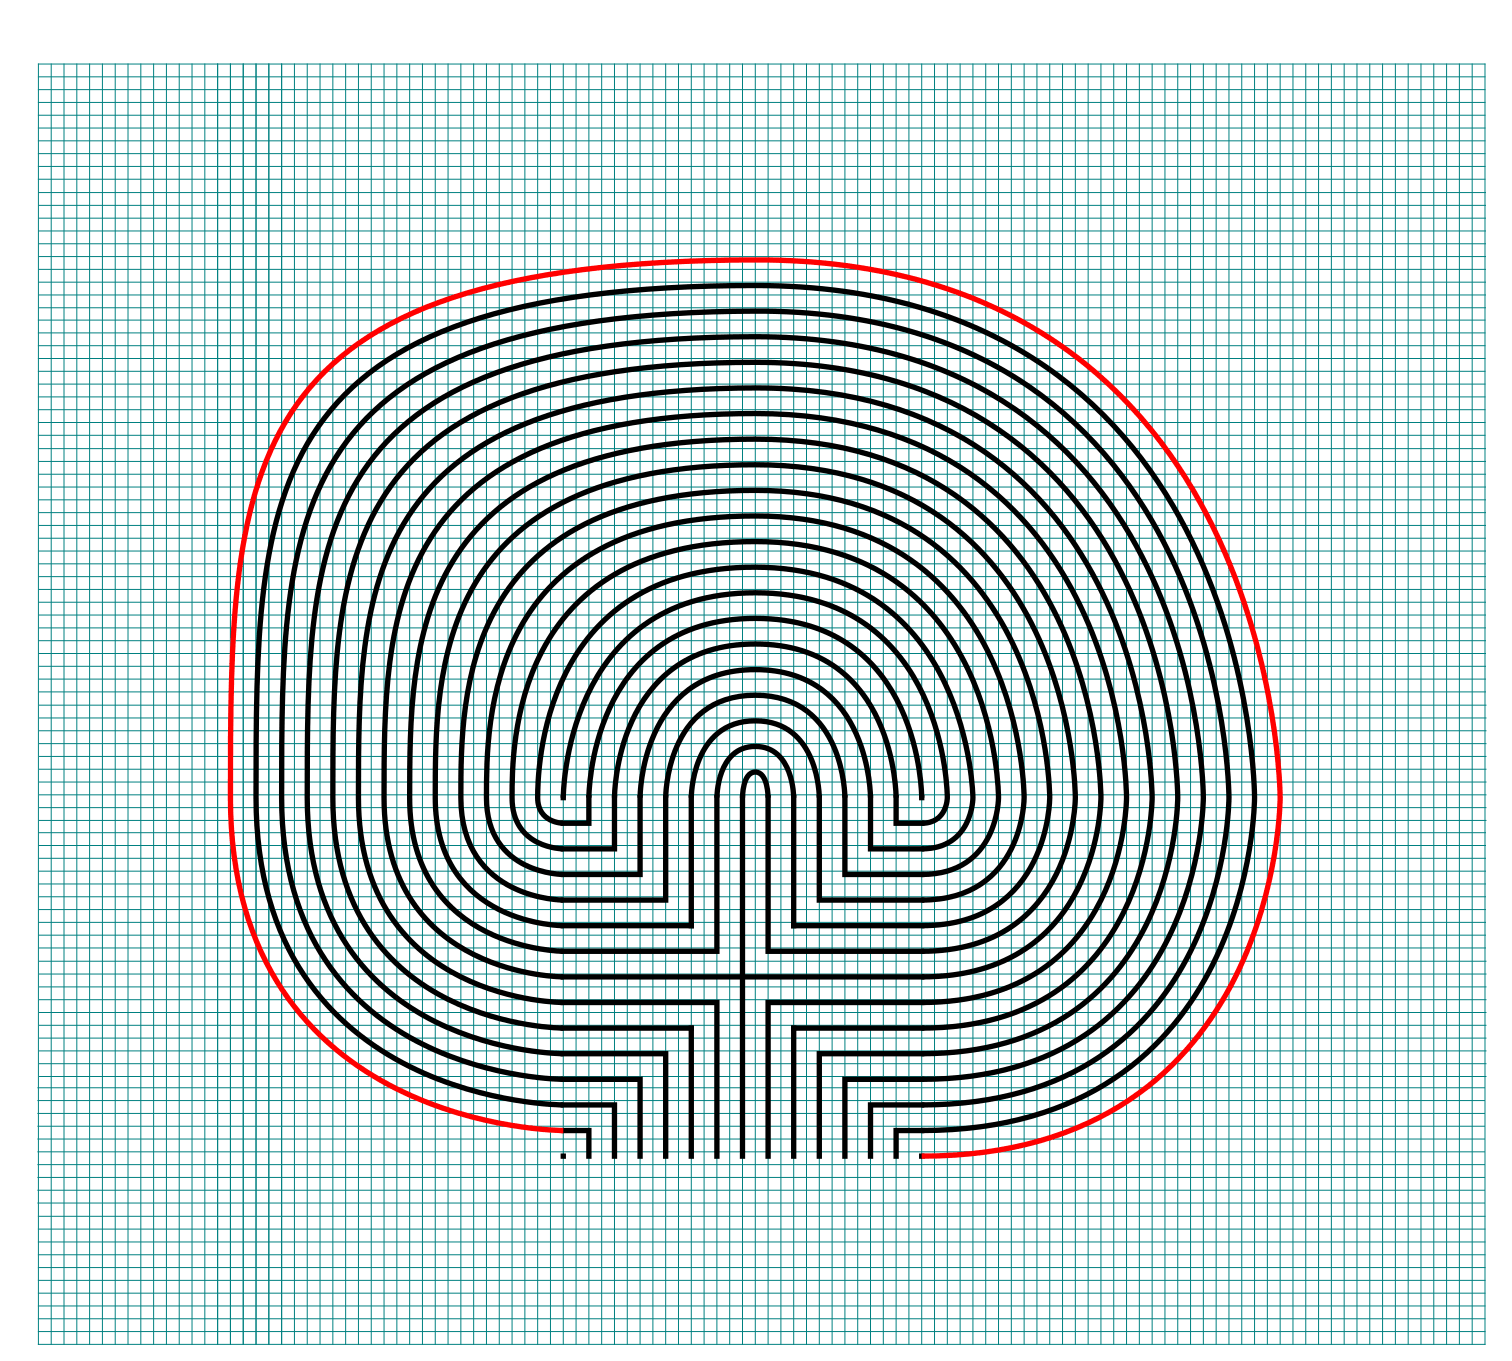
If you get into any trouble refer to the directions for the Classical 7 Circuit Labyrinth. This is essentially the same, but many more steps. That completes the drawing of an 27 circuit labyrinth.

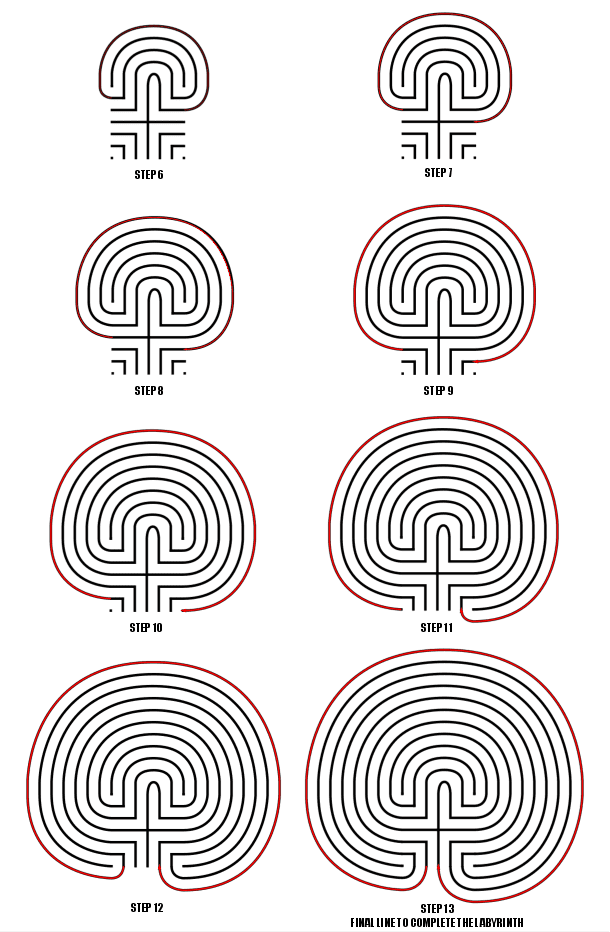
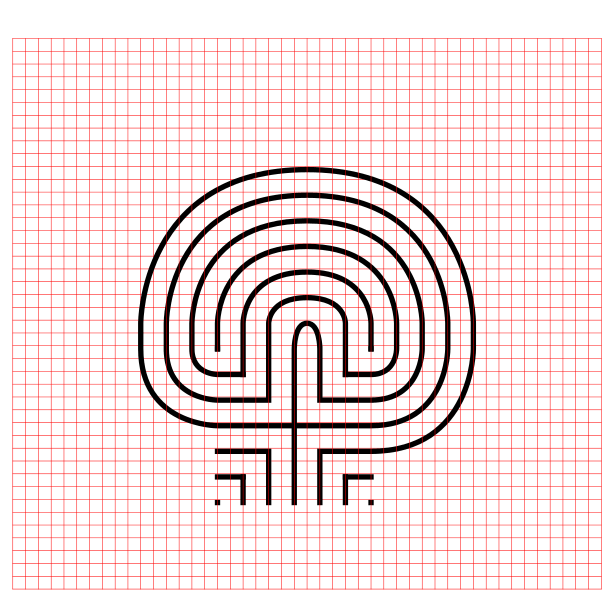
MAKING THE LABYRINTH - STEP BY STEP WITH GRIDS
If you want to see the labyrinth being made with grids, here is a gallery where you can build the labyrinth step by step. Click on the first image and build away !


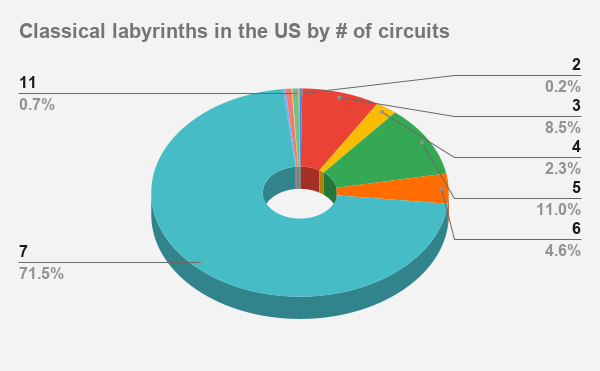
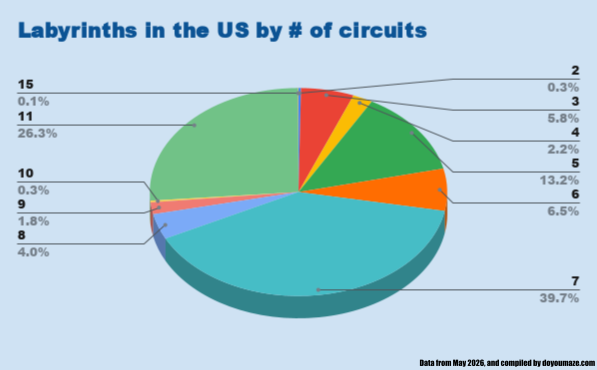
Some data from my labyrinth research:
So 40% of labyrinths in the US have 7 circuits with the next most popular size being 11 circuits at 26%. It would make sense that physical labyrinths do not have many circuits, since each additional layer will add time to a meditative walk. Labyrinth walks are meant to be spiritual and not grueling ! Mazes are a whole different story.
I have over 20 different blog posts with step by step labyrinth making instructions.