How to Draw an 11 Circuit Labyrinth

Drawing an 11 circuit labyrinth is fun once you learn the starting seed pattern and the rules of building the pathways. Follow this 13 step process and draw your own 11 circuit labyrinth. At the end of the post I have a made a quick 2 minute video showing the drawing of the labyrinth if you are a more visual learner ! The best way to both practice and create this is on a grid to help guide you on the correct spacing. Let’s get started.

Centering a drawn labyrinth on the page (Pro Tip #1)

If you are hand drawing a labyrinth and would like the completed drawing to be centered on the page there is a quick trick to help you do it. The seed you draw will end up being in the bottom half of the page slightly off center to the left. Check out the example below that compares the starting seed pattern center (in red) to the center of the finished drawn labyrinth (blue). The center of the labyrinth ends up being just above the arch of the labyrinth goal you will draw in Step 2.

Making an 11 Circuit Labyrinth tip to align to the center of the page

11 Circuit Labyrinth making tip to align to the center of the page

Step 1: Draw the starting seed pattern

The starting seed pattern based on an imaginary 6x6 box grid. Start with a centered is a plus sign. Add L shapes one grid away from the plus sign in all 4 quadrants. Now add another L shape in all four quadrants one grid away from the previous L’s. Finally add a dot to each of the four corners. Basically, copy the seed the pattern you see here:

11 circuit labyrinth seed pattern

Step 2: Connect the first arch to create the goal

Draw a curved line from the top of the plus sign to the L directly to the right using an arch that extends 1 grid high. The top of the arch should peak halfway between those two points. This line will form what will become the goal of the labyrinth. As a reminder the center of the completed labyrinth will be just above this point.

How to Draw an 11 Circuit Labyrinth, step 2

Additional information to help with your drawing (Pro Tip #2)

Let’s further explain the arching pathways you will be drawing in more detail, because from now on each path you draw will require this information. Each side of the labyrinth has different alignments that create the peak arch point for each pathway. All northern pathways (shown below in red) align above the midpoint of the goal. All eastern pathways (shown in blue) align with the original top right dot in the seeding pattern. Western pathways (shown in green) align to the top left seeding pattern dot. The southern part of the labyrinth also aligns to the corner dots, one for each side (shown as purple and orange). Keep these points in mind as you create your arches/pathways.

Making an 11 Circuit Labyrinth - Showing how peaks align correctly

11 Circuit Labyrinth making tip to align the peaks

Step 3: Connect the next endpoint to the left to the next endpoint on the right

Every step from now on will be basically the same. Move one point to your left (moving counterclockwise) and connect that to the next point on the right (moving clockwise). In this case the large backwards L on the top left of the seed pattern to the small L on the top right of the seed. The arch should peak at the same point as the goal below it in the pattern.

How to Draw an 11 Circuit Labyrinth - Part 3

Step 4: Connect the next endpoint to the left to the next endpoint on the right

The small backwards L in the top left to the dot in the top right corner. The arch should peak at the same point as the goal below it in the pattern.

How to Draw an 11 Circuit Labyrinth - Part 4

Step 5: Connect the next endpoint to the left to the next endpoint on the right

The dot in the top right corner to the end of the small L in the top right corner. The arch should peak at the same point as the goal below it in the pattern.

How to Draw an 11 Circuit Labyrinth - Part 5

Steps 6-13: Connect the next endpoint to the left to the next endpoint on the right

I assume you have the pattern down to complete making the labyrinth with only pictures with nice red lines. Follow the graphic below to complete steps 6 - 13.

How to Draw an 11 Circuit Labyrinth - Steps 6-13

Steps 6-13

11 Circuit Classical Labyrinth

11 Circuit Classical Labyrinth

That completes the drawing of an 11 circuit classical labyrinth. It happens to be the “right handed” version of the labyrinth. If you want to make the left handed version every step above would be the same but moving to the left instead of right. Just imagine following the directions while looking in a mirror. The majority of labyrinths you see will be right handed. The laeft handed versions look odd to many people:

Left Handed 11 Circuit Classical Labyrinth

Left handed 11 circuit labyrinth

If you are interested in a comparison of Classical, Square and Circular Labyrinths the linked post will show you how they compare from a design perspective.

How To Draw an 11 Circuit Classical Labyrinth Video:

Here is a quick 2 minute video to see this in action from my YouTube channel ! Notice how the grids help with the construction !

A video showing How to Digitally Draw an 11 Circuit Classical Labyrinth

How to Draw a Classical 7 Circuit Labyrinth

Drawing a classical labyrinth can be easy and fun once you learn the starting pattern and the rules of building the pathways. Follow the simple 9 step process below and draw your own 7 circuit classical labyrinth. Or, if you are more visual you can skip to the bottom and watch a quick 2 minute video of the labyrinth being made !

Step 1: Draw the starting seed pattern.

It can be seen by some people as originating from a 4x4, 16 box grid. There is a plus sign centered and dots in each of the four corners, with 4 “L” shapes between the + and the corners. See below how the starting pattern (in red) relates to the 16 grid 4x4 box. Here is that visually:

4x4 grid of blocks
Classical 7 Circuit Labyrinth Seed Pattern shown on a grid for comparison

And how the seeding pattern looks without any guidelines:

Classical 7 Circuit Labyrinth Seed Pattern

Classical 7 Circuit Labyrinth Seed Pattern

Pro tip: Do not center the initial pattern on the page or in the space you are using to build your classic labyrinth. Start it 1/3rd of the way from the bottom as the majority of the building will take place above the initial pattern. If you care about left/right centering also move slightly to the left on the page. Centering will come with practice so consider yourself lucky if you get it right the first time !! Below is a labyrinth showing the center of the initial seed pattern compared to the center of the final labyrinth.

Classical 7 Circuit Labyrinth center alignment explanation

Step 2: Create the goal of the labyrinth

Connect the top of the plus sign to the first point directly to the right using an arching pattern. This first connection will create the goal of the labyrinth. Notice that the goal of this classical labyrinth is small compared to other constructions. If you were creating this pattern for a physical labyrinth this would mean a small central gathering place.

Making a classical 7 Circuit Labyrinth Step 2

Arching connection - creating the goal

Classical 7 Circuit Labyrinth -  Step 2 - Create the Goal

Classical 7 Circuit Labyrinth - Step 2 - Create the Goal

Step 3: Connect the first pathway arch

Moving to the next point to the left, the top of the backwards “L” in this case, connect it to the next point to the right, or the dot in the far right corner, again using an arching pattern. The peak of this line will align with the peak from the goal you drew in Step 2. It also should create a pathway the same width as your seed pattern. Notice that we have moved one spot to the left and connected it to the next spot on the right. This pattern will continue for this labyrinth and most that you create ! Each new arch you draw will peak above the previous peak at the top of the labyrinth.

Making a Classical 7 Circuit Labyrinth Step 3

Drawing Arch #2

Let’s fast forward a bit to further explain the arches with more detail. Each side of the labyrinth has different alignments that create the peak arch point for each pathway. All northern pathways (shown below in red) align above the midpoint of the goal. All eastern pathways (shown in blue) align with the original top right dot in the seeding pattern. Western pathways (shown in green) align to the top left seeding pattern dot. The southern part of the labyrinth also aligns to the corner dots, one for each side (shown as purple and orange).

Peak points for each drawn pathway by side

Steps 4 - 9: Connect the next arch, moving from the left

For each step continue to move to the next point left, connecting each subsequent point to the next point on the right in an arching pattern. Step 9 will connect the final points and complete your classical labyrinth ! As you connect each point ensure you create pathways that are equal sizes (or alternatively create walls an equal distance apart from the previous wall).

Making a Classical 7 Circuit Labyrinth Steps 4 - 9

Steps 4 - 9

And that does it. You’ve drawn a classic 7 circuit labyrinth ! You get better each time you make one ! Hopefully this helped make this drawing easy and fun !!

The Left Handed 7 Circuit labyrinth

Now we have just made a right handed version of a classic labyrinth (Did you know it was right handed ?) . What you might not know is there is a left handed version of the same labyrinth. Take everything you just learned in the steps above and reverse them as if you are looking into a mirror. The seeding pattern stays the same but the first arch moves to the left followed by arches drawn to the left in each additional step.

Left handed 7 circuit classical labyrinth

Left handed 7 circuit labyrinth

If you are more visual here is a quick video review of what we did from my YouTube channel (where I show how to make mazes/labyrinths and also show the making of maze art):

About the 7 circuit labyrinth:

The 7 circuit classic labyrinth is said to represent the journey of life. The path is the journey that we all take, and the center is the goal that we are all trying to reach. The 7 circuits represent the 7 stages of life: birth, childhood, youth, adulthood, middle age, old age, and death. When found in the real world (as opposed to drawn on paper), the labyrinth can be used as a tool for meditation by walking the path slowly and mindfully. As you walk, you can focus on your breath and your thoughts. You can also use the labyrinth to reflect on your life and to set goals for the future.

Additional posts you might like:

Interested in learning how to make or draw other digital labyrinths ? You can find many different step by step instructions HERE.

I have step by step instructions on how to make over 40 different maze types HERE.

The 12 best maze/labyrinth movies of all time

The top 12 maze generation websites

How to Draw a 3 Circuit Labyrinth

Drawing a classical 3 circuit labyrinth is both easy and fun once you learn the starting pattern and the rules of building the pathways. Follow this simple 5 step process and draw your own 3 circuit classical labyrinth. If you are more visual (or you are curious to watch) there is a 1 minute video at the end showing the process.

  • Step 1: Draw the starting seed pattern.

The starting seed pattern is a plus sign with four dots in each of the four corners in the space apart from the lines to form pattern below.

3 Circuit Labyrinth starting seed pattern

3 Circuit Labyrinth starting seed pattern

PRO TIP: Start the pattern on the page in front of you slightly below center and left of center (perfecting this will come with practice). See the example showing your starting center vs. your ending center.

Labyrinth making tip - how to place the labyrinth on the page

Labyrinth making tip

  • Step 2: Connect the first arch (or draw the goal)

Draw a curved line from the top of the plus sign to the dot in the top right corner of the starting pattern. The top of the arch should peak halfway between those two points. This line will form what will become the goal of the labyrinth.

Making a 3 Circuit Labyrinth  - Step 2 - Draw the Goal

3 Circuit Labyrinth - Step 2 - Draw the Goal

  • Step 3: Connect the next arch from the left

Draw a curved line from the left corner dot to the end point on the right side of the plus sign. Space the line an equal distance from the wall to the inside as you draw the curved line. Notice that you have moved one point to the left and connected that to the next point on the right. This theme will continue for almost all labyrinths you construct.

Making a 3 Circuit Labyrinth  - Step 3 - Draw the next arch

3 Circuit Labyrinth - Step 3 - Draw the next arch

  • Step 4: Connect the next arch from the left

Draw a curved line from the end point of the left side of the plus sign around to the dot on the bottom right side of the pattern (Again, the next on the left to the next on the right). Space the line an equal distance from the wall to the inside as you draw the curved line.

Making a 3 Circuit Labyrinth - Step 4

3 Circuit Labyrinth - Step 4 - Draw the next arch

  • Step 5: Connect the next arch from the left

Draw a curved line from the last remaining dot on the bottom left of the pattern around to the bottom point of the plus sign to complete the labyrinth (see the pattern ?). Space the line an equal distance from the wall to the inside as you draw the curved line.

3 Circuit Labyrinth  - Step 5 - Draw the final arch

3 Circuit Labyrinth - Step 5 - Draw the final arch

That does it. The final 3 circuit classical labyrinth after 5 easy steps !!! If you struggle along the way I suggest you watch the video below which contains a grid structure that may help.

Additional construction option: You have just made a right-handed classical labyrinth. To make a left-handed version change step 2 and connect your first arch to the left instead of the right, then continue reversing the steps and you will create the inverse version of the labyrinth !

3 Circuit Classical Labyrinth

3 circuit classical labyrinth

Notice where the starting pattern is in relation to final labyrinth, not centered, but towards the bottom left, both left of center and south of center.

Here is the quick video showing what we just learned from my YouTube channel ! Notice how the grid structure both guides and helps the construction. If you are wondering the vector graphic program I use in the video is Inkscape, which is open source and available for free to download and use.

A quick video showing the digital drawing of a 3 Circuit Classic Labyrinth

Other posts you may like:

How to make other labyrinth types HERE.

How to make over 40 different maze types HERE.

The 12 Best Maze and Labyrinth Movies Of All Time

The 8 best books about mazes, labyrinths and their history

The Name Maze Project

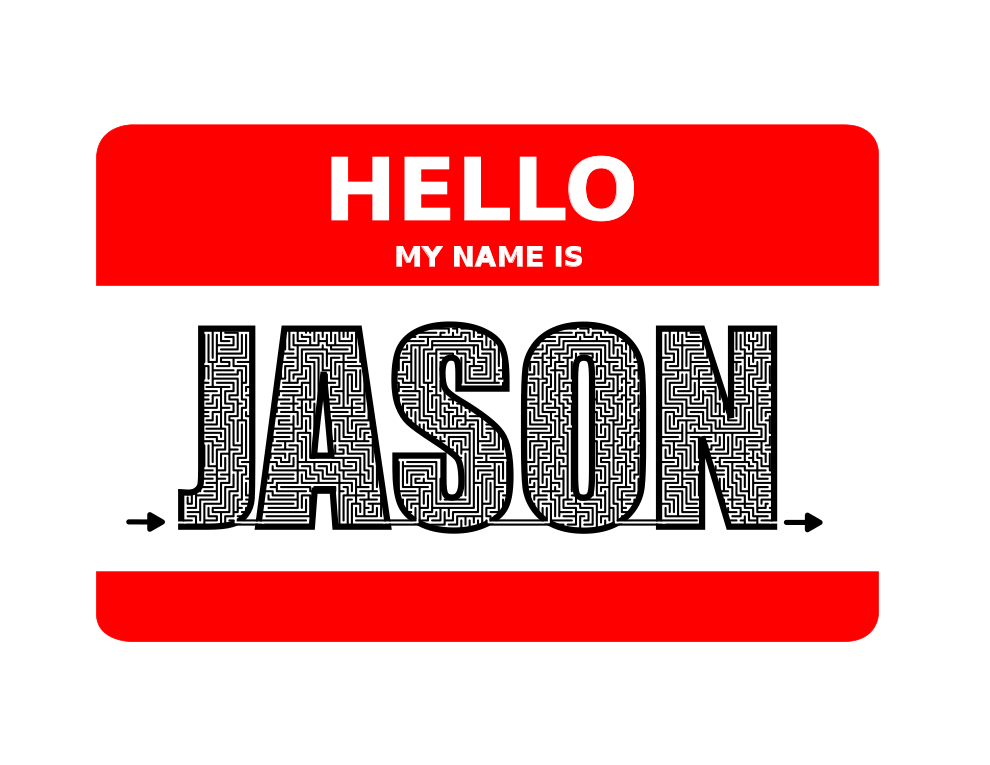
Every section of the Doyoumaze website has a story. Today I tell you about the Name maze section of the website. (If you are just interested in HOW to make a maze of your name, I have that covered.) I thought people would enjoy seeing their name in maze form - a kind of personalized maze. If you want to do this on your own click on the link above, otherwise we continue on… Maybe it was my time in corporate America but I think these mazes would look good on a cubicle wall. And they are fun to make. I also thought they would make a nice gift. Print out a friends name and write a note thanking them for being amazing (or maybe a-maze-ing). Now the story of how I went about actually making the name mazes. Here were the stages I went through:

Stage 1 - Names of my Close Friends and Family

Initially I started out as anyone would making my close friends and family members names. That got me to 6 mazes….ok maybe a few more,. Let’s say about 25 mazes. I added these to the website and felt pretty good. Now if they visited my website I had the important people done.

Stage 2 - The Ten Most Popular Male and Female Names

I did a quick search for the 10 most popular names for Men and Women. This is where I found out the Top 10 Men’s names in the United States represent 23% of all Men’s names ( James, John, Robert, Michael, William, David, Richard, Charles, Joseph, and Thomas) and for Women the Top 10 represent 10.7% of all Women’s names (Mary, Patricia, Linda, Barbara, Elizabeth, Jennifer, Maria, Susan, Margaret, Dorothy). I thought it was interesting that the Men’s name database has 1200 different names while the Women’s name database has 4,275 names !!! I later realized this was partly because men have more standard name spellings than women (like Katherine & Catherine & Katharine & Kathryn).

At this point I could display all maze name images directly on the website (and not the name listings you see today).

Stage 3 - My LinkedIn Connections Names

I have approximately 460 connections on LinkedIn. I thought it would be nice to make a maze for each connection. The best part about this project was that I got to think about each person as I made their maze. The people I have lost touch with. My old co-workers from previous jobs. I have to admit, this was a very rewarding project simply because of this process. This project added 302 more unique names to the maze name section. I would like to thank the following names for being popular among my connections:

Michael and Michelle - 8 connections each

Brian, Rachel and Rick - 6 connections each

David, Greg, Jason, Jennifer, Mary and Richard - 5 connections each

Now, if you ask me to connect on LinkedIn you’ll have a much better chance if you have a (short) common name. Website wise this is where I had to take down the pictures of each maze name and use the name listing version you see today. Because once you have so many names, if you want the page to load quickly lots of images is not helping anyone.

Stage 4 - Close variations of Existing Names

If I make Richard, it is easy to make Ricardo. Debbie became Deb. Douglas became Doug. Frank became Fran. etc. Close variations added about 100 more name mazes to the portfolio.

Stage 5 - Top 100 Male/Female Names

I decided that with so many names done I wanted to see how many of the top 100 Men’s/Women’s names I had already mazed. The answer was 134. Since there were only 66 more names (out of the 200 names) that needed to be made I went ahead and finished all of them.

Stage 6 - Top 200 Male/Female Names

Well, I might as well keep going right……I added 132 more names (out of the 200) when this was complete. As I finished this up I found these statistics about how many US names I had covered with the project:

The top 200 Male names represent 72.5% of men’s names.

The top 200 Female names represent 58.2% of women’s names.

Plus I have 262 names not in the top 200 from the previous Stages 1-4. So I think I’m pretty well covered as a % of total US names. The final tally of name mazes ended up being 662…and growing. If you have a name I have not done yet, you can always request it here.

UPDATE:

Stage 7 - Top 300 Male /Female Names

I researched the next 200 overall names (thru #300) and I already had 52 of them on the site. That leaves 148 to make if I take this on, names like Agnes and Cecil. I completed this and along the way added in a few other similar names…+164 names…new total 826 !!!

Stage 8 - Regional names page - “The Land”

I decided to create a Cleveland names page. This added 57 additional names to the project, including some unique ones that everyone knows like LeBron, Kyrie, Zydrunas, Halle, Stipe, Urban, and Dolph. This is the first time I used colors other than black and white for these special edition name mazes. New total 883.

Stage 9 - Top European names

I went with Europe since they have names most closely related to our own but with nice variety. I used the top 10 lists I found online for Europe by country for both men and women. Not every name was done but this did add 161 new names and I broke the 1,000 barrier. You can thank Turkey for Zeynep and Slovenia for Zala. New total 1,044.

Stage 10 - Top Americas and Oceanic names

Kept with the International theme but felt like I needed to break it into parts. Again, like Europe I did not do every name in each top 10, just the most recognizable and any that appeared in multiple countries. I was very happy to add my first X name thanks to Mexico, Ximena. Haiti brought us Widelene and Peru gave us Milagros. I added 94 with this project. New total 1,138.

Stage 11 - Top African Names

I learned that South Africa has a thing for names like Blessing, Prince, Princess, and Faith. Also was able to add 4 “Y” names to the 6 I already had and another Z name. Overall Africa brought an additional 74 names. New total 1,212.

Stage 11.1 - National Bubba Day

National Bubba Day June 2nd meant an addition to the list, +1. New Total 1,213.

Stage 12 - Male names from Asia

Asia has such a wide variety of names I had to split it by gender. A mix of traditionally Muslim, Jewish and Asian names made this section varied as there was very little overlap between countries. There is also less overlap with traditional Christian names already on the site. We can thank China for short names like An, De and Yi. Our new first name alphabetically Aarav comes from India. Shout out to Pakistan for Zahid. And more “Y” Names, +6 from 10 before. Overall I added 126 additional names . New total 1.339.

Stage 13 - Female names from Asia

The second half of Asia added 108 new names. This included 2 Q’s, 5 X’s, 8 Y’s and 4 Z’s. I also added 13 names with dashes in them. Most of these names are ones I was unfamiliar with and they are all top ten in Asian countries….can’t imagine what an uncommon name is !!!! New total 1,447.

Stage 14 - Names from Movies

In an experiment to find more names to add to the website I decided to use the character names from movies I was watching until I generated at least 50 new names. I wondered how many movies I would need to watch before I hit 50. The answer was 24 movies !! Here are the movies I watched and the names that came from them:

The Sons of Katie Elder (1965). The Western starring John Wayne and Dean Martin brought us the names Bud, and Curley. And yes, at some point Curley was a given name, not a nickname.

Big Jake (1971). Another John Wayne western. More nicknames that were once given names - Pop and Buck.

The Gunfighter (1950). Gregory Peck Western about a gunfighter who isn’t looking for trouble, but always seems to find it. Names: Hunt and August.

The Westerner (1940). Western starring Gary Cooper that deals with homesteaders in the early days of the West. Names: Cole, Hod and Shad.

Lonely Are The Brave (1962). Kirk Douglas and Walter Matthau western. Names: Morey and Hinton.

High Sierra (1941). Humphrey Bogart is a gangster just out of prison doing what he knows best. Names: Red and Doc.

The Defiant Ones (1958). Tony Curtis and Sidney Poitier are escaped convicts on the run. Name - Angus.

Days of Wine and Roses (1962). Jack Lemmon and Lee Remick. Great drama film about an alcoholic marriage. 100% rating on Rotten Tomatoes. New names were Kirsten, Ellis, Rad and Dottie.

Night of The Iguana (1964). Richard Burton and Ava Gardner star in this John Huston drama that brought us the name Hank.

They Shoot Horses Don’t They (1969). Jane Fonda stars in this drama about a dance marathon contest during the Depression. Names: Rollo and Shirl.

A Woman is a Woman (1961). Jean Luc-Godard comedy starring Anna Karina. Name: Emile

Bloody Sunday (2002). Historical drama about the Irish protest that resulted in a massacre by British troops. Names: Eamonn, Bernadette and Gerry.

Lovers of The Arctic Circle (1998). Finnish movie about a mystery and a romance. Names: Alvaro and Aki.

Tyrannosaur (2011). UK film about a violent man searching for redemption. Name: Gurav.

Dark Places (2015). Charlize Theron stars in this drama/mystery film that generated a surprising 7 names: LIbby, Lyle, Diondra, Trey, Debby, Magda and Runner. I also added Dion from Diondra.

Reign of the Supermen (2019). Some animated DC Comics Superman. This was an easy way to get the names Lex, Clark and Dabney.

The Commitments (1991). Alan Parker movie about starting a band in Dublin, Ireland. Names: Imelda and Mickah.

Three Identical Strangers (2018). Documentary about identical triplets that were split up at birth unbeknownst to them. Names: Hedy, Elliot, Eddy, and Mort.

O Lucky Man ! (1973). Malcolm McDowell is a naive salesmen. Names: Mick and Monty.

Secondhand Lions (2003). Michael Caine, Robert Duvall and Haley Joel Osmant star in this drama/comedy about a boy spending the Summer with his 2 wierd uncles. Names: Garth and Hub.

Missing (1982). Outstanding political drama starring Jack Lemmon. 0 names.

Suddenly Last Summer (1959). Elizabeth Taylor and Katherine Hepburn star in this drama/mystery. 0 names.

Seconds (1966). John Frankenheimer Sci-Fi flic starring Rock Hudson. Great premise, nice movie, 0 names.

Adam’s Rib (1949). Comedy Romance starring Katherine Hepburn and Spencer Tracy. This is the movie that got me to over 50 new names !! Names: Kip, Beryl and Olympia.

So what is next for name mazes ? What is Stage 15 ? Here are the options I am considering:

1. The next 100 names for men/women

I need to research the next 200 overall names, 100 from each gender (both thru #400). Hopefully a nice number of them are covered already on the site.

2. MORE Top international names

Keep with International by doing the most popular names in the world.

3. More regional names like the Cleveland section

4. The uncommon letters

Search out names that start with uncommon letters like U, Q, X, Y, and Z

5. Maze the names of everyone I meet in a day

6. Pick a random sports roster and maze all names

Wondering what happened ? Well here’s my next name maze project update !

Have an idea you’d like to see ? Let me know in the comments.

Hello My Name Is Jason name tag Maze