A Comparison of 5 different types of 11 Circuit Labyrinths

I have previously shown how to make a variety of digital labyrinth drawings. The ones I reviewed fell into one of 5 categories: classical labyrinths, square labyrinths, circular labyrinths, octagonal and hexagonal labyrinths. Today we are going to take a quick look at the five different structures and compare them. We will also discuss the different symbolism associated with each labyrinth shape.

First let’s look at the seed patterns. For the classical and square labyrinths you can use the same seed pattern show below. None of the circular, octagonal, and hexagonal labyrinths have traditional starting seeds beyond their inherent shapes.

Labyrinth seed pattern

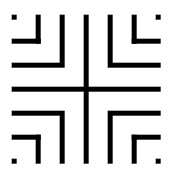
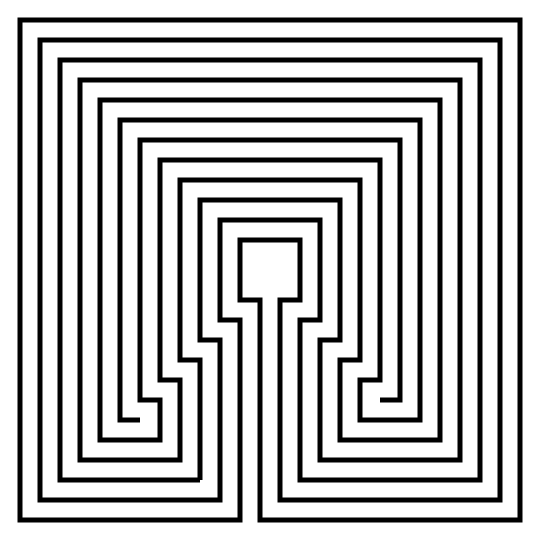
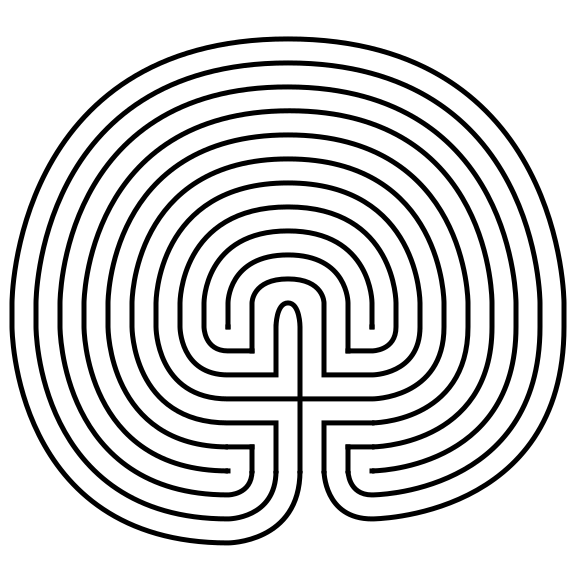
Next let’s look at the connections for the labyrinths that use this seed pattern. The difference between a square and classical labyrinth is simple, and that is the shape of the connections between the seed endings. Here is the first move for each, one square and one curved (each makes the destination of the labyrinth).

Making a Square Labyrinth - step 2
Making a  Labyrinth - step 2

Both also use the following seed connections to finish the drawing of the labyrinth:

Seed pattern for 11 circuit labyrinth with connections

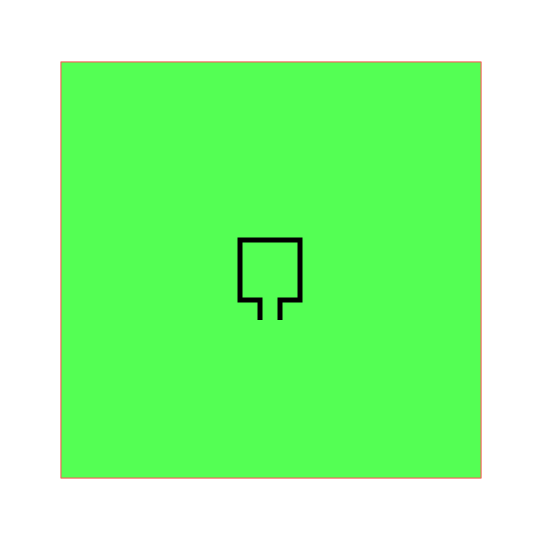
For a square labyrinth you also have a second option to create a larger square goal if you prefer (the seed is shown with a green background guide below). This is more likely to be found in a real world labyrinth to allow labyrinth walkers to have a large center to rest/meditate in. On the right you see the final version of this center goal variation.

Square center labyrinth variation
11 Circuit Square labyrinth with large center

What about the starting seeds for the other 3 types of labyrinths ? Well it seems they go their own way. While they also have 11 circuits, the making of them differs significantly from the classical and the square versions. They also have more variety in the way they are constructed, including allowing the creator to make some aesthetic choices along the way.

Let’s first look at the starting patterns:

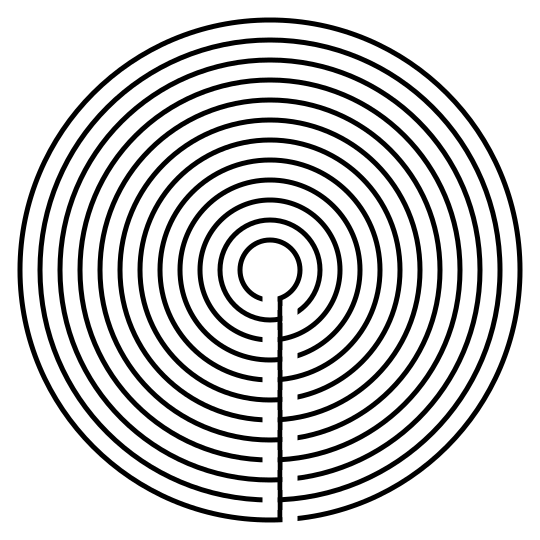
Circular - 12 concentric circles

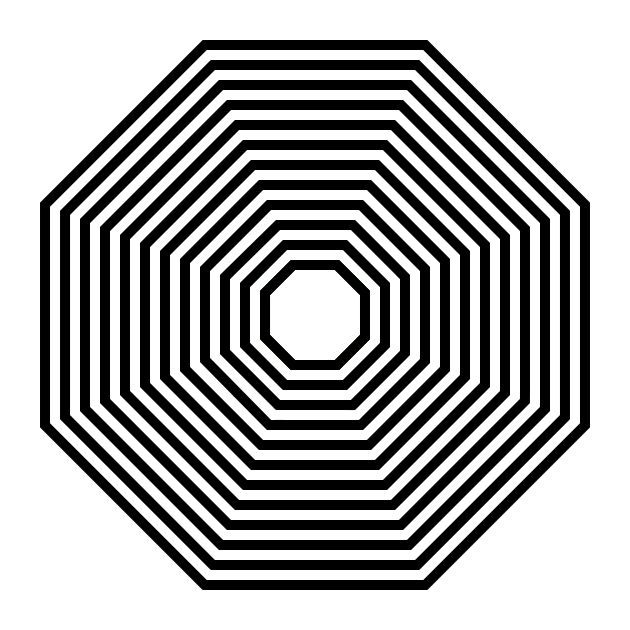
Octagonal - 12 concentric octagons

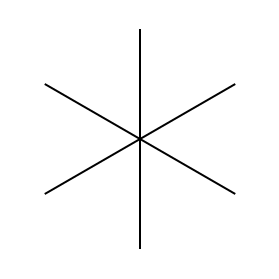
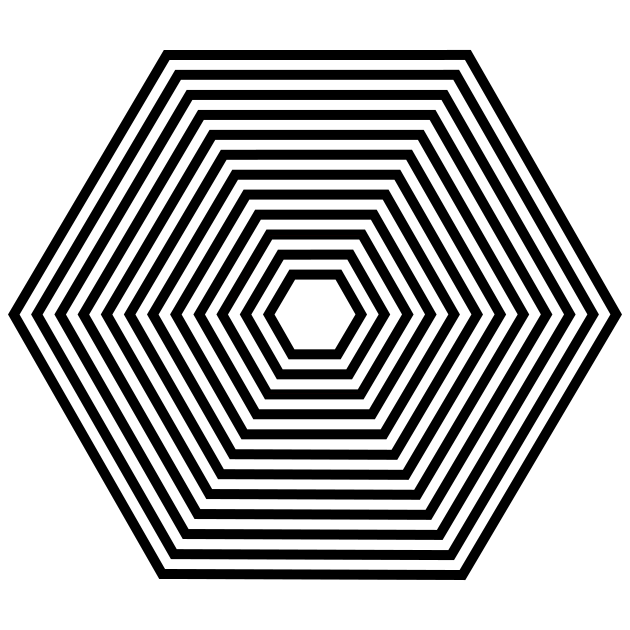
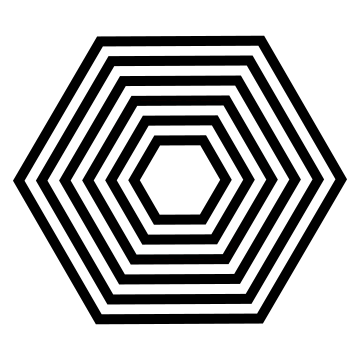
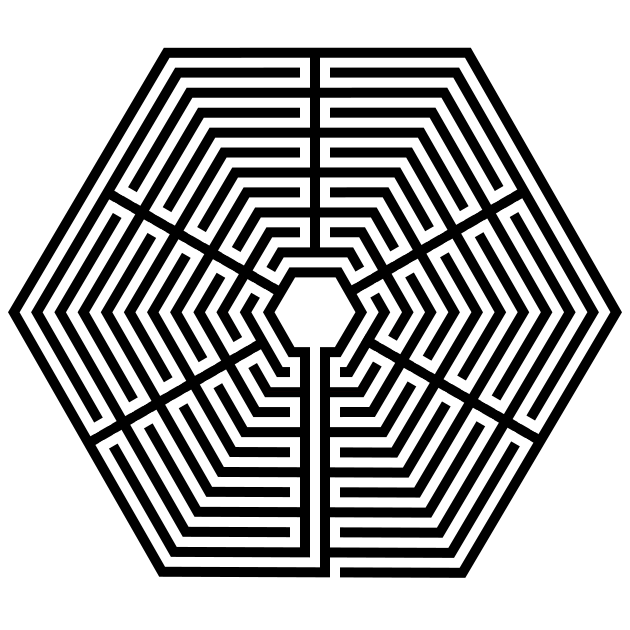
Hexagonal - 12 concentric hexagons

12 concentric circles
12 concentric octagons
12 concentric hexagons

We have consistency here, we just change the shape. If you did not already know, the # of concentric shapes needed is always 1 greater than the number of circuits you want. So, if you wanted to make a 7 circuit pentagonal labyrinth, you need to start with 8 concentric pentagons. If you go back to our seeding pattern for both the square/classical labyrinths you’ll notice that there are 12 seeded connections there also ! So this math is consistent across all constructions.

The next step in drawing each of these labyrinths is determining how many turn-backs or sections you would like the labyrinth to have, and it really is your personal choice. There is no standard way to draw the walls and turn-backs like you find with the classical labyrinth. I typically make 4 sections for my step by step instructions, but I have made 1,2,4 and 8 sections for most shapes with one exception, the hexagonal looks best in 6 sections vs. 8 for obvious reasons. Similarly, a pentagon would look natural with 5 sections.

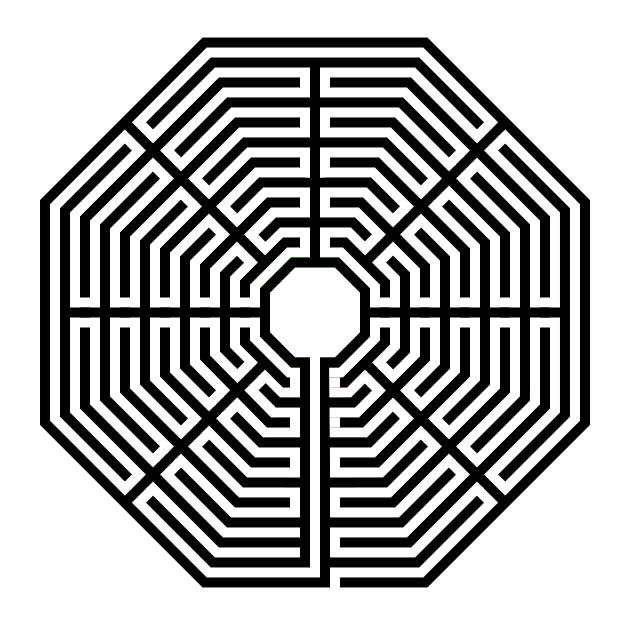
Here are the 1,2,4, and 8 section octagonal labyrinths:

Octagonal labyrinth 11 circuit 1 section
Octagonal labyrinth 11 circuit 2 section
Octagonal labyrinth 11 circuit 4 section
Octagonal labyrinth 11 circuit 8 section

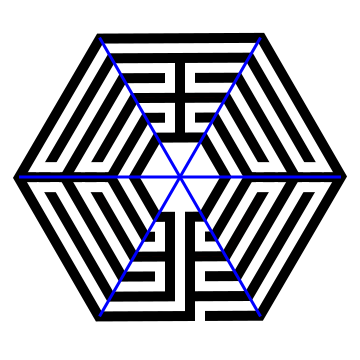
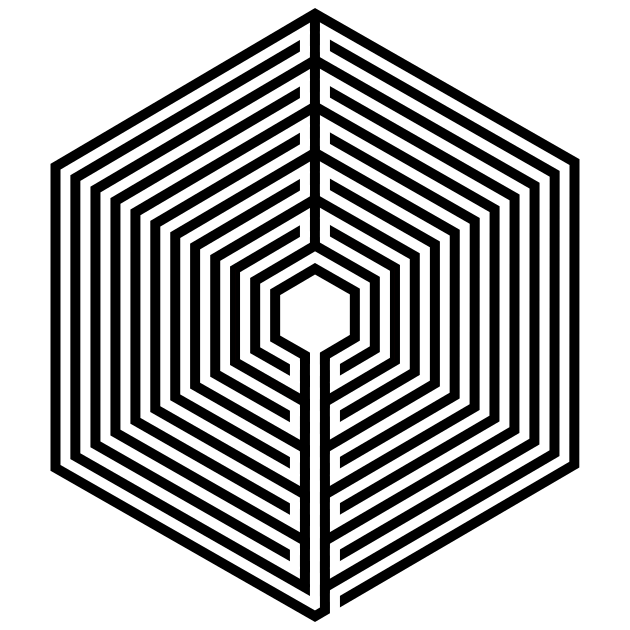
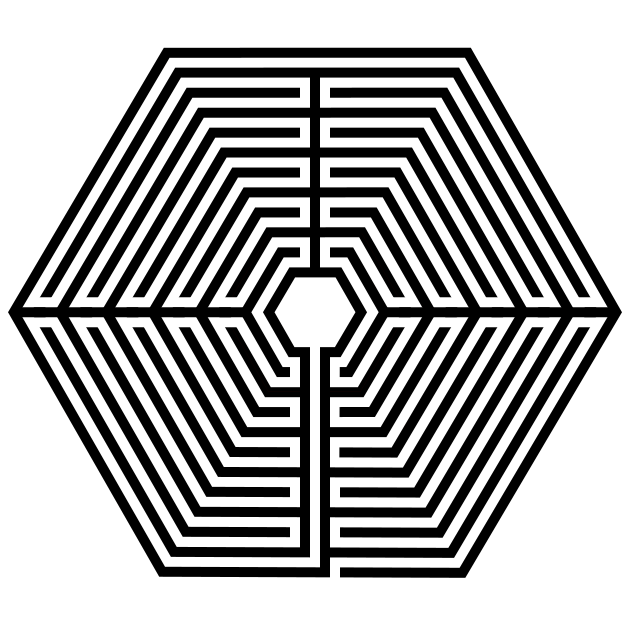
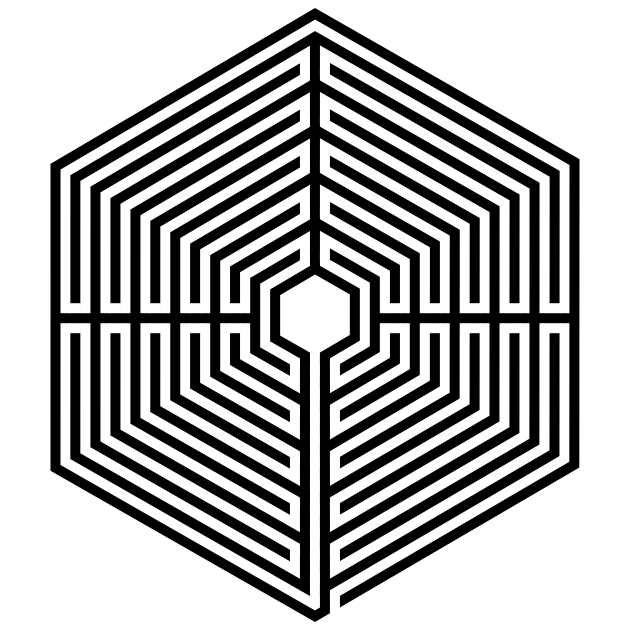
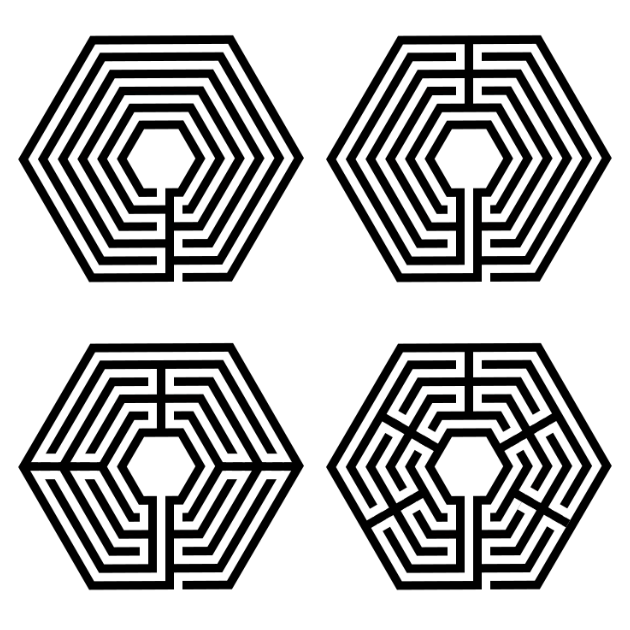
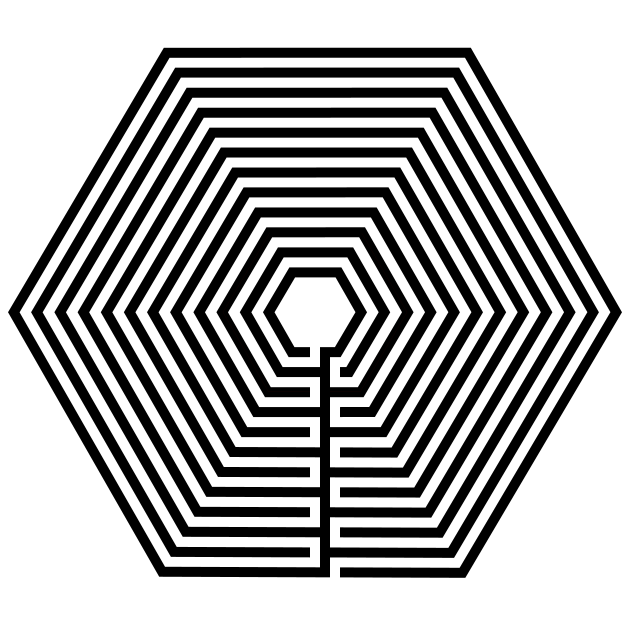
Here are the 1,2,4, and 6 section hexagonal labyrinths:

Hexagonal labyrinth with 1 section
Hexagonal labyrinth with 2 section
Hexagonal labyrinth with 4 sections
Hexagonal labyrinth with 6 sections

And finally the 1,2,4, and 8 section circular labyrinths:

Circular Labyrinth 11 Circuit 1 section
Circular Labyrinth 11 Circuit 2 sections
Circular Labyrinth 11 Circuit 4 sections
Circular Labyrinth 11 Circuit 8 sections

Once you have chosen the number of turn-backs, you can also make 3 more design aesthetics:

Wall or Line Thickness:

For my examples, the hexagonal and octagonal labyrinths each used standard equal constructions (the wall and pathway thicknesses were the same). I like the way they look. All of my other examples used a regular construction. Here is what a circular labyrinth would look like in standard equal construction. All labyrinths can be made in either construction. Which do you prefer ?

11 Circuit Circular Labyrinth thin walls
11 Circuit Circular Labyrinth thick walls

Left-handed vs. Right-handed Labyrinths:

All 5 versions of these labyrinths can be created as either right handed or left handed. Every example in this discussion so far has been right handed. The left handed versions is the mirror image of what I have shown. This is difficult to notice for most people except for the classical labyrinth where it is apparent as shown below (although you would notice the handedness of any labyrinth that you were walking I imagine):

11 Circuit classical labyrinth right handed
11 Circuit classical labyrinth left handed

Labyrinth Orientation

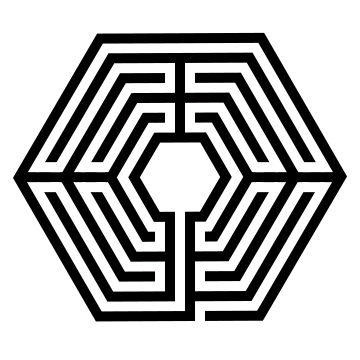
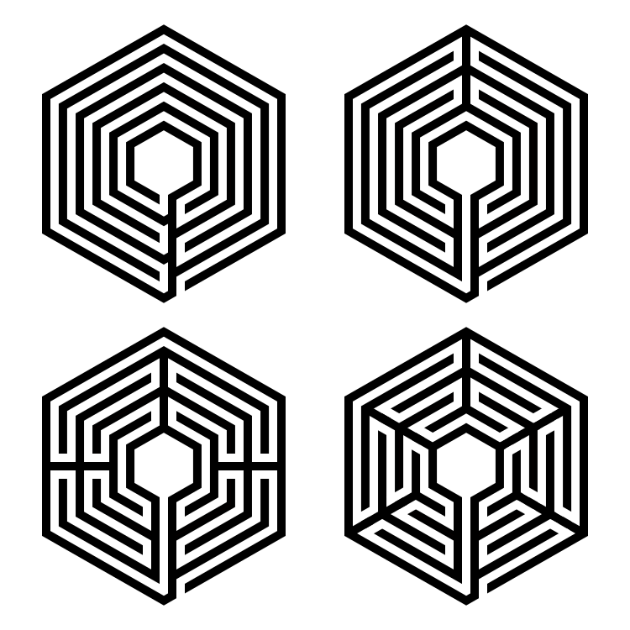
The last variation applies to only the octagonal and hexagonal labyrinths construction (or any other shape you decide to use). For geometric shapes you may start the initial pathway centered on a wall, as all the above examples have done, or you may start the labyrinth on a corner. Here is the 4 sectioned hexagon with each orientation. Notice that the section lines are placed in the same place for each version.

11 circuit Hexagonal labyrinth
11 circuit Hexagonal labyrinth start in corner

So that concludes our discussion and comparison of the 5 main types of labyrinths. I hope I have inspired you to create your own !

More shapes to consider:

Following the basic steps I have outlined you can create additional shaped labyrinths. I think once you get to a decagon (10 sided) and dodecagon (12 sided) regular shaped polygons you are close enough to a circle that that would be the preferred construction. A pentagon and triangle are certainly both possible, although not commonly seen. Similarly, irregular polygonal shapes are possible but typically not drawn, just used in the real world because a rock/tree/other is in the way of the path.

Here is the final comparison. Which do you prefer ?

11 circuit labyrinths in 5 different shapes

Labyrinths - Shape and Symbolism

The symbolism of labyrinths is complex and varied. Some people see them as symbols of the journey of life, while others see them as representations of the universe or the mind. Labyrinths can also be seen as metaphors for the challenges that we face in life and the rewards that we can reap if we persevere. Here is a look at some of the symbolism found in the most common shapes:

Most Classical labyrinths have 7 circuits. The 7 circuits represent the 7 stages of life: birth, childhood, youth, adulthood, middle age, old age, and death.

Square labyrinths are often seen as representing the four elements (earth, air, fire, and water),

Circular labyrinths are often seen as representing the cycle of life.

Hexagonal Labyrinths may have been made for a variety of reasons. One theory is that the number 6 has symbolic significance in many cultures. It is often associated with creation, completion, and balance. For example, in the Bible, God created the world in six days, and the Star of David has six points. It is possible that the builders of labyrinths used the number 6 because they believed that it had special powers or meaning.

Step by step instructions on how to draw digital labyrinths.

How to Make a 11 Circuit Hexagonal Labyrinth

In this post I will show you how to draw a hexagon and then expand that out to a full digital 11 circuit hexagonal labyrinth.

How to Draw an Hexagon

If you want to draw an hexagon with equal lengths here is the method I would use.

Step 1 Draw a straight line

Step 2 Rotate the line 60 degrees

Obviously this is a digital method where you can copy and paste then rotate, but it also works if you are hand drawing. Use a pencil and protractor and ensure you use the same length of line.

Step 3 Rotate the line 60 degrees again

This will create what looks like a widely spaced asterisk.

vertical line

Step 1 Draw a line

vertical line with 2nd line at 60 degree angle

Step 2 Rotate 60 degrees

3 lines making an asterix

Step 3 Rotate 60 degrees again

Step 4 Connect the ends of the lines

This will create outer walls of the hexagon that are the same length.

Making a hexagon Step 4

Connect the ends of the lines

Step 5 (both are optional) Delete the original lines and rotate the hexagon

You can delete the guidelines to create your final hexagon, but you may not want to. Why ? Because when you create a labyrinth using this template the guidelines you used also guide you on when you turn the lines (or alternatively embed the hexagon) for your next layer of the labyrinth. You also have the option to rotate the hexagon to have a wall parallel to the bottom of the page/screen, but I did not do this in my example.

blue line hexagon

Blue line Hexagon

Before we get into the step by step instructions, I want you to notice where the walls of the labyrinth make their turns. I have highlighted them below in blue - if you made your Hexagon using my method above and you did not delete the guidelines here you can see that each turn happens at these guides. The example is a 5 circuit version, but it will be true for ANY size circuit labyrinth.

Hexagon with sections shown

How to Draw a 11 Circuit Hexagonal Labyrinth

Step 1 Draw 12 concentric hexagons

Now that you know how to draw a good hexagon let’s get started drawing our labyrinth by drawing 12 of them. I always use a standard equal construction, meaning that the width of the walls equals the width of the pathways in between them. For this version I have rotated the hexagon so that bottom is parallel to the bottom of the page.

PROTIP: Start your drawing with the center goal so you do not run out of room !

PROTIP: To create a hexagon of x# of different circuits, you just need to draw x+1# of hexagons. So a 23 circuit labyrinth needs 24 hexagons, etc.

12 concentric hexagons

Step 1 - Draw 12 concentric hexagons

Step 2 Draw the internal sections

In this step we draw our internal turnaround points which create sections for the labyrinth. In our example we have 4 sections. At 9, 12, and 3 o’clock draw straight lines that cut off all but 1 pathway. At 12 this is the outside path and at 3, and 9 it is the most internal pathway. Finally create what will become the final pathway to the goal by adding 2 walls centered at 6 o’ clock. The left wall of those 2 walls should not cover the outside pathway.

Making a hexagon Step 2

Step 3 Break the walls into pathways

Each section will need 10 ‘cuts’ to make the pathways wind thru the section. Also cut the final walkway to the goal and the entrance just to the right of that through the outside wall.

11 circuit hexagonal labyrinth

A note about turn-backs. My example above has 4 sections. But you can also draw the same labyrinth with more or less turn-backs (sections). Below I have a 1 section, 2 section, 4 section (the one we just made) and a 6 section version of hexagonal labyrinths. If you imagine walking these, the more sections, or turn-backs, the more back and forth walking you will do. All examples are 5 circuit hexagonal labyrinths.

hexagon labyrinths in 4 section varieties

A note about orientation. I also wanted to show you how the labyrinth would look if we had not rotated it. In this version the entrance and final pathway to the goal lead from a corner instead of the center on a flat portion on the outer edge. Here are how the 2 and 4 sectioned labyrinths would look:

11 circuit hexagonal labyrinth corner start 2 sections
11 circuit hexagonal labyrinth corner start 4 sections

And let’s compare the standard 4 section versions in more detail because we can adjust our steps above to make another version. Step 1 is the same except for the orientation of the hexagons you draw. Step 2 is actually the same as far as where the lines are drawn and what pathways are left open. And Step 3 is also the same since you cut the pathways in the same place ! So essentially the steps are pretty much the same ! So if you want to make the “corner” version you can !

11 circuit Hexagonal labyrinth 4 sectioned
11 circuit Hexagonal labyrinth 4 sectioned and alternative corner start

Additional posts you might like (maze artwork - the websites specialty):

Car Wash Sign Maze

Rock n Roll Hall of Fame Maze

Maze of the Week #19 - Fresno Van Ness Avenue Sign Maze

My 19th maze of the week features another sign, this one from California with the Fresno Van Ness Sign.

The maze is a standard construction and uses the structure of the poles to naturally create walls of the maze. This does however mean that the scale of the pathways becomes very small.

Some information about Van Ness Avenue in Fresno

While you can find this on the Local Register of Historic Resources, there is not a lot of information about the sign. I did learn that there is a neon lighting on the sign, but my maze presents the sign during the day so that is not apparent. Also this is considered an entrance “gate” to the avenue.

The maze:

I consider this a full color maze, although it could just as easily be considered in greyscale because it lacks any color.

Fresno Van Ness Ave Sign Maze

Fresno Van Ness Avenue Sign Maze

I hope you enjoy the maze. You can find downloads of the maze at the mazes permanent home.

Coming next week:

A sign maze from the Western part of the US

How to Make a 5 Circuit Hexagonal Labyrinth

In the past I have shown you how to make labyrinths that are classical, circular, square and octagonal. Today I add one more version of the labyrinth, the hexagonal labyrinth. I will start with how to draw a hexagon and then expand that out to a full digital hexagonal labyrinth.

How to Draw a Hexagon

If you want to draw an hexagon with equal lengths here is the method I would use.

Step 1 Draw a straight line

Step 2 Rotate the line 60 degrees

Obviously this is a digital method where you can copy and paste then rotate, but it also works if you are hand drawing. Use a pencil and protractor and ensure you use the same length of line.

Step 3 Rotate the line 60 degrees again

This will create what looks like a widely spaced asterisk.

vertical line

Step 1 Draw a line

draw a hexagon step 2

Step 2 Rotate 60 degrees

draw a hexagon step 3

Step 3 Rotate 60 degrees again

Step 4 Connect the ends of the lines

This will create outer walls of the hexagon that are the same length.

draw a hexagon step 4

Connect the ends of the lines

Step 5 (both are optional) Delete the original lines and rotate the hexagon

You can delete the guidelines to create your final hexagon, but you may not want to. Why ? Because when you create a labyrinth using this template the guidelines you used also guide you on when you turn the lines (or alternatively embed the hexagon) for your next layer of the labyrinth. You also have the option to rotate the hexagon to have a wall parallel to the bottom of the page/screen, but I did not do this in my example.

blue line hexagon

Hexagon

I wanted to draw a hexagonal labyrinth with the walls and pathways of equal width at an equal width apart (similar to a standard equal maze if you are familiar with that construction). I think it looks best visually. If you are not concerned with that aesthetic you should be able to eyeball your labyrinth together much easier. Here is a standard equal labyrinth that I made that has 4 sections (4 internal turn-back locations).

4 section hexagonal labyrinth

4 section hexagonal labyrinth

If you are eyeballing the drawing of this type of labyrinth, I suggest you start with the center goal portion and work your way out in layers. Could you design in the opposite direction, from the outside in ? Of course you can ! BUT, you may run out of room for your center goal ! If you go inside out, you only run out of room if you are using a piece of paper that is too small (and digitally you would never run out of room) !!

Also I want you to notice where the walls of the labyrinth make their turns. I have highlighted them below in blue - if you made your Hexagon using my method above and you did not delete the guidelines here you can see that each turn happens at these guides.

4 section hexagonal labyrinth with sections shown for reference

How to Draw a 5 Circuit Hexagonal Labyrinth

Note that this method is for digital creation and involves drawing and cutting (erasing).

Step 1 Draw 6 concentric hexagons

Now that you know how to draw a good hexagon let’s get started drawing our labyrinth by drawing 6 of them ! I always use a standard equal construction, meaning that the width of the walls equals the width of the pathways in between them. For this version I have rotated the hexagon so that bottom is parallel to the bottom of the page.

PROTIP: Start your drawing with the center goal so you do not run out of room !

6 concentric hexagons

Step 1 - Draw 6 concentric hexagons

Step 2 Draw the internal sections

In this step we draw our internal turnaround points which create sections for the labyrinth. In our example we have 4 sections. At 9, 12, and 3 o’clock draw straight lines that cut off all but 1 pathway. At 12 this is the outside path and at 3, and 9 it is the most internal pathway. Finally create what will become the final pathway to the goal by adding 2 walls centered at 6 o’ clock. The left wall of those 2 walls should not cover the outside pathway.

draw a hexagon step 2

Step 3 Break the walls into pathways

Each section will need 4 ‘cuts’ to make the pathways wind thru the section. Also cut the final walkway to the goal and the entrance just to the right of that.

5 circuit Hexagon labyrinth

A note about size. You can add additional steps if you would like, just continually adding internal sections until you are ready to finish the labyrinth by adding a final edge with an entrance.

A note about turn-backs. My example above has 4 sections. But you can also draw the same labyrinth with more or less turn-backs (sections). Below I have a 1 section, 2 section, 4 section (the one we just made) and a 6 section version of hexagonal labyrinths. If you imagine walking these, the more sections, or turn-backs, the more back and forth walking you will do.

comparison of 4 different 5 circuit hexagonal labyrinths

I also wanted to show you how the labyrinth would look if we had not rotated it. In this version the entrance and final pathway to the goal lead from a corner instead of center on a flat portion of the outer edge. Here are how the 4 sectioned labyrinths look:

4 different hexagonal labyrinths with corner starts

And let’s compare the standard 4 section versions in more detail because we can adjust our steps above to make another version. Step 1 is the same except for the orientation of the hexagons you draw. Step 2 is actually the same as far as where the lines are drawn and what pathways are left open. And Step 3 is also the same since you cut the pathways in the same place ! So essentially the steps are pretty much the same !

Hexagon labyrinth with flat start
Hexagon labyrinth with corner start

Additional posts you might like (maze artwork):

Guardian Bridge Maze

QRO Walking Street Maze

Giraffe Maze