Maze of the Week #66 - Jallianwala Bagh Memorial Maze

Maze of the week #66 is of a memorial located in Amritsar, Punjab, India. It is the Jallianwala Bagh Memorial which sits on the location of the Jallianwala Bagh massacre in 1919. Here is a video without audio showing a walkthrough to the memorial.

Photo: flickr, P.L. Tandon

Jallianwala Bagh Memorial

Jallianwala Bagh Memorial

The Maze: A simple full color maze.

Jallianwala Bagh Memorial Maze

Jallianwala Bagh Memorial Maze

I hope you enjoy the maze. Free maze download is available on the site.

Coming next week:

The most famous building in India

Maze of the Week #65 - Bridge Guardian Maze

It’s that time of year again. Baseball season starts March 30th. Maze of the week #65 was my attempt to celebrate that fact. It is a maze of the Guardian from the bridge that overlooks Progressive Field in Cleveland, Ohio. Specifically it is one of the Guardians of Traffic sculptures (1932). You can read about them in Cleveland Magazine or check out this short video about the name change:

Photo: flickr, Erick Drost

Guardians of Traffic bridge statues in Cleveland, Ohio

Guardians of Traffic

The Maze: One color. Not my best maze. I made this a few years ago and never used it (until now). I post it here to show you how some of my mazes get developed over time. This is NOT the final product.

Guardian of Traffic Maze

Bridge Guardian Maze

And now to look into my improved version:

Photo: This photo from flickr, and Heather McLaughlin, will become important.

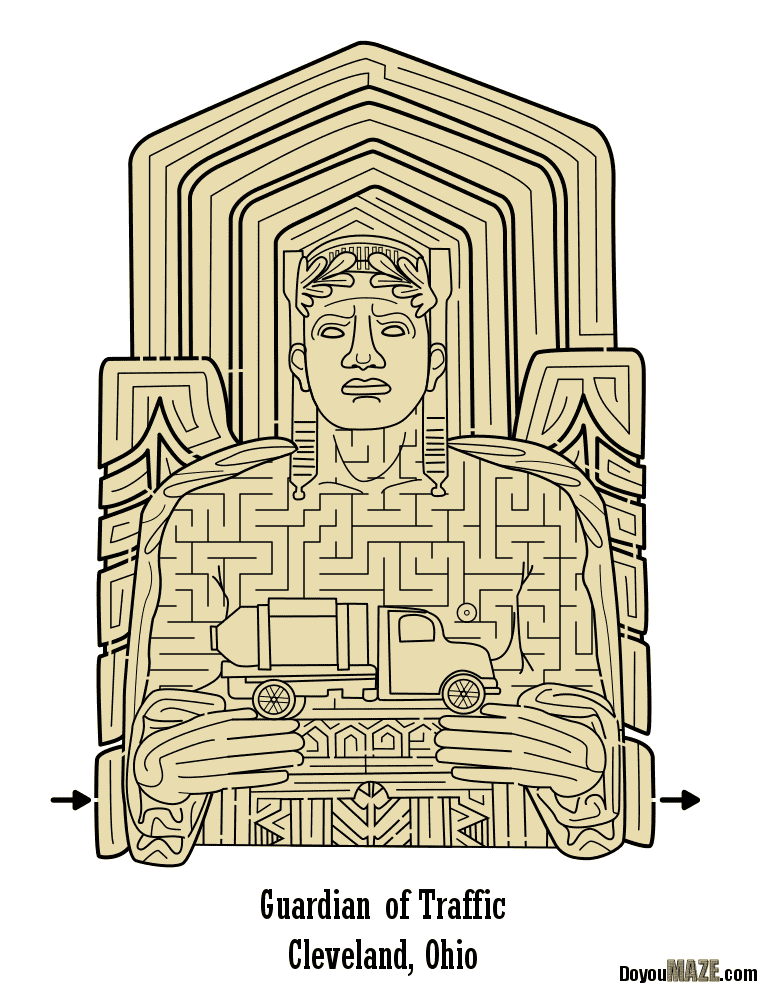
And now what I did to improve (hopefully) the maze and make it more interesting.

1. Colors changed - The initial maze was one color. I changed the overall color to be darker and added a secondary color. I also added shadows in many places.

2. Details added - I went back and found a better photo of the truck and added additional details to it. I added some new details to the face, added fingernails, etc. You can compare the mazes and find even more !

3. Extended the maze - I made the maze longer and extended it to the bottom of the page. The actual structure is very large and the previous “floating” version of the maze was not accurate. I also added the side panels that were missing from version 1.

4. Changed the Maze - I kept this an easy kids maze. I changed the non-core maze portion at the top and deleted the lower portion of the maze.

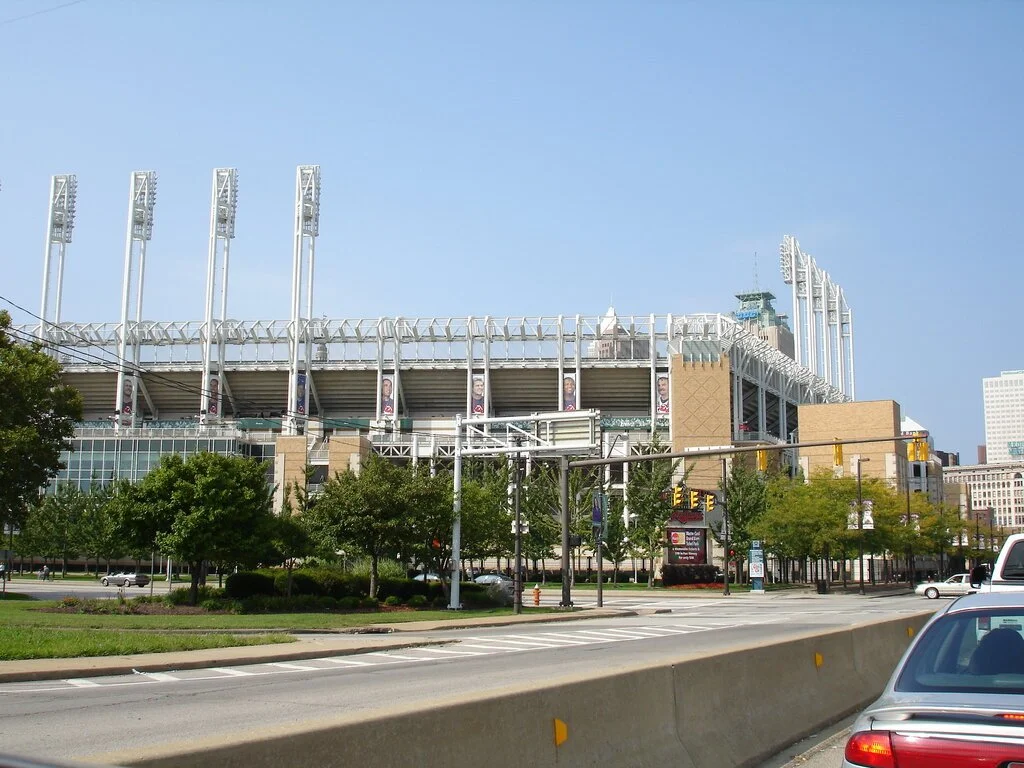
5. Added background - I wanted to try this as mixed media. I thought about doing a blue sky but the location of this bridge overlooks the baseball stadium, so I found the photo above to make this a mixed media maze !

6. Start and goal changed - I felt that this would look better by changing the arrows to an internal lettered start and goal.

7. Letter and branding moved - I moved the branding and lettering to the top of the page. I also re-sized the title to be larger than the city name.

8. Wider cuts - There are a few places where I “cut” through the illustration to connect the parts of the maze. I slightly more than doubled these for easier solving.

And so here is the “After”. Which maze do you prefer ? Did this improve the maze ?

Bridge Guardian Maze, Cleveland, Ohio

This maze has it’s own page where you can download it. Happy mazing !!

Coming next week:

A monument in India

Maze of the Week #64 - Leeds Castle Maze

I have always wanted to do a castle maze and Maze of the week #64 does just that with the Leeds Castle Maze located in Kent, England. It will not be the last castle I maze this year ! While a castle was first built on the site in 857, the look has changed many times of the centuries. In fact there is a YouTube video showing just how it has changed during the years:

Photo: flickr, Angela Hamblen

Leeds Castle

Leeds Castle

The Maze: Full color, large size.

Leeds Castle Maze

Leeds Castle Maze

I hope you enjoy the maze. Download is available on the homepage

Coming next week:

A bridge monument

How to Draw a 3 Circuit Square Labyrinth

Drawing a classical 3 circuit square labyrinth is both easy and fun once you learn the starting pattern and the rules of building the pathways. Follow this simple 5 step process and draw your own 3 circuit classical square labyrinth.

Step 1: Draw the starting seed pattern.

The starting seed pattern for this labyrinth is not the typical plus sign you may be used to. Instead it is 3 vertical lines, with 2 horizontal lines. The horizontal line on the left aligns with the bottom of the 3 vertical lines, while on the right side it aligns with the top of the vertical lines. Each line is the same length. See below:

3 Circuit Labyrinth Square starting seed pattern

3 Circuit Labyrinth Square starting seed pattern

Step 2: Draw the center goal

At the 2 rightmost vertical lines draw a line up one grid. This will become the opening to the center goal. Draw a square centered on top of this. Grid-wise this is a 3x3 square.

Making a 3 circuit Square Labyrinth step 2

3 Circuit Square Labyrinth - Step 2 - Draw the Goal

Step 3: Draw the next level

Connect the top of the remaining left vertical line to the far corner of the right horizontal line. It is an upside-down squared U shape started with a small horizontal move on the left side. See below.

Making a 3 circuit Square Labyrinth step 3

3 Circuit Labyrinth - Step 3 - Draw the next arch

Step 4: Draw the next level

Connect the left side of the horizontal line around the structure clockwise until it reaches the end of the rightmost vertical line. Again this creates an upside-down square U shape plus a horizontal connection in the last section. See below.

Making a 3 circuit Square Labyrinth step 4

3 Circuit Square Labyrinth - Step 4 - Draw the next arch

Step 5: Connect the final arch from the left

Connect the ends of the bottoms of the final 2 vertical lines around the structure to complete the labyrinth.

Making a 3 circuit Square Labyrinth step 5

3 Circuit Square Labyrinth - Step 5 - Draw the final arch

That does it. The final 3 circuit classical square labyrinth after 5 easy steps !!!

3 circuit classical square labyrinth

3 circuit classical square labyrinth

And here is the same labyrinth shown with grids so you can understand the shape better.

3 circuit classical square labyrinth shown on a grid

Alternative construction option: You have the option to use the more traditional starting seed pattern to create a 3 circuit square labyrinth, but this is not the most common construction. This version does not have a large square center and ends up not even being a perfect square. Here is the 5 step process to create it.

PRO TIP: this is the same construction and instructions as a 3 circuit classical shaped labyrinth but instead of curving the corners you draw the lines and corners at 90 degree angles !

Step 1: Draw the starting seed pattern.

The starting seed pattern is a plus sign with four dots in each of the four corners in the space apart from the lines to form pattern below.

3 circuit classical square labyrinth alternative seed pattern

Step 2: Connect the first “arch”

Draw an upside -down U shaped line from the top of the plus sign to the dot in the top right corner of the starting pattern. The top of the arch should peak halfway between those two points. This line will form what will become the goal of the labyrinth.

Square 3 circuit Labyrinth Alternative Part 2

Step 3: Connect the next “arch” from the left

Draw an upside down U shaped line from the left corner dot to the end point on the right side of the plus sign. Space the line an equal distance from the wall to the inside. Notice that you have moved one point to the left and connected that to the next point on the right.

Square 3 circuit Labyrinth Alternative Part 3

Step 4: Connect the next “arch” from the left

Draw another clockwise line from the end point of the left side of the plus sign around to the dot on the bottom right side of the pattern (Again, the next on the left to the next on the right). Space the line an equal distance from the wall to the inside as you draw the line. Again this looks like an upside-down U plus the connections to the appropriate ends.

Square 3 circuit Labyrinth Alternative Part 4

Step 5: Connect the next “arch” from the left

Same process as before but this time you connect the bottom left dot from the seed to the bottom of the plus sign.

Square 3 circuit Labyrinth Alternative Part 5

That completes the process for this alternative version.

3 circuit classical square labyrinth with small center