Creating a Hidden Maze - Case Study #1

Some of my most popular content involves my making of hidden mazes. I can teach you how to make a hidden maze in 6 steps. And I have created over 30 hidden maze challenges to test my maze making ability and your ability to solve them (or for the solver to know what they say without solving them which would mean I didn’t make a very good maze). But I have never done a case study to expand on some options I made when making some of the new mazes. This also is a variation of how I teach you to make a hidden maze, with more details between the steps.

Let’s use my instructions as a basis for the case study

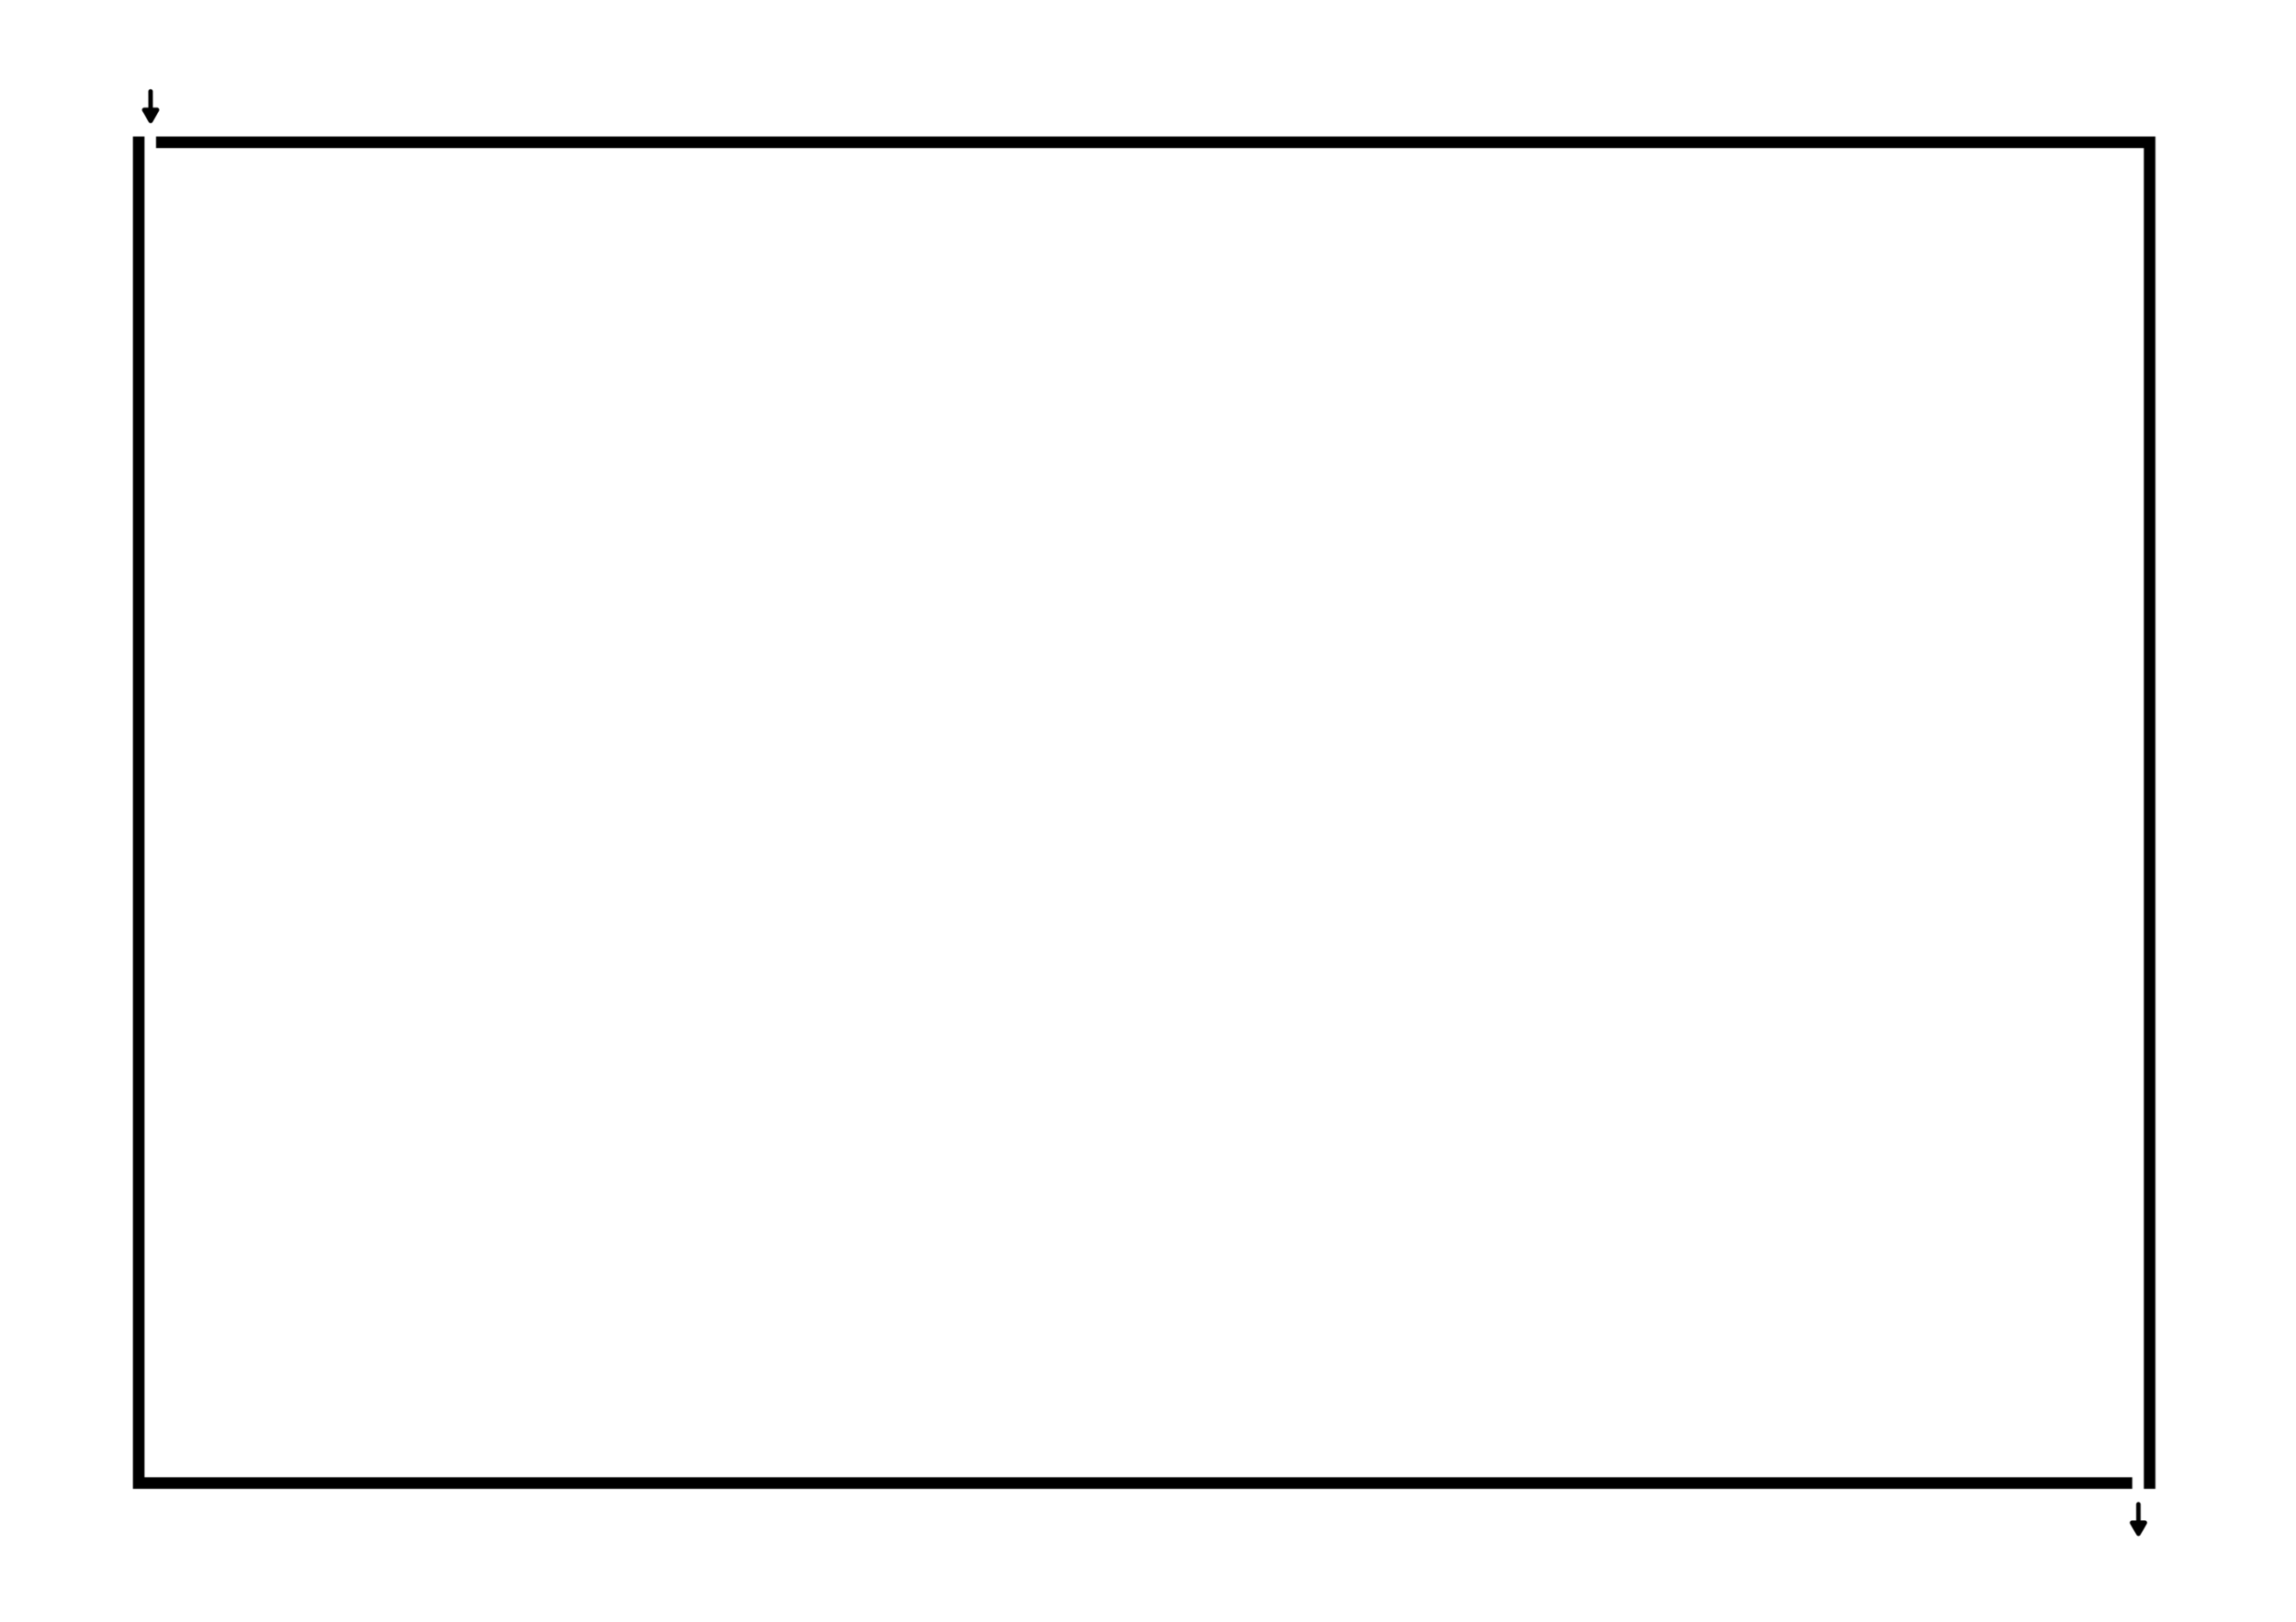
Step 1 - Draw the Outline

Now my hidden message mazes are boring in this regard as I make them to be used as the front of greeting cards. This means a simple rectangle.

Step 1.5 - Choose the Start and Goal

And this step is usually combined (thus step 1.5), and I present it that way here. Because English is written left to right the start will be on the left side of the page (I chose the top corner) and end on the right side (I chose the bottom right corner). I could have easily used the sides of the rectangle as start/goal.

empty blank rectangle with arrows for a maze

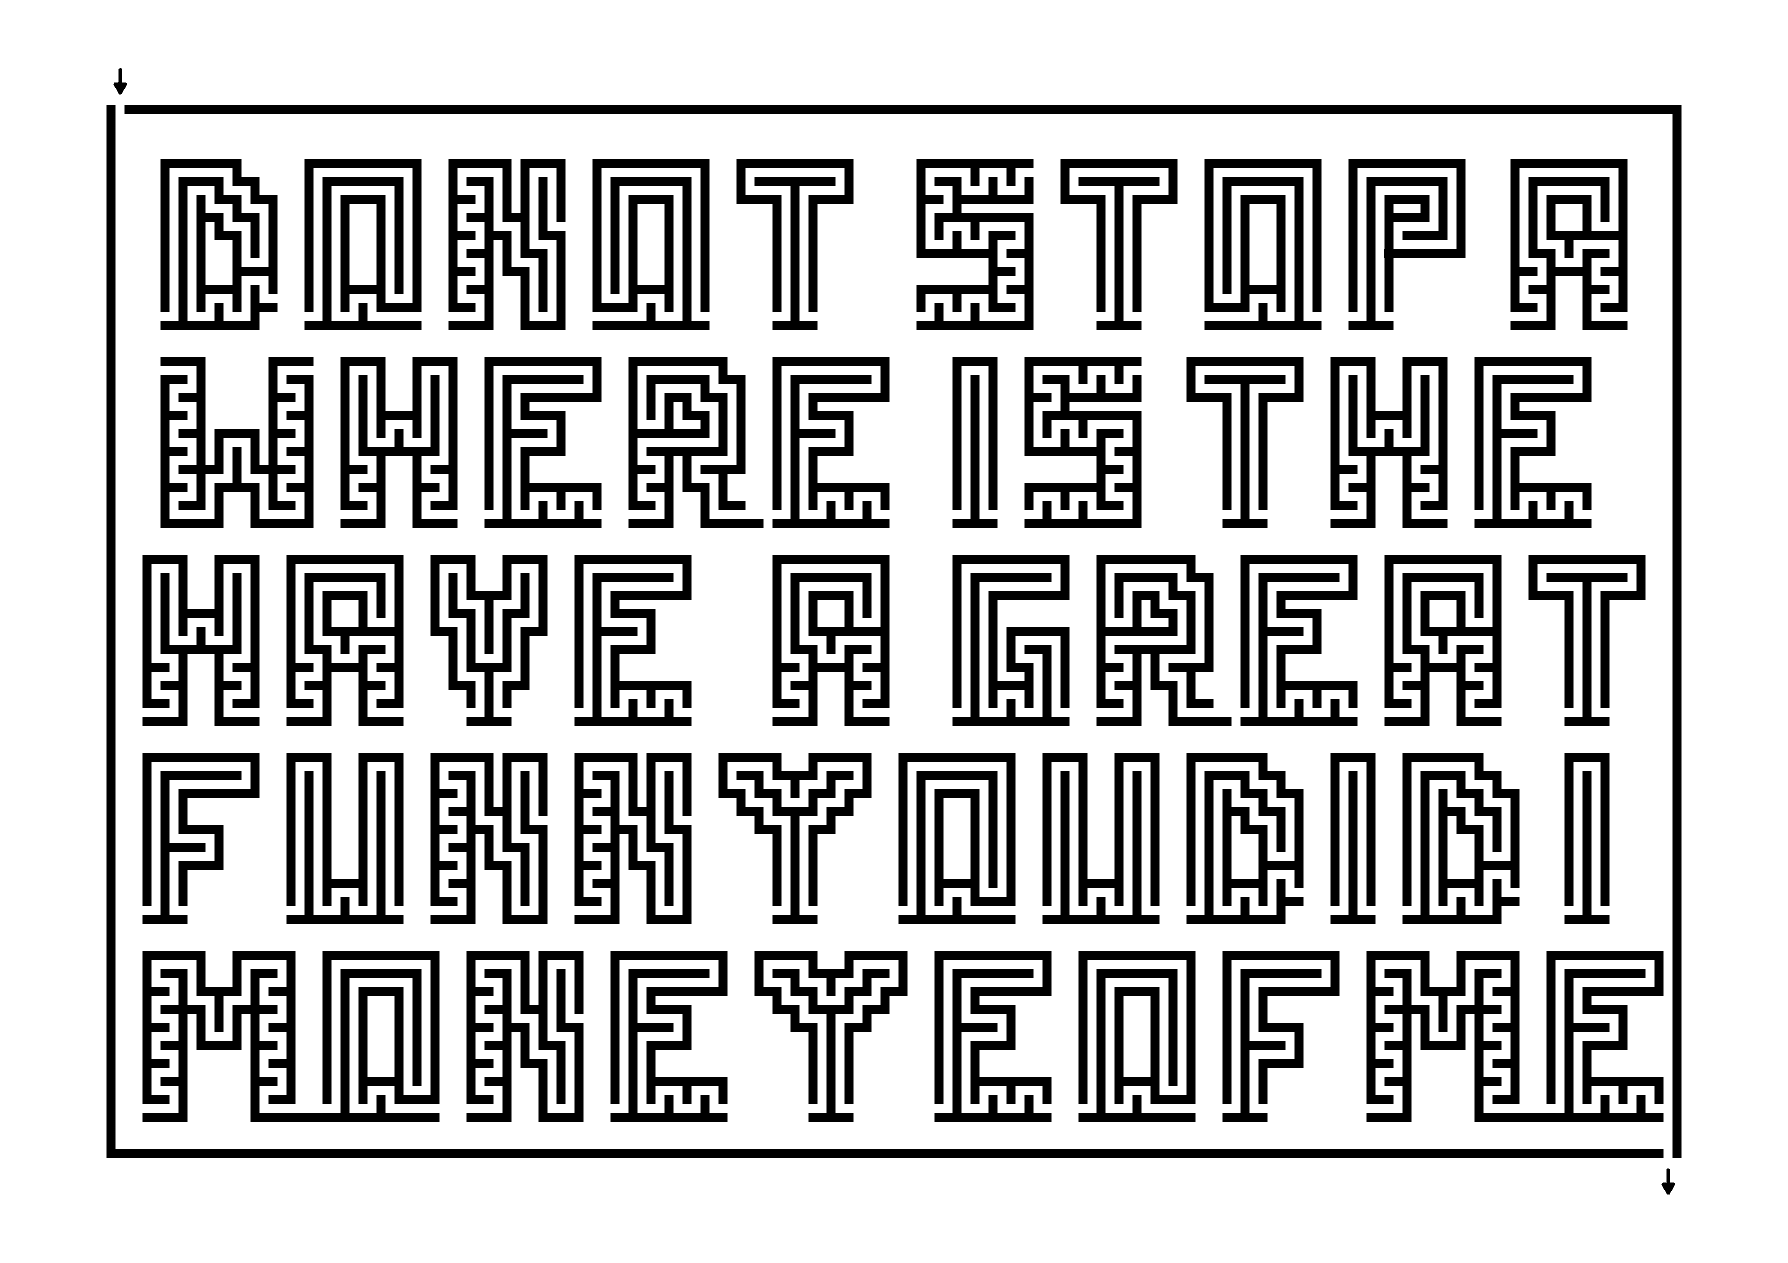
Step 2 - Write the Guide Message

Step 3 - Maze the Hidden Message

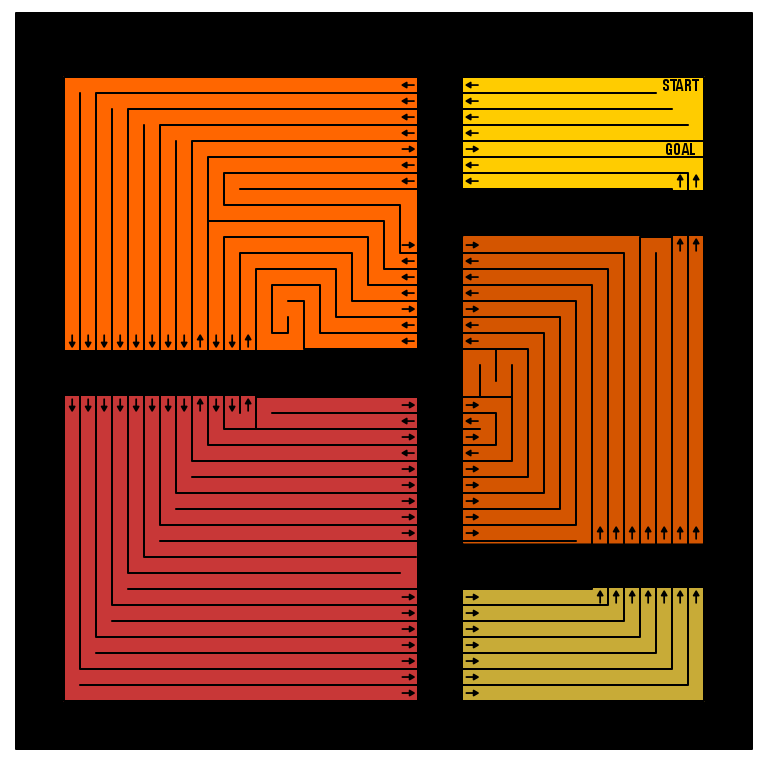
For my recent hidden message mazes I have used pre made mazed letters to speed things along. Here are my initial message possibilities. So, I do not use a guide message to make each letter from scratch each time.

Rectangle full of mazed words

To confuse the solver I have added in a variety of false words that will not be used. While my initial hidden message mazes used one message and everything else was a false pathway, these are less about the false pathways and more about the false message. Here is a quick list of the possible words hidden in each row. I overlap some word possibilities, like the Y ending in funny also being the starting Y in you. This could also be expanded and made more difficult.

words mazed in a box showing possible combinations of words

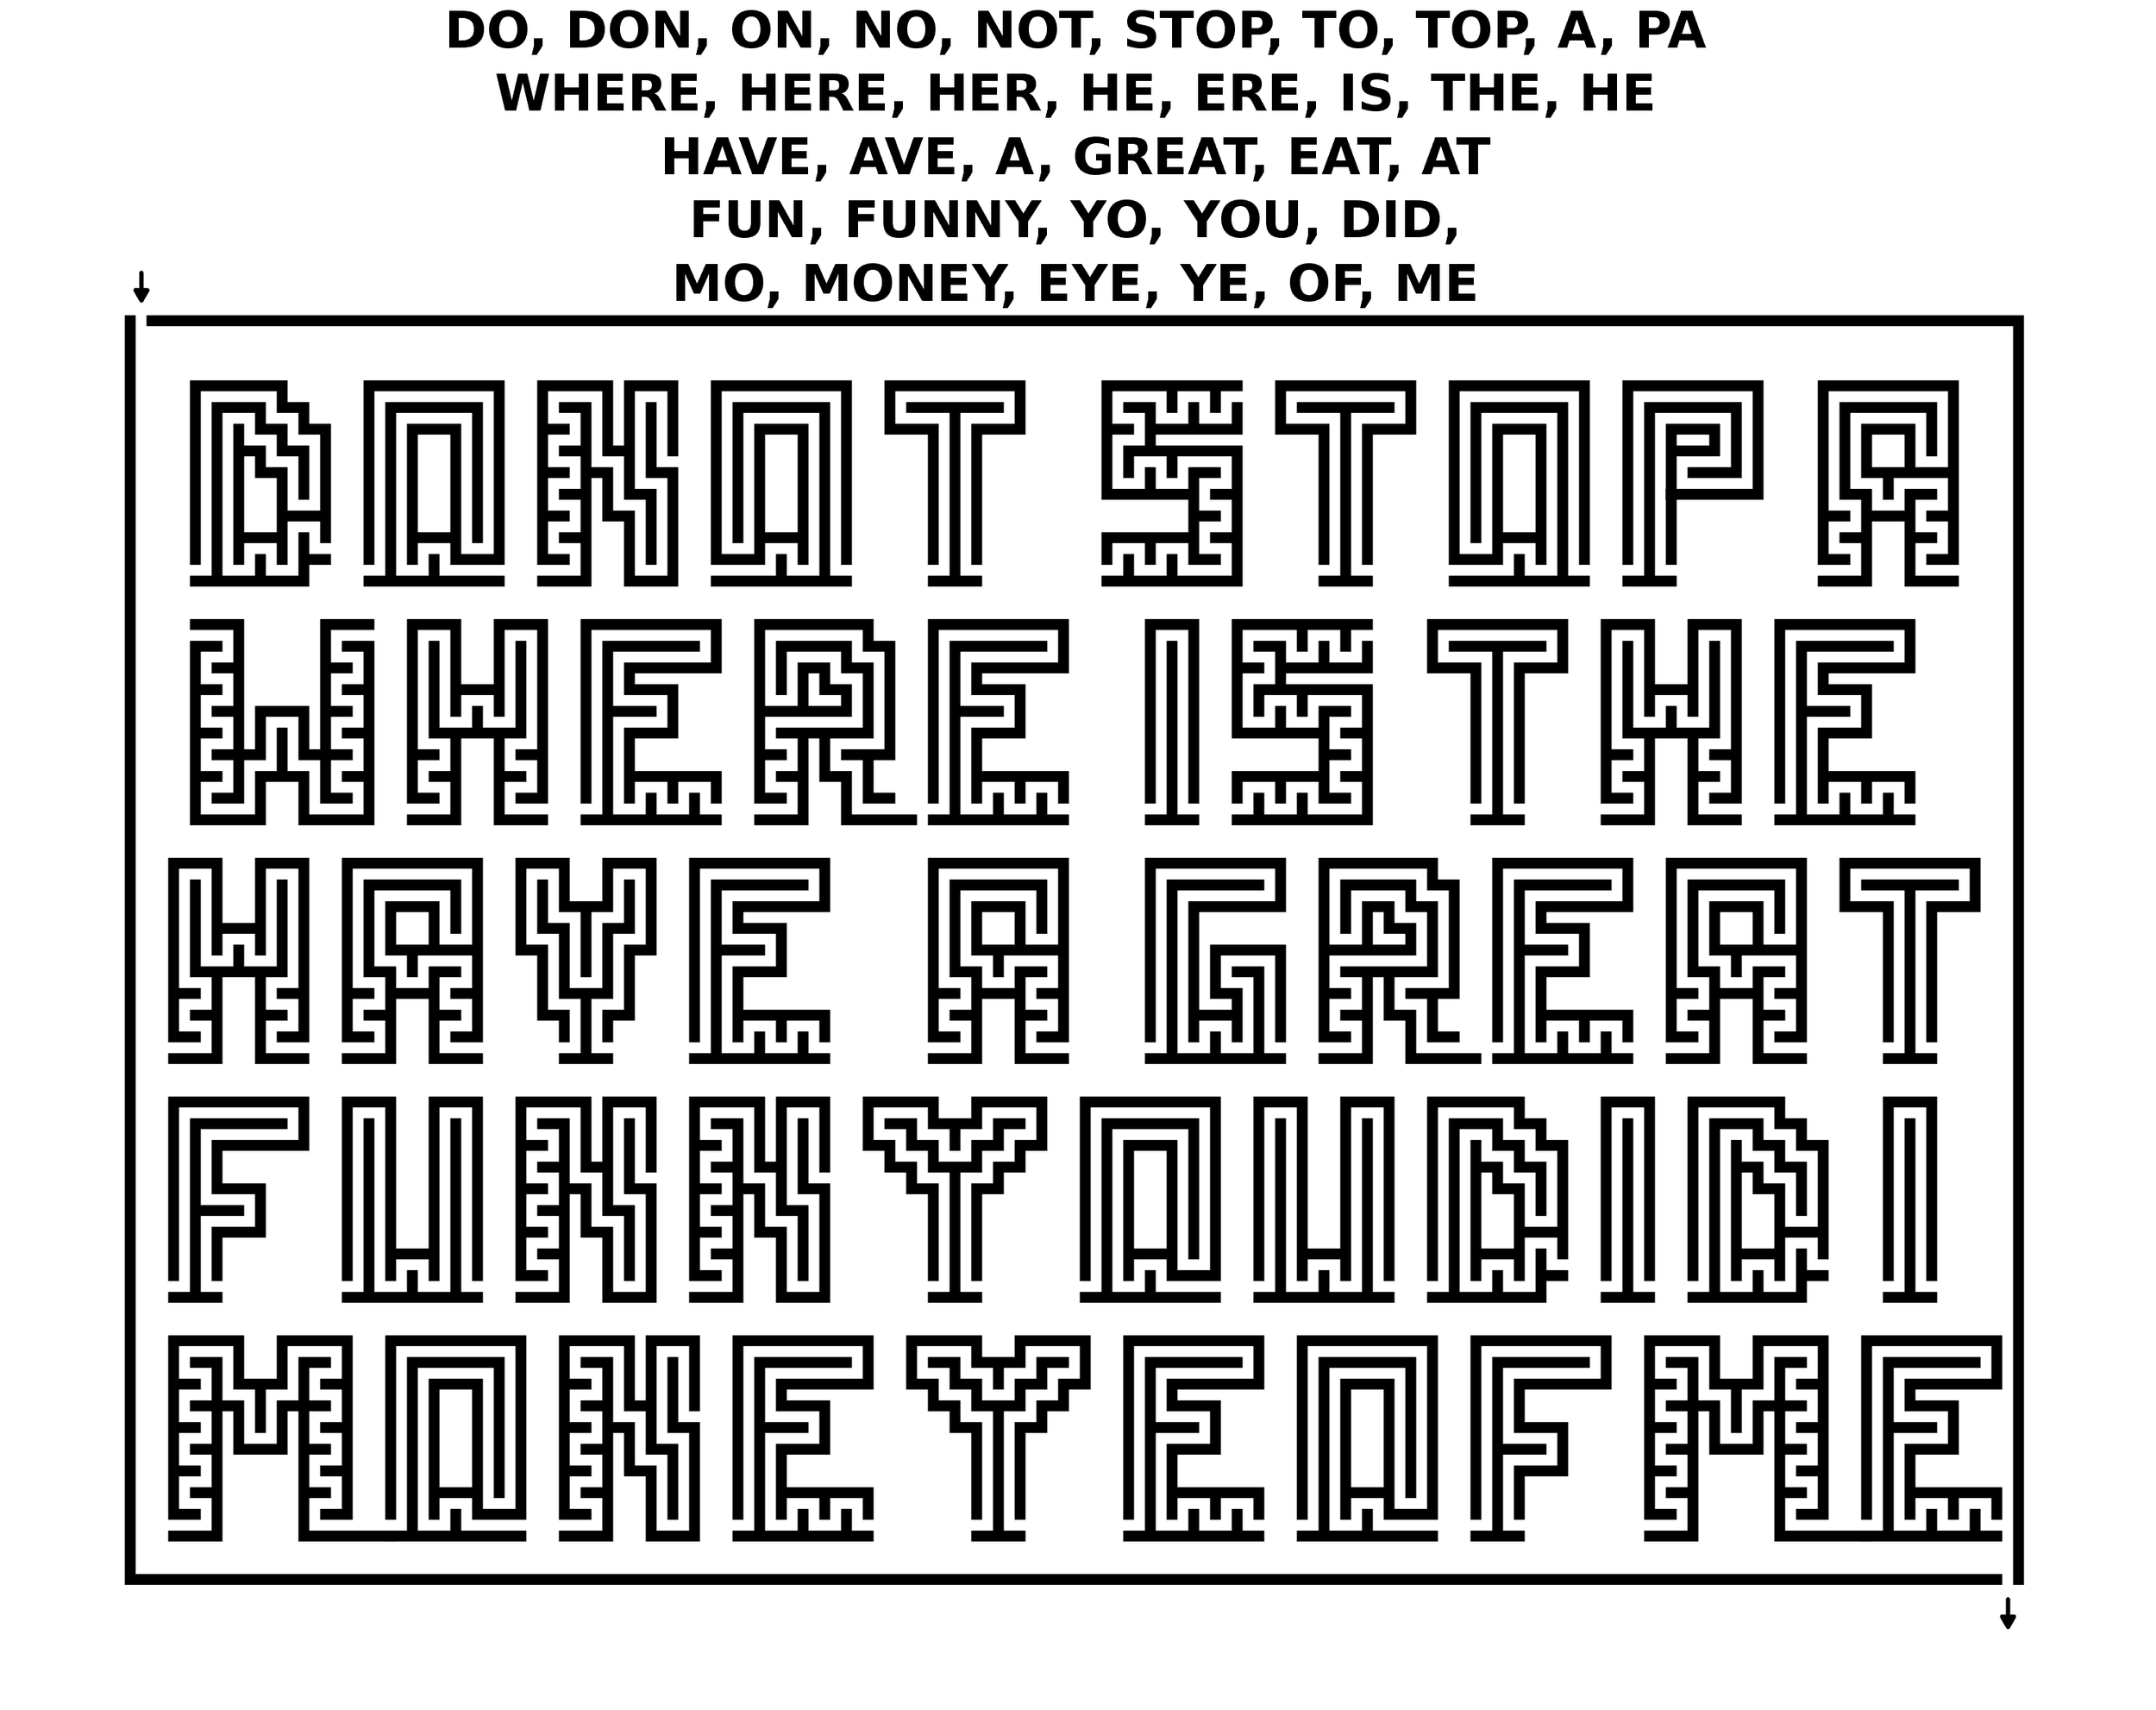
Here is where I actually fulfill Step 3 as this maze will say “Have a Great”. I make sure to close out any pathways so there are not any possible solves that don’t have a message.

Hidden word maze being made

Step 4 - Draw the False Pathways

I draw a message row one at a time to ensure that I do not mistakenly make an extra solve. I make my false pathways short on the left side of the maze so the solver knows they have chosen the wrong row quickly. So when I mazed the bottom row, you will not get past the M before reaching a dead end.

Hidden word maze being made 2

Or the F in the second to last row.

Hidden word maze being made 3

Again I did a dead end after the W

Hidden word maze being made 4

Step 5 - Complete the Maze

The first row uses DO before it dead ends. This completes the maze. Hopefully the use of all those letters and the false pathways filling in between make this a difficult maze to solve with your eyes. What do you think ?

Hidden Message Maze example

Step 6 - Make the Maze Solution

HIdden Message Maze solution - Have a Great

How to Make a Pod Maze

The 42nd type of maze construction is the Pod Maze. This construction came about from a collaboration with a friend, While the final product can look many different ways, the core ‘pod’ idea stays the same. Let’s define what a Pod maze is then get into the step by step instructions ! I have included a free downloadable book of 31 Pod Mazes at the end of the post.

Pod Maze - A Maze with separated sections, called pods, that must be traveled between to solve the maze. The ability to jump between pods is denoted by small arrows in the pathways.

How to Make a Pod Maze

Step 1 - Draw the Background and Pods

The background will determine the shape of the maze. I typically use a black background to match the color of the pathways I will be drawing. Matching these will save you headaches during construction ! The pod placement and shapes are your choice. Make sure you have enough places where it will become possible to move between pods. The spacing is up to you. In a simple maze closer together will be easier.

Design Option - make the background a light color and change it to the final color during the final step ! This allows the pathways to be more easily seen during drawing !

Black square with 4 large dots inside

Step 2 - Choose the Start and Goal (optional)

Choose the start, and optionally the goal and place them in the pods. The goal can always be moved later as the maze is constructed !

40.2 Pod Maze START GOAL.png

Step 3 - Start Mazing

I use a standard construction in the actual pods, but many other options would also work. As you move to the edges of a pod, add a small arrow to indicate where a pathway can cross into the next pod. The adjacent pod should have an arrow aligned in the same plane across to indicate the proper movement allowed as in the example below.

Design Option - When drawing the pathways you could stop them at the pod edges OR continue them across the background (these will be invisible when the background matches the pathway color). If you use a light color background during design this will help with the design !!

40.3 Pod Maze keep mazing.png

Step 4 - Keep mazing and finish the maze

Continue to draw pathways until you have finished completing the entire maze.

40.4 Pod Maze keep mazing.png
Pod Maze example

Step 5 - Create the Solution (optional)

Make a solution to the maze !

Pod Maze example Solution

Additional Pod Maze Examples

This additional example uses a spiral construction extensively within the maze.

Square Pod Maze 3 sections

And this second example adds some color to make the maze more interesting. Nice autumnal colors.

Pods Maze in autumnal colors

In this third example I mix a few different shapes, using triangles and a center circle as pods.

Pods Maze with purple shapes

Free Downloadable Pod Maze Book

Pod Maze Book Cover

The Pod Maze Book

A free downloadable book featuring 31 different pod mazes. Mazes come in a variety of shapes and colors. El libro esta disponible en Español tambien !

File Size: 329 KB

Step by step instructions on how to make over 40 different maze types.

Step by step instructions on how to make digital labyrinths.

Enter the Dragon (1973) Movie Review

Enter the Dragon (1973) IMDB Amazon

Enter the Dragon movie poster

This classic 1970’s martial arts movie set a high standard before special effects took the genre to a new level. Considered by many (including IMDB) Bruce Lee’s best movie, it was released in the US just a few weeks after his untimely death. The movie follows Lee as he tries to infiltrate and investigate a man named Han’s inner circle during a martial arts tournament that Han holds on his island.

We have a few American characters who have stories we follow also, each working their way to the tournament and fighting all along the way. The story doesn’t really matter as much as the fight scenes which happen early and often. And this review is here because the movie contains a maze scene. Like The Lady from Shanghai this movie also ends with a scene in a mirror maze, although it is more of a disorienting mirror room. Figuring out who your real opponent is from all the ones reflected in the mirror is the key to surviving the fight !

Great fight sequences. I give it a 7/10.

Spoiler - the final mirror fight scene !

Alice in Wonderland (1951) Movie Review

Alice in Wonderland (1951) IMDB Amazon

Alice in Wonderland (1951) movie poster

The classic Lewis Carroll novel brought to life by Disney in 1951 remains a classic today. Now there have been dozens of adaptions of this story. So many they are difficult to count. 1903, 1915, 1923, 1931, 1933, 1949, 1955, 1966, 1972, 1985, 1999, 2009, and 2010, all had versions with the 2010 film starring Johnny Depp, Mia Wasikowska and Helena Bonham Carter being the biggest, generating over $1B in ticket sales globally. I wonder if that version means we will have to wait a few more years for the next version of the film to be made ? Because this story WILL be made into another film.

Back to the 1951 Disney version. This is the classic you remember from when you were a kid. Great for kids. Lots of wonderful characters and fun situations and songs. Another bonus is a runtime that kids can handle at 71 minutes long, something many modern movies have forgotten !! And yes, there is a maze towards the end of the movie which gets it on my site. Alice is led into a maze by the Cheshire cat where she proceeds to paint the roses red, she’s painting the roses red….

Great for all ages. I give it a 7/10.