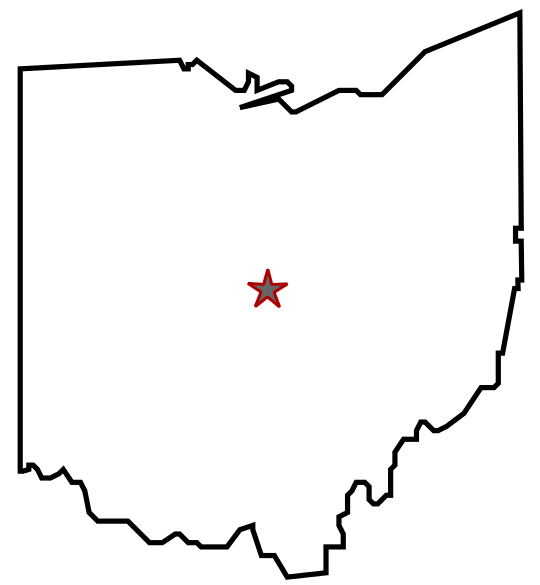
In a series of posts I will show you how to make a maze in a wide variety of design constructions. The 10th type of maze construction is the Hidden Message maze. Let’s define what I mean, then get into the example. Every example will use the sample basic outline (the state of Ohio) to better illustrate the differences between each maze type. There is also a second type of hidden message maze called a Hidden Message Trail Maze. I will give an example of it below and explain how it works.
Hidden Message Maze - A maze of any type of construction that when solved, the correct path contains a hidden written message. The maze maker should have a goal to make the message as hidden as possible in an unsolved maze.
HOW TO MAZE A HIDDEN MESSAGE MAZE
Step 1 - Draw the Outline
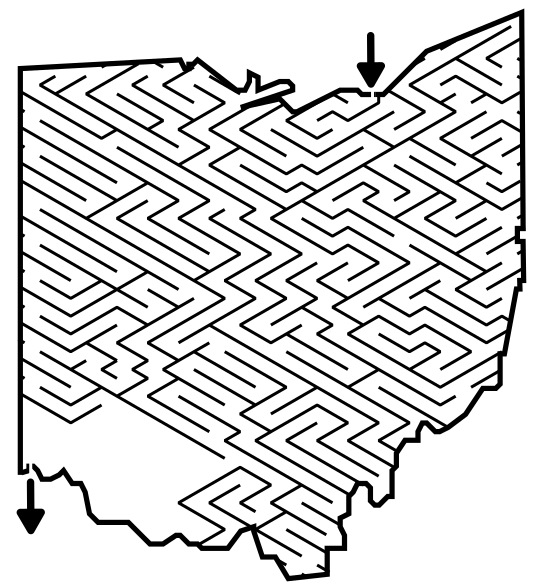
The outline of the maze makes the outer wall of the maze. It can be anything from a simple shape like a square, to a complex picture. The outline should be thicker than the internal lines to give the maze definition. In the example below I chose the state of Ohio.
Step 1.5 - Choose the Start and Goal
For Hidden Message mazes the start and goal will typically start on the left of the outline with the goal on the right of the outline since you are writing in English. If hiding a message in other languages you may go right to left.

Step 2 - Write the Guide Message
On the inside of the outline write the message you would like to hide in the maze. This will be your guide as you make the maze walls. Make sure the size is large enough to allow two passes of maze paths to make a letter. If your letters are too small you will not be able to hide the message as easily as drawing the pathways will become too difficult.
Quick Tip: The smaller the width of the pathways you use the easier it will be to hide a message. It is also easier for the solver to read the message when complete since a narrow pathway is filled more easily than a wide one by drawing a single line with a writing utensil.

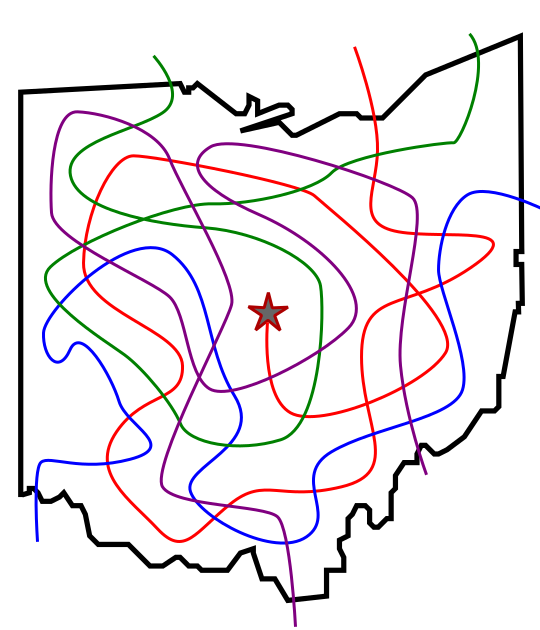
Step 3 - Maze the Hidden Message
Draw lines to create the maze walls, completing a letter at a time while moving left to right while creating the maze. As I mentioned before, the letters should be at least two pathways thick to ensure each letter can be made properly.

Entrances and exits to each letter should align.

Connect the letters to complete the message.

Step 4 - Draw the False Pathways
After deleting the guide word, fill in the rest of the maze with false pathways. A decision you need to make is how much of an option you want these paths to actually be. Do you want the solver to actually possibly select the paths or would you prefer the maze solver follows a labyrinth path to automatically create the hidden message ? The below example allows the solver to fail by selecting false paths.

Step 5 - Complete the Maze
Complete all false branches and assess how hidden your message actually is. In the example below do you know what the message is ? I believe it is well hidden.

Step 6 - Make the Maze Solution
For a Hidden Message Maze this step is NOT optional. You need to see how the final product actually looks. Fill the correct pathway completely and see how you did ! I think the example came out well. If I could go back and make one change I would change the h to an H to make the “HI” more easily read. However, based on the context and construction of the maze I think it reads Ohio easily (unless you are not from the US, or unfamiliar with the state). If you do not like what you have made make some last minute adjustments !

So now you should be able to make a maze with a hidden message inside it, or a maze whose solution spells a word.
HIDDEN MAZE CASE STUDIES
If you want to see an alternative Case Study of the making of a hidden maze, I have a blog post about that also. In that version I use a variety of pre-made maze letters hidden in a maze to (hopefully) confuse the solver, fill the maze space and create a hidden maze.
I also delve into solving a maze (it also happens to be a hidden maze) using a reverse solve method in a separate case study.
ADDITIONAL HIDDEN MESSAGE MAZE TYPES
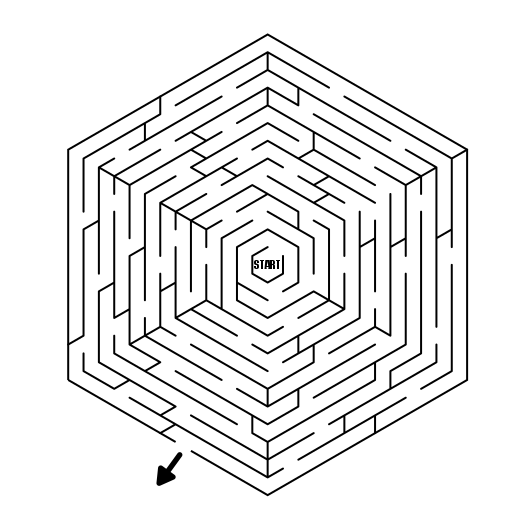
Before I show you more examples, let’s give you a quick example of the second type of Hidden Message Maze, the Hidden Message Trail Maze. While both mazes hide messages for the solver, the trail maze uses actual letters to hide the message for the solver instead of pathways forming the letters. If you want a similar step by step process to learn How to Make a Hidden Trail Message Maze, I have it. In the example below passing over a letter adds it to your message. The initial path options are “There are…” up and to the right, “The beard…” going down or “The Best…” moving to the left. Good Luck !

Hidden Message Trail Maze
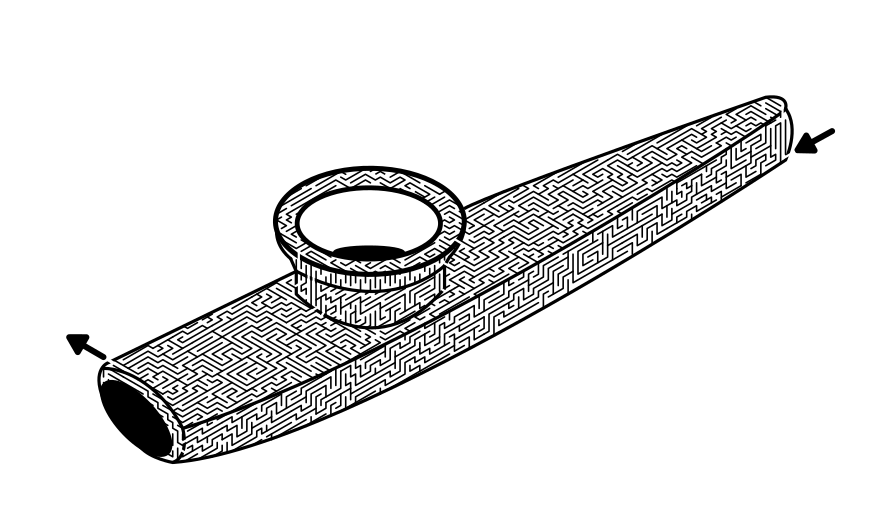
I made a free downloadable book of Hidden Message Trail Mazes if they interest you. I added a few twists, including the addition of clues and the use of clues/idioms. You can check it out in the free downloadable book section. To give you an idea of what these are, can you solve this one ? The clues are the object (the basketball), the type of saying (a quote by Wilt Chamberlain) and the length of the words in the saying (shown by the dashes below the maze).

ADDITIONAL EXAMPLES AND FREE DOWNLOADABLE MAZE BOOK
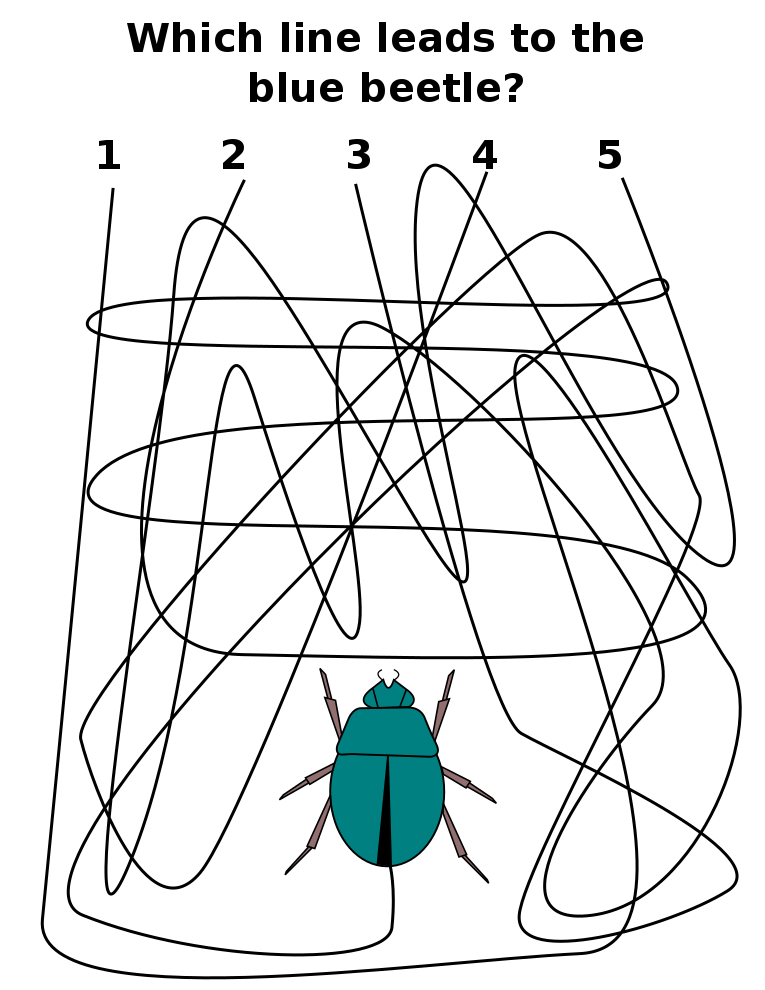
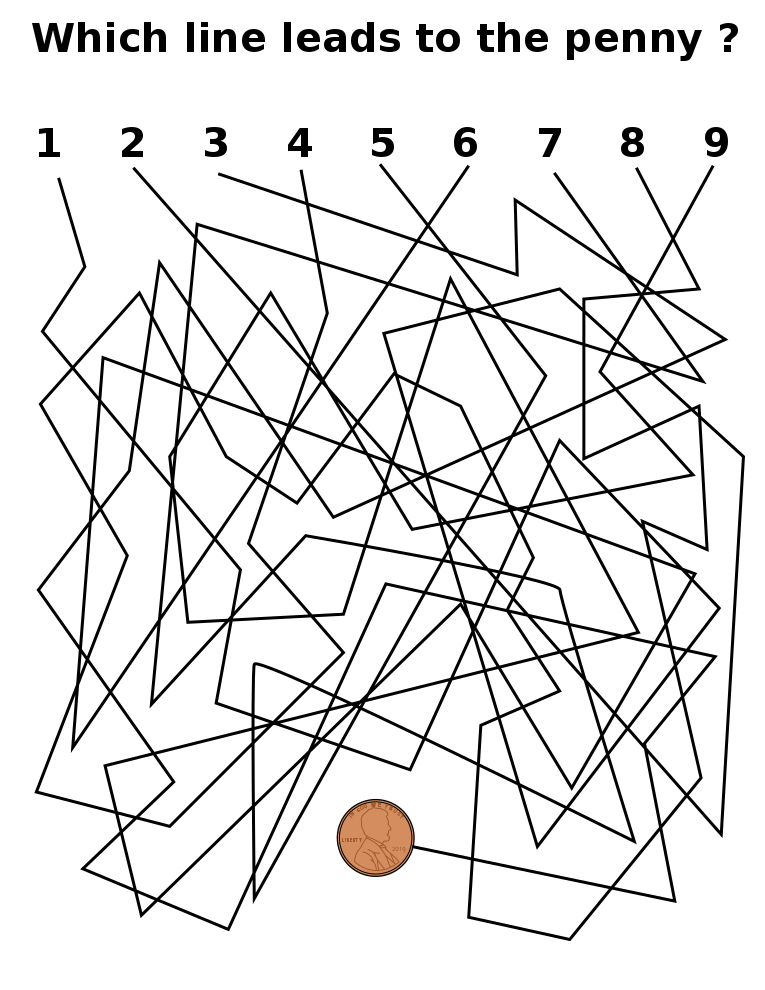
Here is a another example of a Hidden Message Maze. These particular templates are all used for greeting cards. I have collected 34 different versions in a free downloadable Hidden Maze Book if you are up for a challenge. The pathway for this purpose does not have any choices (like a labyrinth) to ensure completion by the solver. I give extra examples to test just how good the messages are hidden in each one. Can you look at the maze and see what it says ? I certainly hope not !! The construction of these all use the standard equal construction (meaning the width of the pathways and the width of the walls are equal). If you want to see a variety of ways to maze individual letters I show them in this post.
If you like this challenge I have made it into 4 separate blog post challenges, 3 parts with 10 messages in English, and 1 part with a few Spanish words:
Hidden Message Maze challenge - Part 1
Hidden Message Maze challenge - Part 2
Hidden Message Maze challenge - Part 3
Desafío Laberinto de mensajes ocultos
Consider solving this with a pen, a marker, or a pencil. The narrow width of the pathways make the solution much more obvious when solved than wider pathways would. I also hid incorrect letter shaped pathways in the mazes to help confuse the solver.


MAKING A HIDDEN MAZE VIDEO
Finally, If you want to watch a quick 2 minute video of the making of a simple hidden message maze. Before you click play do you know what it says ?
Additional post you may like:
Interested in learning how to make or draw other types of digital mazes ? I have step by step instructions on how to make over 40 different maze types.
If you prefer making labyrinths, you can find step by step labyrinth making instructions.