In a series of posts I will show you how to make a maze in a wide variety of design constructions. Previously, we reviewed the 29th type of maze construction - the Weaving Paths maze. Today I will give you an alternative method (an improved method IMO) of making a weaving path maze. The main difference between the two methods is the resulting spacing of the paths in the final product. This method will result in a more uniform design. Let’s review what I mean by a Weaving Paths Maze, then get into the example.
Weaving Paths Maze - A Maze WHERE paths are allowed to weave around each other creating an extra plane for the maze solver to work in.
How to Make a Weaving Paths Maze (IMPROVED METHOD)
Step 1 - Draw a “picnic blanket” template
The template will serve as the shape of the maze and also help you keep track of spacing as you make the actual maze. It can be anything from a simple shape like a square, to a complex picture. My example uses a simple square structure. I use 2 colors to help keep the construction organized. This background will organize the drawing of your pathways. I have a rule that no pathways can be drawn in the white boxes. This picnic template creates that structure for you.
Step 2 - Start Drawing the Pathways
While most mazes are built by individual walls, in a weaving maze you design a pathway by virtue of the parallel walls you are drawing. A weaving pattern is achieved by controlling the direction of paths rather than the building of walls. Using the template, ensure you only draw pathways on the colored part and never on the white portion of the grid. This ensures good spacing. I draw a section at a time and use a color (I prefer grey, but feel free to choose your own color) to help establish the maze from background.
You also must follow a few rules: Do not end a maze path under another pathway. Do not change pathway directions under another pathway. Do not split a path way into multiple pathways under another path. Basically, only create dead ends in open space.

Step 3 - Draw additional paths
Continue drawing pathways making sure you take advantage of the weaving. Here is a mid-completion look at the maze construction.
A note on difficulty and fun-ability: Remember that in a weaving maze the more loops you create the more difficult the maze will be to solve. But, those loops also add a bit of fun to the maze solve also. If a solver incorrectly takes a false pathway and instead of reaching a dead end the loop will return them to the mistake (Much more fun to solve!!!).

Step 4 - Complete all pathways
Complete all pathways, ensuring that you have made a viable solution !

Step 5 - (Optional) - Add directional arrows or shadows
If you believe the final version of the Weaving path maze you have made has paths that might confuse the solver you have the option to add arrows at any dimensional intersection to clarify the path can be taken. I think this maze does not need any arrows. I also sometimes use shadows to show where a pathway goes under another pathway (best seen in my Pipe maze example).
Step 6 - Complete the Finishing Touches
Add the Start and Goal arrows (could be done sooner), and delete the background guide template.
Step 7 - (Optional) Create a Background
Make the maze completely black. Copy and shift it and return it to the original coloration to create a shadow background. I think this helps to make the maze look more dimensional and easier to follow for a solver. Notice that this also makes the pathways look darker (I did not change the color between steps). Depending on what colors you use this color dynamic will change.

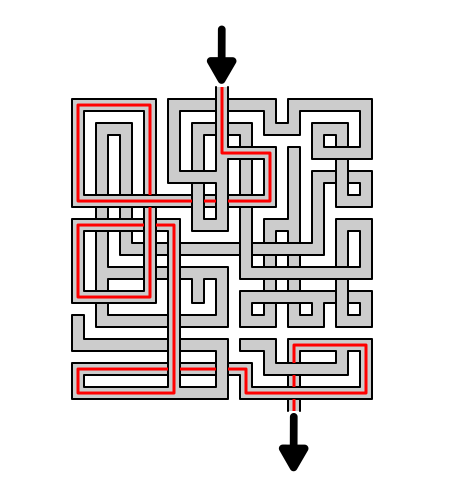
Step 8 - Draw the Solution
Highlight the correct path in the final version of the maze to create the final maze solution (shown here in red).
Additional Weaving Maze Examples
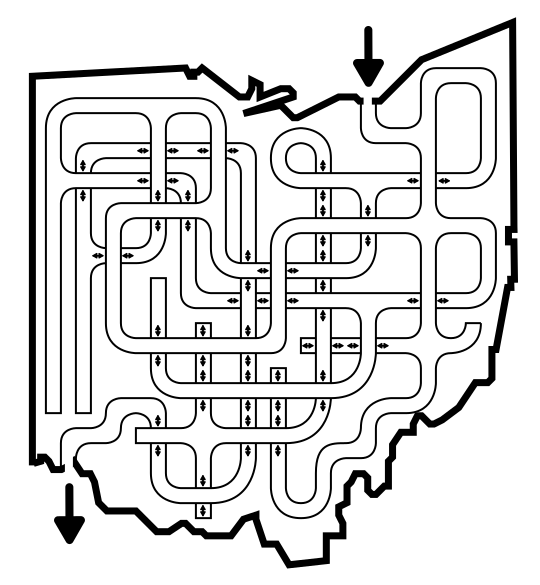
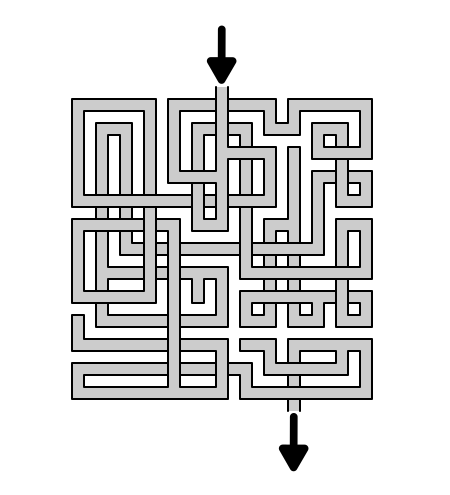
The below example of a weaving path maze was made without a template guide. It has irregular spacing between pathways and many large gaps vs. the improved method. Depending on how you want your final maze to look will determine if you use the guide or not. One other thing to note about this version is that the black and white pathways on a white background make it difficult on my eyes. I would actually prefer this maze more if the pathways had a color.

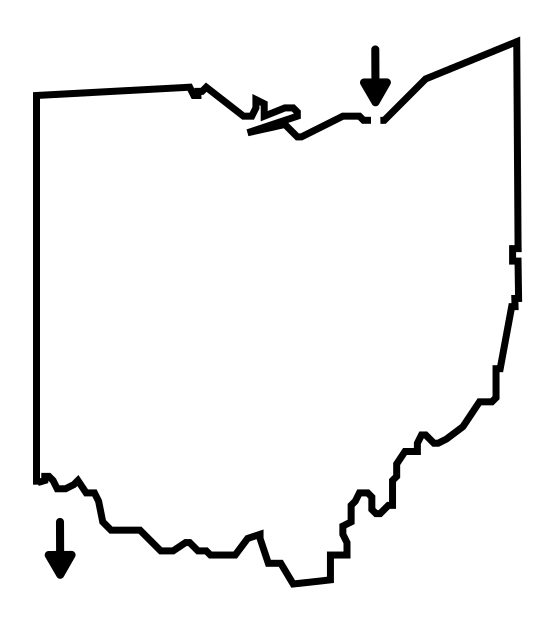
One more example made with a guide and even spacing, no gaps. This also adds some color and a new shape. I did not use a background. Obviously the template used to make this had the same shape as the final maze.

That inspired me to show you a few examples of weaving maze templates. Get creative on your own templates. Just an additional note - make sure to fill in all spaces to create the shape when you are actually making the maze. It requires a little more on-the-go planning as you create the maze.


Another example that I did for Christmas, a Weaving Christmas Stocking Maze. It uses multiple colors and a unique shape.

And my last example showcases a large version of a weaving maze. This is difficult maze but a lot of fun to solve.

For additional examples, explore the 10 different types of weaving maze styes, including pipes mazes and see which you prefer:
What is Your Preferred Weaving Maze Style ?
I also created a method to help create a complicated weaving maze that I found very helpful when making this maze type for adults:
Creating a complicated Weaving Maze - an updated method
I did a 3 part blog series on maze constructions if you want to design your own type of maze. Part 2 speaks about pathway options including weaving pathways !
Part 1 - Starting and Ending a Maze - Speaks to the 9 most popular ways to start and stop a maze
Part 2 - Maze Path options - Explores the 12 different pathway options for a maze
Part 3 - Conditional Path options - Speaks to 11 different conditional options to add to a maze to make it more enjoyable
Interested in learning how to make or draw other types of digital mazes ? I have step by step instructions on how to make over 40 different maze types.
If you prefer making labyrinths, you can find step by step labyrinth making instructions.