
In this post I will show you how to draw 2 different types of diamond labyrinths, a 7 and an 11 circuit version. I will also show you some alternative sizes and discuss what is possible, them show you a real world diamond shaped labyrinth. Here is what you can expect:
PART 1: HOW TO DRAW A 7 CIRCUIT LABYRINTH
PART 2: HOW TO DRAW A 7 CIRCUIT LABYRINTH (WITH GRIDS)
PART 3: HOW TO DRAW AN 11 CIRCUIT LABYRINTH (WITH GRIDS)
PART 4: OTHER VERSIONS + A REAL WORLD EXAMPLE
PART 1: HOW TO DRAW A 7 CIRCUIT LABYRINTH
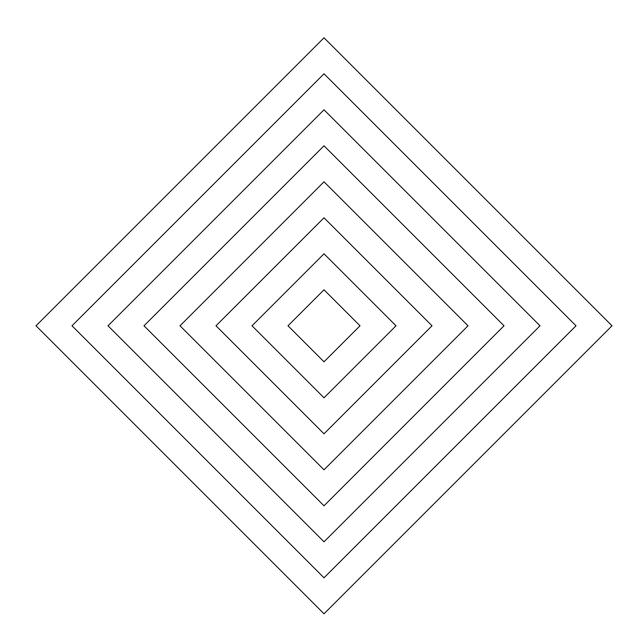
Step 1 Draw 8 concentric diamonds
These will become your guides for the drawing of the labyrinth. Note that the number of circuits you want add one and that is how many concentric layers you need for any labyrinth creation.
PROTIP: Start your drawing with the center goal so you do not run out of room ! This also allows you to pick the size the center goal will be.
AESTHETIC CHOICE: For this example my diamond uses a square turned by 45 degrees. The 11 circuit diamond labyrinth will be made using a 2/3 grid (2 over, 3 up) giving it a sharp angle.
Step 1 - Draw 8 concentric diamonds
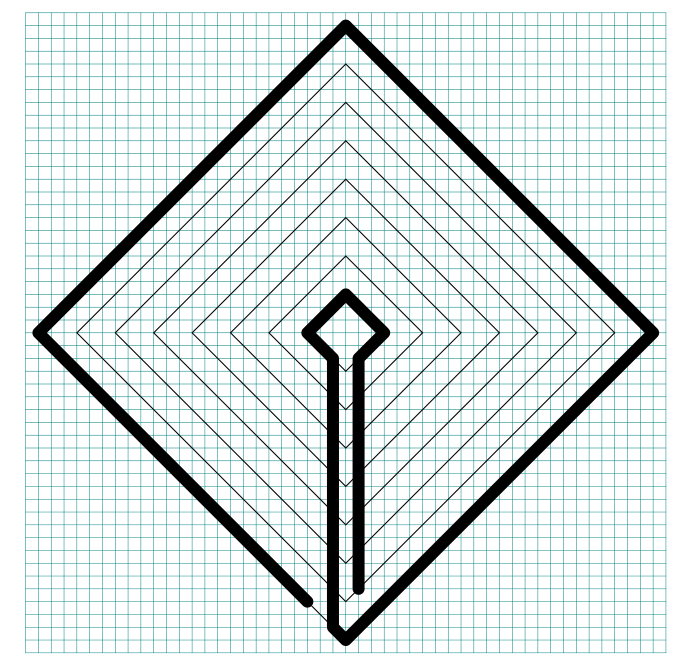
Step 2 Draw the outer wall, and pathway to the goal
At the 6 o’clock portion of the center diamond, draw a centered pathway to the edge, while keeping the right side open for the outer pathway on the right. Extend the left pathway to the edge and then create the outer wall all the way around the diamond, leaving only the entrance pathway open on the bottom left of the diamond and turning north until you reach the second inner diamond (this creates the entrance pathway).
AESTHETIC CHOICE: I decided to make this labyrinth using standard equal walls and pathways, but you can also use thinner lines if you want.

Step 2 Draw the outer wall, and pathway to the goal
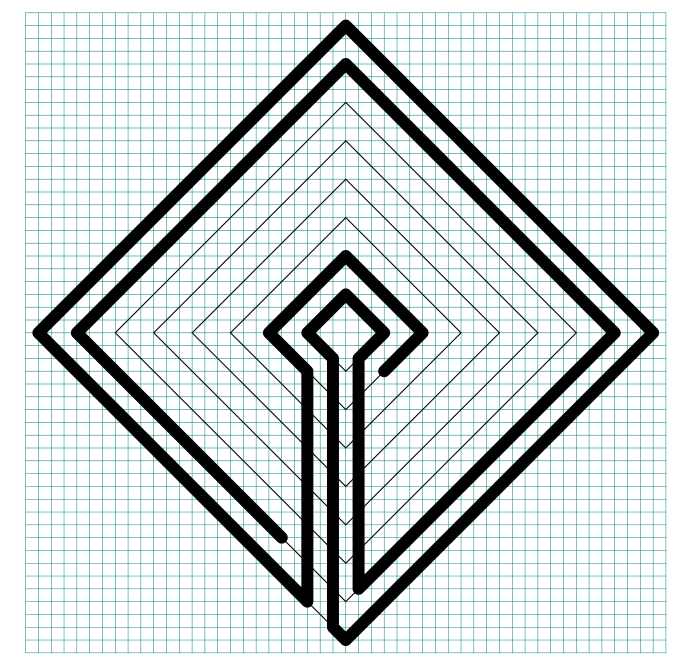
Step 3 Begin the internal pathways
Continue the entrance pathway around the center goal, leaving the pathway open on the bottom right of the second center diamond. Using the third internal diamond draw a wall to create a second pathway from the center, stopping on the bottom left and leaving the pathway open for the turnback.
Take the right pathway from the center goal and continue it counterclockwise around the diamond, stopping to keep the pathway open on the bottom left of the diamond.

Step 3 Begin the internal pathways
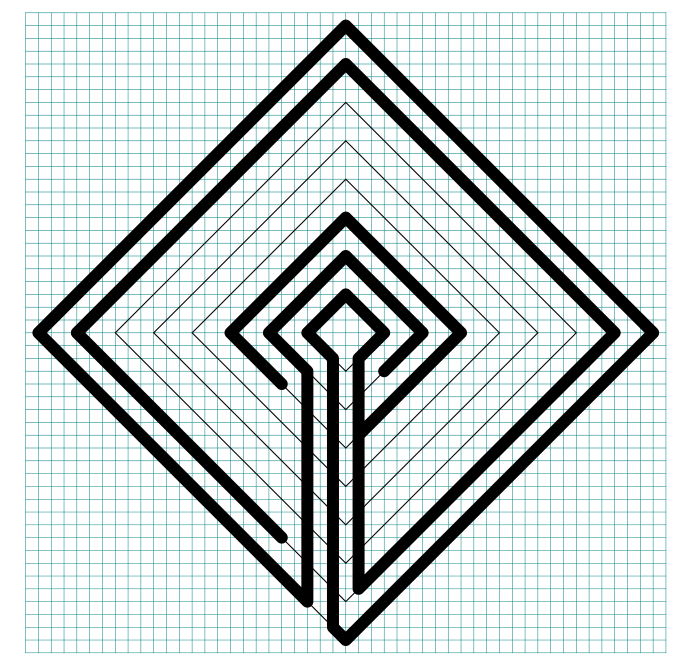
Step 4,5 Continue drawing the internal pathways
In the center portion of the diamond, draw a turnback pathway in the next concentric diamond, creating a third pathway from the center goal. Keep the pathway open on the bottom right for a turnback the other way in the next step.
And draw the next layer back the other way.

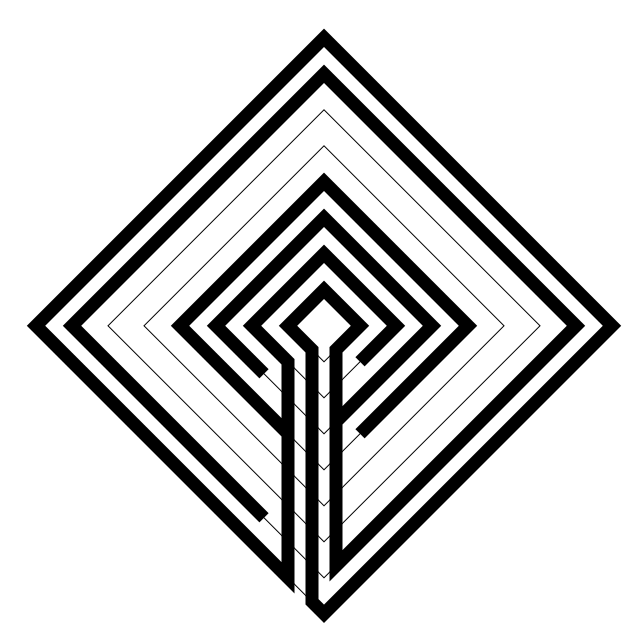
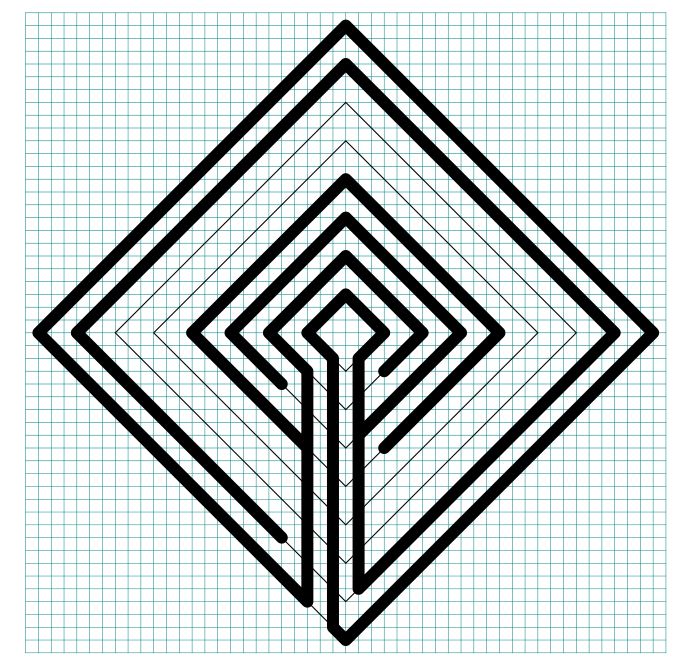
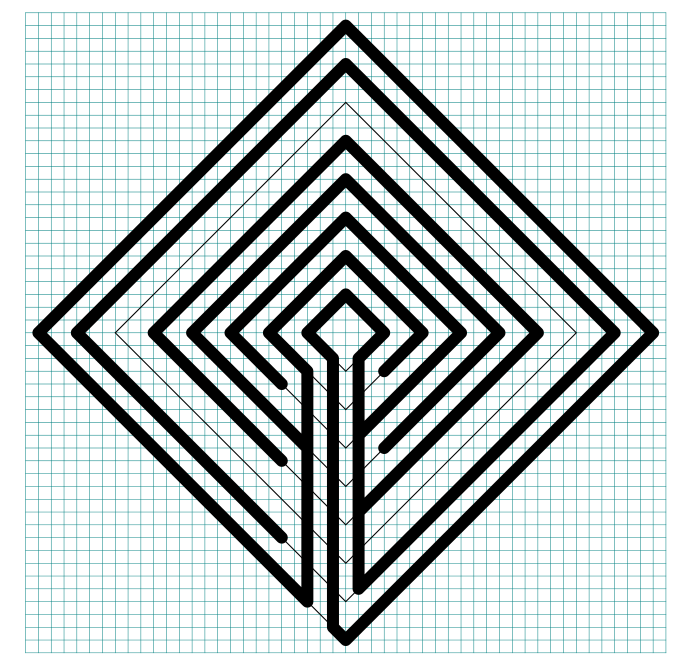
Step 6 Finish the internal pathways
One last layer to draw to complete the labyrinth.

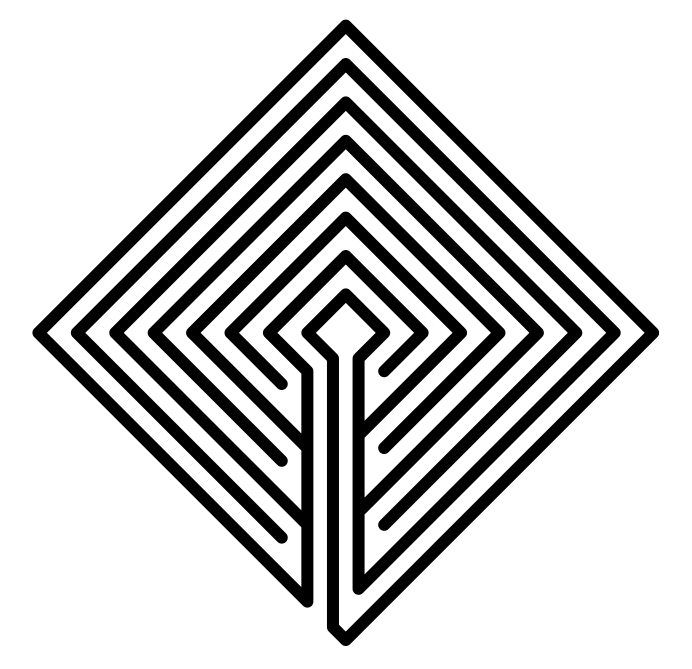
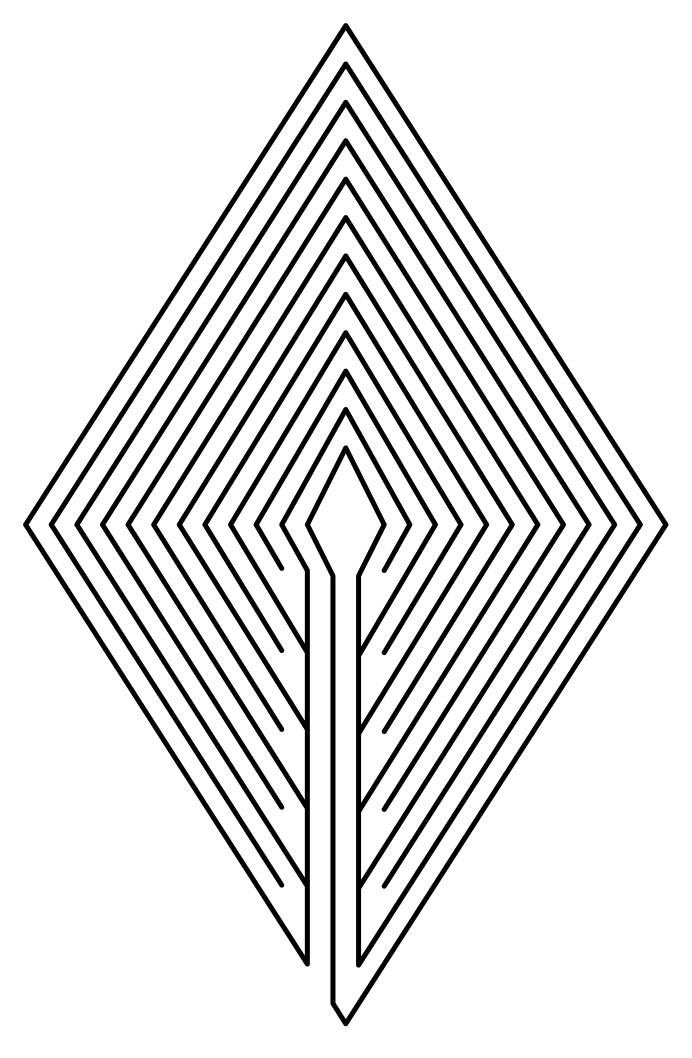
Step 7 Delete guides and make aesthetic changes
Delete your guidelines. You can change the widths now if you do not like how it looks. I changed the wall endings at the turn-backs to have curved ends, because I like how it looks.
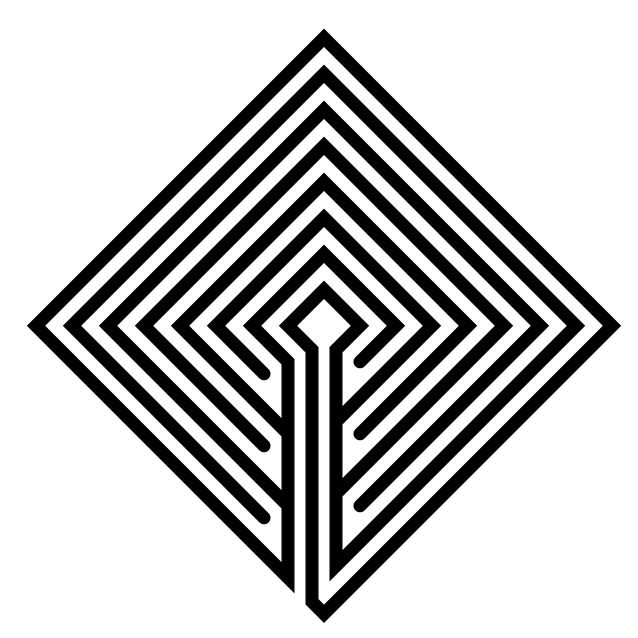
That concludes our instructions. Good luck in making your own design !
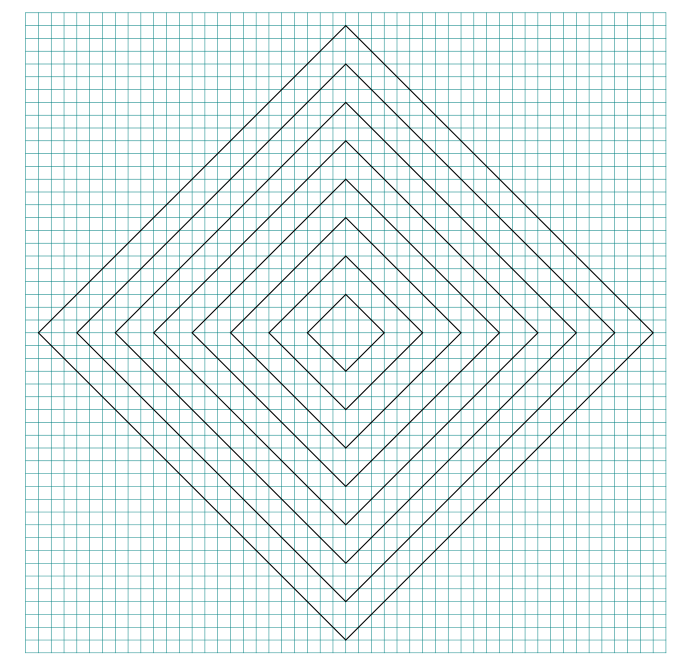
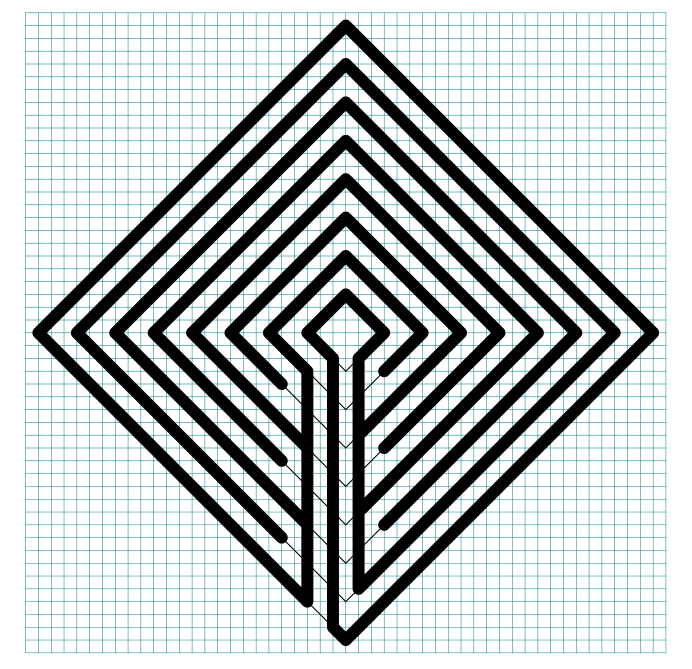
PART 2: HOW TO DRAW A 7 CIRCUIT LABYRINTH (WITH GRIDS)
For reference here is the labyrinth being made with the grids shown. You can see it being built by using the next control.

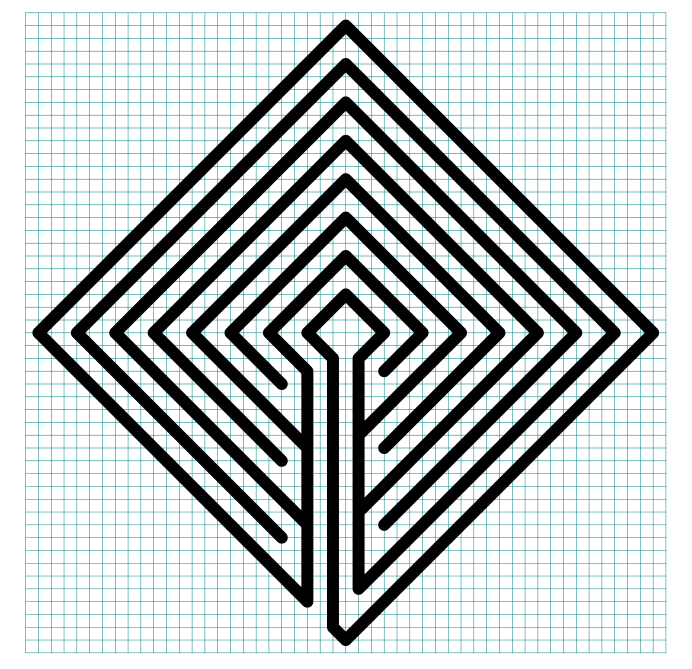
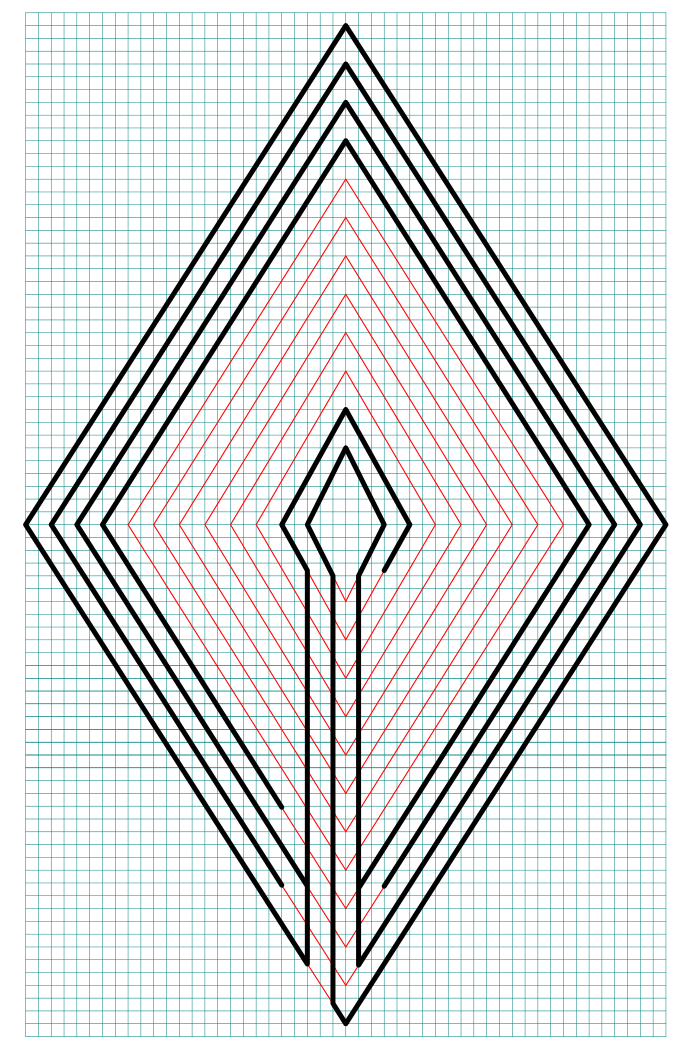
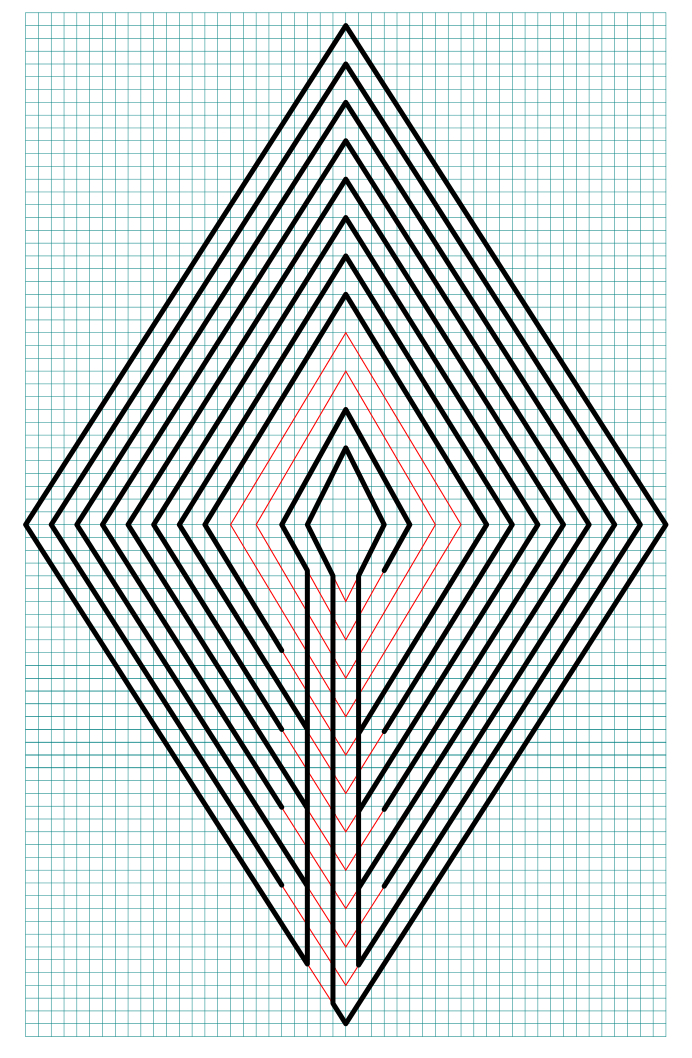
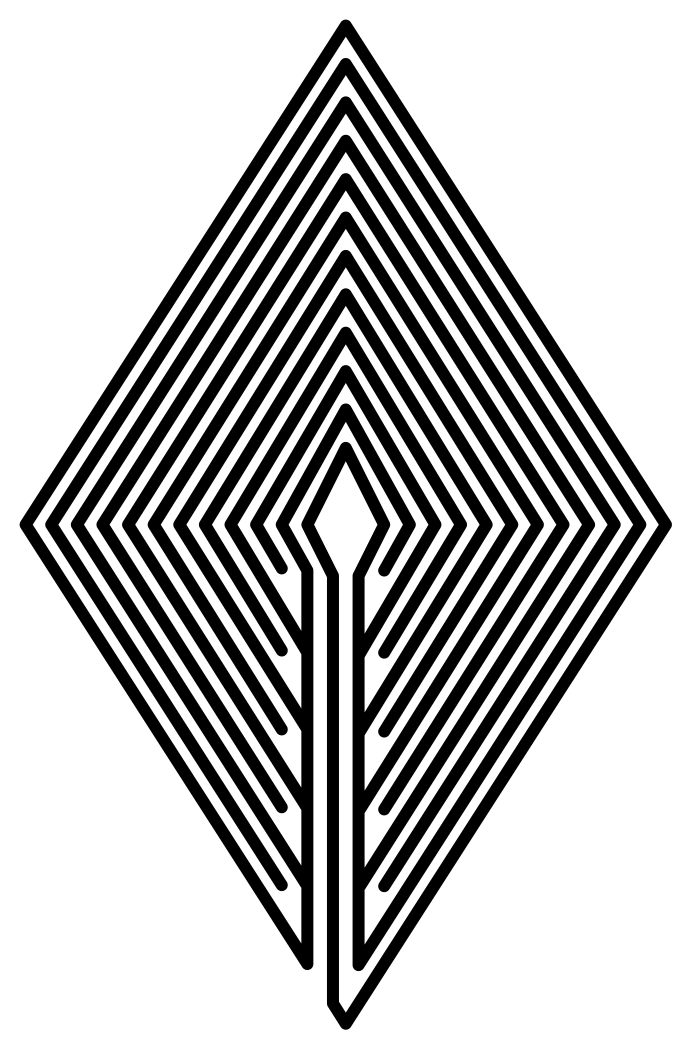
PART 3: HOW TO DRAW AN 11 CIRCUIT LABYRINTH (WITH GRIDS)
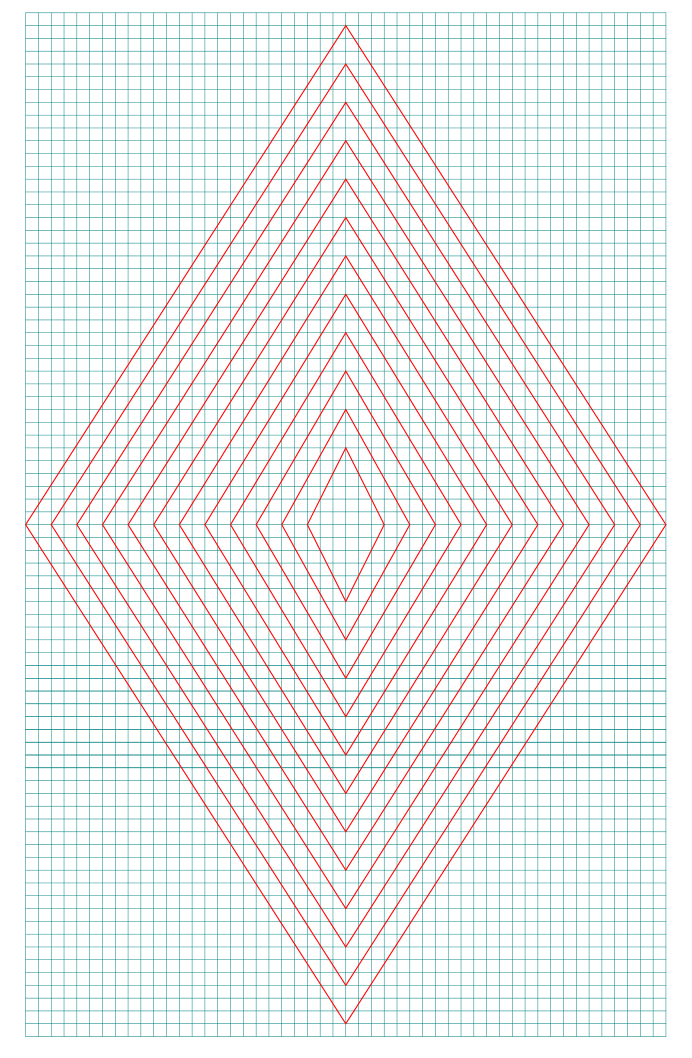
Step 1 Draw 12 concentric diamonds
These will become your guides for the drawing of the labyrinth. Note that the number of circuits you want, you need to add one and that is how many concentric layers you need for any labyrinth creation.
PROTIP: Start your drawing with the center goal so you do not run out of room !
AESTHETIC CHOICE: For this example my diamond was made using a 2/3 grid (2 over, 3 up) giving it a sharp angle. The 7 circuit uses a square turned by 45 degrees to create the diamond.
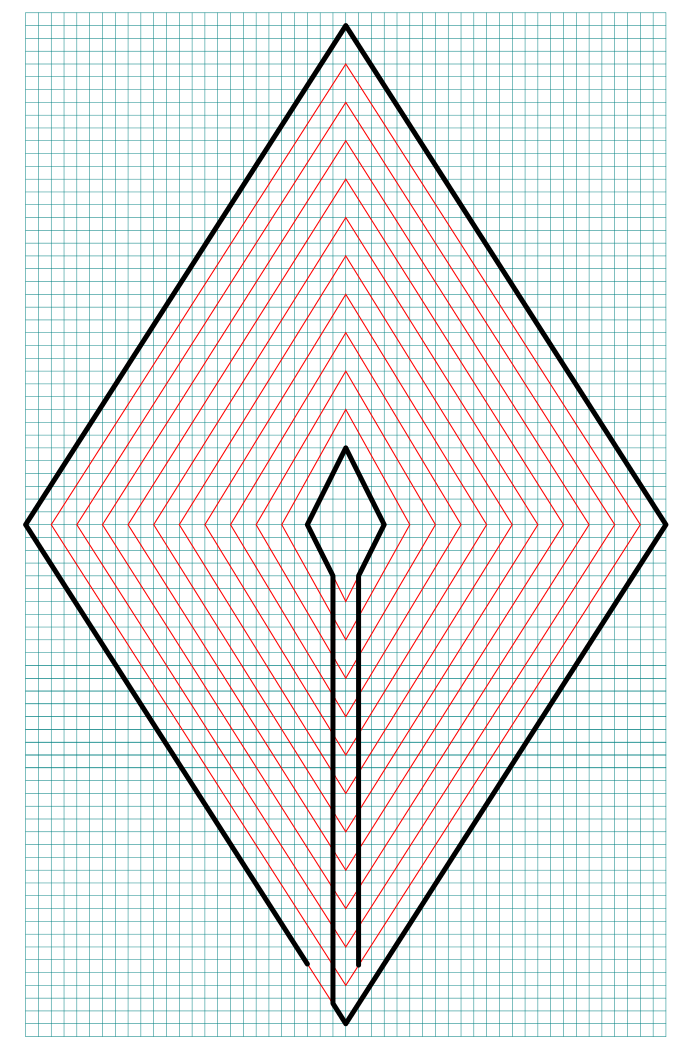
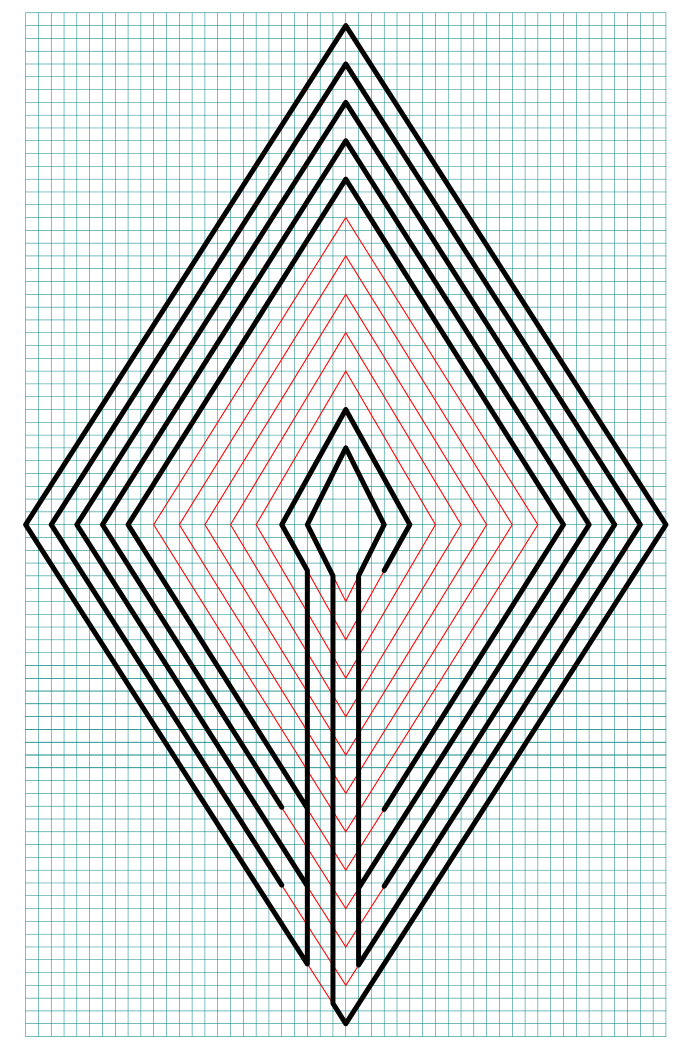
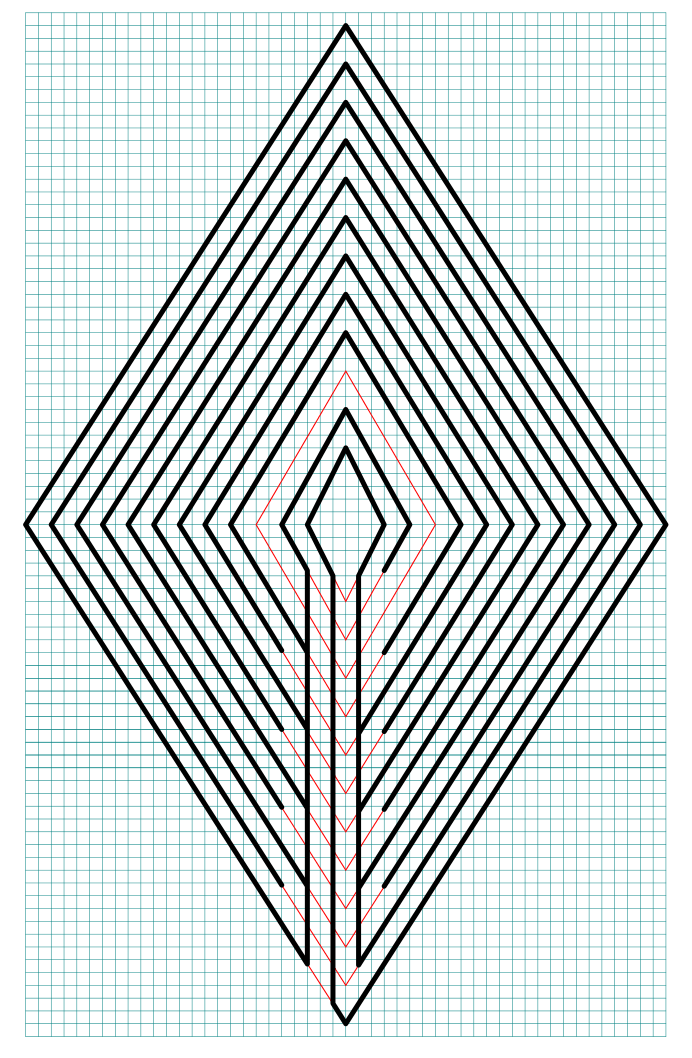
Step 2 Draw the outer wall, and pathway to the goal
At the 6 o’clock portion of the center diamond, draw a centered pathway to the edge, while keeping the right side open for the outer pathway on the right. Extend the left pathway to the edge and then create the outer wall all the way around the diamond, leaving only the entrance pathway open on the bottom left of the diamond. The distance should be equal to the width of the pathway that enters the center.
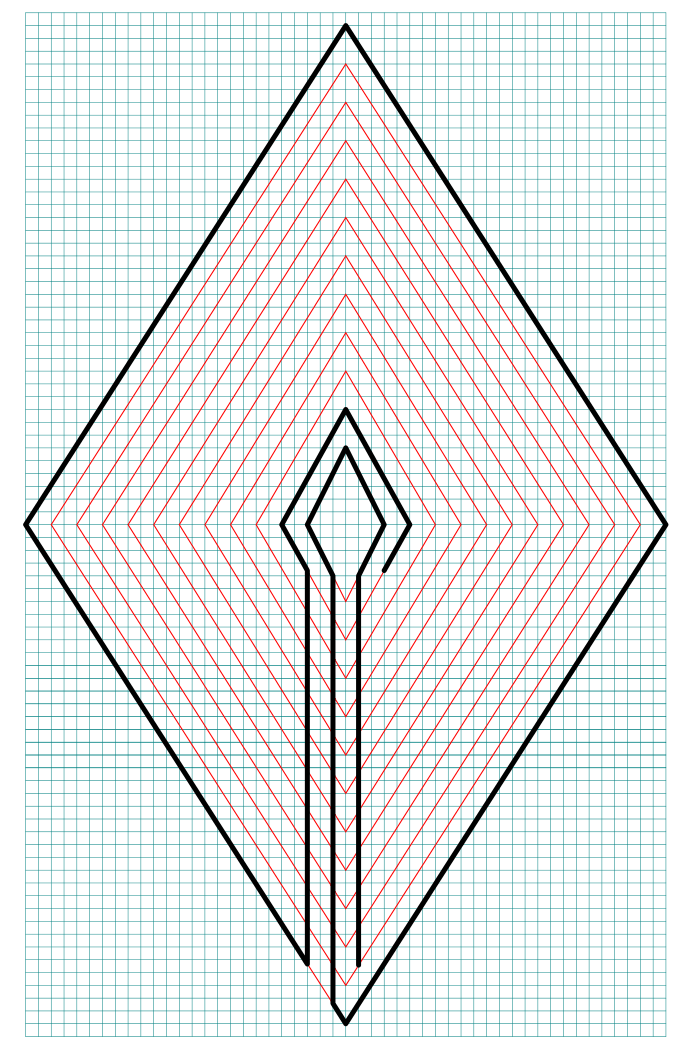
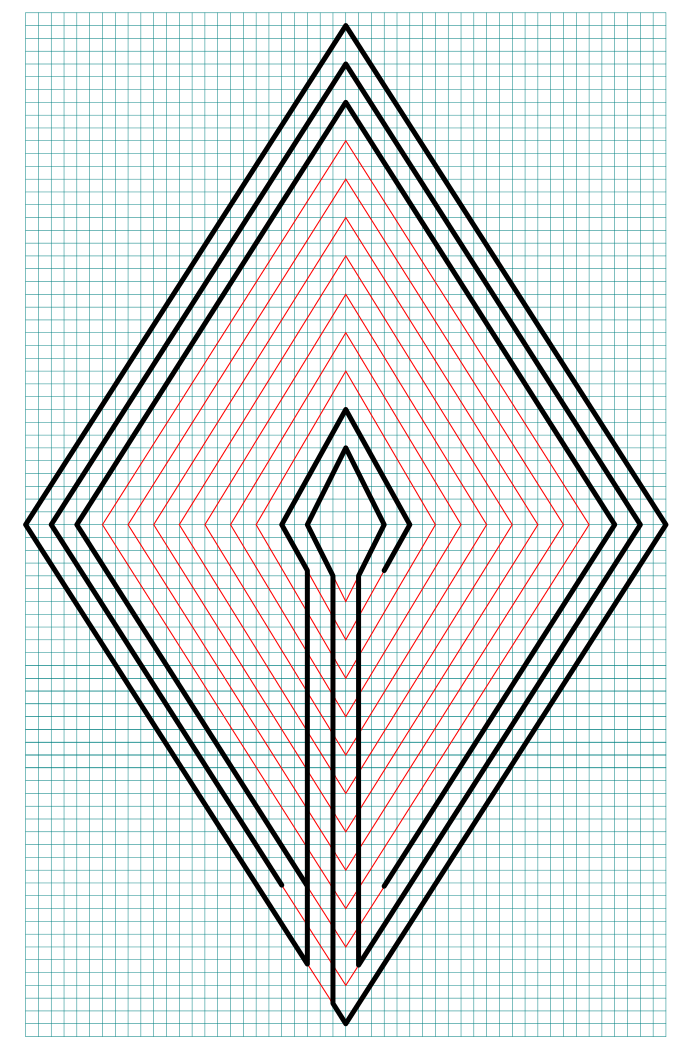
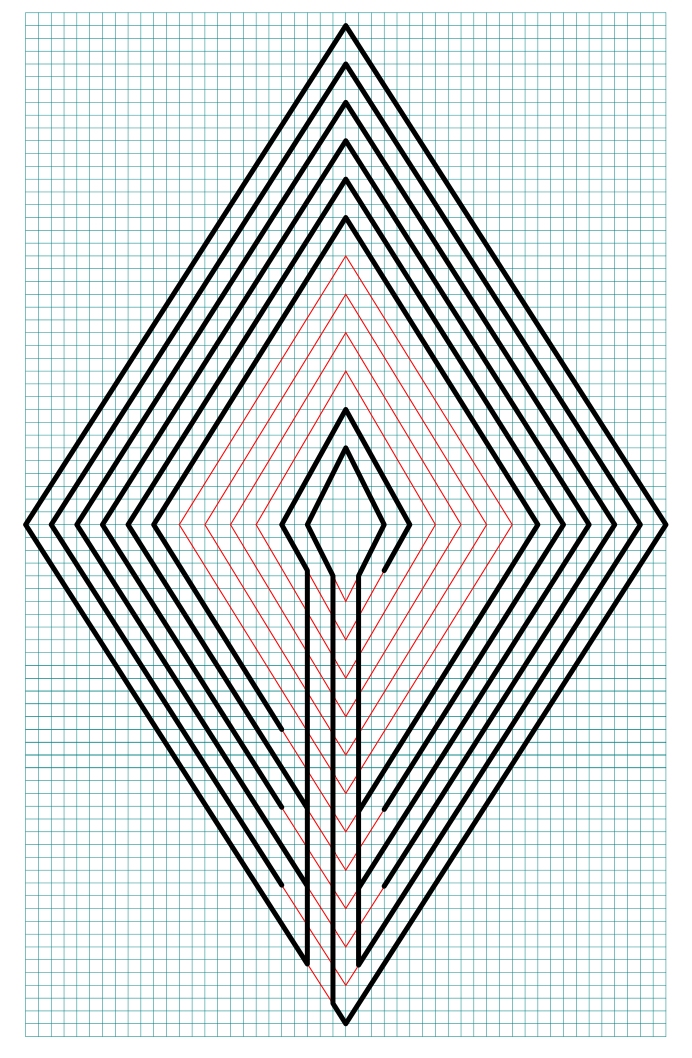
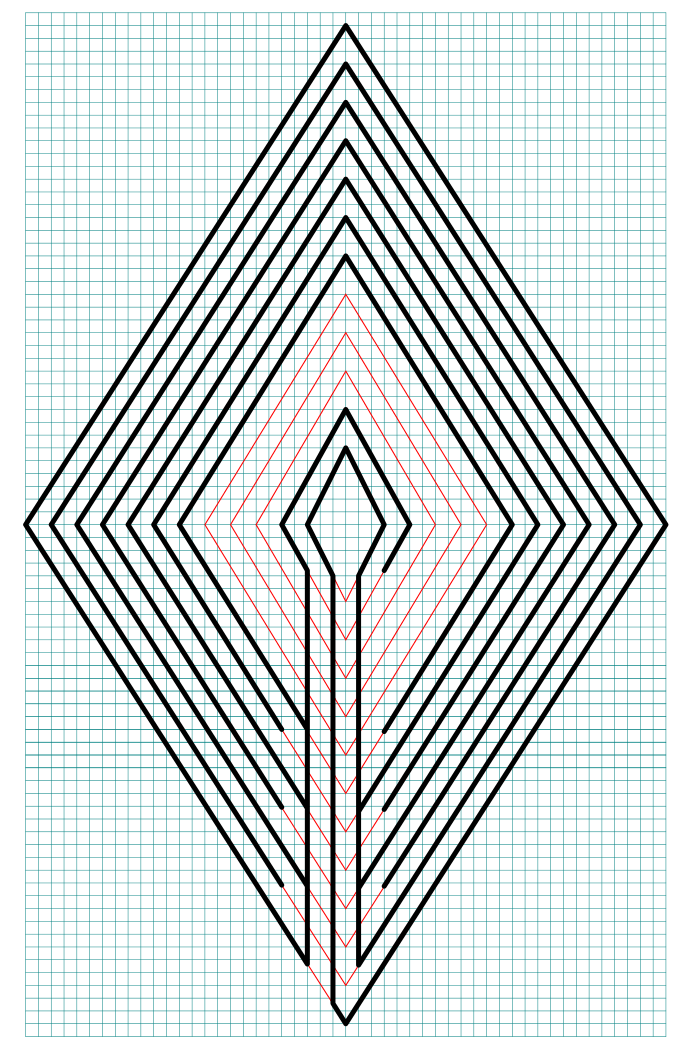
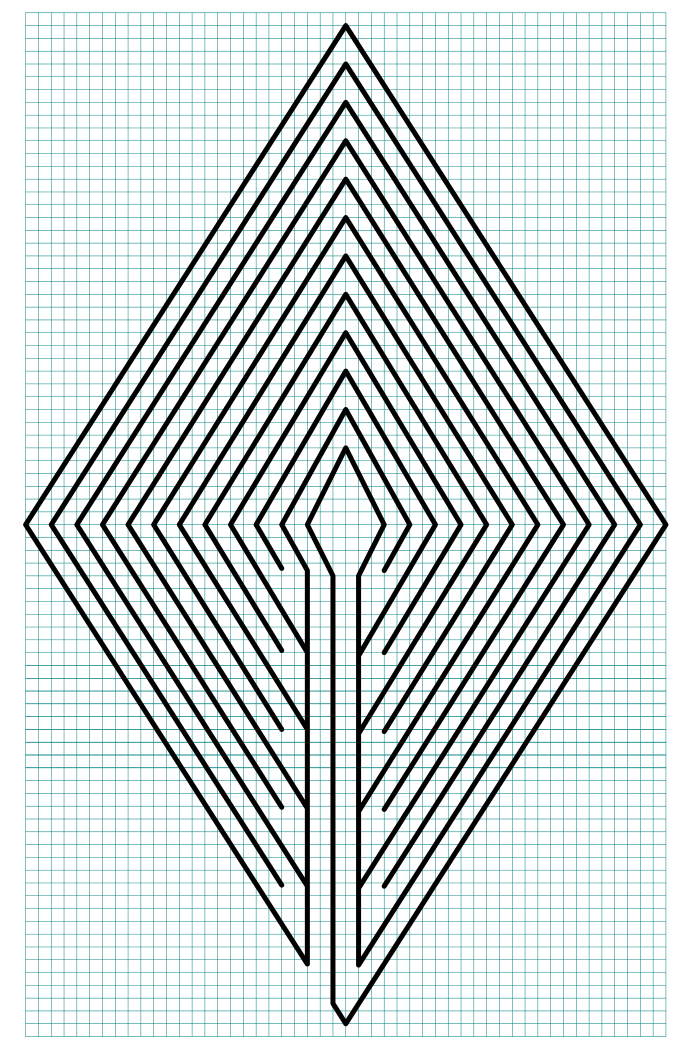
Steps 3 and forward create the internal pathways
Create one layer at time, working from the outside to the inside of the diamond. Build the labyrinth below in the gallery using the next control.


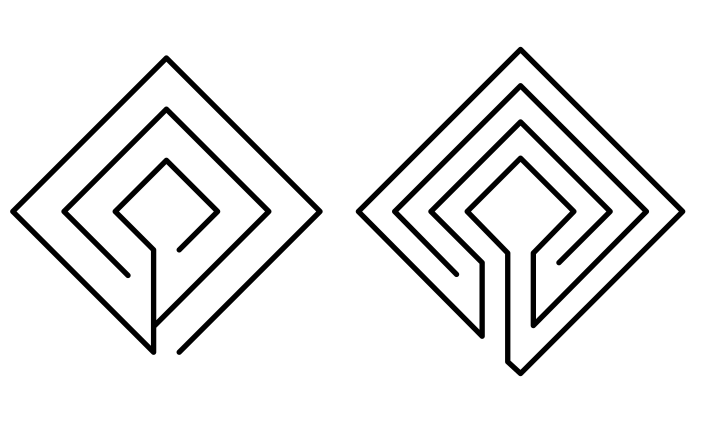
PART 4: OTHER VERSIONS + A REAL WORLD EXAMPLE
The diamond labyrinth is versatile. Odd circuit numbers are easily adapted based on the constructions above. Even circuits can be more tricky, but here is an example of a 2 and 3 circuit to give an idea of what is possible. The odd circuits versions use the long pathway to the center, while the even numbered versions use the immediate turn out of/into the center goal.
You could also create a spiral labyrinth in a diamond shape… but I am not how to tell the difference between a square an a diamond when the shape is a spiral. Seems like it depends on the direction you walk up to it from ?
As far as real world examples, there are not many to choose from, but I did find one:
The Stanwood City Hall Park Labyrinth in Stanwood, WA is a 5 circuit diamond version labyrinth painted on concrete. It’s a bit over 17 feet wide and open to the public !
Additional posts you might like:
US Labyrinths to visit by state
10 of the Most Frequently asked Questions about Labyrinths, with Answers